You’re about to ditch crinkly paper and learn a slick, reusable trick: fabric wrapping. I’ll show you how to pick the right cloth, wash and trim it, and fold gifts like a pro — think silk for bottles, soft cotton for boxes, knots that look fancy but take two seconds. It’s eco-smart, tactile, and oddly satisfying to tie a perfect bow with your own hands, so stick around and I’ll teach you the moves.
Key Takeaways
- Choose fabric suited to the gift: silk for bottles, cotton for books, muslin for jewelry, and fleece or jersey for bulky items.
- Wash, dry, and cut fabric with clean edges so it’s soft, shrink-free, and easy to fold.
- Use the right size: allow extra fabric for knots—about twice the longest gift dimension plus 2–4 inches.
- Wrap with neat folds and secure with decorative knots, scarves, twine, or bias tape instead of ribbon.
- Store wrapping cloths folded or hung in breathable containers so they stay clean and reusable.
Why Choose Fabric Over Paper for Gift Wrapping
If you want your gift to look like it arrived with a story already attached, pick fabric over paper—I promise you’ll feel like a clever magician, not a sap. You’ll unwrap textures, not crinkles; you’ll hear a soft rustle, feel the weight of cloth, see colors that don’t scream “last-minute.” I love the sustainability benefits—fewer landfills, reusable wraps that double as scarves or napkins. You get creative designs, too: patterns that hint at the giver, prints that spark a grin. Tie a knot, fold a corner, tuck in a sprig of lavender, and you’ve staged a small, delicious reveal. You’ll look thoughtful without trying too hard. Trust me, people notice the care, and you’ll enjoy the applause.
Best Fabrics and Sizes for Different Gifts
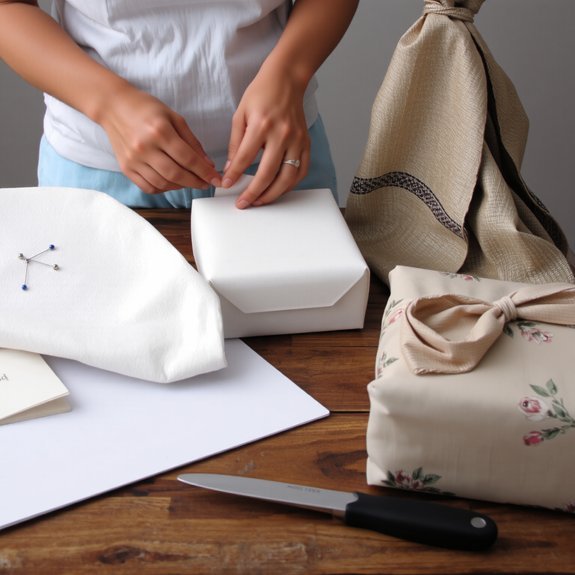
One dozen tiny scarves won’t do for a bottle of wine, and a king-size duvet cover isn’t exactly subtle for a paperback—so let’s pick the right cloth for the job. I’ll tell you what to grab. For bottles, use a square of silk scarves, slick and elegant, about 20–24 inches, tie a neat knot and it glints like you tried. For jewelry, a scrap of cotton muslin, soft and breathable, 8–12 inches, wrap gently so metal won’t scratch. For books, medium-weight cotton, 16–18 inches, fold crisp corners, you’ll like the tidy look. Bulky toys beg for jersey or fleece, larger wrap, casual tie. Electronics? Go padded fabric or double-layer cotton, precise folds, secure with ribbon. Trust your hands, not luck.
Preparing Your Fabric: Washing, Folding, and Cutting
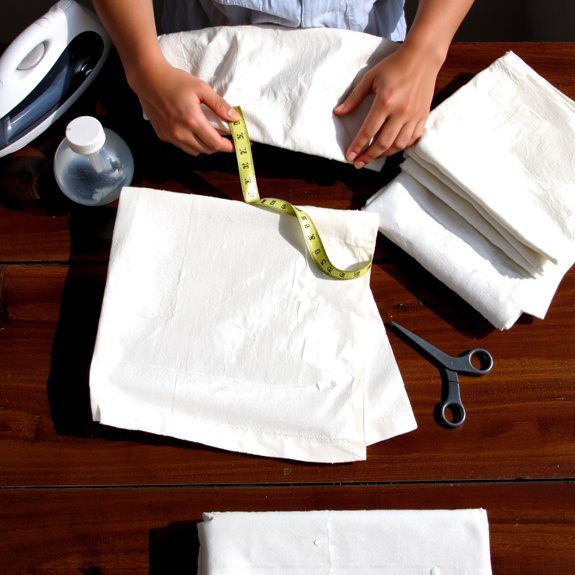
You’ll want to wash and dry your fabric first, so it’s soft, shrink-free, and won’t surprise you later — I learned that the hard way when a “perfect” wrap shrank into a sad napkin. Lay the cloth flat, smooth out the wrinkles with your hands, then measure and cut clean edges with sharp scissors or a rotary cutter, keeping a steady eye on the grain so corners meet like they’re on purpose. Trust me, a little prep now saves a lot of fussy tucking later, and it makes the final reveal feel like magic instead of craft time chaos.
Wash and Dry Fabric
Because fabric remembers where it’s been, I always start by washing and drying it before I even think about folding—no exceptions, even for that pretty linen you swear isn’t going to shrink. You’ll sort by fabric types, check labels like a detective, and treat delicates gently. I toss in a mild detergent, skip the fabric softener if you want crisp edges, and pop sturdy cotton on warm. Listen for the spin cycle, smell the clean; it’s oddly satisfying. Dry low for silks, medium for cottons, remove while slightly damp to avoid stiff creases. Steam or tumble briefly to relax fibers, then lay flat or shake out to cool. This fabric care routine saves you time, grief, and one ruined gift—trust me.
Measure and Cut Edges
Alright—grab your ruler and your scissors; we’re finally getting down to the business of clean cuts. You’ll lay the fabric flat, feel the soft nap under your fingers, and smooth out a wrinkle with a palm. I’ll show you quick measuring techniques: measure twice, mark once with tailor’s chalk or a washable marker, note seam allowance if you’re fussy like me. Use a rotary cutter for straight edges, heavy-duty shears for thicker cloth, those cutting tools feel satisfying in your hand. Keep the ruler tight, breathe, then slice in one confident motion. Trim stray threads, flip the corner, admire the crisp line. It’s practical, it’s pretty, and honestly, it makes wrapping feel like a tiny victory.
Simple Bandana Wrap for Small Boxes and Bottles
If you’ve got a bandana and something small to hide under fabric—say a tiny gift box or a favorite bottle—this wrap will make it look like you meant to be charming all along. You’ll love how bandana patterns pop against plain paper, and how fabric choices change the whole vibe, trust me. Lay the square flat, center the item, fold opposite corners over, tie the remaining two in a tight knot. It’s quick, playful, foolproof.
If you’ve got a bandana and a tiny treasure, fold, knot, and voilà—charming, playful, and effortlessly gift-ready.
- Choose a bandana that matches the recipient’s style.
- Center the gift, smooth wrinkles, tuck edges neatly.
- Cross corners, pull snug, don’t over-tighten.
- Tie a double knot, trim tails, add a sprig if you’re feeling dramatic.
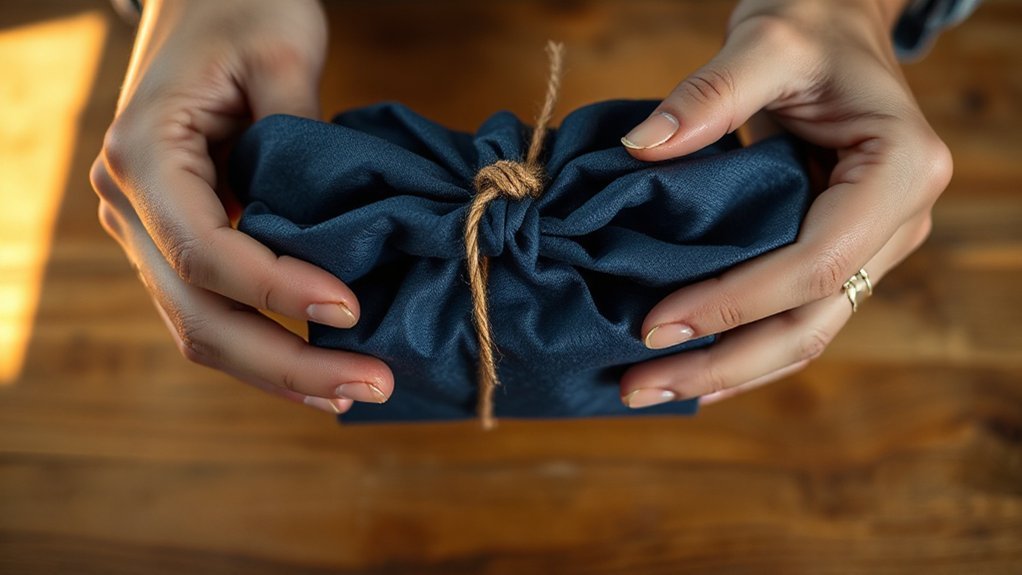
Classic Furoshiki Square Wrap Techniques
You’ve mastered the cheeky bandana knot, so let me show you how a proper furoshiki square makes even a boring box look like a present from someone who reads aesthetics blogs for fun. Lay a crisp cotton square face-down, set the box diagonally, pull opposite corners over the top, tuck tight, feel the fabric hug the edges — that satisfying little creak of cloth. Fold the remaining corners into a neat knot, or twist into a flat bow. I mention furoshiki history because these moves are centuries-old, elegant and clever. You’ll love how the pattern aligns, the texture warms your hands, and the whole thing screams care. Plus, fabric sustainability means this gift gets unwrapped, reused, and adored again.
Robust Wraps for Oddly Shaped or Bulky Items
When something’s oddly shaped or embarrassingly bulky, I don’t pretend a neat square will do the trick—so I get tactical. You’ll lean into creative folding, pick fabric choices with weight and stretch in mind, and treat the item like a puzzle you’re allowed to win. Start by padding corners, draping generously, then cinch and smooth until it looks intentional, not messy.
- Use sturdy cotton or twill for structure, silk for sheen, linen for breathability, fleece for padding.
- Fold in panels to build flat planes, tape lightly to hold layers, test fit.
- Roll cylindrical parts, secure with ties or clips under folds.
- Trim excess, tuck edges with fingers, press seams with palm.
You’ll end up with a confident, cozy package that feels custom-made.
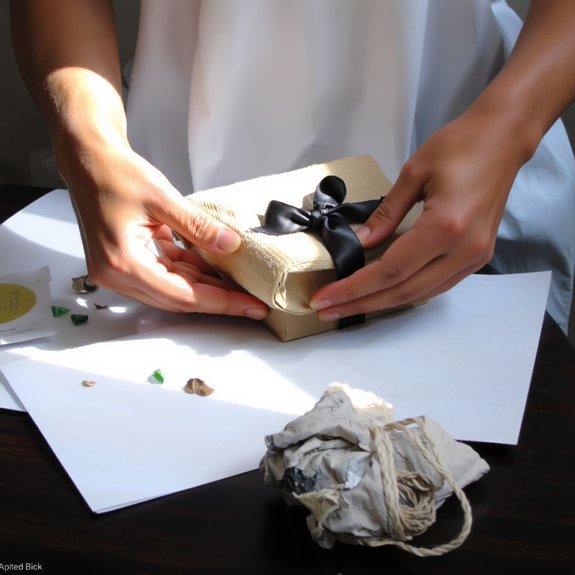
Decorative Knots, Ties, and Ribbon Alternatives
While knots might seem like a tiny detail, they’re the punctuation mark that turns plain cloth into a present with personality — and I’m here to teach you how to make them sing. You’ll learn decorative knots like the simple square, the elegant bow knot, and the sailor’s carrick bend, each giving texture and voice. Use thin scarves, twine, or bias tape as ribbon alternatives, they feel different, smell like linen, and grip fabric better. I’ll show you how to pull tails, tighten without puckering, and tuck ends so they stay neat. Practice a few quick loops, whisper encouragement to your fabric (I do), and pick a knot that matches the gift’s mood — playful, formal, or delightfully wonky.
Adding Embellishments: Tags, Greenery, and Accessories
Knots set the mood, but the extras sell the story — little flourishes turn wrapped cloth into an occasion. You want your package to sing, so you add a tag, tuck in a sprig, and smile like a craft-show ninja. tags ideas pop up fast: handwritten kraft, tiny watercolor cards, stamped kraft, or a typed mini-note. greenery options bring scent and texture; think eucalyptus twigs, rosemary sprigs, holly, or dried lavender. Try this:
- Tie a ribbon, tuck a sprig, attach a stamped tag.
- Layer a paper tag over fabric, secure with a safety pin.
- Bundle herbs with twine for aroma and charm.
- Add a tiny ornament or shell for personality.
You’ll finish with a gift that feels deliberate, alive, and oddly theatrical.
Care and Storage: How to Reuse and Maintain Wrapping Cloths
How do you keep a favorite wrapping cloth from turning into a sad, stiff relic in the back of your linen closet? I treat mine like a pet: gentle, regular attention, and no crowded cages. For fabric care, I hand-wash delicate silks in cool water, use mild detergent, and air-dry flat; cottons get a quick warm wash and a tumble on low. Iron or steam while slightly damp, it smooths creases like magic. Fold with tissue between layers, roll delicate pieces to avoid creases, and label bundles so you don’t play linen roulette later. For storage solutions, use breathable cotton bags, shallow boxes, or hanging organizers; cedar keeps moths out, but skip plastic if you want your cloths to breathe.
Quick Tips for Wrapping Fast and Looking Polished
If you want to look put-together in ten minutes flat, I’ve got your back — and your pockets full of tricks. You’ll feel slick, fast, and a little smug. Grab fabric, scissors, a ribbon, and something to weigh the corners. Fold, tug, smooth; press seams with your palm. Try these quick moves:
- Measure once, fold twice — makes neat corners fast.
- Use a weighted knot — ties stay put, no pins needed.
- Swap ribbon for a sprig or a button — instant polish, eco friendly options.
- Roll leftover scraps into a bow — saves fabric, looks intentional, and uses innovative techniques.
I coach you through small sounds: snip, snap, tuck. You’ll finish smiling.
Conclusion
You’ve got this—wrap like a pro, not a panic. I’ll say it: fabric turns a ho‑hum gift into something tactile and lovely, like “don’t judge a book by its cover,” but better—judge by the cloth. Fold, knot, tuck, feel the smooth silk or cozy cotton, tie a rustic twine bow, add a sprig of rosemary, and step back. You’re giving care, not trash. Practice once, and you’ll keep these cloths forever.
Leave a Reply