You’ll be amazed how a string of tiny LED bulbs can turn your sagging eaves into a festive runway, but let’s get it up without a trip to urgent care. I’ll walk you through picking the right lights, testing frayed cords, and climbing a ladder like a pro—three points of contact, remember—while we laugh at my own crooked first attempt; stick around and you’ll have a safe, weatherproof display that actually stays lit.
Key Takeaways
- Inspect all light strands, cords, and plugs for damage, fraying, or exposed wires before installation.
- Use outdoor-rated LED lights, weatherproof plugs, and insulated extension cords to reduce fire and shock risk.
- Plug into GFCI-protected outlets and avoid overloading circuits or daisy-chaining multiple extension cords.
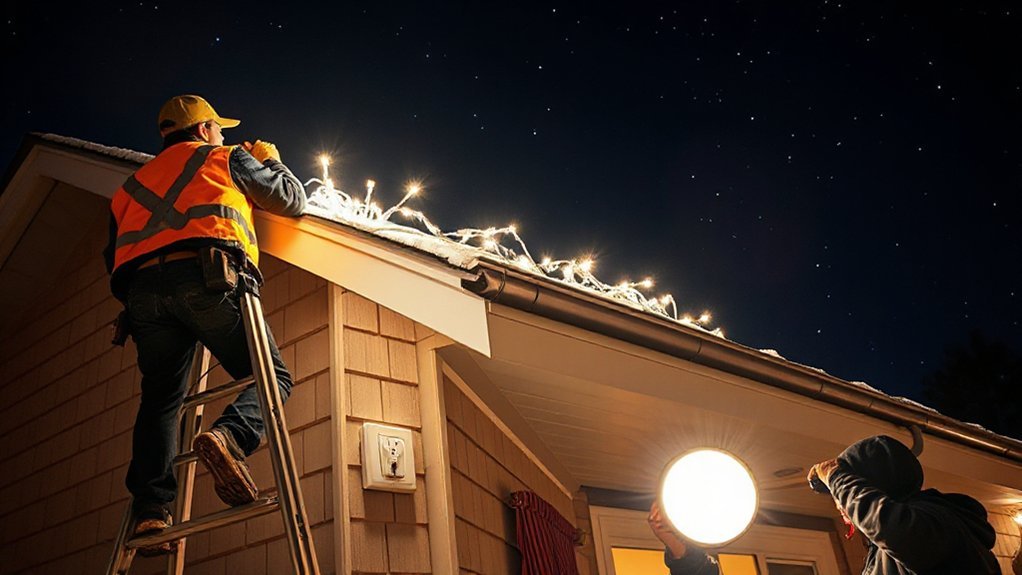
- Use a stable, non-conductive ladder with a spotter, maintain three points of contact, and avoid overreaching.
- Secure lights with clips or hooks (no nails or staples), keep connections off the ground, and unplug during severe weather.
Choosing the Right Lights and Equipment
If you’re anything like me, you want lights that look magical and don’t short out the neighborhood, so start by picking bulbs that match the job. You’ll want LED options for stringing gutters, wreaths, and trees, because they’re cool to touch, won’t melt plastic clips, and deliver serious energy efficiency — your wallet will thank you. Choose outdoor-rated strands with sturdy sockets, weatherproof plugs, and the right length so you’re not juggling excess slack. Grab good clips, insulated extension cords, and a reliable ladder with rubber feet; don’t improvise with tape and hope. I say this from experience, while nursing a minor ego bruise and a coffee stain, but trust me: pick smart gear, set it up calmly, and enjoy the glow.
Inspecting Lights, Cords, and Connections
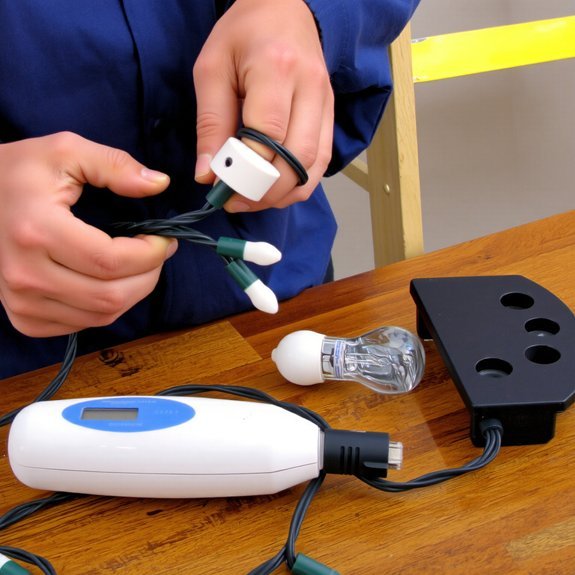
Start with one careful sweep of every strand, cord, and plug—don’t rush it like you’re about to bail on a boring party. Run your fingers along bulbs, check for cracks, discoloration, or gritty bits that smell like bad wiring. Tug gently at connections, listen for wiggle, spot loose prongs. It’s basic light maintenance, you’ll thank me later.
- Look for frayed insulation, exposed wire, or melted spots; if you see any, toss that strand.
- Test each bulb and socket on a known-good outlet; swap bulbs, watch for flicker or heat.
- Coil intact lines neatly for cord storage, avoid tight knots, label sets so you don’t reenact a holiday crime scene.
You’ll stay safe, avoid sparks, and keep the magic humming.
Planning Your Layout and Power Sources
You’ll want to break your house into tidy layout zones — roofline, bushes, porch — so you can picture the show before you start climbing. I’ll help you map each zone, count the strands, and sketch where outlets or timers need to sit, so you don’t end up with a tangled glitter bomb at midnight. Check your circuit capacity too, don’t overload one breaker, or you’ll be the neighborhood mystery when the lights go out.
Choose Layout Zones
Three zones usually do the trick: roofline, yard, and power hub — and I’ll show you how to tame each one without frying the neighborhood. I pick layout styles that read like a map, then assign clear zone designations so you don’t end up chasing extension cords at midnight. Picture yourself on a ladder, crisp cold air, lights in hand — plan feels good.
- Roofline — trace eaves, corners, gutters; keep clips every 12–18 inches.
- Yard — wrap shrubs, outline paths, anchor stakes for stakes that don’t wander.
- Power hub — centralize plugs, run cord channels, label each string.
You’ll work smarter, not harder, and laugh when the neighbors ask how you did it.
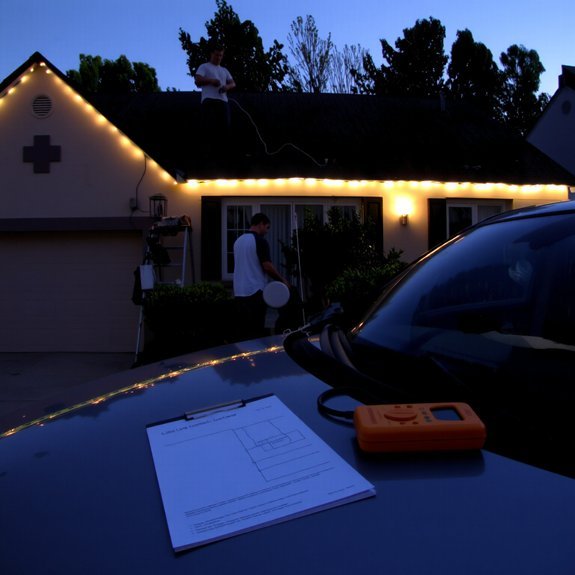
Assess Power Capacity
If you want your display to glow without tripping every breaker on the block, we’ve got to size up the power like pros—briefcase-open, clipboard-out, but with less formality and more hot cocoa. You’ll count bulbs and strings, note wattage per strand, then total the power load. Walk the yard, plug in a tester, feel for warm cords, sniff for that “too-much-Christmas” ozone—okay, maybe don’t sniff too hard. Check your panel, read labels, and respect circuit limitations; don’t be clever with extension cords. If a circuit’s near max, split the lights across circuits, or use LED strands that sip juice. Label everything. I’ll remind you: safety’s boring until it isn’t, so plan smart, laugh at your ladder mishaps, and stay powered-up.
Ladder Safety and Working at Heights
When I haul out the ladder, I treat it like a partner in crime: steady, reliable, and not given to surprises, because surprises on a roof make my knees go numb. You double-check ladder stability, set feet on firm ground, and lock every hinge; you smell cold metal, feel rubber feet bite the concrete, hear wind negotiate your balance. Keep height awareness front and center, measure reach, never tiptoe at the top. Use a spotter, clip your tool bag on, and talk through each move.
- Inspect rungs, locks, and feet before climbing, replace damaged parts.
- Angle the ladder properly, three points of contact always.
- Wear grippy shoes, avoid carrying bulbs in your hands.
Preventing Electrical Hazards and Overloads
Okay, here’s the fun, not-so-flashy part: check your light set ratings so you know what each strand can handle, and don’t guess — read the little tag like it’s a secret map. Plug into GFCI-protected outlets outdoors, feel for that reassuring click, and if you’re using extension cords keep them single runs — no daisy-chaining like it’s a holiday conga line. I’ll say it straight: overloads are boring but dangerous, so split loads, use rated cords, and keep your display bright, not toasting.
Check Light Set Ratings
Because trusting a tangled ball of bulbs and a snowman clip to the mystery powers of your outlet feels like a dare, you’re going to check the light set ratings first — I promise it’s not boring. You’ll flip the strand over, feel the plastic, read the tiny print, and decide. Look for voltage and amp info, note whether it’s indoor or outdoor, and compare light set types — incandescent draws more, LEDs save power, they brag about energy efficiency for good reason.
- Confirm voltage and maximum amps — don’t guess, calculate.
- Count connected strands allowed on one circuit — follow the label.
- Inspect for damage, frayed cord, missing plugs — replace if unsure.
Do it now, you’ll thank me when the breaker stays calm.
Use Gfci-Protected Outlets
If you want your holiday lights to stay merry and not singe your eyebrows, plug into a GFCI-protected outlet — seriously, it’s like a tiny electrical bouncer watching for trouble. I tell you this because GFCI benefits aren’t hype; they cut power fast if water or a frayed wire tries to ruin your night. Walk the yard, note Outlet locations before you hang anything, plan routes, and picture extension cords like tightrope lines. You’ll feel the cold, hear the ladder creak, and appreciate that reset button when a gust trips it. Test the outlet first, press Test, then Reset, like a secret handshake. If something trips, don’t curse—investigate, fix the fault, then smile and plug back in.
Avoid Daisy-Chaining Cords
You’ve already hunted down the GFCI outlets and given them the secret handshake, so now listen up — don’t turn your yard into a spaghetti monster of extension cords. You’ll tempt fate, and overload issues, if you keep daisy-chaining lights like it’s a DIY trophy. I’ve tripped breakers, smelled that telltale ozone, and vowed never again.
- Count plugs: know each string’s amperage, don’t guess, avoid daisy chain risks by spreading load across circuits.
- Use rated cords: heavy-duty, outdoor, UL-listed, keep connections off wet ground, tuck them under rubber mats.
- Plug limit: follow manufacturer maxs, use power strips with overload protection, label runs so you won’t recreate the mess next year.
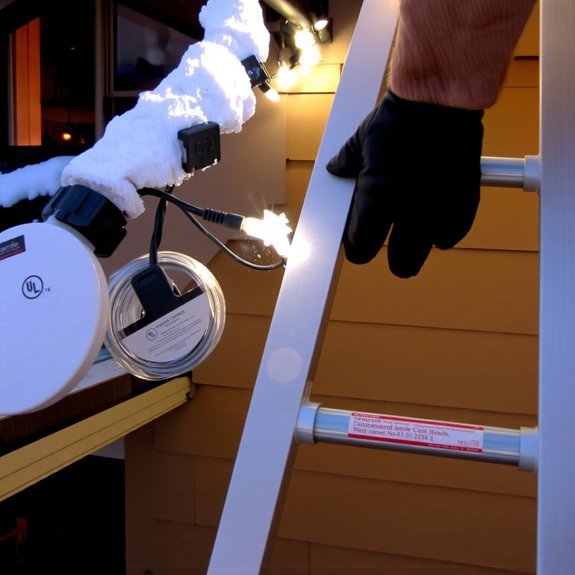
Weatherproofing and Securing Your Display
When the forecast says rain, wind, or that weird sleety drizzle that sneaks up and ruins everything, don’t sigh and hope for the best — get ruthless about weatherproofing and securing your display. I’m blunt: use weatherproof materials, silicone-seal connectors, and outdoor-rated cords. Run lights through drip loops, tuck plugs up off the ground, and wrap exposed joins with proper tape, not duct tape (we’ve all learned that lesson).
For securing methods, grab clips, zip ties, and a stout staple gun with insulated staples, and fasten to gutters, fascia, or stakes, not fragile shingles. Check lines for movement, tug gently, listen for rattles. When wind comes, you’ll be glad you did. Finish with a walkaround, hot cocoa optional, ego intact.
Conclusion
You’ve got this. I’ll admit, I once spent an hour untangling lights that looked like a Christmas octopus, but after you inspect cords, pick LEDs, clip—don’t nail—everything in place, and use a GFCI outlet, it’s smooth sailing. Picture 350 steady LEDs per strand, glowing like a tiny galaxy on your roof. Keep three points of contact, don’t overreach, and check for heat; if something smells off, unplug and fix it. Safe holiday glow.
Leave a Reply