Author: Jordan C

  • How Do I Prepare a Charcuterie Board

    How Do I Prepare a Charcuterie Board

    You’ll think you’ve ruined every party if your board isn’t perfect — relax, you haven’t. I’ll walk you through picking meats and cheeses, tossing in fruits, nuts, crackers and spreads that actually sing together, and arranging them so your guests think you’re an appetizer wizard; keep things room-temp, label the weird stuff, and please don’t overcompensate with too many toothpicks — now let’s get your board looking dangerously delicious.

    Key Takeaways

    • Choose 3–5 cured meats and 3–5 cheeses with varied textures and flavors, labeling cheeses for guest clarity.
    • Add fresh and dried fruits, crunchy nuts, and at least two spreads (sweet and savory) for contrast.
    • Include a mix of carriers: crusty bread, crackers, flatbreads, and gluten-free options arranged for easy access.
    • Assemble on a clean board: place large items first, use ramekins for spreads, and tuck small items into gaps.
    • Prep ahead: slice meats/cheeses, refrigerate, then bring out 20 minutes before serving for best texture and aroma.

    Choosing Your Meats and Cheeses

    elegant meat and cheese platter

    Pick three to five meats and call it a day — but don’t make them boring. You’ll grab a few cured meats, like silky prosciutto, peppery salami, and something smoky, and you’ll arrange them with swagger. I’ll tell you to fold, fan, and pile, so each bite has texture and drama. Then, move to cheese varieties: creamy Brie, a sharp aged cheddar, maybe a funky blue, cut and labeled so guests aren’t guessing. I whisper plating tips, tuck slices next to clusters, leave space for nibbling. You’ll smell salt, fat, and tang, you’ll hear the little crunch of cracker against cheese. It’s simple, satisfying, and slightly showy—exactly how entertaining should feel.

    Selecting Accompaniments: Fruit, Nuts, and Spreads

    fruit nuts and spreads

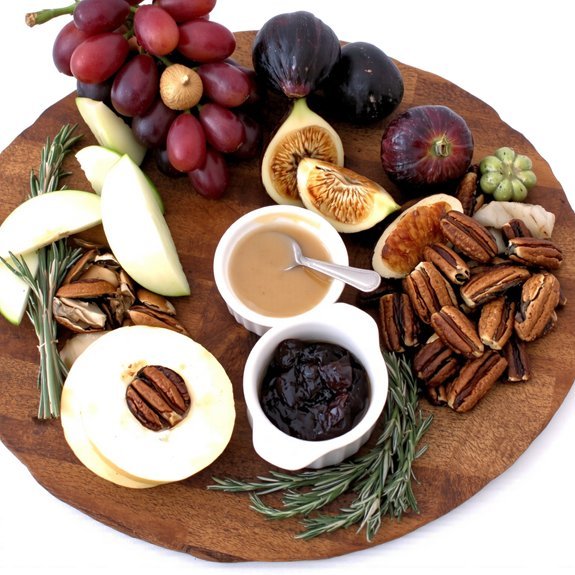
    You’ll want a mix of fresh and dried fruit, bright berries or crisp apple slices for juiciness, and chewy apricots or figs for concentrated sweetness — contrast is everything. Toss in crunchy, salty nuts for texture, think roasted almonds or candied pecans, and don’t skimp on sweet and savory spreads, like honey, fig jam, or tangy mustard, to tie bites together. I’ll walk you through combos that sing, and we’ll laugh when my “perfect” board collapses under its own deliciousness.

    Fresh vs. Dried Fruit

    How do you want your board to feel—bright and crunchy, or cozy and chewy? I say pick both, but choose your vibe first. Fresh fruit benefits jump out: juicy grapes, crisp apple slices, and zesty citrus lift salt and fat, they cool the palate and look gorgeous, you’ll get color and snap. Dried fruit varieties bring chew, concentrated sweetness, and rustic charm—figs, apricots, dates—slice or leave whole, they pair beautifully with soft cheeses. Arrange fresh near cheeses that need a cleanse, tuck dried into little nooks by stronger flavors. Don’t mix them on the same bite unless you mean to—contrast is the point. Trust your taste, have fun, and don’t be afraid to taste-test.

    Crunchy and Salty Nuts

    Fresh fruit wipes the palate, dried fruit soaks up goat cheese like it’s the last towel at a pool party—now let’s talk nuts, because every board needs that snap and salty kick. You’ll want a mix of nut varieties, textures and salts, so guests nibble and nod. I toss clusters, scatter roasted almonds, and slap down candied pecans like a prank—music starts.

    1. Marcona almonds — buttery, mild, great with Manchego, simple salt.
    2. Roasted cashews — creamy crunch, match with spicy salami, citrus.
    3. Smoky pecans or walnuts — bold, excellent with blue cheese, dark chocolate.

    Pick crunchy, salty, varied sizes, label them, refill often, and don’t overthink it.

    Sweet and Savory Spreads

    Even if you’re pretending it’s just “a little something,” I want spreads that do the heavy lifting—think silky honey that pools like sunshine next to punchy mustard, sticky fig jam that clings to a cracker, and tangy tapenade that makes your tongue sit up and clap; I pile them in small bowls, drag a tiny spoon through each, and watch guests debate like it’s a courtroom drama. You’ll balance sweet spreads with savory dips, contrast textures, and build tiny flavor scenes: smear blue cheese dip, dollop apricot preserve, sprinkle toasted sesame. Use bowls, not blobs, so people can play. Label if you’re fancy, hide the thinnest spoon for last. Trust me, a well-chosen spread sparks conversation, rescues shy eaters, and makes your board unforgettable.

    Bread, Crackers, and Other Carriers

    variety enhances snack boards

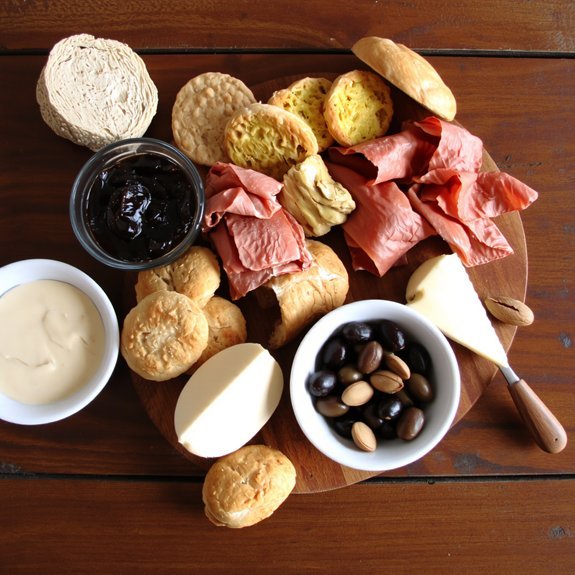
    A few good carriers can make or break your board, so don’t skimp—I’m telling you that from hard-earned snack science. You want texture, ease, and visual pop. I toss sourdough varieties and flavored breads into bread baskets for rustic charm, slice crisply for bread serving, and stash gluten free options so no one’s left hungry. I love crisp artisan crackers and thoughtful cracker pairings.

    1. Pick a breadsticks selection and pita chips for crunch.
    2. Add flatbreads types and toasted rounds for chew.
    3. Offer soft rolls and seeded slices for spreadability.

    You’ll arrange, taste, adjust, maybe nibble too much. It’s practical art, and yeah, you’ll get praised.

    Balancing Flavors, Textures, and Colors

    You’ll want a little sweet, a little savory, and a tangy kick so every bite surprises you, like a tiny flavor fireworks show on your tongue. Mix crunchy crisps with soft slices and creamy spreads, pile them so people can see and hear the contrast as they reach in. I’ll nag you to taste as you build, rearrange for color, and laugh when a combo that shouldn’t work turns out brilliant.

    Sweet, Savory, Tangy Contrast

    When you’re building a board that sings, don’t let everything taste like the same sad sandwich—contrast is your secret weapon. You want sweet flavor to flirt with salty bites, savory balance from meats and cheeses, and bright tangy accents to cut through richness. I’ll show you how to make each mouthful interesting, not fussy.

    1. Add a spoon of fig jam, a slice of prosciutto, and a lemony pickle for instant drama.
    2. Pair a nutty cheese, a drizzle of honey, and a smear of grainy mustard to tease the tongue.
    3. Scatter roasted grapes, cured salami, and a sherry vinegar drizzle for pop and perfume.

    Keep textures varied, colors lively, and trust your palate — taste as you go.

    Crunchy, Soft, Creamy Mix

    Crunch is your secret handshake: I want you to hear it before you taste it. I make a point of tossing in crunchy vegetables—carrot sticks, radish coins, celery shards—so your guests bite, grin, and wake up. Then you layer soft items: ripe figs, pillowy burrata, thin-sliced prosciutto that melts on the tongue. Creamy dips sit in bowls, bold and cool, ready to soften those loud crunches. Arrange colors like you’re composing a joke; contrast bright greens with pale cheeses, deep purples with golden crackers. Hand someone a slice, watch their expression change. You’ll get texture play, balanced flavors, and a board that talks back. Trust me, you’ll be smug and everyone will ask for your secret.

    Assembly Techniques and Visual Layout

    Alright, let’s get hands-on — this is where the board stops being a pile and starts looking deliberate. You’ll set the stage with bowls for spreads, then place big items first, thinking visual symmetry and color contrast. Don’t overthink, just work in thirds, like a stage.

    1. Arrange anchor items (cheeses, large meats) in a triangle, create gaps for movement.
    2. Fill gaps with clusters (fruit, nuts), vary textures, sprinkle color contrast where dull spots show.
    3. Fan slices, roll salami, shove crackers upright for height, add herbs for scent and green flash.

    You’ll step back often, adjust, nibble, and laugh at crooked lines. It’s food theater; you’re the director, and the audience is hungry.

    Dietary Restrictions and Alternative Options

    You’ve just finished playing set designer with cheeses and crackers, so now I’m going to tackle the picky eaters, the allergies, and the vegans without making you feel like you’ve entered a nutritional boot camp. I recommend vegan alternatives like cashew-based spreads and marinated tofu, plant based spreads that taste indulgent, and vegetarian pairings—grilled veggies, olives, herbed hummus—that even meat fans sneak. Offer gluten free options: rice crackers, corn tortillas, and seeded crispbreads. For nut free choices, pick seed mixes and roasted chickpeas. Keep lactose free cheeses and low sodium meats on a labeled corner, simple and proud. Round it out with allergen friendly snacks, bright fruit, and crisp pickles; everyone finds something to love, you included.

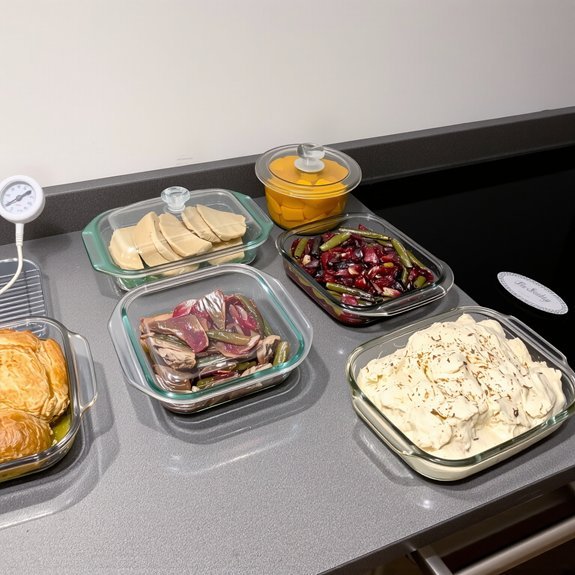
    Serving, Storage, and Make-Ahead Tips

    If you want your board to still look like it just rolled off a food stylist’s Instagram, timing is everything — and fortunately I’ve learned the tricks from dozens of last-minute rescues. I’ll walk you through serving tips, storage solutions, make ahead ideas, and presentation techniques so you’re calm, not frantic. I talk like a coach who’s also your clumsy cousin.

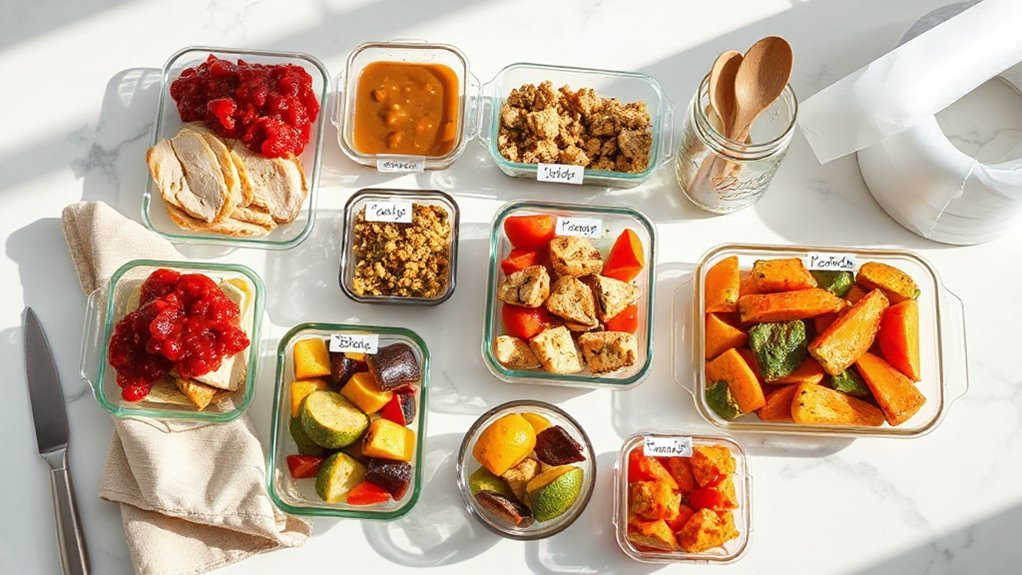
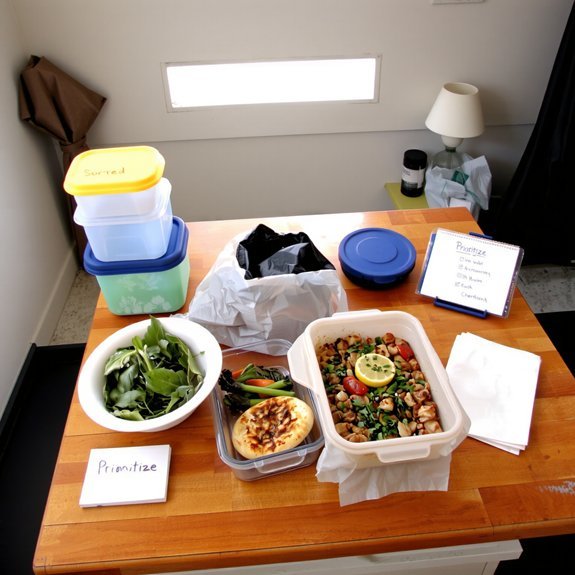
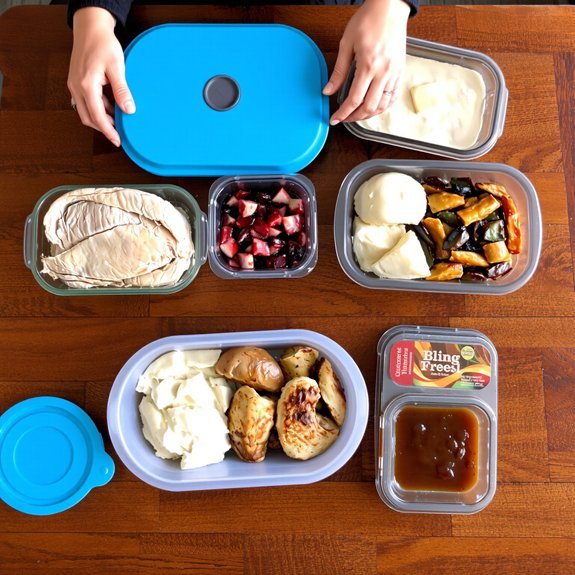
    1. Cut and chill: trim cheeses, slice cured meats, wipe boards dry; wrap and refrigerate, then open 20 minutes before serving for aroma and texture.
    2. Assemble fast: lay large pieces first, tuck spreads in ramekins, sprinkle nuts and herbs for color, don’t over-pack.
    3. Store smart: airtight for leftovers, freeze hard salami, label everything — future-you will thank present-you.

    Conclusion

    You’ve got this—arrange meats and cheeses with a wink, fold prosciutto like tiny roses, fan salami, smear fig jam, toss grapes, sprinkle almonds. Fun fact: 68% of hosts say charcuterie is their go-to party starter, so you’re in good company. I’ll admit, my first board looked like chaos, now it looks intentional. Let it warm, label dietary bits, and watch guests devour your handiwork with impressed, slightly greedy smiles.

  • How Do I Make Mulled Wine

    How Do I Make Mulled Wine

    Ever notice how one simmering pot can make a room feel like a holiday movie set? You’ll grab a fruity red, toss in cinnamon, star anise and cloves, peel an orange with purpose, and let the kitchen fill with sticky, warm spice — it’s simple theater, really, and you’ll look like you know what you’re doing. I’ll show you how to simmer gently, sweeten smartly, and serve it so everyone pretends you planned this.

    Key Takeaways

    • Choose a fruity, mid-range red (or dry white) and discard any wine that smells off.
    • Combine wine, citrus peel, whole spices (cinnamon, cloves, star anise), and a sweetener in a heavy pot.
    • Warm gently to 65–75°C without boiling, simmering slowly to extract flavors and tasting as you go.
    • Sweeten last with honey, maple, liqueur, or brown sugar to balance acidity and spice.
    • Strain, serve garnished with citrus, berries, and a cinnamon stick, and store refrigerated up to 3 days.

    Choosing the Right Wine

    choosing cozy wine wisely

    If you want the mulled wine to taste like a cozy hug instead of a boiled mystery, start with the right bottle. You’ll pick a red wine for depth, something fruity, not tannic, because you don’t want grit stealing the show. I’d avoid super-expensive labels — this isn’t a sommelier’s parade, it’s winter comfort. If you prefer a lighter approach, try a dry white wine, it mulls surprisingly well with citrus and a touch of honey, bright and cheeky. Smell the bottle, pour a sip, and trust your nose; if it smells off, don’t force it. I keep a reliable mid-range red and a crisp white on hand, so when cold hits, I’m ready, no panic, just pour and heat.

    Essential Spices for Mulling

    mulling spices require balance

    You’ll want whole spices—sticks of cinnamon, star anise, and clove studs—so you can smell them hit the pot before you even turn on the heat. Decide between fresh and dried: fresh citrus peels and whole nutmeg give bright, zesty punch, dried bay or ginger add steady backbone, and I’ll warn you, too many cloves will boss the room. Start with modest quantities—one cinnamon stick, three cloves, a half-apple slice worth of nutmeg—and taste as you heat, because mulling is negotiation, not warfare.

    Whole Spices Selection

    Although I won’t promise your kitchen won’t smell like a holiday movie in ten minutes, choosing the right whole spices is where the magic starts, and I’ll walk you through it like a mildly obsessed friend whispering secret recipes. You’ll grab cinnamon sticks for warm backbone, star anise for that licorice twang, whole cloves for sharp perfume, and a couple of nutmeg seeds to grate over the top. Toss them in a saucepan, bruise the cinnamon, press the cloves into citrus, give star anise a little nod, and hold the nutmeg like a tiny fortune. You’ll simmer gently, taste, and tweak. Don’t go overboard; mulled wine is a suggestive art, not a punch to the face.

    Fresh vs. Dried

    Wondering whether to reach for the jar of whole cloves or the sad little packet of ground spice? I’ll be blunt: fresh herbs sing, dried ones whisper. You’ll notice fresh herb benefits immediately — bright citrus thyme, glossy bay leaves, crushed star anise that snaps. They lift aroma, they look pretty in the pot, they make you feel fancy and competent. But dried herb convenience is real; you’ll grab, toss, and never worry about wilting. I mix approaches, because life’s messy and so is my spice drawer.

    1. Use fresh for aroma and visual drama, when you’ve got time and flair.
    2. Use dried for pantry ease, quick weekday mulls.
    3. Combine both to balance pop and steadiness.
    4. Bouquet garni hides whole bits, neat and classy.

    Spice Quantities Guide

    One neat rule I follow: start with small, then build — you can always add, you can’t take away. I tell you this because spices are sneaky, and you’ll thank me when your kitchen doesn’t smell like a cinnamon factory. Use 2-3 star anise, 3-4 cloves, 1-2 cinnamon sticks per bottle of wine. Add a thumb-sized slice of fresh ginger for bite, a strip of orange peel for brightness. If you like it sweet, a tablespoon of sugar, honey, or maple balances tannins. Taste as it warms, tweak gently. Try classic spice combinations—cinnamon-clove-orange—or bolder mixes with cardamom and star anise. You’ll learn which flavor profiles sing for you, and you’ll mess up once, laugh, then nail it.

    Sweeteners and Flavor Enhancers

    taste depth not sweetness

    Sweetness is your friend here, and I’m not talking about polite sugar—think molasses-thick honey, bright maple, or a splash of liqueur that makes you grin. I like to test honey alternatives and different sugar types, so you won’t get bored. You’ll taste depth, not just sweetness. Add gradually, stir, and sip warm, not scalding.

    1. Use honey or maple for viscosity and warmth, they coat the tongue, comfort like a blanket.
    2. Try brown sugar or demerara for toffee notes, they give body, they don’t hide.
    3. Add a spoon of jam or liqueur for complexity, it’s cheating that works.
    4. Don’t overdo it, you can always add more, but you can’t take it back.

    Fruit Additions and Garnishes

    Looking for a little brightness to cut through all that cozy spice? You’ll toss in citrus fruits—orange twists, lemon slices—to wake the aroma, I promise it snaps awake. Add berry blends, frozen or fresh, for a playful color and a tart pop, stir gently so they don’t turn to mush. Dried fruits like apricots or figs give body, they soak up spice and sweeten slowly, which I love. For contrast, tuck in a sprig of rosemary or thyme for herbal notes, it smells like a garden crashed your kitchen party. Aim for flavor balance: don’t overdo any one thing. Garnish with a citrus wheel, a few berries, a cinnamon stick, and you’re handing people winter in a mug.

    Step-by-Step Mulled Wine Method

    Start by grabbing a heavy-bottomed pot and a good mug—you’ll want something that holds heat and feels honest in your hands, not some dainty teacup pretending to be festive. I walk you through a clear, cozy method that honors mulled wine history and modern festive traditions, no pomp, just smell and warmth.

    1. Combine wine, sugar, citrus, and spices in the pot, stir gently, listen to the tiny hiss as flavors meet.
    2. Add a cinnamon stick and star anise, press scents into the liquid, imagine old markets and holiday lanes.
    3. Simmer slowly, taste and tweak sweetness, wink at ritual, don’t rush the letting-be.
    4. Strain, pour into your mug, garnish, sip, sigh—mission accomplished.

    Temperature and Timing Tips

    If you let the wine flirt with heat too aggressively, it sulks and turns bitter, so I keep things gentle and precise. You’ll want to aim for a low simmer, around 70–80°C (160–175°F), and resist the urge to boil; temperature control saves aroma, keeps spice oils lively, and avoids that burned-edge taste. I stir, I sniff, I taste — every ten minutes at first, then every five when you’re nearing perfect. Use a kitchen thermometer, set a timer, and don’t walk off. For larger batches, add a bit more time, for single mugs, subtract a few minutes; those are basic timing techniques that actually help. When it smells like holiday magic, you’re done — pull it off heat and serve.

    Nonalcoholic and Low-Alcohol Alternatives

    Want the mulled-wine vibe without the buzz? I’ve got you. You’ll still get steam, cinnamon perfume, and that cozy, sock-sliding warmth, minus the wobble. Try nonalcoholic wines as a base, they mimic body and fruit, you’ll stir in orange and clove and taste comfort. Or, if you want a whisper of kick, add low alcohol spirits, a splash, not a dive.

    1. Heat nonalcoholic wines gently, don’t boil, you’ll lose aroma.
    2. Infuse with citrus, cinnamon, star anise, simmer low, smell the room sigh.
    3. Use low alcohol spirits sparingly, for complexity, not intoxication.
    4. Finish with honey or maple, taste, adjust, and serve warm, smug and proud.

    Scaling the Recipe for a Crowd

    You’re throwing a party, I’m pouring for a crowd, and we’ve got to pick the right volume so no one’s left waving an empty cup. Keep your spice and infusion ratios steady as you scale—more wine isn’t license to drown the cinnamon, so taste as you go and smell for that warm, orange-clove hit. Think about heating and serving logistics too: big pot or urn, gentle low heat, ladle-ready cups, and a clever friend to man the station so you can sip one warm yourself.

    Choosing the Right Volume

    One simmering pot serves six people, but that’s just the polite dinner-party answer; I plan for two cups per guest, because everyone naps on leftovers and I don’t trust manners. You’ll think in liters or quarts, and you’ll think about volume considerations and party sizes before you buy the wine. Measure cups, count guests, add a little extra for seconds and sneaky refills.

    1. Estimate demand: sober guests take one, thirsty guests take two.
    2. Buffer rule: add 10–15% extra for spill and seconds.
    3. Vessel choice: use a stockpot for 12+, a saucepan for small groups.
    4. Reheat plan: warm smaller batches on the stove, keep a thermos hot.

    I narrate like a friend, practical, slightly cheeky, hands-on, precise.

    Spicing and Infusion Ratios

    If you’re scaling mulled wine for a crowd, think of spices like a band—each instrument needs its time and volume, or the whole thing sounds wrong. You’ll want clear spice balance: cinnamon leads, star anise and cloves solo sparingly, orange peel fills the harmony. I recommend per liter: 1 cinnamon stick, 2 cloves, half a star anise, a strip of peel. For 10 liters, multiply, but don’t go linear—reduce cloves a touch, they bite. Use infusion techniques: tied sachets for easy removal, cold maceration overnight for gentle melding, or brief simmering for punch. Taste as you go, trust your nose, adjust sugar last. You’ll serve warm smiles, not a spice crime scene.

    Heating and Serving Logistics

    When you’re serving mulled wine to a crowd, plan like you’re running a tiny, festive railway—trains (and people) need smooth arrivals, clear platforms, and a boss who looks like they know the timetable. I pick a primary heating method, then a backup kettle, because crowds are cheerful, impatient, and will test your patience. Keep a thermometer nearby, watch serving temperatures, aim for 65–75°C, never boiling, so spice oils sing not scorch. Ladle with rhythm, announce pours, make each cup feel curated.

    1. Use a slow cooker for steady heat, and a saucepan for quick top-ups.
    2. Batch in large pots, label vats, rotate to keep flavor even.
    3. Station one server, one cashier, one trash wrangler.
    4. Prep mugs, garnishes, napkins — speedy theater.

    Serving Suggestions and Pairings

    Since mulled wine’s already doing the heavy lifting with heat and spice, I like to keep the rest of the scene simple and a little theatrical, like I’m hosting a cozy mystery where everyone’s guilty of drinking too much warmth. For holiday gatherings, set out mugs, cinnamon sticks, and citrus slices, let guests garnish their own, it’s interactive and avoids your pretending to be a bartender. For cozy evenings, dim lights, light a clove-studded orange, and hand someone a blanket — instant atmosphere, minimal effort. Pair with salty cheeses, roasted nuts, dark chocolate, or spiced shortbread, they’ll cut the sweetness, boost the spice, and make you look thoughtful. If someone asks for a sober option, offer warm spiced apple cider, and wink like it’s your best improvisation.

    Storing and Reheating Mulled Wine

    Because mulled wine tastes best warm and a touch naughty, you’ll want to store and reheat it like you’re protecting a cozy secret, not hoarding leftover soup. I cool it quickly, stirring occasionally, using simple cooling techniques: ice bath, shallow pan, gentle fan. Then I decant into clean storage containers, glass jars work best, lids tight, spices tucked in.

    1. Cool fast, but don’t shock the flavor—let aromas settle.
    2. Use glass storage containers, label date, keep in fridge up to 3 days.
    3. Reheat low and slow on stovetop, don’t boil, taste and tweak sugar or spice.
    4. For parties, warm in slow cooker, keep lid on, stir before serving.

    You’ll sip, grin, and pretend it was effortless.

    Conclusion

    You’ve nailed it — warm, spiced, and impossibly cozy. Keep the heat low, taste as you go, and don’t drown good wine in sugar. Fun fact: mulled wine sales jump about 30% each winter in many countries, so you’re joining a global cozy club. Make a pitcher, strain it, garnish with orange and cinnamon, then watch faces light up. I’ll take credit for the smell; you take the applause.

  • How Do I Bake Sourdough Bread for Beginners

    How Do I Bake Sourdough Bread for Beginners

    Baking sourdough is like coaxing a shy orchestra to play—it’s about patience, timing, and a little faith in crusty drama. You’ll feed and tame a starter that smells tangy and alive, mix flour and water until the dough feels like soft putty, fold it every half-hour so it grows strength, shape with gentle hands, and score for that perfect oven bloom—I’ll walk you through each step, but first let’s get your starter bubbly and ready.

    Key Takeaways

    • Maintain an active starter: feed regularly, discard a portion, and use when it doubles and smells pleasantly tangy.
    • Mix flour and water gently, autolyse 20–60 minutes, then add salt and knead until the dough feels smooth and slightly glossy.
    • Bulk ferment at room temperature with gentle folds every 20–30 minutes until the dough shows bubbles and slight rise.
    • Shape gently to create surface tension, proof until a slow spring returns on a poke, then score just before baking.
    • Preheat a Dutch oven to 475°F, bake covered 20 minutes for steam, uncover and finish at 430°F until deep brown and hollow-sounding.

    Getting and Maintaining a Healthy Starter

    maintaining a healthy starter

    Smell this—like a tangy orchard after rain, with a sly whiff of yeast and lemon; that’s your starter waking up. You’ll talk to it, feed it, watch bubbles bloom like tiny lanterns. I tell you straight: starter hydration matters—too thick, it sulks; too thin, it runs away. I show you a simple feeding schedule, twice a day when warm, once when chillier, and you’ll learn to read the rise and fall like a mood ring. Spoon out, discard a bit, add equal parts flour and water, stir until smooth. Keep it warm, but not hot. Use clear jars, label times, and don’t panic at odd smells—most are fine. You’ll get this; I stutter, but the starter won’t.

    Mixing, Autolyse, and Salt Addition

    dough mixing and autolyse

    Okay, now we move from coaxing your starter to actually making dough—this is where the science meets elbow grease. You’ll mix flour and water, use gentle mixing techniques so you don’t beat out the air, and feel the shaggy mass turn smooth under your hands. I like a quick fold-and-scoop to test gluten, it feels like petting a reluctant cat. Letting the dough rest, that autolyse benefits stage, hydrates flour, wakes gluten, and makes later handling easier. Add salt after autolyse, sprinkle it on, then knead it in; salt sharpens flavor and tightens the structure. You’ll notice texture change, a glossy sheen, the dough sighs a little. Trust your touch, trust the clock, and enjoy the tactile therapy.

    Bulk Fermentation and Folding Techniques

    bulk fermentation and folding

    Once the dough has settled and your kitchen smells faintly of tang and possibility, you start bulk fermentation — that roomy, low-key phase where time does most of the work and you get to look important while folding. You’ll leave the dough to rise at room temp, watch bubbles form, feel the dough’s surface tighten under your fingers, and grin like a scientist. Every 20–30 minutes, perform gentle folding techniques: wet hands, scoop from one side, stretch up, fold over; rotate the bowl, repeat 4–6 times. Folding builds strength, traps gas, and shapes the crumb without punching the life out of it. Trust the rhythm, listen to subtle resistance, and don’t rush — patience rewards you with airy structure and flavor.

    Shaping, Proofing, and Scoring the Loaf

    Three simple moves will turn your relaxed, bubbly dough into a picture-ready loaf, and I’ll walk you through them without pretending I invented the wheel. You’ll shape, proof, and score with confidence, feeling the dough’s elasticity under your palms, hearing its slight sigh.

    Three simple moves—shape, proof, score—and your bubbly dough becomes a picture-ready loaf, imperfect and joyfully yours.

    • Use gentle shaping techniques: tighten the surface with quick, tidy turns, don’t tear the crumb.
    • Respect proofing times: watch, press, and judge by poke, not by the clock alone.
    • Choose scoring patterns: single slash for oven spring, decorative cuts for show.
    • Pick loaf sizes: smaller bakes proof faster, larger boules need more patience.

    I’ll remind you, you’ll mess up sometimes, then laugh, then eat warm, imperfect perfection.

    Baking Setups, Steam, and Temperature Control

    You’ve shaped, proofed, and scored your loaf—hands dusty, dough proud, and maybe a little lopsided—and now you’ve got to get heat and steam to do the heavy lifting. I preheat my oven with a Dutch oven inside, because oven preheating matters—very much—get it screaming hot, 475°F for 30–45 minutes. For steam generation, I toss ice cubes or a cup of boiling water into a preheated tray, or rely on the sealed pot’s own humidity; both lift crust like a magician. Slide the loaf in, cover for 20 minutes, then uncover and drop to 430°F, bake until glossy, deep brown, and the house smells like triumph. Listen for a hollow tap, then resist the urge to cut too soon.

    Conclusion

    You’ve turned flour and water into a living thing, so don’t panic now. Keep feeding that starter like a needy pet, fold the dough like you’re tucking it in, proof until it springs back, and score with confidence. Pop it into a screaming-hot Dutch oven, breathe in the caramel and steam, and watch crust bloom. You’ll burn a finger, laugh, taste victory, and realize bread is just patience wearing a delicious, crackling coat.

  • How Do I Make Slow Cooker Turkey Breast

    How Do I Make Slow Cooker Turkey Breast

    Like a cozy sequel to Thanksgiving, you’ll get perfect turkey without the drama — and I’ll show you how. You’ll trim and rub the breast, tuck herbs under the skin, and dump a splash of broth and garlicky aromatics into the slow cooker, then let low heat work its quiet magic for hours while your house smells like heaven. It’s easy, forgiving, and worth the tiny bit of patience — but first, a few pro tricks.

    Key Takeaways

    • Choose a bone-in turkey breast (6–8 lb) for better flavor and even slow-cooker cooking, or a smaller boneless for quicker shredding.
    • Trim excess fat, pat meat dry, and tuck thin edges for uniform thickness and even cooking.
    • Rub or spread a compound butter or seasoning blend (herbs, garlic, citrus zest, salt) under and over the skin.
    • Cook in a 6–8 quart slow cooker on LOW 4–6 hours (or HIGH 2–3) until internal temperature reaches 165°F.
    • Rest 10–15 minutes, slice against the grain, and store leftovers in shallow airtight containers in the fridge.

    Choosing the Right Turkey Breast Cut

    choose the right turkey

    If you want juicy, no-fuss turkey, start with the cut—you can’t fix a stubbornly dry bird with spices and wishful thinking. I tell you straight: pick the right breast type, bone-in for flavor, boneless for speed. You’ll feel the heft, smell faintly of iron, imagine slicing glossy meat. I show you both options, compare textures, note how skin crisps or doesn’t. Think about portions, single breast or split, and how each plays with various cooking methods. Want shreddable, choose a larger, slower-friendly piece; want slices, grab firm, chilled breast. You’ll touch it, weigh it, make the call like a tiny food judge. Trust me, the cut sets the whole outcome.

    Essential Tools and Slow Cooker Types

    essential slow cooker tools

    You’ll want a slow cooker that fits the bird without cramming it — think roomy 6–8 quart for a whole breast, smaller for halves, and yes, size matters when browning and basting. I like ceramic inserts for even heat and that gentle, gravy-friendly finish, but metal ones heat fast and slide right into a broiler if you want crisp skin (just don’t yell at me when you forget the oven mitts). Gather a good thermometer and sturdy tongs, because you’ll be poking, flipping, and tasting like a proud, slightly nervous chef who’s about to serve dinner.

    Slow Cooker Sizes

    Because size actually matters when you’re slow-cooking a turkey breast, I’m going to make this short and practical: pick the right pot and you’ll get juicy meat, pick the wrong one and you’ll be poking sad, dry slices at the table. You want a snug fit, not a wrestling match. Small cookers are great for single breasts, they cradle the meat, keep juices close, and heat evenly — ideal for two to four people. Large cookers handle bigger breasts or bone-in pieces, they give room for aromatics and liquid without overflowing, but too much empty space dries things out. I say measure first, tuck the breast in, pour in a splash of broth, and don’t overfill. Simple, effective, tasty.

    Insert Materials

    Tools matter. You’ll want a few essentials, trust me — they actually save you from dried-out drama. I grab tools that let me season, sear, and nestle the breast into cozy cooking liquids. Sensory payoff: sizzling oil, fragrant turkey seasoning, steam that smells like victory.

    • Heavy skillet for browning, gives flavor, crispy edges you’ll brag about.
    • Instant-read thermometer, no guessing, poke once and you’re gold.
    • Slow cooker with removable insert, easy cleanup, steady low heat.
    • Tongs and a wide spatula, gentle handling keeps juices inside.

    Pick a casserole-style slow cooker for even heat, or a tall one if you’re stuffing aromatics around the breast. You’ll be smug, and your guests will ask for seconds.

    Preparing and Trimming the Turkey Breast

    trim pat tuck prepare

    One solid thing before we even reach the slow cooker: trim that turkey breast like you mean it. I tell you this because trimming techniques matter — you want even thickness, no dangling fat, no ragged silver skin that puckers when cooked. Lay the breast skin-side down, feel for fat and cartilage, and slice them away with a sharp knife. Pat the meat dry, don’t skip this; a dry surface helps browning later and lets your preparing marinade stick better. If you find a tendon, tug gently and cut. Tuck thin edges under so the breast heats evenly. I talk you through each snip, small confident motions, like surgery but less dramatic. Now it’s ready for the slow cooker, smelling clean and hopeful.

    Seasoning Blends and Herb Butter Options

    If you want that turkey breast to taste like it actually remembered being alive, you’ll need seasoning and fat that know what they’re doing — and that’s where herb butter and smart spice blends come in. I tell you, smearable butter is magic; you’ll tuck it under the skin, press it in, and hear silence as flavor settles in. Herb blends lift brightness, thyme and parsley whispering, while Spice rubs bring bold edges, smoked paprika and garlic marching in.

    • Classic herb butter: butter, rosemary, thyme, lemon zest, salt.
    • Spicy rub: smoked paprika, cayenne, brown sugar, cumin.
    • Citrus-herb twist: orange zest, sage, olive oil, pepper.
    • Garlic-parsley compound: butter, parsley, roasted garlic, lemon.

    Aromatics, Liquids, and Flavor Boosters

    You’ve lathered that herb butter under the skin and rubbed the spicy mix into crevices, now let’s give the slow cooker something to sing about: aromatics, liquids, and a few sneaky boosters that make the whole thing taste like you actually tried. I toss halved onions, smashed garlic, celery ribs, and thick carrot chunks around the breast so steam carries savory depth, and those herb combinations you chose get echoed in the pan. Pour in low-sodium chicken stock, a splash of white wine, or apple cider—enough to come halfway up the meat, not drown it. Add a couple bay leaves, a few peppercorns, maybe lemon slices for brightness. For umami, a dash of soy or Worcestershire works wonders. Smell check. You’re winning.

    Searing vs. No-Sear: Pros and Cons

    While I love a good sizzle, I won’t pretend searing is a magic spell — but it sure does give the breast a gorgeous, brown crust and a mouthwatering roasted aroma that makes dinner sound like a triumph before you even carve it. You’ll notice Searing benefits right away: texture, color, flavor depth. But skipping that pan has perks too, so here’s the trade-off, plain and useful:

    • Searing benefits: crisp, caramelized crust, tempting aroma, added savory Maillard notes.
    • No sear advantages: faster cleanup, less fuss, juicier interior when you’re pressed for time.
    • Searing costs: extra step, splatter, a hot pan to babysit.
    • No sear costs: paler look, milder surface flavor, but still tasty and simple.

    Slow Cooker Settings and Cook Times

    Okay, so you’ve got that beautiful breast, maybe seared, maybe not — either way, it’s time to talk slow cooker settings and cook times, which are more like a gentle nudge than a rule book. I tell you straight: low or high are your friends, pick based on schedule. Low gives plush, fall-apart meat, high speeds things up when life’s chaotic. Watch your slow cooker temperature—most dial lows sit around 200°F, highs near 300°F, but check your manual, mine lies to me like an old friend. For a 3–4 pound breast, expect a cooking duration of roughly 3–4 hours on high, or 5–7 on low. Add aromatics, resist peeking, and enjoy the slow crescendo of smell.

    Checking Doneness and Food Safety Tips

    Let’s not romanticize this — food safety is sexy when it saves you from a week of regret. I tell you straight: don’t guess doneness. Use a probe, stick it into the thickest part, avoid touching bone, and rely on temperature checks. You’ll hear the slow cooker hum, smell the browned edges, and you’ll want to plunge in — don’t.

    • Use a calibrated thermometer, aim for 165°F in the thickest spot.
    • Keep juices contained, wipe spills immediately, practice safe handling.
    • Chill leftovers within two hours, shallow containers cool faster.
    • Never rinse raw turkey, you’ll splash bacteria around.

    I keep it simple, I keep it clean, and I sleep better knowing you will too.

    Resting, Slicing, and Serving Suggestions

    After you pull the turkey breast from the slow cooker, give it a beat—resting isn’t optional, it’s the ticket to juicy slices, and I promise you it’s worth standing there like a vigilant turkey bodyguard for ten to 20 minutes. I tuck foil loosely over the bird, whispering encouragement, and use simple resting techniques: tent loosely, leave undisturbed, let internal juices redistribute. When you slice, use steady slicing methods: long smooth strokes with a sharp knife, cut against the grain, trim thin or thick depending on your mood. For serving ideas, think warm gravy drizzle, crisp herbs, bright citrus. Plating suggestions: stagger slices, add roasted veg, sprinkle crunchy crumbs. Serve confident, smile, take a bow—you earned this.

    Storing and Reheating Leftover Turkey Breast

    If you want your leftover turkey to taste like it went on a spa retreat instead of a math test, treat storage and reheating like a ritual, not an afterthought. I’ll walk you through simple storing methods, so the meat stays moist, fragrant, and ready. Cool it quickly, slice against the grain, and pack in airtight containers with a splash of stock. I talk fast, I joke more, but I mean it.

    Treat leftover turkey like a spa day: cool fast, slice against the grain, pack airtight with a splash of stock.

    • Refrigerate within two hours, use shallow containers, label with date.
    • Freeze in portions, wrap tight, use within three months for best flavor.
    • Reheat techniques: low oven at 300°F with foil and broth.
    • Microwave: cover, short bursts, let rest between zaps.

    Conclusion

    You’ve got this—slow cooker turkey breast is forgiving, like a good friend who never judges. I promise the meat will be tender, juicy, and smelling like Sunday dinner, if you trim, season, and give it time. Use broth and aromatics, cook low, check for 165°F, then rest before slicing. Serve hot, watch the happy silence, and stash leftovers promptly. It’s simple, reliable, and delicious—comfort on a plate, every time.

  • How Do I Cook Ham for the Holidays

    How Do I Cook Ham for the Holidays

    Most people don’t know that a pre-cooked spiral ham only needs gentle heating, not an hour of oven punishment. You’ll learn how to trim, glaze, and time it so the crust sings and the meat stays juicy, and yes, I’ll show you a failproof glaze that even your picky aunt will admire. Stick with me — I’ll stop the drying-out disaster before it starts, and we’ll still have room for pie.

    Key Takeaways

    • Choose the right ham (smoked, spiral, bone-in, or boneless) based on flavor, presentation, and how much hands-on carving you want.
    • Trim excess rind and fat, leaving a thin fat cap so the glaze penetrates without creating greasy slices.
    • Reheat or cook to safe temperatures: 145°F for raw ham, 140°F for fully cooked/reheated, using a meat thermometer.
    • Glaze with a sugar-acid base (brown sugar, maple, mustard, or fruit) and brush every 10–15 minutes, finishing under broil for caramelization.
    • Roast at 325–350°F, plan 15–20 minutes per pound for pre-cooked bone-in, then rest 15–20 minutes before slicing.

    Choosing the Right Type of Ham

    choose ham that resonates

    Why pick one ham over another—doesn’t that feel oddly like choosing a holiday soulmate? You’ll sniff first, trust me, because aroma tells you stories: a smoked ham hits you with woodsy, savory warmth, while a spiral ham promises convenience and those postcard-perfect slices. You’ll imagine the table, plates clinking, jaws mid-chew, and decide whether you want rustic depth or effortless glam. I’ll nudge you toward smoked ham if you crave smoky drama, char notes, and a chewy, satisfying bite; pick spiral ham when you want neat rounds, glaze that clings like candy, and zero knife theatrics. Either way, picture slicing, tasting, a little dance in the kitchen—you’ll know when you’ve found the one.

    Preparing and Trimming the Ham

    trim ham for optimal flavor

    You picked a ham, now let’s get it ready — I’ll help you spot the right cut and trim it like a pro, no stress. Lay it on a sturdy board, feel for the fat cap and follow the bone with a sharp knife, peeling away any thick, waxy blubber until you’ve left a thin, even layer that’ll baste and crisp. Trust me, a little careful trimming smells better, carves prettier, and makes the glaze actually stick, so roll up your sleeves and let’s make this ham sing.

    Choosing the Right Ham

    How do you pick a ham that makes everyone forget about the messy year and fight over seconds? You weigh ham varieties, you sniff for sweet or smoky flavor profiles, and you picture that glorious brown crust. I say go bone-in for depth, if you don’t mind a little carving theater. Boneless is neat, fast, kid-approved. Spiral-cut saves your wrist, but check glaze absorption—some hams drink it up, others shrug. Smoked versus honey-cured? Smoked hits you like a cozy fireplace, honey-cured sings of sticky, golden sweetness. Feel the heft, examine the label, imagine the aroma pulling guests from the couch. I promise, pick one with confidence, and you’ll be the reason someone whispers, “Can I have more?”

    Trimming Excess Fat

    When the ham comes out of its wrapper, take a breath and look it over like you’re about to tame a small, fatty beast—I do, every time, because trimming is half ceremony, half surgery. You’ll see thick rind and blobs of fat. I tell you to start with a sharp knife, slice away pockets of fat, leaving a thin cap for flavor. Feel the texture, smell the pork, don’t be squeamish. Use gentle strokes, pull the fat with your free hand, keep the blade angled, that’s key. These trimming techniques speed cooking, prevent greasy glaze, and help even seasoning. Fat removal isn’t about purging flavor, it’s about balance. You’ll end up with a neater, juicier roast, and a proud grin.

    Glaze Ideas and Application Techniques

    glazed ham application techniques

    Even if you’re planning a simple spiral-sliced ham, don’t skip the glaze — it’s the part that turns “nice” into “knock-their-socks-off.” I’ll walk you through flavor ideas that actually sing (brown sugar and mustard? yes. maple and bourbon? absolutely.), and show how to paint, baste, and finish so every slice has a glossy, caramelized crust that cracks with a satisfying snap. Start with a base: brown sugar, a splash of maple syrup, and a spoonful of spicy mustard for snap; add cloves, citrus zest, or bourbon if you’re brave. Brush on, let it set, baste again every 10–15 minutes, and finish with a hot broil for five minutes to blister. Slice, smell, smile, serve.

    Oven Roasting and Baking Times

    Okay, here’s the game plan: set your oven temperature right, I mean precise heat so the fat crisps and the meat stays juicy, and I’ll walk you through the sweet spot for both spiral-cut and whole hams. You’ll learn the minutes-per-pound math that stops guesswork, plus when to baste, when to tent with foil, and how long to let the ham rest so juices settle (trust me, patience equals glory). Then we’ll slap on the glaze at the perfect moment, hear the oven sing, and carve into a glossy, fragrant centerpiece everyone’s been eyeing.

    Oven Temperature Guidelines

    Heat is your friend, not a tyrant—treat the oven like a temperamental but reliable sous-chef and you’ll nail the roast. I tell you plainly: set the oven temperature to control flavor, not just kill germs. Different cooking methods need different temps; low and slow brings tender, high heat crisps the exterior. You’ll smell caramel and hear a gentle sizzle when it’s working.

    1. 325°F for gentle roasting, steady and forgiving.
    2. 350°F for a balance of browning and juiciness.
    3. 375–400°F to finish, crisp the glaze, watch closely.
    4. Use an oven thermometer, don’t trust the dial.

    I check color, tent with foil, baste once — you’ll get applause, and maybe a smug grin.

    Cooking Time per Pound

    One reliable rule I swear by: plan for roughly 15–20 minutes per pound for a fully cooked, bone-in ham at 325°F, and about 10–12 minutes per pound if you’re starting with raw ham—numbers that keep you out of the danger zone and in the delicious one. You’ll use simple cooking methods, oven roasting mostly, and do time calculations that make sense. I’m blunt: weigh the ham, do the math, set the timer. You’ll hear the oven hum, smell the sugars caramelize, and peek once or twice like it’s a sitcom. If you’re nervous, use a meat thermometer—145°F for raw, 140°F for reheated, and you’re gold. No drama, just juicy results.

    Resting and Glazing Tips

    You’ve done the math, set the timer, and the oven’s been humming like a tiny orchestra—now don’t wreck it by skipping the rest. Let the ham sit, tented loosely with foil, for 15–20 minutes; juices redistribute, you’ll slice cleaner, and it won’t spatter molten bliss everywhere. Try simple resting techniques: elevate on a rack, keep it warm, and resist the fork.

    1. Brush glaze cold, then reheat briefly for shine.
    2. Baste every 10 minutes for a sticky crust.
    3. Sear under broiler 2–3 minutes for caramel.
    4. Let internal temp settle 5–10°F before slicing.

    Pick glazing options you love—brown sugar, mustard, or maple—mix sweet, tang, and heat, then watch guests swoon.

    Reheating Pre-Cooked Hams Safely

    If you’re staring at a glossy, pre-cooked ham on your counter and wondering how not to ruin it, relax — I’ve got your back. You want safe reheating, and you want it tasty, not rubbery. Preheat the oven to 275–300°F, that’s your sweet spot for even warmth. Pop the ham, fat-side up, in a shallow pan, add a splash of water or stock, cover tightly with foil, and let low, slow heat work its magic. Aim for internal temperature guidelines: 140°F for fully cooked hams, check with a probe in the thickest part. Rest five to ten minutes before slicing. You’ll get juicy slices, no surgical gloves required. Slice, serve, and enjoy the applause.

    Common Mistakes to Avoid and Serving Tips

    Alright, now that your pre-cooked ham’s safely warmed and resting like a diva, let’s talk about the stuff that actually ruins dinner — and how to avoid it. You’ll trip up if you over-glaze, slice too early, or serve it stone-cold. Keep juices, keep patience. For common serving errors, remember: cut against the grain, let carryover finish the job, and save the drippings for sauce.

    1. Over-glazing burns surface, tastes bitter.
    2. Cutting hot makes a juicy mess.
    3. Ignoring internal temp risks safety.
    4. Bland plating kills holiday presentation.

    Plate with colorful sides, spoon glossy glaze over cuts, whisper “look alive” to guests, and enjoy the applause when everyone digs in.

    Conclusion

    You’ve got this. One in four Americans serves ham at holiday meals, so your oven heroics matter. Trim a little fat, slap on that glaze, baste like you mean it, and let the steam perfume your kitchen—brown sugar caramel, tangy mustard, sticky citrus. Rest it, slice it, watch jaws drop. I’ll take credit, you take the applause, and don’t forget: save the bone for soup, it’s dinner encore magic.

  • How Do I Make the Perfect Gravy

    How Do I Make the Perfect Gravy

    You want gravy that smells like dinner’s winning, so we’ll do it right: sweat onions, brown the roast until the pan is naughty with fond, whisk in flour, then add stock a little at a time while you stir like you mean it; taste, tweak with salt, pepper, a splash of acid or sherry, finish with cold butter for shine—simple, exact, and stubbornly delicious—stick around and I’ll show you the tiny tricks that turn good gravy into the stuff people fight over.

    Key Takeaways

    • Build flavor by sweating a mirepoix (2 parts onion, 1 carrot, 1 celery) and browning meat to create fond.
    • Deglaze the pan with stock or wine, scraping browned bits to incorporate deep savory flavor.
    • Thicken gradually with a roux or cold slurry, whisking constantly to avoid lumps and achieve silky texture.
    • Adjust seasoning and balance with acid (lemon, vinegar, or wine) and a final pat of cold butter for sheen.
    • Rescue issues by straining lumps, simmering to concentrate, or diluting salty gravy with unsalted stock.

    Essential Ingredients and Equipment

    essential gravy ingredients and tools

    Alright, let’s get real: good gravy starts with the right stuff. You’re going to want stock, fat, flour, salt, and pepper, nothing mystical. Smoked drippings, chicken bones, or mushroom stock give different gravy types, so pick your mood. Grab essential tools: a whisk that won’t clump, a wooden spoon for scraping, a fine sieve for shine, and a heavy pan that heats evenly. I’ll admit, I once burned flour—I winced, you’ll laugh—so keep a scraper handy. Taste as you go, adjust with acid or butter, watch texture closely, it tells you the story. Prep your mise en place, keep warmth nearby, and don’t forget a mug for spoon-licking. You’re ready.

    Building a Flavorful Base

    sweating mirepoix browning roast

    You start by sweating a mirepoix—onions, carrots, celery—until they smell sweet and a little like caramel, and yes, that smell alone makes you feel proud. Then, brown your roast in the same pan so the fond sings, those dark bits sticking like tiny flavor trophies you’ll scrape up with stock. Stick with me, we’ll turn that caramelized, browned mess into gravy that talks back.

    Aromatic Mirepoix Roast

    Three things happen the second you toss a rough-chopped onion, carrot, and celery into a hot pan: they sizzle, they brown, and they start telling you the story your gravy will later brag about. You’ll pay attention to mirepoix ratios — the classic two parts onion, one part carrot, one part celery — because balance matters, and because I like to argue with tradition while mostly obeying it. Roast those aromatics until edges caramelize, stir, breathe in the sweet, savory perfume. You’ll get the aromatic benefits immediately: depth, sweetness, a savory backbone that hugs your gravy. Don’t let them burn, just coax color and flavor, scrape browned bits gently, taste constantly, and laugh when it smells so good you almost skip the gravy.

    Fond Development Techniques

    Now that your mirepoix has sung and browned, it’s time to let the pan tell the rest of the story—really listen to that caramelized whisper stuck to the bottom. I teach you to coax those flavors, you watch the magic. First, know your fond types: brown beefy bits, pale fond from poultry, and sticky veg caramel—all useful, all different. Use fond techniques like deglazing with wine or stock, scraping with a wooden spoon, and simmering to dissolve treasures. Smell it—nutty, toasty, a little sweet. Don’t burn it, you’ll sulk over bitterness. I’ll jab a lemon or add butter for roundness, you’ll nod. It’s theatrical, intimate, a tiny kitchen confession that turns drippings into delicious gravy.

    Achieving the Perfect Consistency

    silky pourable gravy perfection

    If the gravy’s too thin, it’s sad and slippery; if it’s too thick, it’s a gloopy crime scene — let’s aim for silky, pourable perfection. You’ll watch texture like a hawk, taste as you go, and use simple consistency techniques: simmer to reduce, whisk to smooth, and add measured thickening agents. Start hot, then lower heat; a steady simmer mellows starch and concentrates flavor. Make a slurry with cold liquid before you stir it in, or temper a roux into warm stock, no lumps allowed. I nudge with butter at the end for sheen and silk. If you need to loosen, add warm stock spoonwise; to enrich, simmer a touch longer. You’ll learn the feel: coats the spoon, drips slow, looks irresistible.

    Fixing Common Gravy Problems

    You nailed the texture lesson, and now we cope with the mess-ups that sneak up on you—because gravy is a diva, and you’ll need a few tricks when she throws a tantrum. I’ve seen the lumps, the thin puddles, the sad gray sheen. Common mistakes? Not whisking, adding cold liquid to hot roux, or cooking off the flavor. Troubleshooting tips start with rescue moves: blitz lumps with a blender or strain through a fine sieve, simmer slowly to thicken, or whisk in a beurre manié spoonful by spoonful. If it’s too salty, dilute with unsalted stock, if too thin, reduce or whisk in starch slurry. Taste constantly, adjust heat, and own the fix—gravy forgives, eventually, when you do the work.

    Flavor Variations and Add-Ins

    Welcome to the flavor toolbox—I’m about to make your gravy interesting, not intimidating. You’ll want to taste first, then tweak. Add herb infusions like thyme sprigs, rosemary needles, or a bay leaf tied to a spoon; simmer briefly, then fish them out. Try splashy add-ins—sherry, soy, or a mustard whisk—to lift sadness from bland gravy. For heat or depth, grind fresh pepper or fold in spice blends like smoked paprika and cumin, sparingly at first. Want richness? Stir in brown butter or a pat of cold butter off-heat, whisking until glossy. For brightness, squeeze lemon or drop minced shallot sautéed until sweet. I promise, with small experiments, your gravy will sing, not mutter.

    Serving and Storage Tips

    Plating’s where your gravy gets to brag a little, so don’t let it slouch in a sad spoon — ladle it hot, steady, and with a confident wrist so it pools just right around the meat and veggies; I like to warm the gravy gently on low while the plates rest, give it one last whisk to gloss it up, then drizzle in an S or a heart if I’m feeling dramatic. Keep an eye on serving temperature, aim for warm, not scalding, so flavors sing and mouths don’t protest. If you’re saving leftovers, cool gravy quickly, skim any fat, then portion into airtight storage containers, label and chill. Reheat gently, whisk to revive the sheen, taste, adjust salt, then serve like you meant it.

    Conclusion

    You’ve learned the recipe, now think of gravy as a loyal dog: you train it with patience, feed it good stock, and it repays you with warm, glossy devotion. I’ll say it plain—don’t rush the browning, taste like you mean it, finish with cold butter for that shine. You’ll end up with something comforting, saucy, and seriously gratifying. Keep practicing; the perfect gravy’s a friendship, not a miracle.

  • How Do I Deep Clean Before Guests Arrive

    How Do I Deep Clean Before Guests Arrive

    Last month I turned a messy weekend flat into guest-ready gleam in three hours—think lemon-scented counters, fluffier-than-new pillows, and a tub that actually sparkled; you can too, and I’ll show you exactly where to start so you don’t waste time on pointless tasks. You’ll ditch the clutter first, blitz the kitchen and bathroom, then lose yourself in dusting and mopping with tiny hacks that save big time, but there’s one trick I always keep to myself until the end…

    Key Takeaways

    • Do a 10-minute declutter sprint focusing on visible surfaces, entryway, and sofa-area to instantly tidy the space.
    • Deep clean kitchen: disinfect countertops, scrub sink, empty fridge, and wipe cabinet fronts for guest-ready surfaces.
    • Refresh bathrooms: scrub grout, descale fixtures, replace towels, and sanitize high-touch areas like handles and switches.
    • Clean living and bedroom surfaces: dust, vacuum edges, spot-clean upholstery, and launder bed linens for a crisp look.
    • Improve air and final presentation: vacuum vents, run an air purifier, add subtle scent, and stage a welcoming focal spot.

    Quick Declutter and Prioritize High-Traffic Areas

    declutter high traffic areas quickly

    Okay, let’s start with one rule: if you can see it from the sofa, you’ve got to deal with it. You’ll start by scanning the room, eyes like a curious detective, and use simple declutter strategies: toss, stash, donate. I’ll joke, you’ll laugh, we’ll grab a basket, and everything on chairs goes in. Prioritize spaces with guests in mind — entryway, living room, bathroom — clear surfaces so the place breathes. Touch fabric, smooth cushions, run a hand over dusty shelves, the sense of clean will hit you. Fold throws, hide chargers, tuck toys in bins. Set a ten-minute timer, sprint the rooms, admire the result. You’ll feel smug, I’ll take partial credit, we’ll sip tea.

    Kitchen Deep Clean: Surfaces, Appliances, and Cabinets

    kitchen surfaces and appliances

    You’re starting in the kitchen, where countertops and the sink are the loudest mess-makers, so wipe, scrub, and smell-test until everything’s bright and neutral again. I’ll show you appliance triage next — oven racks out, drip pans soaking, fridge shelves cleared and checked for science experiments — so you can blast grease and stink without mercy. Then we’ll open cabinets, wipe interiors and fronts, reseat anything sticky, and stack dishes like you actually mean it.

    Countertop and Sink Care

    If the countertops could talk, they’d beg for mercy — and honestly, so would I after three kids, a coffee spill, and last night’s pasta sauce saga. You start by clearing crumbs with a damp microfiber, then spray a gentle, pH-safe cleaner for countertop sanitization, let it sit thirty seconds, wipe in circular strokes, smell the lemon, feel the smooth surface come back. Move to the sink, scrape the drain, run hot water, then tackle sink maintenance: sprinkle baking soda, scrub with a toothbrush, rinse, and pour vinegar for a fizzing finish. Polish faucets with a soft cloth, check seals for grime, and re-caulk if needed. You’ll step back, breathe, and pretend you didn’t once hide a moldy sponge behind the trash.

    Appliance Deep-Cleaning Steps

    While you’re wrestling with sticky oven racks and a fridge that smells faintly of mystery science, I’ll walk you through appliance deep-cleaning like a no-nonsense coach with a sponge — we’ll hit the big culprits first, then blitz the small stuff. First, unplug or turn off appliances, then strip trays, shelves, and drip pans. Oven cleaning: soak greasy racks in hot, soapy water, scour with a paste, wipe soot and sweet smoke from glass. Refrigerator maintenance: pull everything, toss expired jars, vacuum coils, wipe seals with baking soda solution so the door stops hissing at you. Finish by deodorizing with coffee grounds or charcoal. You’ll feel proud, your kitchen will smell honest, and guests won’t guess the chaos you survived.

    1. Prioritize safety.
    2. Soak then scrub.
    3. Deodorize last.

    Cabinet Interiors and Exteriors

    A few cabinets deserve extra respect before guests arrive, so I start by opening every door and letting the air out like I’m airing a guilty conscience. You’ll pull everything out, yes, everything—mismatched mugs, mystery lids, that lone sock—and set items on a towel. I wipe interiors with warm, soapy water, scrub sticky corners, dry with a microfiber, and hum a ridiculous tune. On exteriors, you’ll run a degreasing spray, follow wood grain, and buff until handles gleam. Use drawer liners if shelves smell faintly of takeout. Reassess cabinet organization, group like with like, toss expired items, and only replace what belongs. Trust me, you’ll feel proud when guests open a door and don’t blink.

    Bathroom Refresh: Grout, Fixtures, and Linens

    brighten grout freshen linens

    You’ll want to get those grout lines bright again, so grab a stiff brush, baking soda, and a spray bottle of vinegar, and scrub like you mean it — you’ll smell the tang and see the dirt lift. Run the tap, check for limescale on faucets and showerheads, and pop on a descaling soak so the chrome actually gleams instead of whispering “I tried.” Finally, swap in crisp towels and rotate linens so guests get the fluffy, fresh scent they notice before they even say anything, and yes, you should probably run the spare set through the dryer for extra puff.

    Grout Brightening Techniques

    Think of grout as your bathroom’s freckles — small, stubborn, and oddly charismatic when they’re clean. You’ll get hands-on: scrub with a stiff brush, a paste of baking soda and water, then spray vinegar for fizz and lift. You’ll feel the grit come away, smell the sharp tang, see pale lines reappear. Rinse, dry, admire. Don’t skip grout cleaning before guests arrive; it’s the quiet magic trick.

    1. Scrub: baking soda paste, stiff brush, elbow grease.
    2. Brighten: spray vinegar, wait, rinse, repeat.
    3. Seal: let fully dry, apply grout sealing to lock that fresh look.

    I joke while I work, but I swear, sealed grout stays happier, longer.

    Fixture Descaling Tips

    Three quick fixes can save your sink from looking like a mineral shrine: I start with vinegar-soaked paper towels wrapped around faucets, let them sit and fizz, then scrub with an old toothbrush until the chrome sings. You’ll want gloves, a spray bottle, and patience. For stubborn rings, mix baking soda into a paste, apply, let it bubble, then wipe—nice and satisfying. For showerheads, detach or bag with vinegar, run hot water after, and enjoy the pressure comeback. Those are my go-to descaling methods, simple and cheap. Don’t forget to polish with a microfiber cloth, you’ll see every gleam. Fixture cleaning feels heroic, like banishing tiny stone soldiers. You’ll laugh at how good it looks.

    Fresh Linens Rotation

    Nice shine on the faucets means you’re halfway to bathroom glory, but linens finish the job. You want towels that feel like clouds, hand towels that smell clean, and a robe that says, “stay awhile.” Rotate fresh linens from linen storage weekly, toss stained or rough pieces, and stash extras where guests can’t see your laundry pile. I scrub, steam, and fold with purpose; you can, too.

    1. Wash on warm, use gentle detergent, skip fabric softener to keep absorbency.
    2. Dry until almost dry, then air-fluff to soften, shake each towel for loft.
    3. Label shelves, rotate older items forward, donate what won’t revive.

    Good fabric care keeps the bathroom welcoming, and it shows you care, without drama.

    Living Areas: Dusting, Upholstery, and Floors

    If you want your living room to feel like it actually breathes before guests arrive, start with the dust—it’s everywhere, like tiny gray confetti that never RSVP’d. I swear, I sweep with purpose, using smart dusting techniques: microfiber mitts for shelves, a vacuum’s brush for blinds, and a damp cloth for baseboards so particles don’t just float back up. Move cushions, check seams, and do upholstery cleaning where needed—spot-treat stains, steam if fabric allows, or hire a pro for stubborn grime. Floors get the finale: vacuum carpets, tackle edges with a crevice tool, mop hard floors with a gentle cleaner, and let air in. You’ll walk into a room that actually smells like welcome, not yesterday.

    Bedroom Prep: Sheets, Mattresses, and Closet Tidy

    Start with the sheets—you’ll thank me later. I strip the bed, smell the linen, and laugh at how a single fitted sheet hides a week of crumbs. Wash sheets in hot water, fluff, and make the bed tight so guests sink into crisp comfort. Protect the mattress with mattress protection, I say — it’s boring, but practical, like insurance.

    Start with the sheets — strip, wash hot, fluff, and tuck tight so guests sink into crisp, comforting linen.

    1. Wash sheets, pillowcases, duvet cover.
    2. Check mattress seams, spot-clean stains, add mattress protection.
    3. Tidy closet: hang outfits, remove clutter, leave space.

    I open the closet, rearrange hangers, and fold stray sweaters. Leave a small basket for shoes, set a night light on the dresser, and step back — looks done, feels welcoming.

    Floors and Rugs: Vacuuming, Mopping, and Spot Treatment

    Now that the bed’s straight and the closet doesn’t look like a textile crime scene, let’s get the floor telling the same story. Start by scanning for crumbs, Lego landmines, and suspicious pet evidence, then vacuum thoroughly—slow passes, edges twice. For rugs, shake outside if possible, or beat them like you’re auditioning for an action movie; spot-treat stains with gentle detergent, blot don’t rub, and let air-dry. On hardwood care, sweep first, then mop with a damp microfiber—no puddles, please—use wood-safe cleaner, follow the grain, and buff with a dry cloth to restore shine. Finish by tucking rug corners flat, smoothing fibers with your palm, and taking a step back; congratulations, the floor just earned its good manners.

    Air Quality and Small Details: Vents, Filters, and Scents

    While you were busy fluffing pillows and hiding the evidence, I’ll deal with the stuff you can’t see but will definitely notice—the air. You’ll thank me when the room smells fresh, not like mystery leftovers. Do these quick wins:

    While you staged the sofa, I handled the unseen: fresh, breathable air—no mystery leftovers, just welcome.

    1. Inspect vents: vacuum grilles, brush dust out, wipe edges—vent maintenance prevents stale smells and sneaky dust bunnies.
    2. Swap filters: do timely filter replacement in HVAC and vacuums, it’s easy and instantly improves breathability.
    3. Freshen smartly: use scent enhancement sparingly, pick subtle citrus or linen, and run air purifiers on low before guests arrive.

    You’ll get clear, clean air, no aerosol ambushes, just a home that breathes well and welcomes company.

    Baseboards, Windowsills, and Light Fixtures

    If you’ve ever wondered what those dusty stripes along the bottom of your walls are trying to tell you, I’ll translate: they scream “attention.” I get it — baseboards, windowsills, and light fixtures are the house’s forgotten corners, where pet hair, pollen, and the ghost of last winter’s crumbs gather like tiny squatters; you’ll wipe a windowsill and find a smudge that looks suspiciously like a fingerprint from 2009, and you’ll flick a light switch only to see a halo of grime bloom around the bulb. Start with a vacuum crevice tool, then a damp microfiber for baseboard cleaning. Scrape stubborn gunk gently. For windowsill maintenance, lift trapped dirt with a toothbrush, wipe with vinegar solution. For light fixture care, turn off power, remove shades, wash or dust, and polish bulbs to banish dust accumulation and brighten the room.

    Final Touches: Staging, Emergency Kit, and Time-Saving Hacks

    By the time you’ve wiped the last baseboard and polished the bulbs, it’s showtime—so let’s stage the place like you mean it. You pull cushions, fluff them loud, arrange a coffee tray that smells like welcome, and step back to squint like a pro. Use staging tips: pick one focal spot, add a plant, layer a throw. Pack emergency supplies—bandages, stain remover, spare charger—into a pretty basket by the door. Quick hacks keep you calm: set a 10-minute tidy timer, stash clutter in a basket, and light a candle five minutes before arrival.

    Stage with purpose: fluff cushions, set a welcoming scent, create one cozy vignette, and stash emergency fixes in a pretty basket.

    1. Focus: one vignette, one scent, one light.
    2. Fix: small repairs, visible first.
    3. Breathe: you did enough, they’ll notice warmth.

    Conclusion

    You’ve got this—quick wins win the day. Did you know 68% of guests notice a clean bathroom first? So scrub the grout, fluff the towels, and let citrus and vinegar do the heavy lifting. I’ll race you: wipe counters, clear clutter, vacuum, then mop like you mean it. Add a candle, a spare phone charger, and a cheeky welcome note. Guests arrive, you breathe, everyone smiles—mission accomplished.

  • How Do I Organize Holiday Leftovers

    How Do I Organize Holiday Leftovers

    You’ve got mountains of turkey, mysterious casseroles, and gravy that could fuel a small boat, so let’s sort this chaos before it mutinies. I’ll show you how to toss the sketchy stuff, stash the good bits in clear, stackable tubs, and label like a boss so weeknight dinners stop being archaeological digs. You’ll learn quick cool-down tricks, what freezes well, and a few rescue recipes that actually taste better than they sound — but first, grab a marker.

    Key Takeaways

    • Sort leftovers by type (meats, sides, sauces) and discard anything with off smells or texture.
    • Cool hot dishes quickly in shallow containers or ice baths, then refrigerate or freeze within two hours.
    • Label clear, stackable containers with date-first labels and planned meals to prioritize eating.
    • Portion into meal-sized servings and vacuum-seal or wrap meats for longer freezer life.
    • Reheat gently to 165°F, add moisture (stock/water), and repurpose into new dishes like casseroles or frittatas.

    Quick First Steps: Sort, Toss, and Prioritize

    sort toss prioritize meals

    One quick sweep and you’ll feel like a culinary superhero—caped in Tupperware. You grab containers, scissors, and a marker, you open the fridge like it’s a mystery box, and you start sorting leftover types: meats here, sides there, sauces in tiny jars. You toss anything that looks sad or smells off, no guilt, I promise. Next, you name priority meals — what eats first, what can wait — and label containers with dates and meal plans. You taste a spoonful, make a face, decide it’s a science experiment, not dinner. You stack, you zone, you make a “eat ASAP” shelf. You step back, breathe in rosemary and reheated gravy, and feel triumphant, slightly sticky, but totally in control.

    Safe Cooling and Storage Times for Common Dishes

    safe food cooling tips

    You’re about to tame the leftover chaos, and I’ll walk you through cooling tricks that stop bacteria in their tracks — think ice baths, shallow pans, and stirring that hot gravy until it chills fast. I’ll tell you how long things can safely sit in the fridge, from mashed potatoes to cranberry sauce, and which dishes you should freeze ASAP to keep texture and flavor. Stick with me, you’ll get freezer tips that save meals (and dignity), plus simple timing rules so nothing turns into a science experiment.

    Rapid Cooling Techniques

    Even if you’d rather nap than deal with compost-scented Tupperware, get those hot pans out of the counter now—hot food left to sit is a bacteria convention nobody invited. I’ll show you quick tricks that actually work. For soups and sauces, use an ice water bath: set the pot in a sink of ice water, stir frequently, watch steam fade, feel relief. For casseroles or big roasts, slice into smaller portions so heat escapes faster, then cool uncovered briefly. Try the fan method: place shallow containers under a fan, rotate lids after they’re tepid, and don’t garden-toss condensation back in. I’m blunt because I care: cool to safe temps fast, cover, label, and move to cold storage before you nap.

    Refrigerator Storage Times

    Three rules, no drama: cool fast, stash smart, and respect the clock. I tell you this because your fridge isn’t a time machine. Keep refrigerator temperature at 40°F or below, check the dial, and don’t trust vibes. Divide big roasts into shallow pans, stir stews to release heat, then label containers with dates — I even scribble my initials like a food cop. Most cooked meats, casseroles, and gravy? Eat within 3–4 days. Pasta, potato salad, and egg dishes, treat them like divas: 3–5 days tops. Soups often last 3–4 days. If you see off-smells, slime, or color shifts, toss without guilt. That’s food safety: rule the clock, and your holiday leftovers survive — tasteful, safe, and still brag-worthy.

    Freezing Guidelines and Tips

    Okay, so you’ve mastered the fridge clock and avoided science experiments in Tupperware — nice work, food sheriff. Now, you’ll want smart freezing techniques to keep flavor, texture, and food safety intact. Cool dishes within two hours, portion into shallow, airtight containers, label with dates, and press out air — that crunchy seal matters. Soups and casseroles freeze beautifully; cream sauces can split, so stir in cream after thawing if needed. Slice breads, wrap turkey in foil then plastic, and flash-freeze loose items on trays before bagging. Defrost in the fridge or microwave, never on the counter. I’ll admit, I’m clingy about labels, but the payoff is real: less waste, more dinners you actually look forward to eating.

    Best Containers and Packing Techniques

    smart storage and organization

    If you want your fridge to feel like a five-star buffet instead of a chaotic leftovers graveyard, start by picking the right containers—trust me, I’ve saved more cranberry sauce from freezer burn than I care to admit. I reach for vacuum sealing for long-term meats, it removes air and keeps texture, flavor, even that gravy sheen. For daily access, use clear stackable containers, they let you eyeball portions and save space, no digging required. Choose glass for reheating, ceramic for salads, and shallow pans for quick cool-downs; hot food chills faster, safer. Wrap irregular items in beeswax or cling, tuck sauces separately to avoid soggy stuffing, and always seal tightly—your future self will thank you, probably with leftovers.

    Smart Labeling and Date-Tracking Methods

    You’ll thank me later when every container has a bold, readable label that tells you what’s inside before you lift the lid, no scary surprises. Start with the date-first format—2025-11-21 Turkey—and you’ll always see what expires first, plus it makes scanning your fridge a one-second victory. And don’t forget to note reheating limits, because I’ve nuked mystery casserole into cremation more than once, so a simple “reheat once” saves taste buds and dignity.

    Label Contents Clearly

    Because nothing kills leftover joy faster than opening the fridge and finding a science experiment, label clearly—your future self will thank you. I tell you this while squinting at a jar of suspicious casserole. Start with label design that’s bold, legible, and color-coded; a plain white strip won’t save dinner. Use short tags: dish name, key ingredient, reheating note. I group similar items—turkey, sides, desserts—so content categorization is instant, like a librarian for mashed potatoes. Stick labels on lids and sides, so you see info whether you grab or peek. Write with a permanent marker, not a crayon; nobody worships smudged ink. Add one-line notes: “saute, 5 min” or “eat within 3 days.” Simple, clear, saved meals.

    Use Date-First Format

    Alright, you’ve labeled everything like a neat-freak librarian—nice work—now let’s get militant about dates. You’ll thank me when dinner smells fabulous three days later, not sour. Date-first tags read “2025-11-21 Turkey” at a glance, they prioritize freshness, and they make leftover etiquette simple: oldest out first, no guessing games.

    1. Write the date first, then contents, in bold handwriting you can read at 2 a.m., scrape off gravy, stick on lid.
    2. Add who it’s for or reheating notes in tiny print—kids’ lunches, Dad’s portion—so holiday meal planning flows, less drama.
    3. Use consistent format, rotate containers with the earliest dates forward, toss anything past safe timelines, guilt-free.

    Track Reheating Limits

    If you want leftovers that taste like a dream and not a science experiment, track reheating limits like a tiny food cop who also brings cider—trust me, your future self will send you a gratitude text. I slap a sticker on each container with the reheating methods I’ll use, microwave for quick, oven for crisp, sous-vide for oddly fancy cravings. I jot the safe reheating time and simple temperature guidelines—165°F for poultry, 165°F for mixed dishes, different temps for steaks if you’re picky—so you don’t guess and ruin dinner. Keep a marker by the fridge, note who’s bringing what back, and cross off items as you reheat. It’s stupidly satisfying, smells better, and saves the culinary trauma.

    Refrigerator and Freezer Organization Tips

    When you swing open the fridge after a holiday marathon, the first thing that hits you isn’t just cold air — it’s a Tetris puzzle of foil, plastic, and mystery casseroles, and yes, I’m judging that one unlabeled Pyrex like a crime scene. You can fix this. Start with fridge organization: clear containers, labeled dates, grab-ready shelves. Freeze extras flat in zip bags so portions stack, not pile, and you’ll actually find things. I talk to my freezer like it’s a small, stubborn roommate.

    1. Clear bins for types: proteins, sides, sauces — see stuff fast, toss expired guilt-free.
    2. Label, date, rotate: oldest forward, new back.
    3. Portion, flatten, stack: better freezer management, less thaw drama.

    Reheating Safely and Keeping Food Moist

    Because soggy turkey and molten casserole aren’t exactly comfort food, you’ve gotta be strategic about reheating so leftovers taste like a sequel, not a crime scene, and yes, I speak from experience — I once nuked gravy into lava. You heat gently, low and slow, whether oven or stovetop, and you add a splash of stock or water to aid moisture retention. Cover tightly, steam does wonders. For mashed potatoes, a pat of butter and a splash of milk revive creaminess, for turkey, a drizzle of pan juices brings flavor enhancement and juiciness back. Use a thermometer, aim for 165°F, no guessing. Crisp skin? Hit it under broiler for a minute. Taste as you go, adjust salt, and don’t overcook — mercy matters.

    Creative Recipes to Transform Leftovers

    One great trick I’ve got up my sleeve is turning last night’s turkey and sad sides into something that makes you sit up and cheer, not sigh and reach for takeout. I’ll walk you through three fuss-free flips that smell like home and taste like a small miracle. You’ll heat, chop, stir, and slit open joy.

    Turning last night’s turkey and sad sides into three fuss-free miracles that smell like home and spark pure joy

    1. Turkey enchilada bake: shred turkey, fold in leftover casseroles bits, roll in tortillas, top with cheese, bake until bubbly — crisp edges, molten center.
    2. Stuffing-crusted frittata: press stuffing into pan, pour beaten eggs and veggies, nestle turkey, cook low, finish under broiler for bronzed cheer.
    3. Brothy mash soup creations: sauté aromatics, add mashed potatoes, turkey, stock, simmer, blitz for silky, cozy spoonfuls.

    Portioning and Meal-Prep for Easy Weeknight Meals

    If you want weeknights to feel like a sitcom where dinner magically appears, start by portioning like a boss—I’m talking clear containers, measured scoops, and labels you actually read at 7 p.m. hungry-and-harried o’clock. I quarter pies, slice roasts, and crowd small bowls with vibrant sides, so smells pop when you open the fridge. You’ll do simple meal planning: map three dinners, pack portions, stash sauces separately. Portion control keeps calories sensible, prevents soggy salads, and saves time. Hear me: chop, cool fast, and seal; label with date and dinner idea. Reheat crisply, add fresh herbs, maybe a squeeze of lemon. You’ll laugh when leftovers feel fresher than takeout, and you’ll high-five yourself.

    Reducing Waste: Composting, Sharing, and Donation Options

    When the holiday leftovers start taking over your fridge like tiny, festive squatters, you’ve got options that do more than just shove food into a sad Tupperware graveyard. I’ll walk you through simple, satisfying choices that cut waste, and make you feel less guilty about sneaking pie for breakfast.

    1. Composting: Set a counter bin, label it, and toss peels, bones, and scraps. You’ll notice compost benefits fast — less trash, richer soil, and a satisfying, earthy smell when you turn the pile.
    2. Sharing: Text neighbors, knock on doors, or create a labeled shelf. Smiles, clinking mugs, thank-you hugs — instant holiday currency.
    3. Donation: Use local donation resources, pack safely, drop off promptly. Feed people, not landfills, and sleep better tonight.

    Conclusion

    You’ve got this. Toss anything sketchy, sort meats, sides, sauces, and stash them in clear, labeled containers—remember, 1 in 4 Americans wastes food weekly, so you’re saving cash and conscience. Chill fast, use an “eat ASAP” shelf, or freeze portions for later. Reheat with moisture, and turn extras into casseroles, tacos, or soups. Share, compost, or donate what you won’t eat. I’ll cheer you on—just don’t reheat gravy like a science experiment.

  • How Do I Make My Entryway Winter-Ready

    How Do I Make My Entryway Winter-Ready

    Think of winter as “extra honest” about your door’s flaws — it’ll show them, and fast. You’ll want to seal gaps, toss down a tough doormat that scrapes salt off your boots, and corral dripping gear on a boot tray before puddles stage a takeover; add warm light and a bench with storage, and you’ll actually enjoy coming home, until I tell you the one quick fix most people skip…

    Key Takeaways

    • Weatherproof the door: seal gaps, add weatherstripping, a door sweep, and caulk or foam larger voids to stop drafts and moisture.
    • Use heavy-duty, waterproof doormats and runners with rubber backing to trap snow, salt, and prevent slipping.
    • Organize footwear and wet gear with boot trays, shoe racks, baskets, and hooks to contain slush and speed daily routines.
    • Improve lighting with higher-lumen, warm bulbs and motion-activated fixtures to enhance visibility and safety on dark winter nights.
    • Add functional furniture like a bench with storage and non-freezing mats for comfort, convenience, and a welcoming winter aesthetic.

    Weatherproof Your Door and Threshold

    seal your door effectively

    If you want to keep the cold, drafty sneaks and a rainstorm’s sneak attack out of your home, start with the door and threshold—you’ll thank me when your socks stop icing over. You check the gap, I promise you’re not imagining it, and you feel that thin, icy breeze—gross. Push weatherstrip along the jamb, add door insulation under the skin, tape seams if you’re feeling heroic. Kneel, listen for whistles, prod the bottom with a finger, swap in a foam or rubber sweep. For threshold sealing, tighten screws, replace cracked caulk, shim any sag. I’ll say it plainly: a snug seal saves heating bills, and dignity. You’ll stomp inside warmer, smug, and very proud of that quiet little victory.

    Upgrade to a Durable, High-Performance Doormat

    durable high performance doormat upgrade

    While you’re still wiping snow off your boots and shaking grit from your coat, swap that sad little welcome mat for something that can actually handle winter—trust me, your floors will thank you. You want a mat made from durable materials, something that scrapes, traps, and drains without falling apart. Look for coarse fibers, rubber backing, and raised channels that shed slush; test it with a stomp, listen for the rasp, feel the grip. High performance options include coir blends, recycled rubber, or heavy-duty nylon—each smells faintly of hard work, not mildew. Place it on a slightly rough surface, press down, and step on it like you mean it. I’ll admit, you’ll love how clean your tiles stay, and so will guests.

    Install a Boot and Shoe Organization System

    organized winter footwear solution

    1 quick fix: get your boots off the floor and give them a proper landing pad. I tell you, nothing says winter-ready like order where mud used to rule. Install shoe racks by the door, metal or wooden, stackable or tiered, they keep pairs upright, airing and drying. Slide boot trays beneath taller boots, deep enough for slush and salt, easy to hose out. I swear by a narrow shelf for gloves and a hook for wet liners—tiny rituals defeat chaos. Say a brisk “no” to puddles and a tired “yes” to tidy mornings. You’ll grab matching boots without drama, hear less dripping, feel less guilt. It’s practical, tidy, and honestly, a little smug.

    Add a Moisture-Resistant Rug or Runner

    You’ll want a rug that laughs at slush — go for waterproof fibers like rubber-backed vinyl or tightly woven polypropylene, they shrug off water and salt instead of soaking it up. Pick a size that actually catches footprints, lay it where shoes hit first, and don’t skimp on a runner if your hallway’s long, trust me, your floors will thank you. Shake it out, hose it down, and flip it to dry when needed — quick upkeep keeps mold away and your entryway smelling human.

    Choose Waterproof Materials

    If you want to stop soggy footprints from turning your entryway into a small lake, start with a moisture-resistant rug or runner—I’m serious, it’s the MVP of winter cleanup. I’ll walk you through choosing waterproof materials, because muddy shoes are the enemy and we’re here to win. Look for rugs with water resistant finishes, tight weaves, and synthetic fibers that shrug off slush. Think vinyl-backed mats or recycled plastic runners that don’t absorb, and consider moisture barrier options underlay to protect subfloors. Touch the fabric, tilt it, pour a dribble—yes, I do that in stores, no shame—and watch beads form and roll away. Pick textures that trap grit, not water; pick colors that forgive life’s messes; and install, wipe, repeat.

    Size and Placement

    Alright, you’ve got a waterproof rug—win. Pick a size that matches your entryway dimensions, not ego. If your space is narrow, go long and skinny; if it’s wide, grab something wider so shoes land fully on fabric, not stray into tile puddles. Place the runner so it anchors your furniture arrangement, like the visual spine between door and bench, coat rack, or console. Leave a few inches of floor visible around edges for breathing room, and push it under front legs just enough so pieces feel connected, not glued. Stand back, stomp a boot, listen for the soft thud, smile at the neatness. Congrats, you’ve prevented chaos and soggy socks, with style.

    Maintenance and Drying

    Because damp rugs are the silent villains of a happy entryway, I treat maintenance like a mini emergency drill—squeegee, shake, repeat. You pick a moisture-resistant rug or runner, one that laughs at slush and spits out salt, then make it your winter MVP. Weekly winter maintenance means shake it outside, spray with a hose if muddy, blot stubborn spots, and air-dry flat. For faster results, flip it over, towel-roll excess water, then stand it upright near a fan or sunny door—those drying techniques work like magic. I confess, I talk to mine while I tug it into place; don’t judge. Swap rugs if they smell, and keep a small boot brush and absorbent mat nearby, pronto.

    Create a Dedicated Snow and Wet Gear Zone

    When snow starts stomping through the door, you don’t want it auditioning for a magic act where your floors disappear under wet boots and dripping parkas. So, carve out a snow and wet gear zone, right by the door, where chaos meets order. I’m talking mudroom essentials: a waterproof mat that actually holds water, a bench with cubbies, and hooks at kid and adult height. Add ventilated bins for gloves, a tray for icy boots, and a small towel basket—no more sopping carpets. Use washable rugs, quick-drain trays, and a boot scraper by the threshold. Label bins if you like bossing your family, and keep a hand brush nearby. It’s tidy, practical, and oddly satisfying.

    Improve Lighting and Visibility for Shorter Days

    You’re going to wish you’d fixed this sooner, so let’s brighten things up: swap in bright, warm bulbs that make skin and mittens look friendly, not miserable. Add a motion-activated fixture by the door, it wakes up the porch like a helpful, caffeinated friend when you stagger in with groceries. Trust me, better light means fewer slips, fewer fumbling keys, and you’ll actually enjoy coming home on gray afternoons.

    Add Bright, Warm Bulbs

    Why stumble into a dim, gloomy entryway like it’s a haunted house audition? Swap that mood by choosing bright colors in your bulbs’ light, not just the wreath or rug, and aim for a warm ambiance that welcomes. I tell you, a 2700K to 3000K bulb feels like a cozy sweater for your doorway, softening shadows, showing off mittens, and making faces look human again. Use higher-lumen bulbs where you need clarity—steps, mat, lock—then layer with lamps or sconces for depth. Pick bulbs with good CRI so paint and shoe tones pop. Screw in bulbs, test at dusk, adjust heights. You’ll stop squinting, avoid spills, and actually enjoy arriving home.

    Install Motion-Activated Lights

    Three quick clicks and your porch goes from spooky back-alley to perfectly lit runway—no flashlight juggling required. You’ll thank me when you don’t fumble keys in November drizzle. Install motion-activated lights with reliable motion sensors pointed at steps and the path, not the neighbor’s hedges. I like angled mounts, warm bulbs, and a soft cutoff so light kisses the ground, not your eyeballs. They pop on when you approach, then wink off, saving electricity and boosting energy efficiency. Wiring is simple, or hire an electrician if heights make you dramatic. Test range, tweak sensitivity, and add a timer for late-night security. Charming, practical, low-drama—your entryway will feel welcoming, safe, and slightly smug.

    Seal Drafts and Insulate Around Entryways

    If cold air sneaks in like an unwanted guest, we’ll show it the door—literally. You’ll feel that first shiver, so grab a draft stoppers roll, press it along the base of the door, and listen to silence—no more whistle. I poke around the frame, run my hand for leaks, and seal gaps with caulk or weatherstripping; you can see daylight? Fix it. Insulation tips: add foam sealant in bigger voids, install a door sweep, and layer a tight-fitting storm door if you like armor. Don’t forget window seals near the entry, touch up old insulation in the surrounding wall, and test with a candle for sneaky drafts. It’s practical, quick, and oddly satisfying—like winter-proofing with a grin.

    Incorporate Easy-Care Materials and Cleaning Supplies

    Because nothing kills winter cheer faster than a muddy, slushy mess at your feet, I make the entryway work for me instead of the other way around. You’ll want surfaces that shrug at salt and boots, so pick easy care fabrics, wipeable mats, and a bench that can take a beating. Keep tidy with smart cleaning hacks, and you’ll spend less time scrubbing, more time sipping cocoa.

    • A rubber-backed mat that traps grit, dries fast, and won’t freeze to the floor.
    • A vinyl bench cushion, a basket for mittens, and hooks at eye level for quick drop-offs.
    • A small caddy with wipes, a microfiber brush, and a shoe tray liner for nightly shake-outs.

    Simple, practical, and surprisingly stylish.

    Conclusion

    You’ll step in, shrug off a snow-slick coat, and find order where chaos used to live — what a coincidence, right? I promise you can weatherproof the door, swap in a tough doormat, tuck boots on a tray, and roll out a moisture-resistant runner so winter doesn’t hijack your floors. Bright light, a bench, a little storage, and easy-clean supplies mean less fretting, more hot cocoa. Try it; you’ll actually enjoy coming home.

  • How Do I Create a Hot Cocoa Bar at Home

    How Do I Create a Hot Cocoa Bar at Home

    Like a warm hug that’s socially acceptable, you’ll want a small counter or table, mugs at the ready, and a plan so things don’t devolve into a sticky marshmallow war. I’ll walk you through cocoa bases, milk swaps, must-have tools, and clever mix-ins that actually taste grown-up, plus quick tricks to keep everything hot and tidy—so grab a mug and don’t worry, I’ll warn you about the hot chocolate bombs before someone’s eyebrows get involved.

    Key Takeaways

    • Pick a location, set a theme, and arrange flow with trays, signage, and a nearby trash bin for easy guest movement.
    • Offer at least two cocoa bases (powdered mix and drinking chocolate) plus a DIY option for customization.
    • Provide a variety of warmed milks and clearly label dairy-free choices like oat, almond, and coconut.
    • Set out essential tools: ladles, whisk, small frother, mugs, and insulated dispensers or warmers to retain heat.
    • Create a toppings station with marshmallows, whipped cream, flavored syrups, spices, and adult add-ins, with clear kid/adult signage.

    Planning Your Hot Cocoa Bar: Space, Guests, and Budget

    hot cocoa bar planning essentials

    If you’ve got a corner of the kitchen, a cleared buffet, or even the top of a rolling cart, you can make a hot cocoa bar that looks intentional instead of like you lost a marshmallow fight, and I’ll show you how. You’ll size the space first, imagining mugs lined like happy sentries, then jot guest preferences—dairy, vegan, spicy, plain—so nobody glares at you over sour milk. Set a simple budget, split into essentials and fun extras, and stick to it; I learned the hard way, my wallet still has cocoa stains. Pick bar themes that match your mood—rustic, glam, retro—then plan props, lighting, and flow. Think reachability, spills, and a trash bin within arm’s reach.

    Choosing the Perfect Cocoa Base: Mixes, Drinking Chocolate, and Hot Chocolate Bombs

    choose your cocoa wisely

    You’ve planned the space, bribed guests with promises of mini marshmallows, and penciled a budget that didn’t make your wallet cry—now it’s time to pick what’s actually going in the mug. You’ll choose between pantry-friendly cocoa mixes, silky drinking chocolate, and dramatic hot chocolate bombs. Think about cocoa types and flavor profiles, they’ll steer choices more than trends.

    • Classic powdered mixes: quick, nostalgic, kid-approved, mixes smooth with hot water.
    • Drinking chocolate: thick, glossy, chew-worthy sip, melts like velvet, feels fancy.
    • Hot chocolate bombs: theatrical, messy bliss, surprise fillings pop into warm milk.
    • DIY blend: tweak sugar, cocoa, salt, cinnamon, tailor taste to brag about later.

    You’ll taste-test, adjust, and smile when the first “ooh” escapes.

    Milk and Dairy-Free Options to Serve

    milk and dairy free options

    You’ll want a lineup of milks that makes everyone at your cocoa bar grin: whole and 2% for creaminess, skim if someone’s pretending to be virtuous, and heavy cream for the dramatic stir. Add a few plant-based contenders — almond, oat, and coconut shine, soy holds steady, and cashew feels fancy — and warm them gently so they steam and smell like a cozy bakery. Top it off with dairy-free whipped cream, marshmallows, and a sprinkle station of cocoa, cinnamon, and chopped nuts, and I promise the choices will spark happy chaos.

    Cow’s Milk Choices

    Milk matters. You’ll pick the milk that makes your cocoa sing, whether you’re chasing creaminess or a lighter sip. I recommend tasting a few — I do, shamelessly, like it’s my job. Offer clear choices so guests don’t guess.

    • Whole milk: velvety, rich, perfect for thick, cozy cocoa.
    • 2% or low-fat: milder texture, still warm and satisfying.
    • Flavored milks: vanilla or chocolate add a playful boost, try small carafes.
    • Organic options: for cleaner taste, fewer additives, and peace of mind.

    Warm each gently, don’t boil. Froth for a café vibe, or whisk briskly for quick foam. Label each carafe, add spoons, and you’ll look like you planned it all along — even if you didn’t.

    Plant-Based Alternatives

    Variety is the secret weapon here — I’ll admit I get a little giddy lining up cartons like they’re contestants. You’ll want nut milks first: almond for a light, slightly sweet lift, cashew for creamy richness, oat for cozy thickness, and coconut when you crave a tropical wink. Offer plain and sweetened versions, chill some, warm others. Don’t forget soy, reliable and neutral, and refrigerated plant creamers for extra silk. For adventurous sippers, set out cocoa substitutes — carob blends or matcha for a different vibe; label them, so nobody glares at the wrong mug. I’ll stand by the station, tasting and exaggerating descriptions, nudging guests to mix, sip, and declare a winner.

    Dairy-Free Toppings

    Three good scoops of toppings will make your dairy-free cocoa feel decadent, not like a consolation prize. I want you to pile on textures and bold flavors, so each sip sings. Use dairy free chocolate shavings for melt-in-your-mouth richness, sprinkle toasted coconut for crunch, and add a dollop of vegan whipped that crowns the cup like a tiny cloud. Don’t forget something salty.

    • Dairy free chocolate curls for instant luxury.
    • Vegan whipped cream, pipe it or spoon it, I won’t judge.
    • Toasted nuts or coconut flakes for contrast.
    • A pinch of flaky sea salt to wake the cocoa.

    You’ll mix, taste, adjust, and probably lick the spoon. That’s the point.

    Essential Tools and Equipment You’ll Need

    Okay, here’s the toolbox you didn’t know you needed, and yes, you’ll actually use everything on the shelf. I’m talking essential tools and a compact equipment list that turns chaos into cozy. Grab a large pot or electric kettle for fast heating, a whisk for silky froth, and a ladle to portion like a pro. Keep mugs of varying sizes, heatproof glass jars for mix storage, and spoons—lots of spoons. I like a small milk frother for that café finish, and a tray to corral everything, because I’m tidy-ish. Don’t forget napkins, a small cutting board and knife for garnish prep, and a thermometer if you’re picky about temp. You’ll be ready, confident, and annoyingly well-equipped.

    Mix-Ins and Flavorings to Elevate Every Cup

    When you want to trick your guests into thinking you’re a chocolate wizard, start with smart mix-ins and bold flavorings that do the heavy lifting—think a spoonful of instant espresso stirred into steaming milk, a pinch of smoked sea salt, or a swirl of caramel sauce that glazes the mug and makes everyone pause. You’ll build flavor combinations that surprise, balance sweetness, and deepen cocoa notes. I like to offer concentrated syrups, extracts, and spice blends so people customize confidently.

    Trick your guests into thinking you’re a chocolate wizard with bold mix-ins—espresso, smoked salt, caramel, and concentrated syrups.

    • Orange zest plus a dash of cinnamon for bright, cozy warmth
    • Almond extract with toasted cocoa for a nutty hug
    • A tiny shot of liqueur, if adults are present
    • Seasonal spices sachets for holiday flair and nostalgia

    Toppings, Garnishes, and Edible Decorations

    You’ve got the flavors sorted, now let’s finish the show-stopping part—the stuff people Instagram and then actually eat. I line up bowls of whipped cream, marshmallow fluff, and chocolate shavings, so guests build towers that wobble gloriously. I smash candy canes for stirring, offer a sprinkles station for the brave, and drizzle flavored syrups and caramel drizzle like a pro who once burned toast. Crushed cookies add crunch, edible glitter makes cups sparkle, and a pinch of nutmeg dust wakes the nose. Say things like, “Try mint with dark chocolate,” while you demo a swirl. Keep spoons, napkins, and safe toothpicks handy. It’s silly, sticky, perfect — and everyone leaves happier, with chocolate on their cheeks.

    Warmers, Dispensers, and Keeping Drinks Hot

    You’ll want a few electric drink warmers humming on the table, their soft glow promising hot chocolate that actually stays hot—no sad, lukewarm mugs here. I like to tuck insulated beverage dispensers at the back, lids clinking, steam peeking when guests pour, so everyone can help themselves without a tea kettle relay. Keep a tray of extras—stoppers, preheated mugs, and a tiny whisk—so you can patch leaks in warmth fast, and look like a cozy, caffeinated superhero.

    Electric Drink Warmers

    A few clever gadgets will save your hot cocoa party from becoming a lukewarm regret, and electric drink warmers are the MVPs. I plug one in, hear the soft hum, and know everyone gets cocoa that’s cozy, not tepid. You’ll appreciate precise temperature control, quick reheats, and less babysitting. Remember, electric warmers pair well with good drink safety: keep cords tucked, lids secure, and a thermometer handy if kids are around.

    • Choose a model with adjustable heat, so marshmallows don’t melt into oblivion.
    • Look for spill-proof designs, because guests are delightfully clumsy.
    • Favor easy-clean surfaces, you’ll thank me later.
    • Use a dedicated station, label it, and keep the chaos contained.

    Insulated Beverage Dispensers

    Think of insulated beverage dispensers as the hulking, reliable friend who shows up with blankets and flasks—steady, warm, and annoyingly helpful. I set one on the table, its matte steel skin humming faintly with promise, and tell you to ladle slow, feel the steam. You’ll like how insulated containers keep cocoa at serving temp without babysitting, and how thermal jugs pour smooth, no-drip river into mugs. I wink, remind you that labels save chaos—“extra marshmallows” vs “peppermint”—and hand you a ladle like it’s a magic wand. They look impressive, they’re practical, and they free you to mingle, refill cookies, or fumble with fairy lights. Trust me, they’re the backstage crew that makes your party shine.

    Techniques for Heat Retention

    When the party’s buzzing and the lights are doing their twinkle trick, I want your cocoa to stay just-steamy enough to make people sigh, not sulk. I walk you through simple heat retention techniques so your drinks feel cozy, every cup. Use warmers and insulated dispensers, tuck in thermal insulation materials, and don’t skimp on lids.

    • Set electric warmers on low, stir often, taste-test for comfort.
    • Choose an insulated beverage dispenser, preheat with hot water first.
    • Wrap carafes in blankets or neoprene sleeves, secure with clips.
    • Keep lids closed, use small ladles to limit air exchange.

    You’ll save flavor, avoid scalds, and look like the host who actually planned ahead — miracle achieved.

    Kid-Friendly and Adult Variations

    Since everyone deserves a warm treat, I like to split my hot cocoa bar into kid-friendly and grown-up zones so chaos stays cute instead of catastrophic. You’ll set out kid friendly recipes on one side: classic marshmallow-studded cocoa, cinnamon-hot chocolate, and a DIY sprinkle station kids can’t resist. Label cups low-sugar, offer milk options, and keep spoons and napkins handy — sticky fingers guaranteed, you’ll laugh about it later. On the adult side, tempt with adult indulgences: spiked Mexican cocoa, salted caramel, espresso shots, and bittersweet chocolate shavings. Provide small pourers, shot glasses, and napkins for grown-up spills. Shift between zones with a small sign, keep flavors bold, textures contrasty, and invite everyone to customize their cozy cup.

    Styling, Signage, and Lighting for a Festive Display

    Because lighting and little details make a table feel intentional, I treat my hot cocoa bar like a tiny stage — and yes, I am the slightly overprepared director. You’ll style with intent: pick one festive themes palette, layer textures, and keep paths clear so guests can perform their own marshmallow choreography. I add fairy lights low and warm, a small lamp for pouring, and candles (LED if kids are near).

    • Use mismatched mugs for character, group by color or pattern.
    • Hang creative signage with chalkboard tags, witty prompts, and arrows.
    • Place trays for toppings, spoons, and napkins to avoid spills.
    • Add a centerpiece, evergreen sprig, or candy-cane prop for scent and focus.

    You’ll see, it feels cozy, organized, and a little theatrical.

    Cleanup, Storage, and How to Repurpose Leftovers

    You’ll want to wipe down spills right away, grab a damp cloth and a little elbow grease so hardened marshmallow goo doesn’t become a sticky crime scene later. I always stash extra supplies—zip bags for cocoa, airtight jars for toppings, and labeled bins—so putting things away feels like a tiny win. And if you’ve got leftover hot chocolate, chill it into morning coffee creamer or freeze it in ice cube trays for future mugs, because waste is uncool and delicious repurposing is not optional.

    Quick Cleanup Tips

    One quick trick I swear by: tackle the mess while the mugs are still warm, not when you’ve devolved into a sticky, snack-smeared zombie. I rinse mugs immediately, do quick wipe downs of spills, and stash garnishes fast so crumbs don’t migrate like tiny invaders. You’ll thank me.

    • Scrape chocolate with a spatula, then wipe with a damp cloth.
    • Soak spoons and frothers in warm, soapy water while you chat.
    • Funnel leftover cocoa into airtight jars for easy storage, label them.
    • Turn stale marshmallows into melted-toast toppings or s’mores bits.

    Move fast, but don’t panic. Warm mugs mean softer mess, less elbow grease. You’ll save time, get a cleaner counter, and have tasty leftovers ready for round two.

    Storing Supplies Properly

    If you want your hot cocoa setup to survive more than one indulgent evening, start by treating storage like a tiny pantry boot camp — I mean it, labels, seals, and a little discipline will save you grief later. I toss used marshmallow bags into resealable storage containers, press out air, and label with sharpie — yes, even the cinnamon sticks. For supply organization, group cocoa powders, syrups, and toppings on one shelf, mugs on another, spoons in a jar. Wipe jars warm, dry, then pop on airtight lids so scents don’t cross — your peppermint shouldn’t flirt with vanilla. Leftovers? Freeze extra hot chocolate in ice cube trays for frothy iced cocoa later. You’ll thank me when mornings are effortless.

    Conclusion

    You’ve got this. Like a cozy fireside scene from a favorite movie, your hot cocoa bar will draw people in—steam rising, chocolate scent thick in the air, mugs clinking. I’ll cheer you on from the sidelines as you scooping, stirring, and tasting (yes, you’ll taste-test). Keep it simple, playful, and stocked. Guests will linger, laugh, and ask for seconds. That’s the magic—warmth, flavor, and a little homemade charm.