Author: Jordan C

  • How Do I Decorate for Hanukkah

    How Do I Decorate for Hanukkah

    Like lighting a menorah in a quiet room, you can make your home glow with meaning and style—I’ll show you how to pick colors, place your menorah, and add cozy details that actually feel festive. Start with blues, whites, and silvers, mix textures—velvet, glass, and warm wood—scatter gelt and dreidels, and build a kid-friendly craft station that doubles as décor; picture candlelight reflecting off a shiny orb, laughter from the kitchen, and a simple centerpiece that ties it all together.

    Key Takeaways

    • Choose a blue, white, and silver color palette with layered textures (velvet, woven throws) for a warm, festive atmosphere.
    • Place a styled menorah in a visible spot (mantel, console, or window) on a runner, keeping flames at eye level or below.
    • Use varied lighting—dimmable lamps, string lights, and clustered candles at different heights—to create a cozy glow.
    • Display heirlooms and family menorahs on trays or risers, and frame photos or recipe cards to share stories.
    • Add kid-friendly crafts (paper menorahs, felt dreidel garlands) and budget DIYs like gelt garlands or thrifted menorah makeovers.

    Setting the Tone: Color Palette and Lighting Choices

    cozy calm textured lighting

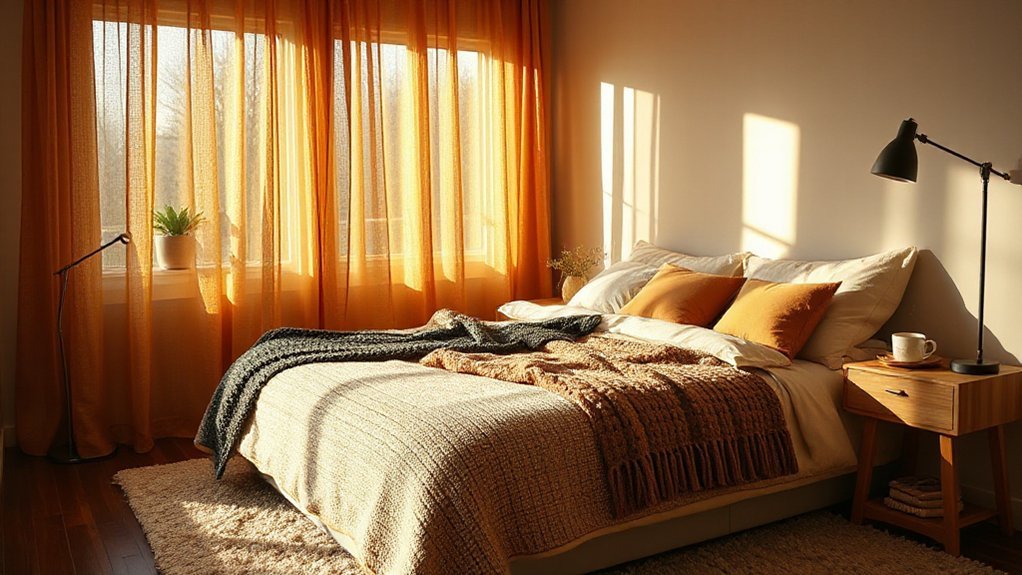
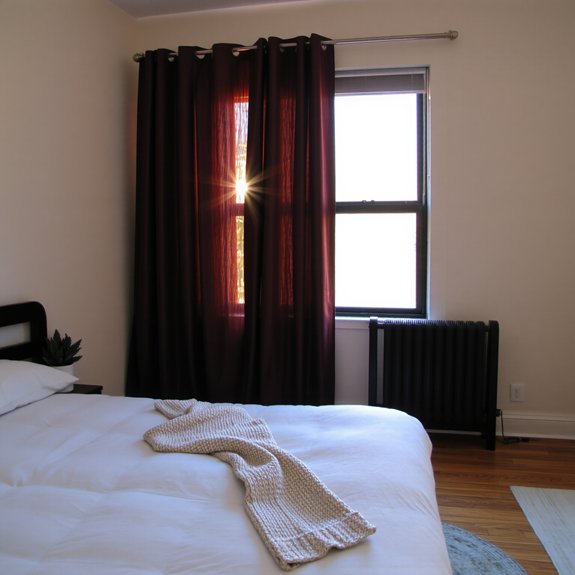
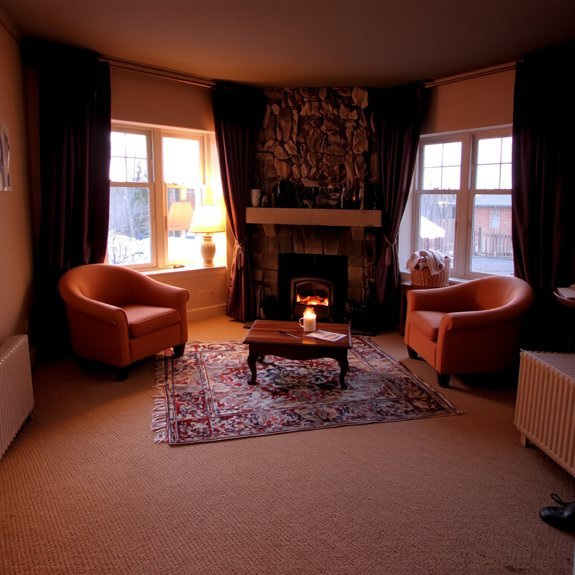
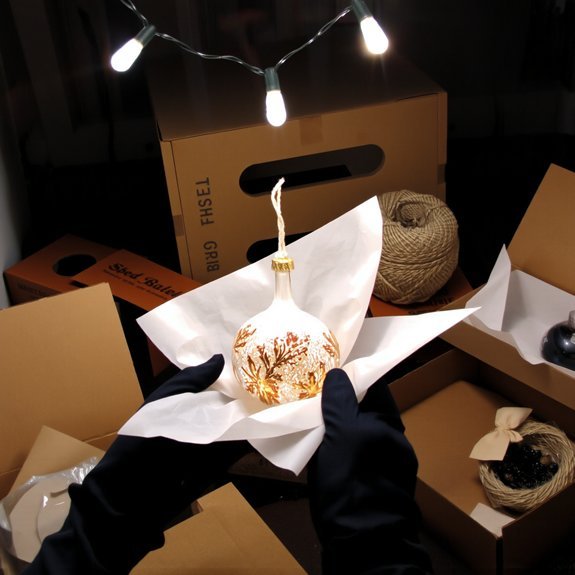
    If you want the room to feel like a cozy menorah, start with a clear color story and let the lights do the talking. You’ll pick blues, whites, and a dash of silver, because color symbolism matters—blue feels calm, white reads pure, silver sings celebration. I’ll tell you to layer textures: velvet pillows, woven throws, shiny ornaments that catch a candle’s wink. Use varied lighting techniques—dimmable lamps, string lights, candle clusters—place them at different heights so shadows play like a duet. Talk to your space, seriously, tug a rug, angle a lamp, step back, squint. Laugh if it looks odd, adjust. When the glow finally hits, you’ll know you nailed it; the room’ll breathe, warm and ready.

    Modern Menorah Displays and Placement Tips

    stylish menorah placement tips

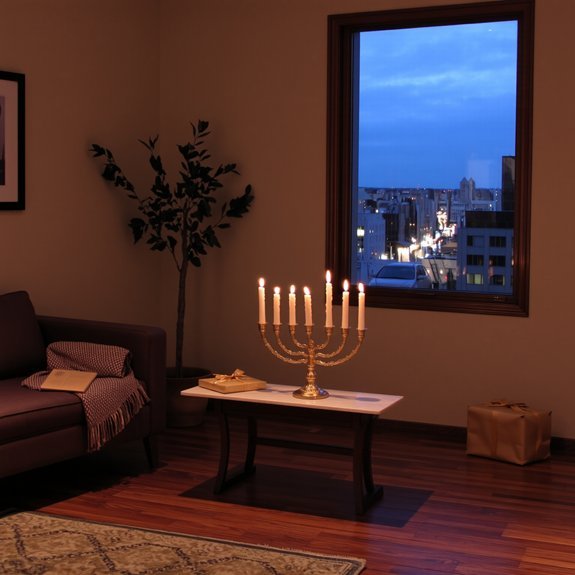
    When I think about a menorah in a modern home, I want it to sit like it means something—visible, balanced, and a little bit stylish, not shoved behind a plant where it can sulk. You choose from brushed metal, ceramic, or minimalist glass, each menorah styles choice saying something about you, even if you’re still learning to say it. Place it where light meets life: a console near the door, a window ledge that catches dusk, or a mantel where company gathers. Mind display height, keep flames at eye level or slightly below, so they’re intimate but safe. Anchor with a simple runner, scatter a few gelt, step back, and adjust until it feels right. You’ll smile; I promise.

    Table Settings for Festive Meals and Game Nights

    cozy menorah playful dreidel

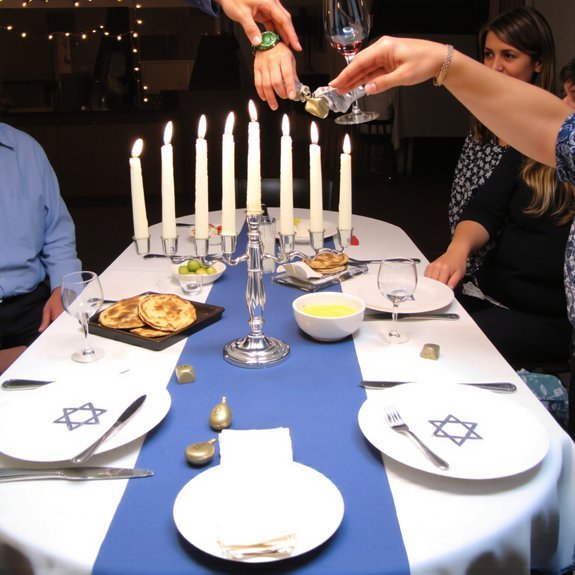
    Think of a low, cozy menorah centerpiece glowing in the middle of your table, warm wax scent and soft light bouncing off glasses so everyone looks slightly better than they are. Toss playful dreidel placemats beneath plates, they’re bright, a little cheeky, and perfect for when someone inevitably loses at the game but wins at snacks. I’ll show you quick swaps and setup tricks that keep the mood festive, the table clutter-free, and the night rolling.

    Cozy Menorah Centerpiece

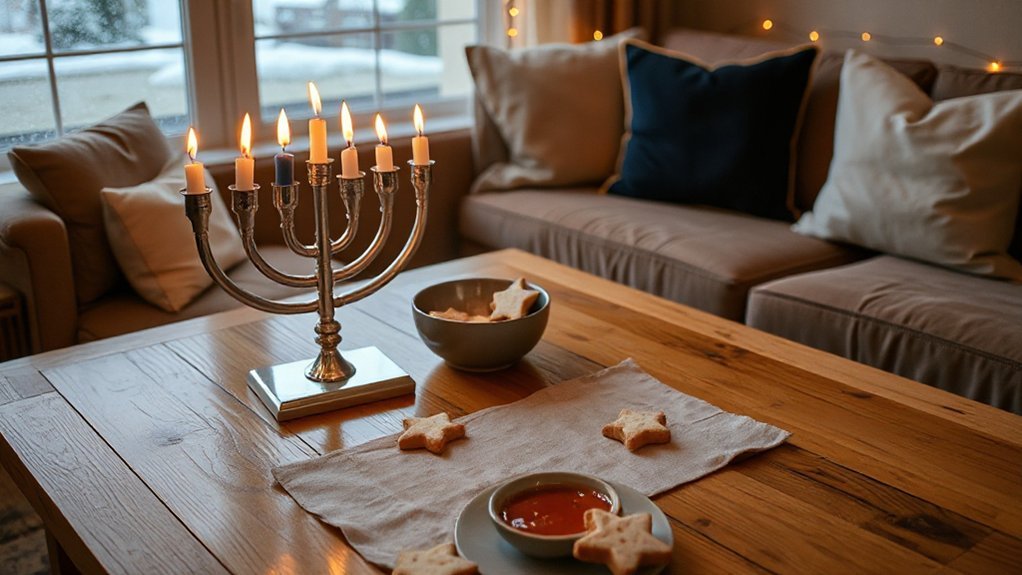
    One bright idea is to let your menorah be the cozy anchor of the table, glowing like a little lighthouse that says, “Eat, laugh, play, but do it right here.” I set mine on a low runner, sprinkle in a few velvet napkins and pine-scented candles, and suddenly the room smells like holidays and victory at board games; you’ll want to reach across the table just to steal warmth. Choose among menorah styles that match your vibe — sleek brass for modern nights, rustic wood for homespun charm — and mind centerpiece heights so sightlines stay open. Add a few roasted-nut bowls, a soft throw draped over a chair, and light the shamash with a flourish; guests grin, forks pause, conversation brightens.

    Playful Dreidel Placemats

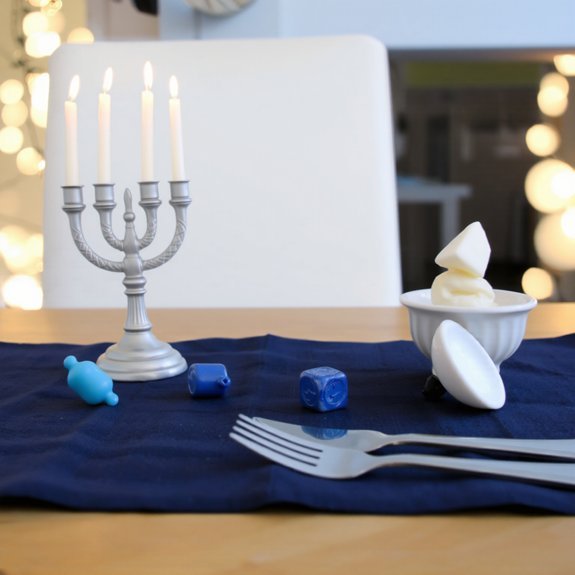
    Dreidels make the table feel like a tiny carnival, and I’ll show you how to lean into that without turning dinner into chaos. You’ll pick placemats with bold dreidel designs, cut from festive fabrics that handle spills and spin-offs, because yes, someone will knock over a cup. I’ll layer textures—linen napkins, shiny foil coins, a little felt mat for game pieces—so the table hums with touch and sound. Place a mini dreidel at each setting, whisper a cheeky prompt, “Spin for dessert,” and watch cousins argue like diplomats. Bright blues, silver accents, tactile stitches, and a smudge-resistant coating keep things easy. It’s playful, useful, and slightly mischievous—exactly how holiday memories should feel.

    Kid-Friendly Crafts and Decorations to Make Together

    You’ll love these kid-friendly projects, they’re messy in the best way—glue on your fingers, paint under your nails, and laughter everywhere. Start with a paper menorah you can fold and light with finger-painted flames, string a felt dreidel garland that jingles when the kids run by, and stamp gift wrap with potato-cut stars for a rustic, squeaky-good finish. I’ll hold the tape, you bring snacks, and together we’ll make the house look like Hanukkah happened and everyone had a blast.

    Paper Menorah Craft

    Grab a handful of colorful cardstock, some glue sticks, and patience for glitter — we’re making a paper menorah that actually looks festive and won’t fall apart mid-sing-along. You’ll practice careful paper cutting, trace candle shapes, fold a sturdy base, and pick festive designs that pop. It’s loud, joyful, and slightly messy — exactly how it should be.

    1. Cut nine candle shapes from cardstock, layer colors, glue, press, let dry — kids love the snappy edges.
    2. Create a solid strip base, score, fold, glue tabs, slide candles in — it sits proud on the mantle.
    3. Add tissue-flame accents, a sprinkle of glitter, tiny stick “matches” for role-play, and bragging rights.

    Felt Dreidel Garland

    I love a craft that’s equal parts cute and chaos, and a felt dreidel garland is exactly that — soft, colorful, and totally kid-proof enough to survive snack time. You’ll cut simple dreidel shapes from felt, mix felt color combinations like navy with silver, teal with cream, or bright blue with yellow, and let kids glue on Hebrew letters with fabric glue. String them on twine, alternate sizes, and watch the hallway turn into a spinning parade. Add garland embellishments — pompoms, tiny bells, sequins — for sound and sparkle. You’ll end up with something imperfect, loud, and adorable. Clean-up’s quick, memories are sticky, and everyone gets to brag about their ridiculous, proud dreidel.

    Potato-Stamped Wrapping

    If you’re into tiny triumphs and gloriously messy victories, potato-stamped wrapping is the craft for late-night gift panic or a rainy afternoon with sticky-fingered kids. You’ll carve simple shapes into halved potatoes, press them into paint, and stamp rhythmic patterns across plain kraft paper. It smells faintly of earth, and kids laugh when the potato drips paint like a tiny, useless comet.

    1. Prep: cut potatoes, sketch dreidels or stars, lay newspaper.
    2. Paint: dab, press, lift — repeat; let little hands go wild.
    3. Finish: dry, tie with twine, tuck in a note.

    You’ll end up with imperfect, joyful holiday wrapping that looks homemade and priceless, and you’ll love the chaos.

    DIY Garlands, Wreaths, and Wall Art

    When the house starts smelling like cinnamon and candle wax, I know it’s time to get crafty — and yes, you’re roped in. You’ll tackle DIY wall hangings that mix felt Stars of David, blue fabric, and tiny bells you can barely hear but love anyway. Try festive garland ideas: string paper dreidels, popcorn, and beads, hang them low so kids can snag a piece, laugh, rewind. For creative wreath designs, use citrus slices, rosemary sprigs, and linen ribbons — it smells like hope, honestly. Make artistic paper crafts at the kitchen table, scissors clicking, coffee steaming, kids arguing over glitter. You’ll hang, staple, and step back, sighing with pride. Don’t worry, mistakes look intentional. Mission accomplished, you crafty mensch.

    Incorporating Heirlooms and Sentimental Pieces

    Because heirlooms carry stories, you’ll want to give them center stage, not shove them into a corner next to last year’s half-used garland. You’ll walk the room, hold each piece, feel the cool metal or worn wood, and decide how it sings with your menorah. Use heirloom display ideas that let items breathe — don’t cram, rotate.

    1. Place a cherished dreidel on a small riser or tray, add a candle nearby, call it performance art; that’s sentimental ornamentation with intent.
    2. Group mismatched family menorahs on a floating shelf, mix heights, create rhythm.
    3. Frame old photos and recipe cards in a cluster, pluck one each night, tell the quick story, then light the candle.

    Cozy Textiles, Cushions, and Throws for a Warm Ambiance

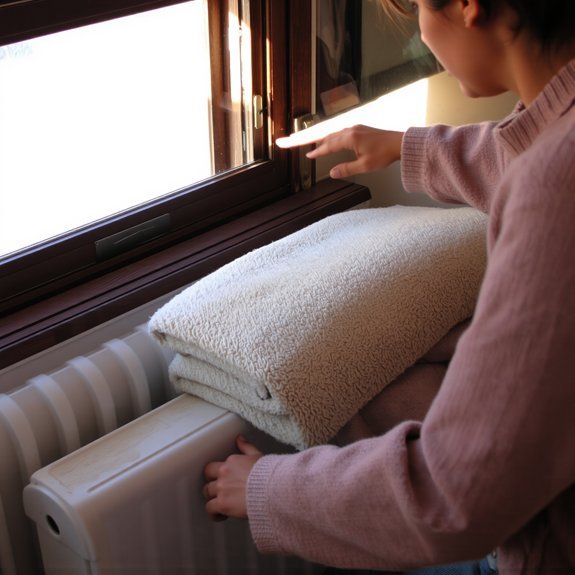
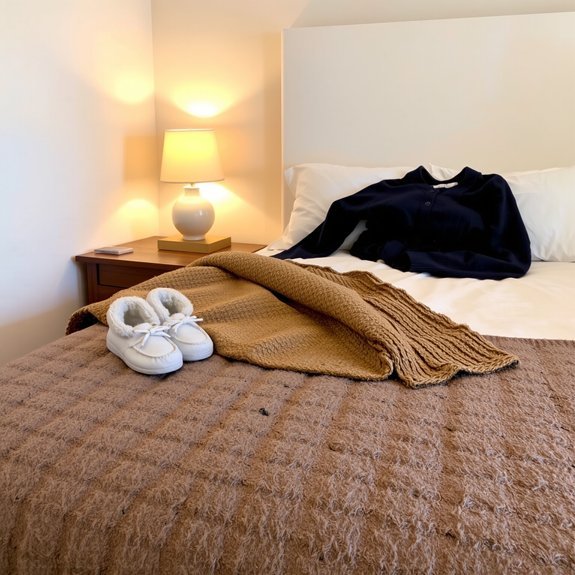
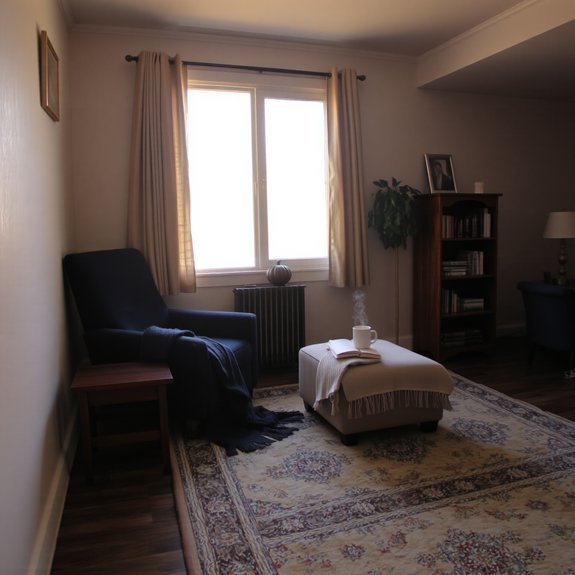
    Though you might think Hanukkah décor is all candles and blue, soft textiles are the secret that turns a room from holiday display into a cozy sanctuary you actually want to hang out in. You’ll pile cozy blankets on the sofa, drape one over an armchair, the fabric whispering warmth when you sit. Mix textures—chunky knit, smooth velvet, a wool throw with subtle pattern—and watch the light from the menorah catch threads like tiny stars. Scatter decorative pillows in varied sizes and heights, don’t be precious, squish them. Add a low tray with cocoa, let steam fog your glasses, inhale cinnamon and citrus. You’ll create corners people claim first, where laughter, stories, and sticky latkes happen, and you won’t mind the mess.

    Last-Minute Decorating Ideas and Budget Finds

    If you’ve left decorating to the last minute, don’t panic — I’ve done worse and lived to tell the tale. You can still make a warm, festive space with clever last minute shopping and a few budget friendly finds. I’ll walk you through quick swaps that look intentional, not rushed.

    1. Raid your pantry and candles: cluster blue, white, metallics, light scented candles, add citrus and pine sprigs for zing.
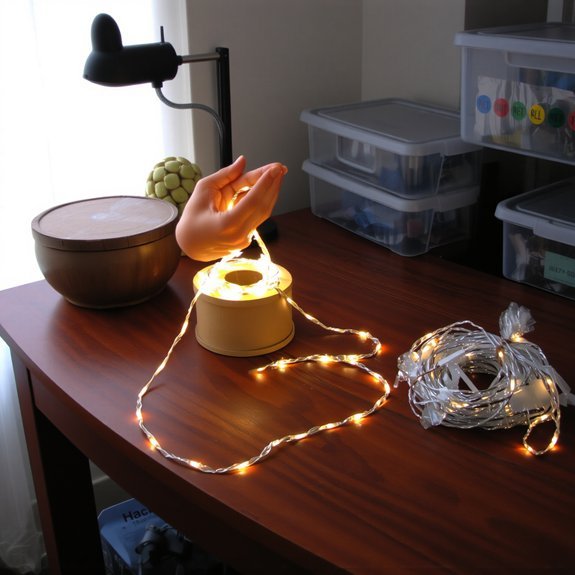
    2. Thrift-store menorah upgrade: spray-paint small frames or lamps, tuck in fairy lights, it’s chic and cheap.
    3. DIY gelt garland: string foil-wrapped coins, mix in paper dreidels, hang across a doorway for instant cheer.

    I’m blunt, practical, and oddly proud of my glue gun scars.

    Mixing Tradition With Contemporary Style

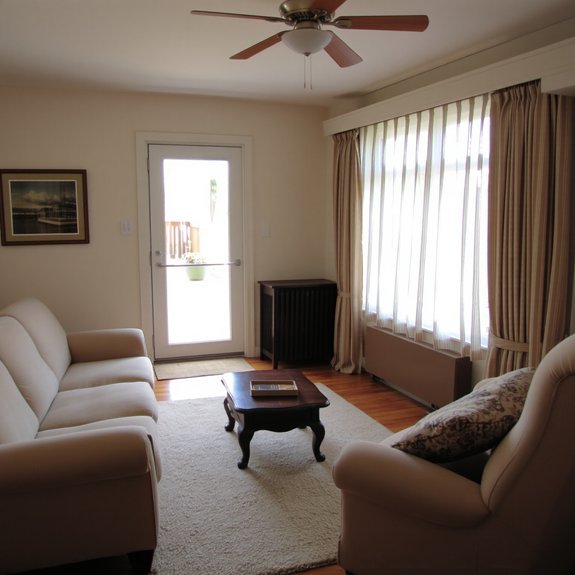
    When you blend old and new, the room feels like it remembers things and is excited about dessert — and that’s a good look. You’ll anchor the table with traditional symbols, a menorah that clicks when you light it, gelt stacked like tiny gold coins, and a bowl of salty, fragrant pretzels for crunch. Then, you shrug on contemporary art: a bright abstract print, a sculptural vase, neon-blue taper candles. Mix metals, layer textiles, and let one bold piece steal the show. I’ll tell you what I do: swap formal napkins for linen ones, scatter frosted pinecones, and hang a small gallery wall near the sofa. It’s cozy, clever, slightly ironic, and totally inviting.

    Conclusion

    You’ve got this — lights, blues, and a menorah that actually gets noticed. Did you know 63% of Americans say holiday décor lifts their mood? I’m proof: I’ll toss velvet pillows, light candles, and melt gelt in your palm like a tiny, guilty treasure. Gather kids for paper menorahs, hang a felt dreidel garland, and tuck an heirloom into the centerpiece. Cozy scents, twinkling candles, warm smiles. Celebrate loud, tasteful, and a little mischievous.

  • How Do I Make My Bedroom Warmer

    How Do I Make My Bedroom Warmer

    Your bedroom will feel like a sauna tonight — or at least it could, with a few smart tweaks — and I’ll show you how to stop shivering. You’ll start by hunting down drafts, slap on weatherstripping, and swap thin curtains for heavy ones that hug the glass; tuck a draft stopper at the door, fluff a down duvet, wear warm socks, and position your bed away from cold walls. Keep going — the quick wins pile up fast.

    Key Takeaways

    • Seal windows, doors, and outlets with caulk, weatherstripping, and draft stoppers to stop cold air infiltration.
    • Add insulation in attics, walls, or attic hatch with batts or foam board to retain warmth.
    • Use heavy thermal curtains or window film and keep curtains open in sun, closed at night to conserve heat.
    • Choose warm bedding—flannel sheets, a down or down-alternative duvet, and a wool throw layered for comfort.
    • Use a modern electric space heater with thermostat, tip-over protection, timers, and one-meter clearance for safe supplemental heat.

    Seal Drafts and Improve Insulation

    seal drafts improve insulation

    If you can feel a ghost of cold air sneaking up your spine every time you pass the window, you’ve got a draft problem—and yes, we’re fixing it. You start by hunting leaks: run your hand along window frames, doors, outlets, feeling tiny betrayals of cold. Seal gaps with caulk or weatherstripping, press it in like icing on a cake, tidy and effective. Lay draft stoppers at the base of doors, they’re cheap heroes, they stop that sneaky breeze. Add insulation materials in the attic or behind walls where you can, batts or foam board, stuff that actually holds heat like a warm blanket. I’ll admit, it’s not glamorous, but you’ll notice the difference fast, and so will your toes.

    Optimize Window Coverings and Treatments

    optimize window insulation strategies

    You’ve shored up the obvious leaks, and now the windows are left holding court like chilly glass villains — time to make them earn their keep. You’ll feel the change fast: less draft, softer light, a room that hugs instead of shivers. Try these simple swaps and hacks, I promise they’re worth the five-minute drama.

    Seal the obvious leaks, then make your windows earn their keep: trap warmth, soften light, and stop the shiver.

    1. Install energy efficient curtains, layered heavy fabric close to the glass, pull them tight at night to trap warmth.
    2. Apply thermal window films, clear and thin, they cut heat loss without killing the view.
    3. Add a draft snake or insulated blinds at the sill, cheap, effective, delightfully low-tech.
    4. Keep curtains open on sunny days, closed at dusk, let daylight warm, then lock it in.

    Choose Warm Bedding and Sleepwear

    cozy warm bedding essentials

    While the rest of the room layers up like a sensible adult, I treat the bed like a cozy fortress you actually want to live inside; think plush quilts that breathe, sheets that hug without clinging, and a duvet so fluffy it forgives my midnight flailing. You want textures that trap warmth, without turning you into a sweaty fossil. Swap thin cotton for flannel sheets, tuck corners tight, add a down or down-alternative duvet, then layer a lightweight wool throw at the foot. Wear soft long-johns or cotton-blend pajamas, socks if your feet rebel. Keep a couple of thermal blankets handy for reading or Netflix marathons, they fold small, pop heat right where you need it. Sleep warmer, wake smiling, and yes, your bed will forgive you.

    Use Efficient, Safe Space Heating

    Great bedding is half the battle, but sometimes you need more than quilts and woolly socks—especially on nights when your radiator snickers at your goosebumps. I grab an efficient electric heater, place it where it can warm you without blasting the whole room, and promise to mind cords like a nervous parent. Safe usage matters—no draping towels, no blocking vents, no leaving it on unattended.

    1. Choose a modern electric heater with thermostat and tip-over protection.
    2. Keep at least a metre clear around the unit, watch for curtains.
    3. Use a timer or smart plug, so you don’t roast or forget.
    4. Inspect cords, plugs, and plugs’ sockets; replace frayed bits.

    You’ll feel toastier, and a touch smug.

    Arrange Furniture and Radiator Use Strategically

    Move your bed away from the radiator so you don’t sleep in a cold pocket while the heater works overtime. I’ll say it bluntly: blocking a heat source with furniture is like wearing mittens to touch a stove — pointless and a little sad. Shift that dresser, angle your headboard, and you’ll feel the difference in minutes, warm air brushing your face like a tiny, efficient sun.

    Position Beds Away From Radiators

    If your bed’s pressed up against a radiator, you’re basically sleeping on a toaster—warm in the wrong way, and a little crispy at the edges—so I recommend pulling it a foot or so away to let heat circulate properly. I tell you this like a friend who’s burned a blanket twice. Good bed placement means you’ll get even warmth, not a hot head and cold toes. You’ll also avoid stale spots where dust and damp hide.

    1. Move the bed one foot from the radiator, check for airflow.
    2. Angle the headboard slightly, channeling warmth across the mattress.
    3. Use a low-profile footboard, don’t trap heat under heavy wood.
    4. Test at night, tweak until it feels cozy, not sauna-like.

    Avoid Blocking Heat Sources

    Now that your bed isn’t smothering the radiator like a guilty blanket, let’s make sure nothing else is playing hide-and-seek with your heat. I tell you this like a friend who trips over ottomans, because blocked vents and clutter steal warmth fast. Pull sofas, dressers, and leaning mirrors a few inches away, aim for clear air paths, and your heat circulation will thank you. Don’t plaster a wardrobe right in front of a heater—your room will sulk and you’ll freeze. Use low-profile furniture near radiators, or angle pieces to guide warm air toward the center. I’ve rearranged rooms at midnight, sweating and triumphant; do a quick test: move one piece, feel the difference, grin, repeat.

    Adopt Nighttime Habits That Trap Heat

    Think of your bedroom like a sleeping dragon, and you’re the sly keeper who tucks it in. You dim warm lighting, light a candle with cozy scents, and close curtains like armor. You pile blankets strategically, creating pockets of trapped heat, not a nest of suffocation. You wear socks, because cold toes ruin everything — I learned that the hard way. You run a short burst of warm air from a heater, then let insulation do the rest.

    1. Layer bedding: quilts, throws, fitted sheet tucked tight.
    2. Seal gaps: towel at the door, draft snakes under windows.
    3. Prep body: warm bath, hot water bottle, thermal pajamas.
    4. Set mood: dim lamps, scented diffuser, low-energy warmth.

    You check, adjust, and sleep smug.

    Conclusion

    You’ve got this: seal those sneaky drafts, hang thick curtains, and tuck in a down duvet so your bed feels like a warm hug. Move furniture off the radiator, use a safe space heater when needed, and wear cozy socks — small moves, big payoff. I’ll nag you like a reliable sweater: do the simple stuff first, taste the warmth, then bask in it; you’ll sleep better, smile more, and stop stealing blankets from your cat.

  • How Do I Arrange Furniture for Winter Comfort

    How Do I Arrange Furniture for Winter Comfort

    Move chairs toward the heat, arrange throws within arm’s reach. You’ll want to sit where it’s warm, not where guests enter, so angle your sofa toward the fireplace or radiator and pull a comfy chair close enough to feel the glow. Layer a wool rug underfoot, toss a chunky blanket over the arm, and block that drafty corner with a tall plant—trust me, your feet will thank you, and I’ve got more tips if you’re ready.

    Key Takeaways

    • Position seating closer to radiators, fireplaces, and sunlit windows to capture warmth and natural light.
    • Keep main walkways 30–36 inches wide while clustering furniture for conversation and heat retention.
    • Angle sofas and chairs to face heat sources and avoid placing seating directly against drafty windows or doors.
    • Layer rugs and throws, use dense base rugs with softer tops, and store blankets visibly for easy access.
    • Layer warm lighting with amber bulbs, table and floor lamps, and mirrors to reflect light into darker corners.

    Arrange Seating to Maximize Heat Sources

    maximize warmth through seating

    If you want to actually feel the heat this winter, move the chairs where the warmth is—don’t just admire the radiator from across the room like it’s a museum piece. I’m telling you, change your seating arrangement so heat sources become the obvious focal points; pull a chair closer to a radiator, angle a sofa toward a sunlit window, or cluster seats around a fireplace. You’ll feel the difference immediately, that soft hug of warm air on your skin. Don’t block vents with furniture, don’t trap warmth behind bulky cabinets. Try swapping a rug or turning a chair to catch the sun. It’s simple, effective, slightly smug, and yes, you’ll thank me when your toes stop protesting.

    Define Cozy Conversation and Reading Nooks

    cozy inviting conversation corners

    When I say “nook,” picture a small, intentional pocket of warmth where conversation and reading happen without effort, a place that practically nags you into staying. You make a reading corner by clustering a comfy chair, a low lamp, and a small side table, so pages glow and cocoa steams. A conversation pit asks for a few low cushions, a soft rug, and an ottoman that’s begging to be used, so voices lean in, jokes land.

    1. Define purpose: solo escape or group chat, pick scale.
    2. Layer texture: throw, rug, lamp—touch, sound, soft light.
    3. Anchor sightlines: face the heat source, not the door.

    You’ll want warmth, intimacy, clear sightlines, and zero fuss.

    Improve Traffic Flow and Reduce Drafts

    optimize space for comfort

    You’ve built a nook that nags you into staying—good job, that was fun—now let’s make sure people actually get to it without tripping over boots or feeling like they’ve walked into a freezer. I shift chairs a few inches, test the path, and if your hallway feels like a chute, pull a chair back. Keep main walkways at least 30–36 inches wide, easy to stride through with hands full. Watch for drafty windows, they’ll sabotage comfort faster than wet socks. Don’t block radiators, but angle seating to shield cold panes, use tall plants or a screen to break gusts. Smart furniture placement clears sightlines, shortens routes, and tucks drop zones for boots and coats out of traffic. You’ll thank me when toes stop screaming.

    Layer Textiles for Warmth and Texture

    You’ll want a pile of cozy throw blankets within arm’s reach, the kind you can swaddle yourself in when the heater’s on the fritz. Layer rugs — a soft wool over a flatweave, for example — to trap cold underfoot and give the room a tactile, lived-in vibe. I promise, a couple of well-placed textures makes the whole space feel warmer, comfier, and a little more forgiving of your mittened clumsiness.

    Add Cozy Throw Blankets

    If the room had a personality, a pile of throw blankets would be its hug — and yes, you’re allowed to smother it. I want you to layer textiles like you mean it: drape a chunky knit over the sofa, tuck a cashmere at the arm, and let a patterned throw peek from a basket. You’ll feel warmth, texture, and instant welcome.

    1. Pick varied throw blanket styles: chunky, woven, lightweight.
    2. Rotate by season and mood, don’t hoard identical pieces.
    3. Use cozy blanket storage that’s visible, make it part of the room.

    Reach for a blanket mid-movie, bury your feet, breathe in that soft, toasted-smell of home. You’re allowed to be dramatic, I won’t judge.

    Layer Rugs for Insulation

    Blankets are lovely, but your feet deserve a hug too, so let’s stack rugs like you mean it. I want you to think layers, textures, warm toes; start with a dense base—wool or felt—for insulation, then add a softer top like shag or cotton for touch. Pay attention to rug materials, pick natural fibers for warmth, synthetic for easy care. For rug placement, center the layered combo where you stand most: under the coffee table, by the bed, or beneath a reading chair. Trim edges so layers peek, not trip. I’ll admit, I once made a trip hazard art installation; learn from me. Tuck corners, anchor with furniture legs, rotate seasonally. That’s warmth you can feel, and a look that says comfort, confidently.

    Optimize Lighting for Warmth and Ambience

    You’ll want to fling curtains wide on sunny days and angle seating toward those bright, chilly windows so the room actually drinks in the daylight, not hides from it. Then, as dusk creeps in and you start losing fingers to the cold, layer in warm artificial light — table lamps, floor lamps with amber bulbs, and a few candles for the soft, crackly vibe. Trust me, you’ll feel the room hug you back, and if the cat judges your lamp placement, that’s just approval.

    Maximize Natural Light

    When daylight thins and the air cools, I push furniture toward the windows like a hopeful moth and let sunlight do the heavy lifting—brightening the room, warming the floor, and making everything feel friendlier; open that curtain, slide the sofa a few inches, and watch light chase the chill from corners you forgot existed. You want natural light to work for you, so think placement, reflection, and simple edits. Move low tables out, angle chairs, and clear the sill. Swap heavy drapes for sheer window treatments during the day, you can close them at dusk. Try these quick moves:

    1. Place seating to face the sun, capture warmth and mood.
    2. Use mirrors to bounce light into dark nooks, double the glow.
    3. Keep floors and surfaces clutter-free, let sunlight land.

    Layer Warm Artificial Light

    Because daylight shrinks and evenings arrive like a polite but persistent in-law, you’ll want to stack layers of warm light so your room feels cozy, not like a stage set for a dental commercial. Start with ambient lighting, a soft ceiling fixture or dimmable recessed cans, and set them low. Add table and floor lamps with bulbs that lean amber, not clinical white — think warm tones, think gentle skin-friendly glow. Place a lamp near your reading chair, another by the sofa, and tuck a small uplight behind a plant for depth. Use dimmers, smart bulbs, or simple three-way options so you can pivot from chores to cuddles. Mix heights, textures, and switches, and watch your room go from bleak to blissful, fast.

    Position Rugs to Retain Heat and Anchor Zones

    One or two well-placed rugs will do more for winter comfort than a thousand throws you never use. I’ll say it plainly: pick rug materials for feel and heat retention, not just looks. You want soft underfoot, a dense pile that traps warmth, and edges that stop cold drafts.

    1. Place a large rug under your seating, centered on the coffee table, to create a cozy conversation zone.
    2. Use a runner by entryways and hallways, to catch cold feet and guide movement, like a warm welcome mat that actually works.
    3. Layer a smaller wool or synthetic rug near beds and reading chairs, so every step feels deliberate, warm, and slightly indulgent.

    Trust me, your toes will thank you, and your room will breathe comfort.

    Arrange Furniture for Efficient Heating and Safety

    If you want your room to feel like a hug instead of a drafty waiting room, start by giving heaters and vents the elbow room they deserve — don’t smother them with sofas and bookcases. I’ll walk you through furniture placement so your space heats faster, wastes less, and stays safe. Pull seating a foot or two away from radiators, tilt a chair slightly toward a vent, and keep curtains off baseboard units. Don’t block airflow with big coffee tables, I know, tragic. Anchor a reading nook near but not on top of heat, add a throw for texture and warmth, and leave clear paths for maintenance. You’ll boost heating efficiency, reduce fire risk, and actually enjoy being indoors this winter.

    Conclusion

    So, you’ve rearranged the room, placed chairs by the radiator, fluffed the throws, and rolled out the rug — feels like a hug, right? I promise, you can make every seat the warm spot. Keep paths clear, block drafts with a tall plant, and let lamps do the sunset work when day fades. Try it tonight; sip something hot, sit down, and enjoy the cozy you made. Isn’t that worth it?

  • How Do I Clean Fireplace Glass

    How Do I Clean Fireplace Glass

    Most folks don’t know that soot actually bonds to glass like cheap glue, so you can’t just wipe and hope. You’ll want to wait until the glass is cold, pull on gloves, and clear away loose ash with a vacuum or brush—trust me, your shirt will thank you—then I’ll show you a simple mix and a few scrubbing tricks that make the glass sparkle again, and yes, we’ll tackle the stubborn black streaks too, but first you need to check the seals and cracks.

    Key Takeaways

    • Ensure the fire and embers are completely cold before starting and, for gas units, turn off the gas and pilot.
    • Remove loose ash and soot with a soft brush or vacuum before applying any cleaner.
    • Clean with a damp microfiber cloth and warm soapy water for lightsoiling; dry immediately to avoid streaks.
    • For stubborn stains, apply a baking soda paste or commercial fireplace-glass cleaner, let sit 5–10 minutes, then gently scrub.
    • Inspect seals and glass for cracks, wipe monthly, and establish a regular cleaning schedule to prevent heavy buildup.

    When and How Often to Clean Fireplace Glass

    clean fireplace glass regularly

    Once or twice a season is a good rule of thumb, but I’ll admit I’m the guy who checks the glass every time I walk past the fireplace—because I can’t stand that ashy haze stealing the view. You’ll want to set a cleaning frequency that fits your use: heavy burners mean monthly checks, occasional fires mean seasonal maintenance. After a long burn, wait until the glass cools, then peek—if you see streaks or a fog, it’s time. Don’t wait for a layer that scrapes like sandpaper; deal with light sooting while it’s easy. Make it part of your routine, like swapping filters, and you’ll enjoy crystal flames, not a gray curtain. You’ll thank yourself, and so will guests.

    Tools and Supplies You’ll Need

    essential cleaning toolkit prepared

    Before you plunge in, you’ll want to lay out a small toolkit so cleaning goes fast and doesn’t turn into a “where did I leave the rag?” scavenger hunt. I like to spread everything on a towel, so you see it, grab it, and don’t eat the stray soot (kidding, but seriously). Essential tools include a microfiber cloth, non-abrasive scrub pad, razor scraper for stubborn spots, a spray bottle, and rubber gloves. For cleaning solutions, pick a commercial fireplace glass cleaner or make a paste with baking soda and water — both smell tolerable, both work. Add paper towels for quick blotting, a bucket for rinse water, and a soft brush to whisk away loose ash. You’re set, ready, and mildly smug.

    Preparing the Fireplace Safely

    ensure fireplace is safe

    Okay, first things first: make sure the fire is completely out and the coals have stopped glowing, you don’t want surprise heat or smoke while you work. Wait until the glass is totally cool to the touch, I mean cold enough that even your impatient fingers would quit — no quick peeks or hand-tests. If you have a gas fireplace, turn off the gas supply and double-check the pilot, because nobody wants you playing hero with fumes.

    Ensure the Fire Is Out

    If you can still hear the faint snap and hiss of embers, don’t fool yourself — that fire isn’t done, and neither are the risks; I always wait until the whole bed is cold to the touch, because trust me, a glowing coal will ghost through your plans faster than you can say “oops.” I squat down, palms hovering over the grate to feel for heat, peeking for any hidden orange pinpricks and poking gently with a metal tool to be sure nothing’s smoldering; if there’s even a whisper of warmth, I feed it more time and set a timer so I don’t get complacent. You’ll want this ritual, because fire safety matters, and different glass types react to heat differently; respect both. Check ash depth, sniff for stale smoke, and don’t rush — it’s worth the wait.

    Cool Glass Completely

    Since glass holds heat like a stubborn cat, you’ve got to let it cool fully before you even think about touching a rag to it — I wait until the surface’s chill makes my fingertips tingle, not just until the room “feels” cooler. Don’t rush this; cooling techniques matter. I open the damper or vents to speed air flow, stand back, and watch the glass lose its dull glow. You’ll feel warmth fade under your palm before the whole pane is safe. Keep pets and kids out, and don’t wipe hot soot — it’ll smear. For glass protection, lay down a soft towel on the hearth to catch drips, and wear gloves so oils don’t betray you. Patience now saves cracked glass later, trust me.

    Turn off Gas Supply

    All right, the glass is finally cool under your palm — victory dance later — now we’ve got to quiet the gas. You walk to the valve, feel the cool metal, and say aloud, “No more drama.” Locate the gas shutoff, usually near the fireplace or at the wall, and turn it perpendicular to the pipe; that small click is sweet relief. Take safety precautions: double-check the pilot is out, sniff for leaks, and keep a phone handy. If anything smells off, don’t play hero — call a pro. I’ll wait while you tighten the last screw, because I’ve learned the hard way that skipping this step leads to regret and locksmith bills I don’t need. Good. We’re safe.

    Step-by-Step Cleaning Method for Wood-Burning Glass

    Before we get your glass sparkling, put on gloves and goggles — I’m not saying you’ll start a chemistry experiment, but better safe than smoky. You’ll scrape and wipe away soot like a pro, feeling the gritty residue lift under a damp cloth and a bit of elbow grease. Follow my simple steps and you’ll be looking through clear glass and grinning, not squinting at a fogged-up mess.

    Safety First Always

    When I say safety first, I mean it—so don your gloves and step back like you’re about to meet a slightly grumpy bear; the glass is still hot, the ashes are dusty, and you don’t want a surprise smudge or worse, a burned finger, reminding you of a bad life choice. I’ll walk you through basics: check the damper, let embers cool, and clear loose ash with a soft brush. Fire safety isn’t a suggestion, it’s policy. Wear eye protection, heat-resistant gloves, and a dust mask—protective gear that makes you look serious, not paranoid. Keep kids and pets out, open a window for ventilation, and have a metal ash bucket nearby. Pause, assess, then proceed; haste breeds regrets.

    Remove Soot Effectively

    Since soot’s a clingy little villain, you’re going to tackle it like a crime scene investigator—only without the dramatic trench coat. I’ll talk you through soot removal step by step. First, let the glass cool, then vacuum loose ash with a soft brush—hear the whisper of dry grit leaving. Dampen a microfiber with warm water and a drop of dish soap, wipe in circles, watch the gray smear loosen. For stubborn patches, sprinkle baking soda, spritz vinegar, scrub gently with a damp pad, rinse, repeat. Wipe dry with a clean cloth to avoid streaks. Those cleaning techniques cut grime without scratching. You’ll end with clear glass, a satisfied grin, and fewer smoke ghosts to haunt your evenings.

    Cleaning Gas and Pellet Fireplace Glass

    Gas and pellet fireplace glass gets a grimy look faster than you’d think, and if you’re like me, that cloudy film makes the whole hearth feel sad and neglected. You’ll want to cool the unit, shut off gas or empty the pellet hopper, and remove the glass panel—carefully, gloves on—so you don’t chip it or your dignity. Use a soft cloth, warm soapy water, and a non-abrasive cleaner made for glass; for a gas fireplace, avoid ammonia fumes near pilot lights. Wipe in circular motions, rinse, then dry with a microfiber to dodge streaks. Reinstall gently, check seals, and light it up. Honestly, it feels like magic when that sparkle comes back.

    Removing Stubborn Stains and Creosote

    If you’ve done the basic cleaning and the glass still looks like someone sneezed soot on it, don’t panic — you’re up against stubborn stains and creosote, and they’re beatable. I’ll walk you through it. First, wear gloves, open windows, and feel the grit under your nails — satisfying, gross. Spray a dedicated fireplace glass cleaner, or make a paste with vinegar and baking soda, smear it on the worst spots. Let it sit five to ten minutes, breathe, sip coffee. Scrub with a nylon pad or razor for really tough creosote buildup, hold the blade flat, don’t gouge. Wipe clean with microfiber, buff till it gleams. Repeat only where needed, inspect for cracks, and admire your reflection — you earned it.

    Preventive Care and Maintenance Tips

    You’ll save time, money, and a surprising amount of elbow grease if you treat fireplace glass like a pet—feed it respect, don’t ignore the mess, and it’ll behave. I tell you this like a friend who’s scrubbed glass at midnight. Set simple preventive measures: burn well-seasoned wood, keep air vents open, and clear ash after each use. I walk through a quick maintenance routine every month — wipe cool glass with a damp microfiber, check seals, vacuum soot from crevices. If you smell smoke, I don’t ignore it; I inspect gaskets and flues. Little rituals save big headaches. You’ll notice clearer views, less scrubbing, and a warmer room. Trust me, it’s less heroic cleaning, more regular care.

    Conclusion

    You’ve got a clear plan now, and that warm, soot-free glass will let the flames glare like a campfire in a mason jar. Trust me, you’ll feel smug wiping soot away, the cloth leaving a streak-free shine while the room smells faintly of ash and lemon. Do this regularly, check for cracks, and you’ll keep the fire cozy and safe. Now go light one—carefully—and enjoy the view.

  • How Do I Make Homemade Winter Candles

    How Do I Make Homemade Winter Candles

    You’re making winter candles, and I’ll walk you through it—wax, wick, jar, a dash of cinnamon or spruce, melt slow, pour steady; you’ll smell nutmeg and pine while the kitchen fogs a little and your cat judges you. I’m practical, not woo-woo: we’ll pick soy or beeswax, match wick size to container, add fragrance at the right temp, cool without cracks, and trim the wick—stick around, I’ll show the simple recipes and how to rescue a wonky pour.

    Key Takeaways

    • Choose a clean-burning wax (soy or coconut blend) and a wick sized to your container to ensure even burning.
    • Pick a winter fragrance combo: citrus top, cinnamon or peppermint middle, and cedar or pine base for depth.
    • Color jars with frost white, evergreen, candy-cane red, or muted amber dyes to evoke a seasonal look.
    • Heat wax to recommended temps, add fragrance at the right temperature, and pour in a draft-free area to cool.
    • Perform test burns, trim wicks to 1/4″, and adjust fragrance or wick size to fix weak scent or tunneling.

    Choosing Wax, Wicks, and Containers

    candle making essentials explained

    If you want your winter candle to actually smell like winter and not like a sad, smoky sock, start with the basics: wax, wick, and container. You’ll pick wax first, weigh options, and I’ll nudge you toward paraffin alternatives like soy or coconut blends, they burn cleaner, hold scent differently, and feel less guilty. Choose a wick that matches diameter, test a burn, watch for tunneling or soot—don’t panic, adjust. Containers matter: glass, tin, ceramic—think heat transfer, look, and lid fit. Add natural additives like coconut oil or stearic acid sparingly, they tweak hardness and throw. You’ll label jars, note ratios, light one for a trial, and learn fast, with maybe one tiny kitchen mishap.

    Winter-Inspired Fragrance and Color Ideas

    winter candle scent layering

    You’ve picked your wax and wick, you’ve learned what not to set your oven mitts on—now let’s make these candles actually smell like winter and not regret. I tell you to layer scents like a pro: start with citrus zest top notes, add a heart of cinnamon spice or peppermint swirl, finish with cedar wood or pine forest base, and you’ll have depth, not mystery. Pick colors that match — frosty white, deep evergreen, candy-cane red, or muted amber for warm vanilla vibes. Test small batches, burn, sniff, adjust. For that cozy fireside sensation, boost smoky notes lightly, don’t overdo it. Label blends “holiday cheer” or “open when it’s cold,” and take pride in smelling like success.

    Simple Recipes: Soy Mason Jar and Beeswax Teacup Candles

    cozy candle making projects await

    You’re about to get hands-on with two supremely cozy projects: I’ll walk you through melting soy, measuring fragrance, and pouring into mason jars so you get that clean, creamy burn; then we’ll switch gears to gently heating beeswax, wicking tiny teacups, and coaxing out warm honeyed aromas. You’ll feel the soft heat on your wrists, smell citrus and cinnamon lift the room, and maybe burn a thumb once — I promise it’s part of the charm. Ready? Let’s light one, make a mess, and call it winter magic.

    Soy Mason Jar Steps

    1 jar, a friendly block of soy wax, and a wick—let’s do this. You’ll feel the soy candle benefits immediately: cleaner burn, longer life, and a soft scent throw that won’t fight with your cocoa. Mason jar advantages mean easy cleanup, safe container, and rustic charm. I walk you through it, step by step, quick and proud.

    1. Clean jar, secure wick, melt wax slowly—stir, don’t splash.
    2. Add fragrance at 185°F, pour at 135°F, steady hands, steady heart.
    3. Let cool overnight, trim wick to 1/4″, label and enjoy.

    You’ll smell warm vanilla, see smooth cream wax, and grin—because you made this, and it’s actually lovely.

    Beeswax Teacup Method

    Grab two teacups you like—mismatched is fine, actually preferable—and let’s make a beeswax candle that smells like a firelit kitchen and looks like it belongs in a cozy novel. You’ll see beeswax benefits right away: clean burn, warm honeyed scent, no fake chemical tang. For teacup selection, pick sturdy porcelain, rinse, and dry; a chip adds charm, not danger. Melt beeswax in a double boiler, clip a cotton wick to a skewer, center it, pour slowly, watch the molten gold settle. Let it cool, trim the wick, light it, and inhale—the room softens, old recipes crowd your thoughts. I’ll admit I once spilled wax; you will too, maybe, and that’s part of the fun.

    Step-by-Step Pouring and Setting Techniques

    You’ll start by heating your wax to just the right temperature, humming a bad song while you watch it melt into a glossy pool, because too hot ruins scent and too cool makes a lumpy mess. I’ll show you when to add fragrance so it binds, and how to pour with calm hands—slow center stream, wiggle to stop air, and don’t panic if a sinkhole forms. Let it cool in a draft-free spot, nudge the wick straight, and I’ll give you quick fixes for cracks and topping up, so your jars come out cozy and not catastrophic.

    Melting and Temperature Control

    Melting wax smells like cocoa butter and quiet victory, and I’ll tell you how to tame it without burning your kitchen or your dignity. You watch the wax go glossy, stir slowly, and check the melting points on your packet, trusting the temperature gauge like a tiny, honest friend. Don’t rush. Don’t roar the heat.

    1. Preheat, monitor, stabilize — patience is the craft.
    2. Aim for the pour range, hold till steady, then lift the pan.
    3. Cool gradually, anchor wicks, cap shrinkage with gentle taps.

    I talk you through scooping, straining, and timing pours so wax layers set smooth. You’ll learn to read the sizzle, feel the tempo, and smile when the first candle stands proud.

    Adding Fragrance Safely

    Once the wax hits its sweet spot and the kitchen stops smelling like a science fair, it’s time to add fragrance — but do it like someone who knows a few things and isn’t trying to set off the smoke alarm. I tell you to measure, not eyeball; fragrance oils and essential oils aren’t interchangeable doses. Use a kitchen scale, add oils at the recommended temperature, and stir gently for sixty to ninety seconds so scent disperses, don’t whip air in. Smell a tiny dab on a spoon, adjust carefully, you can always add a touch more, you can’t un-add. Wear gloves, keep kids and pets away, and ventilate. If you’re nervous, test a small sample candle first — fewer tears, more cozy success.

    Pouring and Cooling Tips

    Before you pour, take a breath and steady the ship — I learned the hard way that impatience makes wax do ugly things. You’ll warm the jar with hot water, check wick position, and test temperature. Pour slowly, steady hand, and watch the glossy surface settle. Good pouring techniques cut bubbles and sinkholes, trust me.

    1. Cool gradually: move jars to a draft-free spot, cover loosely.
    2. Use temperature charts: pour at recommended temps, then let wax fall 10–15°F before topping.
    3. Patch and finish: fill low spots after initial set, trim wick when firm.

    Cooling methods matter, they shape texture and scent throw. You’ll feel pride when the smooth top gleams, and yes, you’ll grin.

    Safety Tips and Storage for Homemade Candles

    If you’re planning to light your homemade candles around the house, you’ve got to treat them like hot, beautiful little divas—respectful distance, steady surfaces, no unsupervised drama. I’m serious. For candle safety, always trim wicks to 1/4 inch, keep drafts away, and never leave a burning candle alone. Put them on heatproof trays, away from curtains, paper, pets, and kids; think “no-fly zone.” When they cool, cap or cover jars to keep scents fresh and dust out. For proper storage, stash candles upright in a cool, dark place, wrapped in tissue or bubble wrap if they’re fragile. Label scents, date batches, and rotate older candles forward. You’ll thank me when your living room smells like winter, not panic.

    Troubleshooting Common Candle Problems

    Okay, you’ve got your candles trimmed, parked on their heatproof thrones, and safely tucked away when not in use — good job, you’re practically a scent sommelier. Now, if a candle tunnels, smokes, or smells faint, don’t panic — you’ve got this. Check wick alignment first; a centered wick burns clean, an off-center one eats wax and puffs smoke. For weak scent throw, try warmer room temps, larger wicks, or more fragrance oil next time. Simple fixes, big payoff.

    1. Trim to 1/4″, center the wick, relight.
    2. Allow full melt pool, avoid drafts, be patient.
    3. Rebatch or add fragrance if scent throw stays shy.

    Talk to the flame, not literally, but with action.

    Conclusion

    You’ve got everything you need to make winter candles that actually smell like the season, not a chemistry set. I’ll be honest, you might spill wax, but that’s part of the fun—learn fast, laugh faster. Pick your wax, choose a snug wick, stir in cinnamon or pine, pour steady, trim the wick. Let them cool like a good story. These candles are tiny, glowing hearths, a pocket-sized winter you can carry anywhere.

  • How Do I Prepare My Car for Winter Driving

    How Do I Prepare My Car for Winter Driving

    You’ll want to get your car winter-ready before the first surprise snowstorm hits, so let’s walk the steps fast and with a little swagger: check tire tread and pressure, swap to winter tires if you can, test the battery and lights, top off antifreeze and winter washer fluid, and make sure the heater and defroster actually work—then toss blankets, snacks, a shovel, and jumper cables in the trunk. Ready to dig into the how-to?

    Key Takeaways

    • Inspect tires for tread depth, uneven wear, and cuts; fit winter tires if tread is shallow and inflate to the owner’s recommended psi.
    • Test battery and terminals for corrosion, secure connections, and measure resting voltage or have a shop perform a load test.
    • Top off and inspect fluids: antifreeze/coolant, oil, brake and transmission fluids, and use winter windshield washer fluid.
    • Verify heating and defrost systems work, replace worn wiper blades, and clear vents to ensure proper airflow and visibility.
    • Pack an emergency winter kit: blanket, warm clothing, shovel, jumper cables, traction mats, flashlight, snacks, water, and a power bank.

    Inspect Tires and Check Tire Pressure

    inspect tire condition regularly

    One quick check can save you from a lot of cold-weather drama. You step into the driveway, hose breath fogging the air, and squat by each wheel; you’re looking for tire tread depth, cuts, and odd wear patterns. Press a penny or use a gauge, listen to your own impatience, and swap to winter tires if the tread’s shallow—don’t gamble on bald rubber. Check tire pressure cold, not after a drive, because pressure drops with temperature; you’ll need a reliable gauge, fingers that don’t complain, and the right psi from the owner’s sticker. Rotate tires if they look uneven, tighten lug nuts, and jot down any weird vibration. You’ll drive warmer, safer, grinning at the sky.

    Test Battery and Electrical System

    battery health quick checks

    Three quick checks will save you from a frozen-start meltdown that makes you want to swear at the steering wheel. I’ll walk you through testing battery health and basic electrical connections, so you won’t stand in snow, cursing, while your car coughs politely and dies. Listen, it’s simple: inspect terminals, look for corrosion, wiggle cables, and note any dim lights. If you’ve got a multimeter, great; if not, many shops’ll test it fast.

    • Clean terminal corrosion with a brush and baking soda paste
    • Tighten loose clamps, don’t over-torque them
    • Measure resting voltage with a multimeter
    • Check interior and headlight brightness for drain signs
    • Listen for parasitic draws with everything off

    Do it now, thank me later.

    Replace or Top Off Fluids

    check and top fluids

    Okay, you checked the battery and didn’t cry in the snow—nice work. Now, pop the hood with me, feel that cold metal under your glove, and scan fluids like a pro. Check coolant levels first, they should sit between marks; low means risk of freezing, which is ugly and expensive. Top off with the right mix, not straight water—read the cap. Next, inspect oil; dark and gritty? Change it. Brake fluid and transmission fluid deserve a glance too, clean and full keeps systems talking. Don’t forget the windshield washer reservoir — use winter formula so it won’t freeze when you need clear glass fast. I’ll admit, fluid checks aren’t glamorous, but they’re cheap insurance against winter misery.

    Maintain Heating, Defrosting, and Wipers

    Several simple checks will save you from icy breath and fogged-up panic attacks when you hit the road. I tell you, test the heating system now—feel warm air on low, then high, and listen for odd rattles. Clear the defroster vents, aim airflow at glass, and watch fog vanish like magic. Replace worn blades before snow, that’s basic wiper replacement wisdom; streaks are betrayal. Keep washer fluid full, buy winter formula, and spray to scrub slush and salt. Check rubber for cracks, pry off ice gently, don’t tear things.

    • Test heater in minutes, note unusual smells or sounds
    • Inspect and change wipers every season
    • Use winter washer fluid only
    • Clear vents and cabin filters
    • Practice quick defrost routine before driving

    Stock an Emergency Winter Driving Kit

    You’ve tuned the heater, cleared the vents, and banished fog from your windshield—nice work, you’re already halfway to winter survival. Now pack an emergency kit like you mean it. Toss a bright blanket, warm gloves, hat, and handwarmers into a crate, add nonperishable snacks, water, a flashlight with fresh batteries, and a small shovel that actually digs. Include jumper cables, traction mats, and a tow strap, plus a compact first aid kit and a whistle. Stash a fully charged power bank, ice scraper, and a bag of kitty litter for traction. Keep contact info for roadside assistance on paper, and mark your car with reflective tape for slick nights. Check and refresh supplies every season — don’t be the person shivering and surprised.

    Know When to Visit a Mechanic

    If your car starts coughing, whining, or acting like it forgot how to be a car, don’t play hero — bring it to a mechanic. I’m blunt: ignore weird noises, and winter will punish you with cold, stranded misery. Learn the common mechanic signs — dashboard lights, odd smells, sluggish starts — and trust them. Track service frequency, don’t guess. I check oil, brakes, battery, belts, and tires like clockwork, and you should too.

    • Squeals when braking or turning
    • Repeated battery slow-cranks
    • Persistent engine warning lights
    • New leaks or sweet antifreeze smell
    • Smoke, white or blue, from exhaust

    Go early, get it fixed, drive warm and smug.

    Conclusion

    Think of your car as a stubborn, loyal dog: you groom it, feed it good food, and check its paws before a blizzard. You’ll inspect tires, top fluids, test the battery, clear the windows, and pack blankets and snacks. I’ll nag you like a practical friend, because slippery roads aren’t polite. Do the simple chores now, and later you’ll ride warm, confident, and smug — while other drivers fumble.

  • How Do I Make a Winter Emergency Kit

    How Do I Make a Winter Emergency Kit

    Think of a winter emergency kit as your polite way of telling chaos to wait a minute. You’ll thank yourself when the power blinks out, the wind howls, and you’re cozy under wool blankets with a mug that hasn’t gone cold—yes, you’ll want a thermos. I’ll walk you through sensible supplies for home, car, pets, and folks who need extra care, quick storage tips, and a short shopping list so you’re not improvising with canned beans and duct tape.

    Key Takeaways

    • Stock at least three days of water and nonperishable, high‑calorie food for each person and pet.
    • Pack reliable light and heat sources: flashlights/headlamps, extra batteries, warm blankets, and hand warmers.
    • Include basic first aid, prescription medications, and copies of critical documents in a waterproof bag.
    • Prepare a car kit with a shovel, ice scraper, jumper cables or battery pack, reflective triangle, and warm clothing.
    • Organize supplies in labeled, easy‑grab bins and prioritize multipurpose, low‑cost items to stay within budget.

    Why You Need a Winter Emergency Kit

    winter emergency preparedness essentials

    When winter slams the door and the power goes out, you don’t want to be the person who realizes mid-shiver that their car has no blankets and their pantry has one sad jar of pickles. I’m telling you this because winter preparedness isn’t dramatic, it’s smart. You’ll appreciate tidy emergency planning when roads freeze, when heaters cough and die, when you’re boiling snow like a backpacking rookie. Picture the hiss of a kettle, your wool socks hugging your toes, a flashlight scissoring across the ceiling. You’ll calm neighbors, trade jokes, lend a spare charger, feel oddly heroic. Don’t wait for panic to teach you. Make simple choices now, practice once, tweak as life changes, and you’ll sleep warmer knowing you’ve handled the storm like a competent, slightly amused adult.

    Essential Supplies for Your Home

    survival essentials for comfort

    Okay, let’s talk gear: you’ll want basic survival essentials—water, nonperishable food, flashlights and batteries—stacked where you can grab them with mittened hands. I also keep cozy comforts handy, like warm blankets, a battery heater or hot packs, and a thermos that actually stays hot, because misery plus cold is just rude. Stick these in labeled bins by the door and under the bed, and you’ll thank me when the power goes out and you’re still sipping warm soup.

    Basic Survival Essentials

    Pick five things and you’ll feel like a genius; I promise I’m not exaggerating. You need basic first aid supplies, bandages, antiseptic, tweezers, and pain relievers—small things that calm panic and stop bleeding fast. Add reliable light: headlamp, flashlight, fresh batteries. Pack water, three liters per person for 72 hours, plus a stove or means to melt snow. Don’t skimp on food storage: canned goods, ready-to-eat meals, a manual can opener, and high-calorie bars that actually taste decent. Include a multi-tool, waterproof matches, and a warm emergency blanket that smells like nothing, but feels like rescue. Label everything, stash it centrally, tell loved ones where it lives. You’ll sleep easier, and I’ll accept the humble brag.

    Home Comfort Items

    Even if the power goes out and the house sounds like a slow, confused beast, you can make your space feel cozy instead of desperate—trust me, I’ve learned the hard way. You gather candles, but don’t just light them, place them behind glass lanterns so the draft won’t blow out hope. Layer seating with cozy blankets, toss extra throws on chairs and the floor, make nests where people actually want to sit. If you’ve got a wood stove, stock kindling, gloves, and a poker; if you don’t, seal drafts and use hot water bottles. Keep a shovel, salt, and a battery-powered fan for gentle air circulation when heaters kick back in. Comfort is practical, tactile, and surprisingly morale-boosting.

    What to Keep in Your Car Kit

    essential winter car kit

    When the weather turns traitor and your car decides to nap in a drift, you’ll want more than hope in the glove box; I’m talking practical, grab-and-go gear that makes you look like you planned ahead (even if you didn’t). You’ll pack smart car supplies and emergency tools, because cold is dramatic and you don’t need a meltdown. I keep a slim kit under the seat, warm and ready. Feel the crunch of snow, taste the metallic air—now act.

    • Compact shovel and ice scraper
    • Jumper cables and a portable battery pack
    • Warm blanket, hand warmers, high-calorie snacks
    • Flashlight, reflective triangle, multitool

    Grab it, slide it in, and drive like you meant to.

    Supplies for Pets and Vulnerable Family Members

    Pets and people matter, so don’t be the person who forgets the furry and frail when the storm shows up. Pack pet essentials: food in sealed bags, water, bowls, leash, litter or pads, favorite blanket that smells like home, and meds labeled with doses. For vulnerable family members, include prescription lists, extra meds, hearing-aid batteries, glasses, warm socks, and small comfort items that soothe—soft scarf, tea sachets, crossword book. Label everything, stash in easy-to-grab bins, and rotate supplies with expiration dates. I speak from spilled kibble and forgotten pills—learned the hard way. Practice quick check drills, call out names, make a grab list on the fridge. You’ll sleep better knowing everyone, two- and four-legged, is covered.

    Tailoring Your Kit to Climate and Household Needs

    • Insulation and heating packs for freezing nights, or shade tarps and extra water for heat.
    • More food, meds, and blankets if your household size is large, or compact kits for two.
    • Sturdy boots and shovels for heavy snow, sunhats and electrolyte mixes for heatwaves.
    • Backup power sized to devices you actually use, not the ones you wish you did.

    Plan smart, pack specifically, test once.

    Safe Storage and Rotation of Supplies

    Because you’ll actually need these things when snowdrifts or power outages show up, store your kit where you can see and grab it in under a minute — not buried in the attic behind boxes of college T‑shirts you swear you’ll wear again. Put items in clear storage containers with labels, so you can spot batteries, meds, and that weird can opener without excavating. Keep heavy stuff low, easy to lift when your hands are numb. I check dates monthly, swap frozen meals before they frost over, and write restock notes on the lid. Supply rotation is simple: first in, first out. Use small checklist cards, mark expiration dates in bright ink, and practice a quick grab — you’ll feel smarter than the storm, even if you’re wearing two mismatched gloves.

    Budget-Friendly Tips and Shopping Checklist

    You can build a solid winter kit without emptying your wallet, so grab a tote, squint at price tags, and hunt for the smart basics—water, a warm blanket, batteries, a flashlight, and ready-to-eat food. I’ll show you a shopping checklist that skips the fluff and nails the essentials, plus a few low-cost extras that actually make cold nights bearable (think hand warmers and a battery-powered lantern). Trust me, you’ll feel proud and a little smug when a storm hits and you’re the one offering hot cocoa.

    Low-Cost Essential Items

    Think of this list as your cold-weather lifeline — cheap, practical, and annoyingly effective. I’ll show you low cost alternatives and budget friendly options that don’t feel like compromise. You’ll get warm, dry, and fed without selling a kidney.

    • Mylar emergency blanket, compact and shiny, traps heat like a tiny tin foil hug.
    • Hand warmers, single-use or reusable, slip into gloves and make toes stop protesting.
    • LED headlamp with extra batteries, bright, hands-free, and annoyingly reliable.
    • Non-perishable high-calorie bars, dense, salty or sweet, melt-in-your-mouth energy on demand.

    I talk like a friend who’s been stuck on a snowy shoulder, I list what works, and I’m blunt: buy these, stash them, repeat.

    Smart Shopping Checklist

    While you’re staring at a cart full of shiny options and budget guilt, let me steer you straight: I’ve boiled this into a no-nonsense checklist that saves money and your backside. You’ll buy multipurpose winter gear, not impulse glitter. Pick a warm hat, insulated gloves, and layered socks that smell like victory not wool. Grab emergency tools: a hand-crank flashlight, compact shovel, scraper, and a sturdy tow strap. Compare prices, read one honest review, then walk away and sleep on it. Hit dollar aisles for zip ties, duct tape, and my beloved chemical warmers. Bundle purchases at one store to dodge shipping fees. Keep receipts in a labeled pouch. Repeat: essentials first, frills never. You’ll thank me later.

    Conclusion

    You might think a winter kit is overkill — I once did, until I sat in a silent, snowed-in car, breathing cold air and regretting my optimism. You’ll feel calmer with water, blankets, a flashlight, meds, and a shovel at hand, and your dog will thank you with sloppy kisses. Pack smart, label bins, rotate supplies, and test gear. Trust me, a little prep turns panic into a hot cup of saved sanity.

  • How Do I Fix Christmas Lights That Won’t Work

    How Do I Fix Christmas Lights That Won’t Work

    You’d think untangling lights is the worst part, until half the strand refuses to glow — ugh. Start by turning the power off, smell the plug for singed plastic, and feel along the cord for cuts; you don’t want sparks or surprises. I’ll show you how to swap bulbs, test fuses, and chase continuity like a detective, so you can stop glaring at your dark wreath and actually get that warm, ridiculous twinkle back — but first, check the outlet.

    Key Takeaways

    • Turn off power, inspect plugs and sockets for melted plastic, scorch marks, or exposed wires before touching the strand.
    • Test the outlet and reset breakers or try a known-good outlet to rule out a dead power source.
    • Replace loose or burned-out bulbs with exact-match bulbs and tighten sockets or adjust metal contact tabs.
    • Open the plug to check fuses and replace with identical voltage/amp-rated fuses if the filament is broken.
    • Use a multimeter to find open circuits, bypass bad sockets in series strands, or isolate sections to locate faults.

    Safety First: Power Off and Inspect for Damage

    inspect for electrical hazards

    Before you get anywhere near the ladder, turn the lights off and actually smell the plug—yes, I mean take a real second to do that. I want you to notice burnt plastic, scorched wire, that faint ozone tang; call it paranoia, I call it common sense. You’ll wear gloves, keep a dry cloth handy, and practice safety precautions like a boring superhero. Don’t touch frayed cords with wet hands. Look for melted sockets, exposed copper, or weird heat spots, they scream electrical hazards. I’ll say it plainly: if it smells wrong or looks wrong, stop. Take a photo, mark the strand, retreat like a sensible person, and get the right replacement or pro help. You’re cautious, not cowardly—good.

    Confirm the Power Source and Outlet

    check power source first

    If the strand won’t light, don’t blame the bulbs yet—check the plug and outlet first, please. I tell you this like a friend who’s tripped over extension cords, because the simplest power supply problem is sneaky. Unplug, glance at the prongs, smell for burnt plastic, then plug into a known-good outlet; you’ll feel the tiny click of certainty. Do a quick outlet inspection: test with a lamp, wiggle the plug, flip the wall switch, or use a tester if you’ve got one. Indoors or out, dry hands, steady footing. If the outlet’s dead, trace breakers, reset GFCIs, or try another circuit. No lights? Great—now you’ve ruled out the socket, one less mystery to haunt you.

    Check and Replace Burned or Loose Bulbs

    replace burned or loose bulbs

    Okay, here’s the plan: scan the strand with your eyes and fingers until you spot the dead or loose bulb, you’ll see a dark filament or feel a wiggle. Swap in an exact-match replacement — same size, voltage, and base — so the circuit stays happy, and don’t force it, snug it gently. If a bulb keeps popping loose, twist the socket slightly or bend the tiny metal tab inward, and grin while you pretend this is all part of the holiday charm.

    Locate the Faulty Bulb

    Because those strings usually die right when you’re five minutes from finishing, I’ll walk you through finding the guilty bulb without drama. You’ll need gloves, steady light, and patience. I use simple bulb identification tricks and basic troubleshooting techniques so you don’t overthink it.

    1. Scan the strand slowly, touching each bulb base, looking for darkened glass, loose fit, or a flicker.
    2. Wiggle suspects gently; a snug click often revives the circuit.
    3. Swap a suspect with a nearby working bulb to isolate the dead one, listen for tiny electrical pops.
    4. Use a battery tester or inexpensive bulb tester for a quick confirmation, no guesswork.

    You’ll find it, fast, with less cursing than expected.

    Replace With Matching Bulb

    Anyone who’s ever wrestled a string of stubborn lights knows the next step: swap the bad bulb for a matching one and watch the magic happen. You peel back the greenery, squint at the sockets, and pop the dead bulb out, fingers smelling faintly of plastic and pine. Match the bulb types — size, base, wattage — or you’ll get a sad flicker, or worse, nothing. Fit the new bulb snugly, don’t force it, just a confident push. Check color temperature too, unless you like a disco of cold blues and warm ambers. I talk like I’ve done this in a blizzard at midnight; you’ll laugh, you’ll curse, and then you’ll plug in a perfect, steady line of glow.

    Secure Loose Bulb Connections

    One quick trick I learned the hard way: a loose bulb can kill the whole string, so don’t just stare at the dark patch like it’s going to feel guilty and fix itself. I tug each bulb gently, smell for hot plastic, and squint for the tiny scorch mark. If it wiggles, you’ve found the culprit.

    1. Turn power off, remove bulb, inspect base for corrosion or a broken filament.
    2. Use bulb replacement techniques: swap with a matching bulb, test the string.
    3. For stubborn sockets, clean contacts with a cotton swab and a dab of rubbing alcohol.
    4. Re-seat firmly, don’t over-tighten, then plug in and watch the show.

    These troubleshooting tips save season and sanity, trust me, you’ll feel triumphant.

    Test Fuses in the Plug and Replace If Needed

    Okay, let’s pop the plug open and play detective. You’ll hear the tiny spring click, smell a faint plastic tang, and squint at two little glass fuses like tiny bones. For fuse testing, gently remove each fuse, hold it up to the light, and look for a broken filament or dark smear. I say “gently” because I’ve killed more fuses with brute force than any kid in a slapstick show. If one’s fried, that’s your culprit. For fuse replacement, match voltage and amp ratings stamped on the plug, slide the new fuse in, snap the cover closed, and test the string. If it still won’t glow, don’t blame the fuses—there’s more sleuthing ahead.

    Use a Bulb Tester or Multimeter to Find Faults

    Grab a bulb tester or multimeter and let’s get hands-on — you’ll test individual bulbs by swapping or probing each socket until the dead one fesses up. Then, run continuity checks along the wiring, listening for that satisfying beep or watching the meter needle after you clip on the leads. It’s fiddly, a little like detective work with tiny lightbulbs, but you’ll see exactly where the fault hides and you’ll feel smug when it’s fixed.

    Test Individual Bulbs

    Think of testing bulbs like detective work for your string lights — and yes, I’m the slightly frazzled sleuth holding a multimeter in one hand and a bulb in the other. You’ll learn bulb types, testing techniques fast, and I’ll walk you through poking, probing, and listening for life. Start with power off, pop a bulb, inspect filament or base, then test.

    1. Use a bulb tester for quick pass/fail — it lights the good ones.
    2. Set your multimeter to continuity or ohms, touch contacts, watch for reading.
    3. Wiggle the bulb gently, listen for loose bits, smell for burnt ozone.
    4. Replace dead bulbs with exact matches, snap them in, power up.

    You’ll feel victorious, like a tiny holiday surgeon.

    Check Wiring Continuity

    Since the lights that won’t glow usually blame a tiny break in the wiring, I start by tracing continuity like I’m following a trail of crumbs — only with a multimeter instead of enthusiasm — and you’ll do the same. Grab basic wiring tools, the bulb tester or multimeter, and a steady hand. Unplug, separate sections, touch probes to socket contacts, listen for the beep, feel the cool metal, see the display jump. If continuity testing fails, wiggle the cord, inspect crimps and tape, note any darkened insulation. Mark the broken spot, cut and splice with solder or twist-on connectors, seal with heat-shrink. Re-test, smile when the beep returns. It’s fiddly, but you’ll fix it, and brag to anyone who’ll listen.

    Locate and Repair Broken or Frayed Wires

    Alright — you’re about to play wire surgeon on your holiday lights, and yes, it’s going to be messier than you imagine. You’ll smell old plastic, feel sticky tape under your nails, and squint at tiny copper like a jeweler. Start by finding exposed conductors, melted spots, or crushed sections in the wire insulation.

    You’re about to play wire surgeon on holiday lights—expect sticky tape, tiny copper, and a bit of plastic smoke.

    1. Unplug, spread the strand flat, and run fingers along the cord to feel breaks.
    2. Cut out the damaged section, strip back clean insulation, exposing just enough copper to twist.
    3. Use solder or crimp connectors, then seal with heat-shrink tubing or quality electrical tape.
    4. Test the repair, flex it gently, and re-inspect after a few lights-on cycles.

    These repair techniques keep things safe and bright.

    Troubleshoot LED String Specific Issues

    Okay, you fixed the frayed cord and resealed that sad little splice — now the lights still blink like a disco possessed. I’ll walk you through LED troubleshooting techniques that cut the mystery fast. First, unplug, inspect each bulb for chips or loose bases, and swap suspected bad LEDs with known-good ones; you’ll hear tiny clicks, see gaps close, or spot a dull filament. Check the driver box for heat, bulging caps, or a burnt smell, touch it carefully, replace if warm and flaky. Wiggle the plug, test the fuse, and clean contacts with alcohol; corrosion kills glow. For String light maintenance, store strands untangled, avoid kinking, and label tested sets — you’ll thank me later when everything shines.

    Restore Continuity in Series and Parallel Circuits

    Alright, let’s get your lights glowing again — first, you’ll check each bulb and the inline fuse with a tester or multimeter, feeling for that tiny break like hunting for a missing button in the couch cushions. If a socket’s dead, you’ll bypass it, bridge the contacts, and listen for the satisfying click as continuity returns, picturing the whole string snap back to life. I’ll walk you through the quick tricks and safety checks, no fuss, just results — and yes, we’ll try not to electrocute the cat.

    Check Bulb and Fuse Continuity

    One quick trick before you start swapping bulbs like a sleep-deprived elf: check the continuity of the bulbs and fuse, because a single open circuit can turn a whole string into sad, dark garlands. I’ll walk you through it, gloves on, multimeter ready, no mystic electrician vibes required. Know your bulb types and check fuse ratings first, those labels matter.

    1. Set your multimeter to continuity, touch bulb contacts, listen for beep.
    2. Test each fuse, replace if open, match fuse ratings when buying spares.
    3. For series strings, find the open link by halving the string, isolate the dead section.
    4. For parallel sections, check individual branches, a bad bulb won’t darken others.

    You’ll feel victorious when everything lights up, promise.

    Bypass Faulty Sockets

    So you’ve found the dead bulb or blown fuse and you’re feeling like a holiday troubleshooting hero — nice work. Now, if a socket’s gone bad, don’t panic; you can do socket replacement or simple circuit bypassing to get the strand glowing again. First, unplug, then cup the cool plastic, pull the bulb, inspect the tiny metal tab; if it’s flattened or corroded, pry it up or swap the socket. For series strands you’ll bypass a faulty socket with a short jumper wire, careful to match polarity, and tape it snug. On parallel sections, isolate the bad socket and replace it outright. I’ll admit, it feels oddly satisfying, like dental work for decorations, and yes, you’ll hear that reassuring snap when continuity returns.

    Prevent Future Problems: Proper Storage and Handling

    If you want your lights to survive another holiday season without turning into a sad, tangled necklace, treat storage like a little ritual, not an afterthought—I do a quick inventory the moment the last bulb comes down. You’ll thank me next year. Proper storage starts with clean, dry strands and careful handling; wipe sockets, remove broken bulbs, and let everything air-dry. Then pack smart.

    Treat holiday lights like a ritual: clean, dry, coil neatly, label, and bin them—your future self will thank you.

    1. Coil each strand on a sturdy spool or cardboard, tuck ends into the loops.
    2. Label by length and location, a sharpie saves time and sanity.
    3. Use plastic bins with dividers, keep moisture and critters out.
    4. Store in a cool, dark spot, away from heat and heavy boxes.

    I joke, but this tiny ritual prevents untangling drama and blown fuses.

    When to Repair, Replace, or Call a Professional

    When’s it worth wrestling with a stubborn string of lights, and when should you admit defeat and call in a pro? You’ll try a quick fix first — squinting at bulbs, tugging gently, testing fuses — because cheap thrills beat hiring help. Use repair timing as a rule: if one or two bulbs fail, you can patch them in minutes; if many bulbs are dark, sockets smell burned, or wires fray, don’t keep betting on luck. If your ladder work makes you dizzy, or the lights are on a tall roofline, call for professional help; electricians bring tools, confidence, and insurance, plus they hate heights less than you do. I’ll grumble, you’ll sigh, but safety wins every time.

    Conclusion

    Think of your string of lights as a grumpy old rowboat, and you’re the stubborn captain who won’t quit till it floats. You turn off the power, sniff for burnt plastic, swap bulbs like trading cards, poke fuses, and hum with a multimeter until continuity purrs. If LEDs act picky, you pry open the problem gently. You’ve fixed more than wires—you’ve rescued holiday glow. If it’s beyond you, call a pro and hand over the oars.

  • How Do I Remove Tree Sap From Carpet

    How Do I Remove Tree Sap From Carpet

    Most people don’t know that sap actually dissolves in alcohol, not just soap and water, so you’ve got a secret weapon in the kitchen or medicine cabinet. I’ll show you how to freeze, scrape, and dissolve that sticky mess without ruining your carpet—think ice cubes, a dull butter knife, and a careful dab of rubbing alcohol—so you can act fast, avoid spreading it, and still feel a little smug about the rescue.

    Key Takeaways

    • Blot fresh sap with a dry cloth, avoid rubbing, and contain the area with paper towels to prevent spreading.
    • Harden fresh sap with ice in a sealed bag, then gently lift with a dull plastic scraper or spoon.
    • Soften old or stubborn sap with warm cloth or hair dryer, test a hidden spot first to avoid damage.
    • Dab a solvent (rubbing alcohol, citrus cleaner, or vegetable oil) sparingly, work from edges inward, and lift softened sap.
    • Clean the spot with mild detergent and water, blot dry, sprinkle baking soda if needed, then brush the nap.

    Quick First-Aid Steps to Prevent Sap From Spreading

    prevent sap spreading quickly

    Alright—first things first, don’t panic. You see the goo, you act fast. I’ll walk you through a quick response that’ll keep the mess from spreading, and yes, you’ll look capable while doing it. First, blot gently with a dry cloth, don’t rub — rubbing invites a bigger fight. Fold the cloth, tap, lift. Next, create a perimeter with paper towels so it won’t creep outward; think tiny barricade, dramatic but useful. Scoop any thick globs with a dull edge, careful not to grind it in. Stay calm, keep your breath steady; sap smells faintly piney, stick-to-your-fingers sticky, and obnoxiously stubborn. Your steady moves will prevent damage, save carpet fibers, and earn you a small, private victory dance.

    Tools and Household Ingredients That Safely Dissolve Sap

    safe sap removal tools

    If you want sap gone without nuking the carpet, you’ll need the right tools and a few household heroes, and yes, I’ve learned most of them the sticky way. I keep a small kit: soft-bristled brush, blunt knife, microfiber cloths, and a plastic scraper — cleaning tools that won’t shred fibers. For solvents, reach for rubbing alcohol, citrus-based cleaners, or a dab of vegetable oil; these natural solvents soften sap without harsh fumes. Test a hidden spot first, don’t guess. Warmth helps, so a warm (not hot) cloth loosens residue. Work from edges inward, lift, don’t rub. I talk you through choices like a grumpy chemist who loves carpets; practical, tidy, and slightly apologetic for my past sticky fingers.

    Step-By-Step Removal Methods for Fresh Sap

    act fast spot treat

    You’ll want to act fast when sap lands on your carpet, so first blot what you can and freeze the rest to snap it off like a stubborn sticker. Then, I’ll walk you through a careful solvent spot-treat—just a dab, a blot, and patience—so you don’t spread the mess or scorch the fibers. Trust me, we’ll make the stain disappear without turning your living room into a chemistry lab.

    Blotting and Freezing

    Once sap lands on your carpet, it acts like a sticky little criminal scene—tacky, shiny, and oddly stubborn—so I’m going to walk you through two of the fastest fixes: blotting and freezing. First, blotting techniques: grab a paper towel, press down, don’t rub — you’ll smear evidence. Peel up layers, switch to a clean square, and lift until no more transfers. You’ll feel the tack lessen, like peeling gum off a shoe. Next, freezing methods: tuck ice cubes in a sealed bag, press onto the sap until it hardens, then chip gently with a spoon. It snaps and flakes away, satisfying as cracking a tiny fossil. If bits remain, repeat; be patient, and don’t panic — it comes off.

    Solvent Spot-Treat

    While blotting and freezing grab the low-speed wins, solvent spot-treats are your power move, the fast-acting chemists that actually dissolve fresh sap instead of just smacking it around. I walk you through solvent types, from rubbing alcohol to commercial adhesive removers, even nail polish remover when you’re desperate, and I swear they work like tiny scalpels. Test a hidden patch first, dab, don’t drench. Use a cotton swab or a clean cloth, apply in small circles, lift softened sap with a plastic scraper, then blot. Rotate tools when they’re gunky. Ventilate, wear gloves, and don’t mix chemicals—this isn’t a chemistry set. Finish with mild detergent and water, rinse, pat dry. You’ll feel smug, and a little like a sap assassin.

    Techniques for Older or Hardened Sap Stains

    Okay, so that sap’s been baking in your carpet like a stubborn little fossil, and we’re not pretending a sniff and a scowl will fix it. First, you’ll soften it with gentle heat so it loosens, then carefully scrape and lift the softened bits, and finally treat what’s left with a solvent, using gloves and good ventilation so you don’t turn the living room into a chemistry lab. I’ll walk you through each step, with exact motions, timing, and safety notes, and yes—I’ll try not to singe your socks.

    Soften With Heat

    Heat is your friend here, so don a pair of gloves and get ready to loosen that rock-hard sap like you’re ungluing a stubborn sticker; I’ve burned a shirt trying other methods, so trust me when I say gentle warmth beats brute force. You’ll use heat application to soften sap, not melt your carpet, so test a hidden patch first. Grab heat tools — a hair dryer on medium, or a handheld steamer if you’re fancy — hold them a few inches away, feel the resin become tacky, watch it glisten, don’t scorch. Stay mobile, move heat in small circles, pause, press a clean cloth to lift softened goo, repeat until it yields. It’s patient work, like coaxing a cat off the couch.

    Scrape and Lift

    Grab a dull knife or a plastic scraper and get ready to play surgeon on that stubborn, rock-hard sap — I’ll be honest, it’s not glamorous, but it works. You’ll lean in, squint, and pretend you’ve got steady hands. Use small, controlled scraping techniques, angle low, and chip away in thin layers so you don’t shred fibers. You’ll feel the scrape, hear the tiny clicks, and smell old pine—nostalgic, oddly guilty.

    1. Thin shavings, like sanding lotion.
    2. Crusty edges lifted, like peeling paint.
    3. Tiny granules, picked clean.

    When the bulk’s gone, switch to gentle lifting methods with a soft brush and vacuum, coaxing residue free. Don’t rush; patience saves carpet and dignity.

    Use Solvent Safely

    If you’re staring at an old, gummy sap ring and your scraping game left a sticky halo, it’s time to bring in a solvent — but do it like a careful chemist, not a reckless pyromaniac. I’ll walk you through solvent types, what to try first, and the safety precautions you can’t skip. Pick rubbing alcohol or citrus-based remover for polyester blends, or isopropyl for tougher spots, test an out-of-the-way square, dab don’t pour, watch the color change like a tiny drama. Vent the room, glove up, keep kids and pets out; that’s basic common sense, not fanfare. Blot with white cloth, repeat, then rinse with warm soapy water. If it smells like regret, stop and call a pro.

    Post-Removal Carpet Care and Deodorizing Tips

    Once you’ve wrestled the sap out of the pile, don’t just walk away—your carpet still needs a little TLC, and I’ll show you how to give it that homecoming glow. You’ve done the hard part, now protect fibers with smart carpet maintenance, and tackle odor elimination so the room smells like victory, not sticky trees. I’d do this next:

    Don’t stop after the sap — give your carpet TLC: deodorize, fluff fibers, and let the room breathe.

    1. Blot with mild detergent and water, then press a dry towel to lift moisture and fluff fibers.
    2. Sprinkle baking soda, wait an hour, vacuum thoroughly — it eats smells and looks like magic.
    3. Brush the nap with a soft brush, restore direction, air the room with a fan or open window.

    You’ll end up with fresh texture, no ghost stains, and a carpet that forgives your outdoor ambitions.

    When to Call a Professional Cleaner

    You’ve fluffed, deodorized, and probably bragged to a friend about your amateur sap-extraction skills, but there are times you should wave the white flag and call in pros. If the stain’s old, dark, or sticky like glue, that’s a clear when to consult moment. If your DIY solvents leave rings, smell harsh, or fade fibers, stop, breathe, and phone someone who knows carpets. Signs for professional help include residue that won’t lift, spread into padding, or reappears after drying. Also call if you’ve got delicate wool, antique rugs, or expensive padding—don’t gamble. Tell the cleaner what you used, show the exact spot, and ask for a quote. They’ll test, extract, and rescue your carpet without drama.

    Conclusion

    Alright, you’ve got this. I’ll freeze or blot, scrape the big globs, then dab rubbing alcohol until the sap gives up the ghost, and finish with mild soap and water so the carpet smells like normal again. I’ll keep a paper towel perimeter, speak softly to the stain, and call a pro if it looks hopeless — sometimes you gotta know when to fold ’em. It’s messy, but doable, and oddly satisfying.

  • How Do I Store Christmas Decorations Properly

    How Do I Store Christmas Decorations Properly

    You’ve survived another merry chaos of lights and glitter, so let’s get those decorations tucked away like a pro — no sad tangled lights, no shattered glass, and yes, fewer trips to the attic. I’ll show you how to clean, pad, label, and stack everything so it’s ready and un-gnarly next year; think plastic bins, wrapped ornaments, wound lights, and a flat-proof plan for wreaths. Stick with me and your future self will thank you — loudly.

    Key Takeaways

    • Inventory and checklist all decorations, quarantining damaged or smoky items for cleaning or disposal before storage.
    • Wrap fragile ornaments individually with soft cloth or tissue and use padded dividers in clearly labeled boxes.
    • Coil and secure string lights on cardboard spools or reels, test bulbs, and store cords untangled in a dry place.
    • Store wreaths flat in round containers or oversized boxes and loosely coil garlands, using pegboards or tall bins to avoid crushing.
    • Use sealed plastic bins when possible, add cedar/moth repellents, photograph damaged items, and inspect storage monthly.

    Preparing Decorations Before Packing

    decoration packing preparations checklist

    Even though it feels like sacrilege to box up the twinkle lights, you’ve got to start by taking stock—so I do a quick inventory, squinting at tangled garlands like they’ve offended me personally. You’ll pull out a decorations checklist, jotting down strands, wreaths, and oddball items you forgot existed. I tell you what to toss: broken hooks, melted candles, anything smelling like last year’s smoke. Lay things out by type, feel the plastic, metal, fabric under your fingers, and decide what needs special packing materials. Wrap fragile-looking bits in soft cloths, coil lights loosely to avoid stress, label bins loud and proud, and promise yourself a reward once the last box is sealed.

    Protecting Fragile Ornaments

    sort pad label protect

    You’ll want to sort ornaments by type first, stacking glass with glass, plastic with plastic, so nothing surprises you like a broken bulb in December. I stuff padded dividers and soft tissue between each piece, hear the muffled clink stop and breathe easier — I’m not proud, but it works. And label the boxes clearly, front and top, because when you’re hunting for the star at midnight you’ll thank both of us.

    Separate by Ornament Type

    1 thing I learned the hard way: fragile ornaments hate being lumped together. You’ll sort by ornament categories, not by whatever box is nearest, and you’ll think about display preferences as you pack. Put glass balls with glass, wooden figures with wood, and sentimental glitter baubles in their own corner — you’ll thank me when you unpack. Handle each piece like it’s auditioning for a museum, breathe, and tuck it into a soft nest (tissue, cloth), label the cluster, and note where it hangs on the tree. Talk to yourself if you must — “don’t drop Grandpa’s angel” — I certainly do. When you separate intentionally, you cut chaos, save memories, and make decorating a calmer, merrier ritual next year.

    Use Padded Dividers

    Okay, so you’ve separated the glass from the wood and saved Grandpa’s angel from a tragic carpet landing — nice work. Now, you’ll protect those fragile favorites with padded boxes and ornament trays, and yes, you’ll look like a professional elf. I talk you through it, quick and practical.

    1. Line each compartment with soft fabric, felt, or bubble wrap, press gently, no squeezing.
    2. Nest ornaments snugly in ornament trays, stems up, so nothing knocks against glitter or paint.
    3. Use padded boxes for oddly shaped pieces, cushion gaps with tissue, foam, or socks.
    4. Stack thoughtfully, heavier boxes below, lighter on top, give each item breathing room.

    You get safety, easy unpacking, and fewer tears next December.

    Label Boxes Clearly

    If you want to avoid a December scavenger hunt and the horror of crushed baubles, label boxes clearly before they go into storage. I tell you this while I dust glitter from my sweater. Use simple labeling techniques: write contents, room, and fragility level on the lid and side, big and bold. Color coding helps—red for delicate glass, green for lights, blue for wreaths—so you can spot the right box at a glance. Tape a quick inventory inside the lid, I promise you’ll thank me. Add a “handle with care” sticker, and sketch a tiny ornament if words fail you. When you lift, you’ll feel secure, not nervous. Less guessing, more cocoa. That’s smart storage, with fewer shattered memories.

    Organizing and Storing String Lights

    tame holiday light chaos

    Because you’ll curse less next holiday if you tame your light chaos now, let’s talk string lights like grown-ups—well, slightly tipsy grown-ups who know their way around a spool. I’ve wrestled tangles, blamed the cat, and learned fast. You’ll thank me when bulbs don’t snap.

    Tame your holiday light chaos now—because fewer curses, fewer snapped bulbs, and slightly tipsy spool mastery await.

    1. Wrap each strand on a cardboard spool or plastic reel, secure ends with a twist tie, label for length and color.
    2. Coil mini lights on a hanger or tube, slide into a clear bin, so you can see twinkles without excavating.
    3. Test bulbs and replace before storing, tape spare bulbs to the cord for easy rescue.
    4. Store in a dry, cool bin, keep cords untwisted, stash extension cords together.

    These light storage solutions are simple, smart, and almost cathartic.

    Compact Storage Solutions for Wreaths and Garlands

    Alright, we’ve tamed the light jungle, so let’s wrestle wreaths and garlands next — they look harmless until you try to shove a pine ring into a shoebox and hear it cry. I’ll show you compact tricks that save space and sanity. Use flat, round wreath storage containers or an oversized pizza box, line with tissue, tuck fragile ornaments between branches, and label like you mean it. For garland organization, coil loosely, secure with soft ties, and hang on a pegboard or inside a tall bin to avoid crushing scent and needles. If you’re feeling smug, store scented pieces separately in breathable bags. You’ll open them next year smelling of cedar triumph, not crushed plastic regret.

    Storing Trees and Tree Accessories

    One good rule: treat your tree like a divorcée — give it space, respect, and a decent place to hang its hat. I tell you, you’ll thank me when unboxing feels like gentle reunion, not archaeological dig. For tree storage and ornament organization, follow this quick checklist:

    1. Disassemble branches, wrap each section in breathable tree bag or old blanket, label wraps with position.
    2. Store trunk vertically, off concrete, on wood blocks; keep dry, cool, and away from pests.
    3. Pack lights coiled on hooks or reels, tested before you tuck them in their box.
    4. Keep ornaments cushioned in egg cartons or padded dividers, layer tissue between, avoid crushing.

    You’ll save time, sanity, and a few baubles — and that’s worth bragging about.

    Labeling and Inventory Strategies

    Okay, now that your tree’s bundled like a retired movie star and the ornaments aren’t playing Jenga, let’s talk labels and inventory — the bit that makes next year less archaeology and more déjà vu. I tell you, start with an inventory checklist, simple, tactile, a sheet you can thumb through while you tap boxes closed. Write box contents, room destination, fragility level. Use clear labeling techniquesbig letters, color-coded tape, durable tags you can read in a dim attic. Snap a phone photo of each box’s contents, I do it, because memory lies. Tape tags to lids and sides, so you can scan without unpacking. Store the checklist digitally, too; I email mine to myself. You’ll thank me next November.

    Seasonal Maintenance and Pest Prevention

    Before you stash the boxes, give each ornament a quick once-over — wipe off dust, check for cracks, and flake away dried garland glue with a soft cloth so nothing surprises you next year. I’ll say it straight: pests love cozy clutter, so seal cardboard seams with tape, swap to plastic bins when you can, and tuck in cedar blocks or moth-repellent sachets to keep critters out. You’ll thank me when you open pristine lights and unchewed ribbons, and I’ll take a tiny bow for the nagging that saved your tinsel.

    Inspect and Clean Items

    Roll up your sleeves and get your hands dusty — we’re about to play backyard detective with your decorations. You’ll unfold boxes, sniff for must, and follow a simple inspection checklist, because neglect is how spiders throw parties. Use gentle cleaning techniques: soft brush, damp cloth, mild soap for plastic, vinegar mix for glass. Handle tinsel like confetti with a sense of urgency.

    1. Spot-check for mold, tears, rust.
    2. Dust bulbs, polish metal, fluff garlands.
    3. Replace burnt bulbs, mend loose hooks, photograph damaged items.
    4. Quarantine funky pieces, air them outside, note repairs.

    I’ll narrate, you’ll act. We’ll make everything sparkle, save memories, and avoid surprises next season — you’ll thank me, probably.

    Seal and Deter Pests

    You did the dirty work—cleaning, fixing, airing out the funky stuff—and now you’ve got tidy boxes and a victory-scent of vinegar in the air. Now seal and deter pests. I tell you straight: nothing ruins holiday magic like mice nesting in tinsel. Use sturdy storage containers, airtight bins, or heavy-duty plastic tubs with tight lids. Add pest deterrents—like cedar blocks, silica sachets, or non-toxic moth strips—inside, not touching delicate ornaments. Wipe rims before closing, tape seams if you’re extra paranoid, label everything bold and obvious. Store off concrete, on shelving, away from heat and damp. Check every month, like a nosy neighbor. If you find trouble, isolate, clean, and replace the container. You’ve got this.

    Conclusion

    You’ll thank yourself next year when you open a crisp bin, sniff the faint pine of last season’s wreath, and find every bulb wrapped and labeled, not a tangle in sight. I once shoved lights in a drawer and learned the hard way—don’t be me. Do the inventory, pad the glass, spool the cords, seal the boxes, and check monthly. Keep it simple, keep it smart, and enjoy the surprise of a stress-free holiday.