Author: Jordan C

  • How Do I Organize After the Holidays

    How Do I Organize After the Holidays

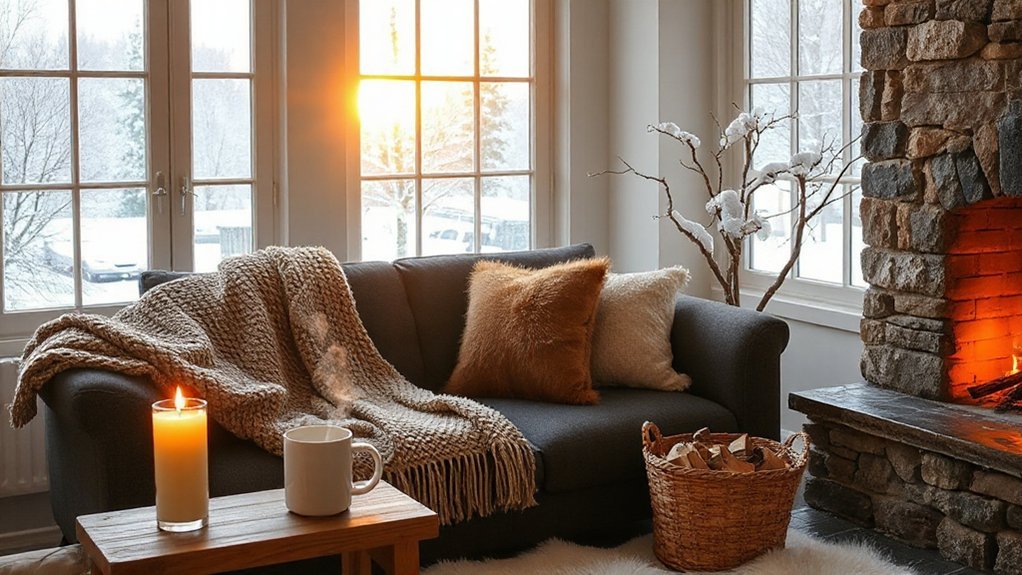
    You’ve got glitter in the sink, half a cinnamon roll on the counter, and eight mismatched strings of lights—so let’s tame the chaos. Start by sorting into keep, toss, and donate piles, stash fragile bits in labeled bins, and roll ribbons onto spools so they don’t look like a hedgehog’s nest; I’ll show you the two-minute tricks that save hours, but first—what’s the one thing you dread putting away?

    Key Takeaways

    • Sort everything into keep, donate, or toss piles and set a timer to stay focused.
    • Pack decorations by category in labeled clear bins, protecting fragile items with tissue or bubble wrap.
    • Coil and secure holiday lights, then store them separately to prevent tangles and damage.
    • Create a single “new gifts” box and a donation bag by the door for immediate processing.
    • Reset routines: five-minute nightly sweeps and a quick seasonal inventory to prevent future clutter.

    Quick Triage: Sort What Stays, Goes, or Gets Donated

    declutter through keep toss

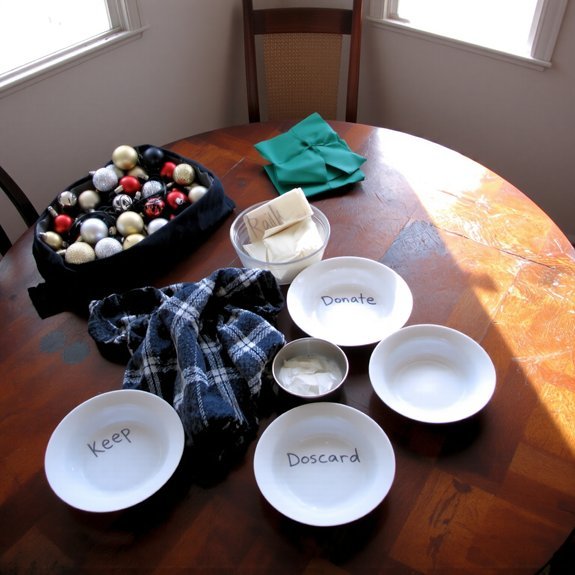
    If you’re staring at a mountain of wrapping paper and mismatched mugs, don’t panic—grab a big box and let’s play judge. I’ll talk you through quick triage: keep, toss, or donate. You touch each item, feel the weight, listen for usefulness; if it jingles memories but never gets used, it’s suspect. Use clear decluttering strategies—set timers, make three piles, be ruthless. For donation options, I’ll nudge you toward local shelters, thrift stores, or online groups that actually want your stuff; box it, label it, schedule a pickup. Say a tiny goodbye, do a victory lap with the empty counter, and move on. You’ll feel lighter, the kitchen smells fresher, and you’ve earned that celebratory snack.

    Efficient Gift Wrap and Ribbon Storage Solutions

    organized gift wrap storage

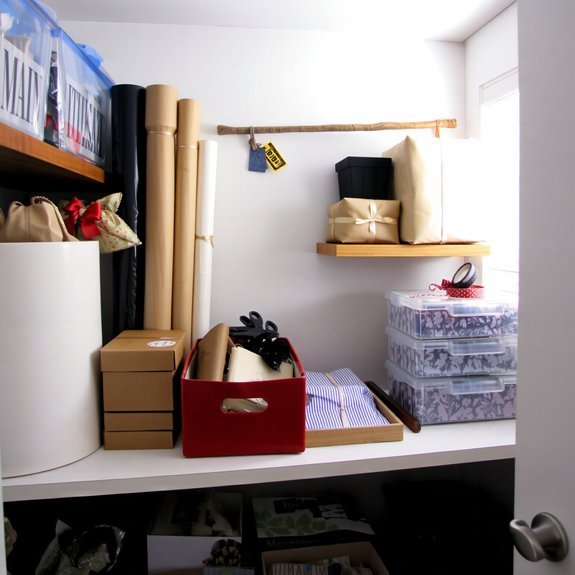
    Alright, you’ve boxed up the donate pile and given the junk drawer a stern talking-to—now let’s wrangle the riot of rolls, ribbons, and rogue bows. You grab the kraft paper, feel the crinkle, then sort by size and pattern, stacking flat rolls vertically in a tall bin so they don’t sag. For ribbon organization, I swear by a shoe box with dowel rods threaded through spools — pull, cut, and no drama. Clear zip bags hold leftover bows and tags, labeled with a Sharpie, because trust me, memory lies. Use a tension rod in a closet for wrapping paper tubes, and a shallow drawer for tape, scissors, and extra gift wrap—everything visible, everything ready, gift-giving made smugly simple.

    Storing and Caring for Seasonal Decorations

    organize and protect decorations

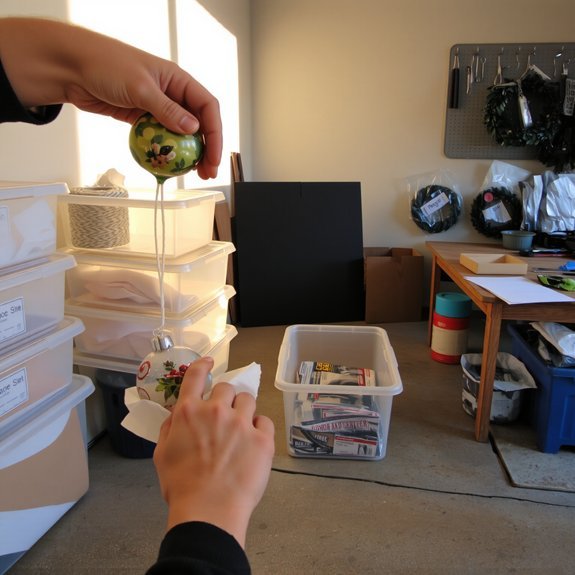
    You’ll want to sort decorations by type first — lights in one box, wreaths in another, ornaments together so you’re not rooting through the chaos next year. Wrap fragile pieces in tissue or bubble wrap, tuck them into divided bins so the glass ornaments don’t clink like maracas, and stash lights loosely coiled to avoid kinks. Label every container clearly, slap a season and a room on the lid, and thank me later when decorating feels like a party, not a treasure hunt.

    Sort by Decoration Type

    One box, one category, no excuses—let’s do this. You grab a tote, I grab the tape, and we attack ornament organization like pros with foam peanuts. Put glass bulbs together, wooden ornaments in a bin, and felt pieces in another; you’ll thank me when you’re untangling next year. For strings of lights, coil each strand neatly, secure with twist ties, and label the plug type—light storage that spares you curses in November. I’ll joke about my tangled disaster from last season, you’ll roll your eyes, we’ll laugh, then actually label. Stack labeled boxes where you can reach them, not where they’ll collect dust and regret. Quick, tactile, satisfying—this is organizing you can feel, see, and actually use.

    Protect Fragile Items

    Good—you’ve got ornaments sorted by type, labeled boxes stacked like tiny monuments to order. Now protect the fragile ones. You’ll wrap each bauble in tissue, then bubble wrap, snug as a burrito, no rattles allowed. Use cardboard dividers for glass, or repurpose egg cartons for small treasures; I confess, I’ve hugged a carton too. For fragile item protection, don’t skip padding the box bottom, then layer, then pad again. Close lids, seal with tape, and mark “fragile” in big letters — you’ll thank me when nothing shatters. Think humidity: silica packets keep metal from tarnishing, cedar blocks deter moths. Store boxes off concrete, on shelves or pallets, in cool, dry spots. These safe storage solutions save heartbreak and cleanup.

    Label Storage Containers

    I keep a Sharpie within arm’s reach like it’s a tiny sword — because labeling saves you from three Saturdays of excavating holiday chaos. You grab bins, feel the cool plastic, hear the lid snap, and write with confident strokes. Pick a label design that’s bold, legible, and a little fun — color-code by season or fragility, add a date, or sketch a tiny ornament. Try varied storage options: clear plastic tubs for visibility, vacuum bags for fabric, cardboard with reinforced bottoms for bulky pieces. Tape labels to lids and sides, and note contents and location, so you don’t have to open every box. Your future self will thank you, probably with coffee, maybe a parade of relieved sighs.

    Handling Sentimental Items Without the Stress

    If you’re anything like me, sentimental stuff sneaks up on you — a chipped ornament, a faded concert ticket, a mug that survived three moves and two exes — and suddenly your closet feels like an emotional obstacle course. You’ll want a system, so pick small bins for sentimental storage, label them honestly, and treat this like emotional decluttering, not a funeral. Touch each item, ask one clear question: does this spark joy or useful memory? Keep a display box for the wow pieces, a photo file for the bulky stuff, and a donate pile for things you’ll never miss.

    • Photograph oversized items, keep the picture instead.
    • Set a 30-second timer per object.
    • Limit keepsakes to two boxes per person.
    • Write a one-line story on each tag.

    Cleaning and Resetting Entertaining Zones

    Let’s tackle the entertaining zone like a short, furious party clean-up—because you’re not wading through confetti forever. You spot sticky counters, a stack of glasses, and that one tapas bowl pretending it left. I grab a trash bag, you clear plates, we hustle. Follow a quick cleaning checklist: clear surfaces, soak pans, wipe sticky spots, polish glassware, sweep crumbs. Put entertaining essentials back where they belong—napkins, serving spoons, that clever tray you love. Open a window, spray citrus cleaner, breathe like you aren’t exhausted. I joke about my apron of shame, you laugh, we scrub. Finish with a fresh cloth, candles reset, playlist queued for next time. The room looks ready, calm, and slightly smug.

    Recycling and Disposing of Holiday Waste Responsibly

    You’re going to sort recyclables right away, emptying soda cans, rinsing jars, and stacking cardboard before it turns into a sad soggy mess. Treat wrapping paper like a picky guest—keep the clean, uncoated stuff for recycling, stash glittery or taped pieces for trash, and yes, I grumble about ribbon too. When it comes to your tree, let’s be practical: bundle or chip it for curb pickup, or take it to a drop-off so needles don’t carpet the living room for months.

    Sort Recyclables Immediately

    After the last guest leaves and the paper confetti is still prickling under your socks, grab three boxes and get to work—now. I make this dramatic because you’ll thank me later; you’ll also feel oddly heroic. Sort recyclables immediately: rinse, squish, separate. Keep food scraps out, lids on jars, and foil flattened. These recycling tips help you avoid the sad, smelly bin pileup and score eco friendly options for curb pickup.

    • Label each box: glass, paper/cardboard, mixed containers.
    • Rinse greasy plates and cans quickly, water saves headaches.
    • Crumple cans, flatten bottles, tuck lids inside.
    • Check local rules on contaminated items before you toss.

    Do it fast, cleanly, with a smug sip of tea.

    Handle Wrapping Paper Properly

    You’ve tackled the recycling mountain, so now let’s face the glittery beast: wrapping paper. I’ll be blunt — not all paper wants to be recycled. Tear off tape, pull out bows, and smooth flats into a pile. If it’s shiny, metallic, or has plastic, it’s trash, not bin-ready. For simple paper, crumble a test ball; if it stays wadded, recycle it. Keep a small bin by the couch, you’ll thank me later. Consider eco friendly alternatives next year — fabric wraps, newspaper art, or reusable bags that look clever, not like charity chic. Say the line out loud: “Less glitter, more sense.” You’ll free space, skip guilt, and still look like a gift-giving pro.

    Dispose of Live Trees

    Let’s drag that piney beast outside and give it a proper send-off — not the curbside shame of needles scattered like confetti. You’re done with sap-smudged hands, tangled lights, ornaments clinking like tiny regrets. Don’t just abandon it; plan tree disposal, pick a spot, and feel a little victorious as you wrestle the trunk into the truck.

    • Call the city, ask about curbside pickup, or find drop-off sites with clear recycling options.
    • Trim the stand, shake loose the needles, wrap the tree in twine for safer handling.
    • Turn branches into mulch, feed garden beds, or make a rustic bird shelter.
    • If all else fails, barter: offer wood chips to a neighbor, there’s pride in being useful.

    You’ll breathe easier, the yard will forgive you.

    Creating a Post-Holiday Storage System That Works

    If you want holiday chaos to stop following you like glitter on a sweater, we’re going to build a storage system that actually behaves; I’ll talk through the bins, labels, and tiny rituals that save holidays and sanity, while you get to feel smug in a clean living room. Start by sorting: keep the cherished, toss the broken, donate the never-used. Choose clear bins for lights, opaque for fabric, small boxes for delicate ornaments. Label loudly, with a marker that actually shows up at midnight when you unpack. Stack by frequency: seasonal, occasional, sentimental. Wrap fragile items in tissue that smells faintly of cedar, tuck tags inside. Set a five-minute “put-away” ritual after every event. These storage solutions and organization tips will keep next year calm, promise.

    Resetting Routines and Spaces for the New Year

    Once the twinkle lights are tucked away and the last crumb of fruitcake has been bravely disposed of, it’s time to reset — for real — so your home stops feeling like a holiday hangover. You’ll tweak routines, nudge habits, and reclaim surfaces that hosted cookie trays and gift chaos. I tell you what to do, you do it—simple.

    • Map morning and evening routine adjustments, noting one small change at a time.
    • Clear a staging zone, sweep crumbs, wipe sticky counters, reclaim flat surfaces.
    • Reassign drawers and bins for seasonal gear, label boldly, test for two days.
    • Optimize closet and shelf layouts for flow, move frequently used items forward.

    You’ll sense order, breathe easier, and actually find your keys without dramatics.

    Preventing Future Holiday Clutter With Simple Habits

    Because you don’t have to wait for next December to decide holiday chaos won’t become a permanent roommate, I’m going to show you a few tiny habits that stop clutter in its tracks — no heroic clean-fests required. I’ll walk with you through pocket-sized rituals, things you’ll actually do. First, a five-minute evening sweep: touch three surfaces, toss one wrapper, rehome one ornament. Say it out loud, like a tiny spell. Next, label a single box for gifted items, smell of cinnamon still clinging to ribbon, and drop new extras there immediately. Keep one donation bag by the door, flopping open like a patient dog. These holiday habits build gentle clutter control, they save your sanity, and yes, you’ll thank me while sipping leftover eggnog.

    Conclusion

    You stood amid glitter and guilt, hands full of tinsel and triumph. I tell you: keep the sparkle, ditch the junk. Toss the broken bulbs, box the favorites, tuck ribbons like little promises. Breathe—cold air, pine scent, coffee mug warm in your palm—then label, stack, slide bins to the back shelf. You’ll stumble, laugh, learn. The room will calm, you’ll feel lighter, and next year’s mess will meet a smarter you.

  • How Do I Make My Home Cozy for Winter

    How Do I Make My Home Cozy for Winter

    You want warmth, you want comfort, you want your place to feel like a hug. Picture sinking into a sofa piled with wool throws, amber lamp light pooling on the rug, cedar and orange simmering in the air—now imagine doing that every night without a cape or a miracle. I’ll walk you through simple swaps—textiles, lighting, scents, little layouts—that turn chill into cozy, and yes, you’ll want to start tonight.

    Key Takeaways

    • Layer textiles like wool blankets, faux-fur throws, and rugs to add warmth and soft texture throughout rooms.
    • Create layered lighting with warm bulbs, dimmers, table lamps, and fairy lights for a soft, inviting glow.
    • Introduce cozy scents such as cedar, vanilla, and orange via candles, diffusers, or seasonal room sprays.
    • Arrange furniture into intimate conversation nooks with clear pathways, added throws, and a nearby lamp or tray.
    • Add seasonal greenery, pinecones, and woven baskets to bring natural texture, scent, and visual warmth.

    Layer Your Textiles for Instant Warmth

    layered textiles for warmth

    If you want a room that feels like a hug, start with textiles—because honestly, blankets and rugs do the heavy lifting. You’ll layer throws, swap thin curtains for heavier ones, and scatter cushions like confetti; I promise it’s fun. Try bold textile combinations, mix wool, cotton, and faux fur, feel the contrast under your hand. Add a chunky knit on the sofa, a low-pile rug by the bed, warmth layers where you sit and where you walk. Tuck a folded throw over an armchair, drape a plaid across the foot of the bed, fluff pillows until they protest. You’ll notice sound softening, footsteps quieter, the room instantly cozier; you’ll grin, realize you did it, and want to stay.

    Master Soft, Layered Lighting

    soft layered ambient lighting

    Want to sit in a room that feels like a soft movie set instead of a hospital wing? You dim the overhead, swap harsh bulbs for warm ones, and let ambient lighting do the heavy lifting. I tell you, fairy lights and low lamps are magic—place a floor lamp behind your sofa, a table lamp near your favorite chair, and a string of lights tucked into a bookshelf. Mix temperatures, not extremes; soft amber bulbs, a cool task lamp for reading. Add festive accents sparingly—a glowing garland, a tiny lantern—so it feels seasonal, not tacky. Move around the room, test shadows, adjust height. You’ll notice how layers create depth, calm breath, and make even Monday nights feel intentionally cozy.

    Bring Warm Scents Into Every Room

    cozy scents for every room

    Three scents, properly placed, will make your whole house feel like it’s wearing a blanket. I mean it — pick three cozy notes: cedar, vanilla, and orange. You’ll light scented candles in living areas, low and safe, letting wick-light mingle with evening chatter. In bedrooms, you’ll diffuse essential oils — a few drops of lavender to hush the mind, bergamot to lift it. In bathrooms, swap in a spicy clove room spray, quick and bold. Rotate scents so rooms don’t get lazy or nose-blind. Keep flames away from curtains, and change diffusers’ pads weekly, yes you’ll forget once, move on. These small rituals make winter feel curated, warm, and a touch theatrical — like your home finally got dressed for the season.

    Arrange Furniture for Cozy Conversation Nooks

    Okay, scents set the mood — now let’s make people actually want to sit down and keep talking. I tell you, start with furniture placement like it’s choreography: pull chairs and a sofa into a loose circle, angle them slightly, leave a coffee table reachable, not in the way. Keep pathways clear, so guests don’t perform a clumsy dance. Add layered throws and a lamp that’s warm, not blinding. Toss a small tray with mugs and marshmallows, offer conversation starters, like a silly question card or a book of quotes. Whisper jokes, I’ll supply the awkward laugh. Light from a candle, a soft rug underfoot, voices low and easy. You’ve made a nook that invites staying, staying longer, sharing stories until night gets jealous.

    Add Seasonal Greenery and Natural Elements

    Go grab some fresh evergreens and make a breezy centerpiece, the pine scent will smack the room awake in the best way. Toss in a few dried floral stems for texture and a little antique vase, because yes, you can be fancy without pretending you’re Martha. Then scatter natural-texture accents—wool throws, a burlap runner, little twig bundles—and watch the space go from meh to snug, fast.

    Fresh Evergreen Centerpieces

    If you want your table to smell like a winter forest and still look effortless, start with fresh evergreens—I’ve learned the hard way that nothing wakes a room like that sharp, resinous scent and a little sticky pine on your sweater. You’ll gather branches—fir, spruce, cedar—mix evergreen varieties for texture, tuck pinecones and a few citrus slices in, and watch guests inhale approvingly. Cut stems at an angle, strip lower needles, arrange loosely in a low bowl or mason jar, don’t overthink symmetry. Add a trio of candles, light them, step back, grin. It’s centerpiece inspiration that’s fast, cheap, and forgiving. You’ll make mess, you’ll laugh, you’ll get sap on your fingers, and it’ll feel like magic.

    Dried Floral Arrangements

    Texture’s the secret weapon I never knew I needed—until I saw a bundle of dried lavender and thought, “Yep, that’s staying.” I’ll show you how dried floral arrangements give your home that lived-in, wintery vibe without the whole watering-and-worry routine: pick a mix of grasses, seed heads, and preserved greens for contrast, trim stems at staggered heights, wrap stems with twine or tuck them into a recycled vase, and don’t be afraid to add twigs, cinnamon sticks, or a few dried orange slices for scent and drama. You’ll learn which dried flower types hold up best, how to layer textures for depth, and how to choose seasonal color palettes that flatter your room. Make a little cluster, step back, smile.

    Natural-Texture Accents

    When the wind starts complaining and the light goes all honey-colored, I start bringing the outdoors in—literally dragging branches, pinecones, and sprigs into the house like a mildly overzealous squirrel. You’ll love this: tuck fir or eucalyptus into a vase, scatter pinecones on a tray, drape garlands across mantels. Use woven baskets for kindling, magazines, even rogue scarves, they add instant, earthy structure. Lay chunky, textured throws over chairs, they beg to be grabbed, they make a couch invite. Smell matters, so bruise a sprig of rosemary, inhale, and pretend you’ve become the cozy main character. Don’t overthink it. Mix rough bark with soft wool, add a candle, sit down, and congratulate yourself on being charmingly seasonal.

    Simple Upgrades to Boost Warmth and Comfort

    Because nothing ruins a cozy evening faster than a drafty socket or a skimpy throw, I’m here to help you make a few smart, low-effort swaps that actually feel luxurious; you’ll be surprised how much warmth comes from small changes. You’ll hear the kettle sing sooner, and your feet will stop staging protests. Start with insulated windows, seal gaps, add heavy curtains, and feel the room hug you back. Layer textiles, swap thin throws for heated blankets, and give your sofa a plush, nap-ready makeover. Small moves, big payoff.

    Small, cozy swaps—seal drafts, layer textiles, add heavy curtains and warm lighting—for a room that finally feels like a hug.

    • Install draft stoppers, your baseboard’s best friend.
    • Use a rug, bare feet will thank you.
    • Bring candles, wax and scent transform mood.
    • Elevate lighting, warm bulbs, dimmers, instant atmosphere.

    Conclusion

    You’ve got this — pile plush pillows, flip on warm lights, and fling a fragrant throw over the chair. I’ll say it plain: texture, torchlight, and thyme-scented things turn cold into cozy. Sit, sip something steamy, and listen to the soft rug hush the floor. Make small swaps, savor slow smells, scatter seasonal stems. Simple steps, snappy style, serious snug: your space will feel like a warm, welcome hug.

  • How Do I Decorate for Winter (Non-Christmas)

    How Do I Decorate for Winter (Non-Christmas)

    Seventy-two percent of people say their home feels colder in winter, so you’ll want to fix that—fast. You can swap bright holiday clutter for warm neutrals, pile on plush throws and mixed-knit pillows, and scatter candles and low lamps that make the room glow like a good sweater; I’ll show you how to do it without tinsel, and you’ll actually want to stay in.

    Key Takeaways

    • Choose a soft, muted palette (beiges, frosted grays, whispery blues) with one or two seasonal accent hues.
    • Layer warm textures—wool throws, knits, faux fur, and area rugs—to create cozy tactile depth.
    • Swap lightweight linens for heavier fabrics like flannel and brushed cotton to trap heat and add visual weight.
    • Add warm ambient lighting with low-watt lamps, candles, string lights, and dimmers for adjustable glow.
    • Use natural elements—bare branches, pinecones, evergreens, and frosted greenery—in simple, balanced vignettes.

    Embrace a Soft, Muted Color Palette

    soft muted color palette

    If you want your home to feel like a cozy exhale instead of a loud holiday parade, start by dialing down the color volume—soft beiges, frosted grays, and whispery blues do the trick. You’ll swap neon cheer for soft hues, and instantly the room sighs. Paint an accent wall in a muted gray, bring in linen curtains that ripple like calm water, place a pale blue throw over the armchair you never sit in (you will, soon). I tell you, neutrals can be daring, they just whisper instead of shout. Add matte ceramics, worn wood, low-contrast art, then stand back and let the mood settle. You’ll feel winter’s hush, not its drumbeat—elegant, quiet, intentionally gentle.

    Layer Textures for Warmth and Comfort

    layering textures for comfort

    When winter arrives and the air feels like it’s been filtered through a freezer, you want your home to hug you back—so start piling on texture like it’s your job. I tell you, layer like a pro: drape cozy knits over a chair, tuck warm throws into baskets, let edges peek out like shy exes. Run your hand across a boucle pillow, feel the tiny hills and valleys, smile because tactile joy is real. Mix suede, wool, and a little faux fur, then step back and admire the cuddle potential. Swap moods with rugs underfoot, add a knitted pouf for impromptu seating, and light a low-watt lamp for amber glow. You’re crafting comfort, not a museum exhibit—own it.

    Swap Linens and Soft Furnishings

    cozy seasonal fabric swap

    Since the nights are drawing in and your duvet has been sulking in linen all summer, it’s time to swap it out for something that actually warms you up—not just in theory, but in real, delicious, blanket-hugging practice. You pull heavier duvet covers, wool throws, and velvety cushions into the light, breathe in the crisp smell of washed wool, and nod—this is better. Choose fabric choices that trap heat: flannel sheets, brushed cotton, chunky knit, faux shearling. Mix in seasonal patterns—subtle plaids, muted botanicals, herringbone—so things read cozy, not kitsch. Toss pillows of varying weights, fold a throw over the armchair, and add a small lumbar for that instant sit-and-sigh effect. You’ll feel the room hug you back.

    Add Warm, Ambient Lighting

    Though you might not notice it until the lights go down, bad lighting can make even the coziest blanket look like it’s on trial, and you deserve better than interrogation-level glare. You swap harsh bulbs for warm, low-watt lamps, and the room exhales. Drape string lights along a bookshelf or curtain rod, not like a disco, but like a soft halo; they twinkle, you sink in. Place warm candles in sturdy holders, mix heights, and never leave them unattended — yes, I’m the nag who cares. Add a dimmer to overheads, toss a few table lamps into corners, and test the glow at night with a hot drink. It’s simple, dramatic, and affordable. You’ll thank yourself when the house finally feels like a hug.

    Incorporate Natural Elements and Branches

    I’m going to make this simple: grab a few bare branches, arrange them in a tall vase, and watch your room go from blah to art gallery in ten minutes. Toss in pinecones and seed pods for crunchy, rustic texture, then brush on a little faux frost or sprinkle glittery snow to catch the light. You’ll smell resin and cold air in your head, your guests will ask where you bought it, and you’ll wink and say, “nature did the work.”

    Bare Branch Centerpieces

    One tall bundle of bare branches can change a room, and you don’t need a degree in floral design or a crate of glitter to pull it off. I tell you, bare branch arrangements are the easiest route to chic, minimalist decor that still feels warm. You’ll brave the cold, clip a few twigs, and bring sculptural lines inside. Try this simple plan:

    1. Trim branches to varying heights, strip loose bark, and test balance in a heavy vase.
    2. Anchor with stones or sand, so stems don’t slouch mid-dinner.
    3. Add a single string of warm LED lights for soft glow, not twinkle overload.
    4. Rotate placement—mantel, table, corner—to refresh the room without fuss.

    Pinecones and Seed Pods

    If bare branches are your sculptural backbone, pinecones and seed pods are the cozy sweaters that make the room feel human. You’ll grab a handful, smell the resin, feel the rough edges, and decide they’re better than scented candles—no guilt, no flame. Toss them in a bowl, string them on twine, or glue a trio to a driftwood platter; pinecone crafts give you instant rustic chic. Mix sizes, toss in cinnamon sticks for warmth, whisper “I made this” when guests ask. For taller vases, skewer seed pods on sticks, fan them out like a humble bouquet. Seed pod arrangements age beautifully, they’re tactile, honest, low-maintenance. I promise, they make winter cozy without trying too hard—like you, on a good day.

    Frosted Greenery Accents

    When winter wants to look like a magazine but feel like your living room, reach for frosted greenery—those pine boughs and eucalyptus sprigs that look like they snuck in from a snowflake’s Instagram. You’ll tuck sprigs in vases, drape winter garlands over mantels, and make frosted wreaths that still smell like the woods. I’ll show quick tricks, you do the cozy.

    1. Trim branches, shake off loose needles, pretend you’re a forest stylist.
    2. Dust tips with faux snow, less is more, don’t look like a glitter bomb.
    3. Mix textures, pine, eucalyptus, and bare twig for contrast, it sings.
    4. Anchor with twine or ribbon, keep it simple, sturdy, and actually useful.

    You’ll get winter that’s chic, not kitsch.

    Use Evergreens and Seasonal Foliage

    Because evergreens keep their color when everything else is snoozing, they’re the secret sauce of winter decor, and I’m here to make you love them like I do; grab clippers, gloves, and a mug of something steaming. You’ll snip boughs, inhale resin and sap, and feel oddly heroic. I show you how to build evergreen arrangements for tabletops and mantels, mix pine, fir, and cedar for texture, then tuck in berries or cinnamon sticks for scent. Make seasonal wreaths that aren’t holiday-only: asymmetrical, relaxed, a little wild. Glue sparingly, bind with twine, let bits poke out. Place pieces where they won’t drip, rotate stems as they dry, and enjoy that evergreen scent—it’s home, without the tinsel.

    Create Cozy Reading and Relaxation Nooks

    Okay, you’ve got spruce on the mantel and a wreath that looks effortlessly wild — now let’s make a spot where you actually want to sit and read something longer than a caption. I carve out a reading corner that’s equal parts snug and stylish, an inviting space that smells faintly of pine and coffee. You’ll want:

    A cozy reading nook—spruce-scented, pine-and-coffee warm, with a low chair, soft throws, and perfect light.

    1. A low chair, comfy cushions, and a soft throw for tactile bliss.
    2. A stack of cozy blankets, an accessible shelf for your personal library.
    3. A small table for warm beverages, a lamp that flatters your face.
    4. A rug, a plant, a little lamp for a calm, serene atmosphere.

    This peaceful retreat earns you quiet, a book, and zero guilt. You’re welcome.

    Introduce Frosted Glass and Metallic Accents

    If you’d like to make winter feel a little more magical and a little less mitten-clumsy, add frosted glass and metallic accents to your rooms — they’ll catch the low light and turn ordinary corners into sparkly, hush-hush moments. I tell you, start small: a frosted vase on a side table, frosted accents on a lamp shade, then step back and enjoy the soft halo. Mix in metallic decor—brass trays, pewter candleholders, a slim silver bowl—so light skips around the room like it’s playing tag. Touch the cool metal, breathe in the clean, muted glow, smile at the tiny reflection of yourself. It’s elegant, not fussy. You’ll feel like you live in a cozy, well-behaved snow globe.

    Refresh Tabletops and Mantels With Simple Vignettes

    You can freshen tabletops and mantels by arranging natural, textured layers—think pinecones, burlap, and frosted glass—that you can touch and almost smell. I’ll show you how to add seasonal color accents, scale pieces correctly, and group items so they read as balanced, not cluttered; it’s like staging a tiny, stylish mountain scene. Grab three objects, step back, adjust until it feels right, and don’t be surprised if you end up rearranging at least twice.

    Natural, Textured Layers

    When the days go short and the house needs a little more hug, I start with small, textured vignettes on mantels and tabletops—because big renovations are for people who enjoy stress and spreadsheets. You’ll keep it tactile, lean on natural fibers and organic materials, and skip anything shiny or scream-holiday. Touch matters — grainy wood, woolly throws, rough pottery, cool glass.

    1. Layer a linen runner, add a low bowl of pinecones.
    2. Stack weathered books, top with a clay candle.
    3. Drape a fringed wool scarf over a chair back, let it spill.
    4. Place a small branch in a narrow vase, no leaves necessary.

    You’ll arrange, step back, nudge, and live with it for a day. It’ll feel like a quiet exhale.

    Seasonal Color Accents

    I keep the soft, grainy layers from the last bit, then toss in a splash of color like it’s a wink—because texture is the story, but color is the punchline. You’ll pick two or three hues from seasonal palettes, nothing fussy, just a confident nod to winter light. Think muted cranberry, steely blue, mustarded gold—colors that feel cozy, not carnival. Use color psychology to guide mood: cool tones calm, warm tones invite conversation. Swap a runner, add a velvet cushion, place a painted candle or a bowl of frosted pears on the mantel. Keep items simple, repeat a hue, vary finish. Stand back, squint like an art critic. If it reads like you meant it, you nailed it.

    Scaled, Balanced Groupings

    Start with a hero piece, something with presence—a low, wide tray, a chunky candle, or a vase that looks like it knows its angles—and build around it, because I believe good vignettes start with confidence, not clutter. You’ll make scaled arrangements that feel deliberate, not accidental. I like to layer textures, cold metal with wool, glossy glass beside matte stone. Keep balanced compositions by varying height, mass, and negative space.

    1. Choose one anchor, then two companions.
    2. Add a contrasting texture, a twist of twig or citrus.
    3. Leave breathing room, don’t crowd edges.
    4. Finish with a small, unexpected sparkle.

    You’ll arrange, step back, grumble, tweak, then smile. It’s simple theater, cozy and calm — winter, but not holiday.

    Maintain a Calm, Decluttered Winter Rhythm

    If you want your home to feel like a slow, cozy exhale rather than a cluttered sprint, I’ll help you get there without turning your living room into a minimalist shrine or a storage unit for guilt. You’ll use mindful organization as a kindness, not punishment: clear a tabletop, keep a catch-all tray, and admit when a candle has had its day. Build simple winter rituals—an evening tea, a lamp lit at 5 p.m., a blanket folded at chair arm—so rhythm replaces random piles. I nudge you to sort by sight and smell, toss or donate with gentle ruthlessness, and stash seasonal gear in labeled baskets. It’s practical, tactile, and oddly soothing. Yes, you can keep things humane and beautiful.

    Conclusion

    You’ll find winter calm if you nudge your space—swap pillows, dim lamps, tuck a knit throw where you sink. I once stacked three mismatched blankets like a tiny, wooly ziggurat and watched my cat declare it a throne; that little pile proved layering wins. So, keep colors soft, scents subtle, branches bare, surfaces tidy. You’ll cozy up faster than hot cocoa cools, and honestly, isn’t that the whole point?

  • How Do I Save on Heating Costs

    How Do I Save on Heating Costs

    You can cut your heating bill without turning into a woolly mammoth—start by dropping the thermostat a couple degrees, swapping thick sweaters for a cozy throw, and sealing those pesky window gaps so warm air doesn’t escape like bad secrets; I’ll show you how to patch drafts, schedule cheap tune-ups, and pick smart thermostats that learn your routine, plus some rebate tricks, but first—let’s find the low‑effort changes that actually feel worth it.

    Key Takeaways

    • Lower your thermostat by 1–2°C (2–4°F) and use blankets to reduce heating energy immediately.
    • Seal leaks around windows, doors, and outlets with caulk, weatherstripping, and foam gaskets to stop drafts.
    • Add attic, wall, and floor insulation to cut heat loss and improve long-term savings.
    • Use a programmable or smart thermostat and set setback schedules for unoccupied hours.
    • Maintain your heating system: change filters monthly and schedule annual professional tune-ups.

    Quick Wins: Small Changes That Lower Your Bills Immediately

    lower bills save energy

    Okay, let’s start with something you can do today: turn your thermostat down two degrees and feel like a tiny, frugal superhero. You’ll notice cooler air, a soft click of the furnace, and a smug grin. I’m with you, I’ll cheer. Small energy efficient habits add up fast, so swap heavy sweaters for blankets, close vents in unused rooms, and let sunlight warm a chair in the morning. If you don’t have programmable thermostats, get one; set lower temps while you sleep and higher when you wake, automatic savings, no fuss. Make coffee, sip slowly, watch the display tick down. These moves are simple, tactile, satisfying — like finding money in an old coat, only better for the planet.

    Sealing and Insulating: Stop Heat From Escaping

    seal leaks insulate wisely

    You can stop that sneaky cold from slipping in by sealing air leaks around windows, doors, and outlets—grab some caulk and weatherstripping and get cozy. Then add insulation layers where your walls feel thin, think of it as tucking your house into a warm blanket. Don’t forget the attic access—insulate and weatherstrip that hatch, because heat loves to escape straight up and I’ve learned the hard way, shivering under my own roof.

    Seal Air Leaks

    If cold air’s sneaking in around your windows and doors, it’s like someone left a freezer door cracked all winter—annoying and expensive, and yes, fixable. You’ll walk the perimeter, feel for drafts with a hand, or light a candle and watch the flame dance. Find gaps, and grab caulking windows kits and rolls of weather stripping; they’re cheap, and you’ll feel heroic. Peel, press, smooth—caulk those seams, press foam or V-strip in frames, and test again. Don’t forget attic hatch and baseboards, where little breezes love to hide. Seal outlets with foam gaskets, too. It’s simple work, a bit like patching a leaky boat, only you stay warm. You’ll cut drafts, cut bills, and maybe brag a little.

    Add Insulation Layers

    Alright, now that you’ve patched the obvious leaks and stopped the drafty saboteurs around doors and windows, let’s layer up—like putting on a sweater for your house. You’ll add insulation layers in walls and floors, tuck batts into cavities, and roll out rigid foam where drafts sneak through. Pick insulation materials that match your climate and budget — fiberglass, cellulose, spray foam — each has different insulation benefits, R-values, and installation quirks. I’ll say it bluntly: more R-value, less heat loss. You’ll feel the difference as rooms stay warmer, radiators work less, and your meter breathes easier. Wear gloves, cut carefully, seal gaps, and pause to admire your handiwork — you just made the house cozier, cheaper to run, and smugly efficient.

    Insulate Attic Access

    One quick fix you probably forgot: the attic hatch is a heat thief, and sealing it will stop warm air from sneaking out like it’s midnight snack time. Walk up, put your hand near the attic hatch, feel that draft? That’s your money slipping away. Pop the access door open, check the frame, and press weatherstripping into gaps. Lay a simple attic tent or foam board over the hatch, tape edges tight, don’t be shy with caulk where wood meets drywall. Add a folded blanket if you must — I do, and it’s embarrassing how well it works. Close it, feel the quiet warmth return, listen for no wind. Small fixes, big comfort. You’ll save cash, and you’ll feel smug.

    Thermostat Strategies and Zoning for Efficient Comfort

    thermostat programming for comfort

    Wondering why your living room feels like a sauna while your bedroom is an icebox? You’re not cursed, you’ve got mismatched zones. I’ll walk you through thermostat programming tricks, and show zoning benefits without the nerdy lecture. Set lower temps for rooms you use less, raise them when you enter, and let setback schedules do the boring work. Use smart thermostats to learn patterns, or simple timers if you’re old-school like me. Install dampers or a second thermostat to control heat room-by-room, and feel the relief when bills drop. Listen for airflow, feel vent warmth, tweak registers. It’s practical, immediate, and oddly satisfying—like folding fitted sheets, only warmer and worth it.

    Heating System Maintenance and When to Replace It

    Because you’ll want your house to feel like a cozy blanket, not a ticking money bomb, I’m going to talk about the upkeep your heater actually needs and how to tell when it’s time to retire the whole thing. Clean or replace filters monthly, clear vents so warm air doesn’t whisper away, and listen for odd bangs or rattles that mean parts are losing the will to live. Annual tune-ups keep heating efficiency up, extend system longevity, and catch tiny problems before they bill you big. If repairs pile up, energy use jumps, or comfort drops — or your unit’s older than about 15 years — plan replacement. I’ll admit, deciding to ditch a familiar clunker stings, but your wallet will thank you.

    Smart Upgrades: High-Efficiency Equipment and Controls

    If you swap out that wheezy old furnace for a high-efficiency model, you’ll feel the difference right away — warmer air that smells cleaner, bills that don’t make you wince, and a heater that actually seems happy to be working. You’ll notice quieter cycles, steadier warmth, and less guessing about comfort. Pair that with energy efficient appliances, and your whole home stops fighting you for heat. Install programmable thermostats, set sensible schedules, and watch waste vanish — mornings cozy, nights cooler, no fiddling. I’ll admit, I once argued with a thermostat like it owed me rent. Now it obeys. Smart controls learn your rhythm, trim peaks, and give you control from your phone, so you stay comfortable, smug, and saving.

    Financial Assistance, Rebates, and Long-Term Cost Planning

    You’ve upgraded the furnace and tamed the thermostat beast, and now it’s time to talk money — the part where your wallet either sighs in relief or stages a protest march. I’ll walk you through where cash comes back, and how to plan so heating doesn’t eat your future pizza fund. Hunt local financial programs, call your utility, and taste the sweet victory of paperwork that pays. Learn energy rebates, federal credits, and low-interest loans; stack them, like pancakes that actually save you money.

    1. Check utility and state financial programs, apply early, photograph receipts.
    2. Clip energy rebates for equipment, mail forms, double-check model numbers.
    3. Build a 5-year budget, track savings, reinvest in insulation.

    Conclusion

    You’ll laugh, but the day I turned the thermostat down two degrees I noticed my cat burrowed into a blanket like a tiny, judgmental burrito — coincidence or a sign? Either way, you’ll save money by doing the same. Seal the drafts, clean the filters, zone your rooms, and grab rebates when they wink at you. Take the small wins now, plan upgrades later, and enjoy warmer pockets and cozier evenings.

  • How Do I Prevent Frozen Pipes

    How Do I Prevent Frozen Pipes

    You don’t have to be a plumber to stop pipes from turning into icy cigars in the dead of night — I’ll walk you through the quick fixes and a few smart upgrades that actually work. Feel the draft under the basement door, picture the soft hiss of a dripping faucet you left on, and imagine insulating that exposed copper with a foam hug; you’ll sleep better. Stick around and I’ll show you the fast moves to avoid a winter mess.

    Key Takeaways

    • Insulate exposed and vulnerable pipes with foam sleeves or fiberglass, focusing on crawlspaces, attics, and exterior walls.
    • Keep indoor temperatures steady (use a programmable thermostat) and never let the house fall below freezing.
    • Open cabinet doors and allow warm air to circulate around pipes under sinks and near exterior walls.
    • Run a slow drip from faucets on cold nights and insulate valve stems and exterior taps.
    • Seal drafts where pipes enter walls, and install heat tape on critical runs following manufacturer instructions.

    Why Pipes Freeze and How to Spot Vulnerable Areas

    prevent frozen pipe damage

    If you’ve ever woken up to a cold, stubborn faucet and felt your heart do a tiny freeze too, you’re not alone — frozen pipes happen because metal and water hate surprises: when temps drop, the water inside contracts, then expands as it freezes, and that expansion builds pressure until the pipe gives. I’ll walk you through the causes of freezing, and show how you spot trouble before it bursts. Look for uninsulated crawlspaces, drafty basements, attic pipes, or exterior walls, feel for icy drafts with your hand, and listen for pinched water lines during cold snaps. You’ll learn to map vulnerabilities, mark them, and plan fixes. Trust me, you’ll catch trouble faster than it catches you.

    Insulating Exposed Pipes and Other Simple Upgrades

    insulate pipes for winter

    While you’re staring at that frost-prone crawlspace, picturing a geyser of icy water, let me tell you: insulating exposed pipes is the cheap, smug little victory you can score against winter. You’ll feel for cold spots, slap on pipe insulation, and hear quiet confidence replace that nervous clanking. Add heat tape where joins get shivery, plug it in, and relax.

    1. Measure runs, cut foam sleeves, press seams tight.
    2. Wrap elbows and valves with extra foam or fiberglass.
    3. Install heat tape per instructions, avoid overlaps.
    4. Seal gaps where pipes pierce walls with caulk or foam.

    You’ll work gloves-on, breathe damp, earthy crawlspace air, and leave a warmer, sturdier plumbing system that’s oddly satisfying.

    Maintaining Safe Indoor Temperatures and Ventilation

    safe indoor temperature maintenance

    You’ll want to keep your home at a steady, not scorching, temperature so pipes don’t stage a midnight freeze-out — set the thermostat, check it like you check your phone, and sigh in relief when the heater hums. Open vents and crack a window now and then to keep air moving, especially in closets or basements where cold pockets hide, and use a fan if a room feels stuffy. I’ll walk you through easy checks and habits that stop surprises, with no heroic plumbing skills required.

    Keep Consistent Indoor Temperature

    A few degrees matter more than you’d think, so I make the thermostat my quiet hero and you should, too — set it, forget the dramatic swings, and your pipes will thank you with silence instead of ice-shattering chaos. I keep a steady baseline, because maintaining warmth isn’t heroic, it’s practical, and I check heater efficiency so the system isn’t working overtime and sighing at me.

    1. Set a consistent temperature, don’t chase hot-cold whims.
    2. Use a programmable thermostat, it learns your schedule, you win.
    3. Insulate accessible pipes, feel for cold spots, act fast.
    4. Service the heater yearly, cleaner parts mean better warmth.

    You’ll save stress, you’ll avoid midwinter panic, and you’ll sleep.

    Ensure Proper Room Ventilation

    Since stale, stuffy air is basically enemy number one for both your comfort and your pipes, I keep rooms moving with purpose — crack a window for a few minutes, nudge a vent open, or let ceiling fans push warm air down the walls so cold pockets don’t hide and freeze my plumbing. You’ll want proper airflow everywhere, especially near exterior walls and under sinks. I open closet doors, aim portable fans into dark corners, and listen for that tiny, satisfied whoosh. Watch humidity control too — damp air chills faster, so run dehumidifiers or exhaust fans after showers. It’s simple theater: warm air circulates, cold retreats. Do this, and you’ll outsmart frozen pipes without drama, just a few smart, noisy moves.

    Smart Faucet and Valve Practices During Cold Spells

    When frost creeps up the windows and your breath fogs the kitchen light, you’ll want to treat faucets and valves like nervous toddlers—gentle, watched, and ready to be bribed with a little warmth. I promise, you can keep things simple, and feel smug when pipes behave. Install a smart valve where you can, it lets you monitor flow, get alerts, and nudge heat remotely. Keep up faucet maintenance, dribble warm water during deep cold, and open cabinet doors to share heat.

    Treat faucets like nervous toddlers—gentle, warmed, and watched; smart valves, drips, and open cabinets keep pipes behaving.

    1. Check smart valve battery and connection weekly.
    2. Run a slow, steady drip on exposed faucets overnight.
    3. Insulate accessible valve stems, not just pipes.
    4. Test shutoffs gently, mark positions.

    Preparing Outdoor Plumbing and Seasonal Shutoff Steps

    You’ll want to winterize outdoor faucets first, so grab a wrench, feel the cold metal under your palm, and turn them off like you mean it. Then shut off the outdoor supply at the interior valve, open the spigot to drain leftover water, and listen for that satisfying little drip as the system empties. I’ll hold your cringe while you disconnect hoses and cap things up — we both know frozen pipes are way uglier than this five-minute chore.

    Winterize Outdoor Faucets

    One quick trick will save you a morning of frantic chipping ice off a frozen hose bib: shut it down, drain it out, and cap it off. You’ll feel clever, smug, and warm inside. Start by clearing the spout, then pull off hoses, they trap water like tiny ice prisons. Slide on outdoor faucet insulation or fit a snug faucet winter cover, you’ll hear the wind complain and your pipes stay silent.

    1. Turn valve (inside), relieve pressure.
    2. Drain outdoor line, open faucet until it trickles.
    3. Install foam or insulated cover, secure with zip tie.
    4. Store hoses, inspect for cracks, replace if brittle.

    Do this quick ritual, and winter loses its leverage.

    Shut off Outdoor Supply

    Okay, now we shut the outdoor supply off—no dramatic music, just a few clicks and the satisfaction of outsmarting winter. You’ll find the shutoff inside, often in a basement or crawlspace, where the supply line from the outdoor faucet disappears into the wall. Turn the valve clockwise, firm but not brutal, listen for the quiet stop of water, that tiny victory sound. Open the outdoor faucet, let any trapped drips escape, feel the cold air kiss the metal, watch the last bead fall. Drain any hoses, coil them like defeated snakes, stash them away. If there’s a frost-free faucet, still close the indoor valve. You’ve just dodged a plumbing meltdown, and yes, you deserve a smug sip of cocoa.

    Emergency Actions When a Pipe Shows Signs of Freezing

    Act fast—don’t wait for the pipe to pop like a surprise party gone wrong. You’ll feel the chill first, a hard, metallic breath under the sink. Don’t panic, call your emergency contact if you need help, but move now. Try these steps, in order, and keep calm.

    Act fast—feel the chill under the sink, don’t panic; warm, insulate, and open faucets before the pipe gives way.

    1. Open faucets to relieve pressure, let a trickle run, listen for silence turning into flow.
    2. Apply temporary heat: hair dryer, space heater (safe distance), or warm towels wrapped tight.
    3. Insulate exposed pipes with towels or foam, seal drafts with tape or cloth.
    4. If cracking or bulging appears, shut the main water, call a plumber, and mention the frozen spot.

    I talk you through it, quick, steady, mildly heroic.

    Conclusion

    I’ve seen pipes huff and puff like annoyed dragons, so don’t let yours star in a winter drama. Insulate the cold spots, keep your thermostat steady, let faucets whisper-drip, seal drafts, and shut off outdoor lines when frost’s coming. Install smart valves if you like calm alerts. Act early, act simple. You’ll sleep warmer, avoid frantic pipe surgery at 2 a.m., and feel like a small, competent hero in your own house.

  • How Do I Winterize My Home

    How Do I Winterize My Home

    You’ve got this — but let’s be real, winter will test you. Walk each room, feel for drafts, listen for rattles from old windows, and jot the stubborn spots down; caulk, weatherstrip, and add a cozy throw to hide your thermostat’s insecurities. Insulate pipes, service the furnace, shut off outdoor faucets, and stash the garden hose; simple moves, big payoff. I’ll show the quick wins next — and the one thing people always forget.

    Key Takeaways

    • Inspect roof, sweep gutters, and secure loose shingles to prevent ice dams and leaks.
    • Seal drafts around windows, doors, and attic hatch with caulk, weatherstripping, and insulation.
    • Insulate and protect exposed plumbing with foam sleeves, heat tape, and allow faucets to drip during extreme cold.
    • Service the heating system: replace filters, check thermostat calibration, clean vents, and schedule a professional tune-up if needed.
    • Shut off and drain outdoor faucets, store hoses indoors, and cover exterior spigots to prevent freezing.

    Assessing Your Home’s Winter Readiness

    winter home inspection checklist

    If you’ve ever woken up to a frosted window and a wallet that forgot what “heating bill” means, trust me—we’re doing this right now. You grab a mug, I grab the checklist, we start a quick home inspection together, flashlight and gloves in hand. Look at vents, test the furnace, listen for odd clanks, sniff for diesel-strong smells—don’t panic, note them. Walk the roof for loose shingles, sweep gutters, peek at attic access, feel for cold spots by doors and windows. Tick off each item on your winter checklist, take photos, set reminders for repairs, call a pro if something’s beyond your toolbox. We’re thorough, we’re practical, and we’ll laugh at the thermostat later.

    Sealing Drafts and Improving Insulation

    seal drafts improve insulation

    Okay—roof walked, vents checked, furnace grumbled at us and survived; now let’s go room by room and stop the wind from crashing our cozy party. You’ll feel the difference fast, like someone turned down a noisy fan. Start at windows and doors, press fingers along frames, listen for hiss, then seal with caulk or weatherstripping. Roll in draft stoppers for under-doors, they’re cheap, smugly effective, and kind to bare toes. Check attic and walls, add insulation materials where the cold seems to sneak through—batts, spray foam, or blown-in, pick what fits your budget and skill.

    • Patch gaps, seal cracks, and embrace patience.
    • Prioritize attic and attic hatch first.
    • Use simple tools, buy good tape, wear gloves.

    Protecting Plumbing and Preventing Frozen Pipes

    prevent frozen pipes effectively

    When cold weather rolls in and your pipes decide to stage a drama, you don’t get to be passive — you’ve got to suit up and outsmart them. I’ll walk you through simple moves: locate exposed pipes in basements, crawlspaces, attics, and along exterior walls, feel for drafts, tap for cold spots. Add plumbing insulation around vulnerable runs, foam sleeves for easy installs, and heat tape where freezing is likely — follow manufacturer instructions, don’t improvise with toaster cords. Let faucets drip during extreme cold, open cabinet doors to share warmth, and shut exterior valves then drain hoses before a freeze. If you spot a frozen pipe, warm it gently with a hairdryer, never open a torch near plumbing. You’ll thank me later.

    Servicing Heating Systems and Thermostat Tips

    You don’t need to be a furnace whisperer to keep your heat humming, and I’ll show you the simple stuff that actually matters: swap that dusty filter — yes, the one you’ve been pretending not to see — check the pilot light or electronic ignition for a steady blue burn, and listen for odd clanks or whistles that say “service me.” I’ll walk you through quick checks, give thermostat calibration tips, and help squeeze better heating efficiency from what you’ve got, no hoodoo required.

    • Verify thermostat calibration with a reliable thermometer, adjust if it drifts, don’t argue with numbers.
    • Clean vents and registers, feel the airflow, note cold spots, seal leaks.
    • Schedule a pro tune-up if noises persist, save energy, sleep warmer.

    Preparing Exterior Elements and Outdoor Faucets

    You’ll want to shut off your outdoor water at the interior valve, then open the spigot to drain any trapped water—trust me, frozen meters are no fun. I’ll show you how to wrap and insulate exposed pipes, tuck away hoses, and spot vulnerable spots where cold will creep in like an unwelcome guest. Follow these simple steps, and you’ll hear less clanking, see fewer leaks, and sleep a lot warmer.

    Shut off Outdoor Water

    Before frost nails the yard, let’s shut off the outdoor water and spare yourself a plumbing horror show. You walk out, taste cold air, and act fast: turn the interior shutoff for exterior spigots, open the outdoor faucet to drain leftover water, then close it. Remove hoses—no tugging, just a firm twist—and coil them dry inside, where they won’t become frozen garden snakes. Slip on foam faucet covers over the spigots for extra peace of mind, they’re cheap insurance and stupidly easy.

    • Do the interior shutoff first, then open the spigot to bleed lines.
    • Store hoses indoors, dry and coiled, to avoid cracks and mildew.
    • Fit faucet covers, check seals, and call a pro if anything leaks.

    Protect Exposed Pipes

    Even if the frost hasn’t moved in yet, act like it’s already camping on your porch—those exposed pipes fry fast. You’ll want to feel the metal with gloved hands, spot the skinny runs under eaves and along foundation walls, and imagine them cracking like brittle candy. Wrap those lines in foam pipe insulation, secure with tape or zip ties, snug but not strangling. For really chilly spots, run heat tape along the pipe, follow the instructions, plug it into a GFCI outlet, don’t improvise. Cover outdoor faucets with insulated caps, drain the lines after you shut the valve, listen for the tiny gurgle that says you did it right. I sound bossy, I know, but your future thawed-out self will thank you.

    Energy-Saving Upgrades and Budget-Friendly Fixes

    If you’re anything like me, staring at last winter’s heating bill makes you want to invent a money-saving time machine, so let’s do the next-best thing: smart, affordable fixes that actually cut energy use. You’ll feel the difference, like a warm blanket for your wallet. Start small, get visible wins, and brag to your thermostat.

    Stare down that heating bill—use smart, affordable fixes, start small, and let your savings feel like a warm blanket.

    • Upgrade to energy efficient appliances, swap incandescent bulbs for LEDs, and let savings pile up.
    • Seal drafts, add cost effective insulation in the attic, and plug leaks around windows for immediate warmth.
    • Install a programmable thermostat, lower water heater temps, and embrace simple habits that keep bills down.

    I’ll hold you accountable, and yes, we’ll celebrate with hot cocoa.

    Conclusion

    You’ve got this—seal the drafts, tuck pipes in, and tune the heater. I once taped a crooked window, heard the wind sigh less, and saved $40 on one bill—small victory, big grin. Do the easy fixes now, call a pro for the stubborn stuff, and document what you did. Walk around, listen for whistling, feel for cold spots, and know you’re making your home snug, safer, and ready for snow.

  • How Do I Get Vitamin D in Winter

    How Do I Get Vitamin D in Winter

    Like a sundial stuck in a snowbank, your skin’s craving sunlight in winter — and yes, you can fix that. I’ll walk you through quick outdoor tricks, tasty food swaps, and the exact supplement moves that actually work; picture brisk air on your cheeks, a mug of soup, and a tiny pill at lunch. You’ll learn what to do when clouds, skin tone, or medications get in the way, so you can stop guessing.

    Key Takeaways

    • Spend 15–30 minutes outside most days around midday with face and forearms uncovered to maximize winter UVB exposure where possible.
    • Eat vitamin D–rich foods like fatty fish, fortified milk or juice, egg yolks, and roasted mushrooms to boost intake without supplements.
    • Take a vitamin D3 supplement (commonly 600–2,000 IU daily) with a fatty meal, unless your healthcare provider advises otherwise.
    • Get your 25(OH)D blood level tested seasonally, especially if older, obese, or medically at risk, to personalize dosing and track progress.
    • Use bright light indoors, position near sunlit windows, and plan short outdoor walks to improve mood and indirectly support vitamin D habits.

    Why Vitamin D Matters During Winter

    vitamin d boosts winter wellness

    Because the sun clocks out earlier in winter, your skin’s vitamin D factory slows way down — and you notice it, trust me. You feel it in sluggish mornings, the thin light scraping your eyelids, and in the afternoons when your mood dips like a curtain. Vitamin D helps your immune system stand guard; when levels fall, you get snottier, slower, more annoyed at small things. It also nudges mood regulation, that quiet chemical steering joy and calm, so you might snap at a barista or cancel plans. I say this like a friend who’s been there: layer up, sip something warm, and plan deliberate light exposure. Little acts matter, they add up, and you can reclaim brightness even on gray days.

    How Sunlight and Season Affect Vitamin D Production

    sun angle affects vitamin d

    You’re outside squinting at the low winter sun, and I’ll tell you straight: the sun’s angle decides how much UVB reaches your skin, so a shallow sky equals less vitamin D. If you live far from the equator, seasons stack against you—shorter days and a slanted sun mean months when your skin barely gets a hit of UVB. I say this with a warm warning and a grin: knowing your latitude and the season helps you plan when to soak up rays, or when to get help from food and supplements.

    Sunlight Angle and UVB

    When winter drags its feet and the sun slides low in the sky, I’m the first to notice how different it feels on my skin—colder, thinner, like the light’s on a diet; that’s not just mood, it’s physics: the sun’s angle changes the amount of UVB that actually reaches you, and UVB is what kicks your skin into making vitamin D. You can watch sunlight intensity drop like a curtain. Tilt matters: shallow rays skim the atmosphere longer, scatter, lose the UVB wavelength mix your skin needs. Stand outside, face the light, feel the difference—warmer, sharper, more sting in your cheeks when UVB is present. I joke, but you’ll want to catch midday beams, expose arms briefly, timing beats guesswork.

    Latitude and Seasonality

    If you live farther from the equator, you’ll notice winter feels like someone turned the sun down—colder light, longer shadows, and way less of the UVB that wakes your skin up to make vitamin D. I’ll tell you straight: latitude variations matter. At higher latitudes, the sun rides low, its rays skim the atmosphere, UVB drops off, and your skin stalls on vitamin D production. Seasonal impacts are dramatic; in midwinter you might get almost zero usable UVB for weeks. So you swap beach vibes for sweaters, step inside more, and need a plan. Stand by a bright window, take short midday walks when the sun peeks, or use supplements—because blaming the clouds won’t raise your D.

    Best Food Sources of Vitamin D for Colder Months

    vitamin d rich foods

    A few smart swaps can keep your vitamin D levels steady through the gray months, and I’ll show you the tastiest ones. You’ll want fatty fish first — think salmon, mackerel, sardines — seared crisp, smelling like the sea, flaked over salads or mashed into a punchy spread. Don’t forget fortified foods, like milk, orange juice, and cereals; they’re stealthy helpers, tasting familiar while doing the heavy lifting. Snack on egg yolks, mushrooms roasted until browned, and a little cheddar on whole-grain toast for comfort food that counts. Mix a quick tray of roasted mushrooms and salmon, I promise it’s easier than you think. Eat varied, plate colorfully, and keep portions regular — simple, tasty, effective.

    Choosing and Using Vitamin D Supplements Safely

    Because winter sun barely kisses your skin, you might need a supplement, and I’m here to make that decision less blah and more practical. You’ll pick between supplement types, D3 or D2, chewable, pill, or liquid drops—D3 usually wins for effectiveness, I admit, like the popular kid in school. Check dosage guidelines, aim for 600–2,000 IU daily unless your doc orders blood-tested amounts, and don’t double-dose because “more” isn’t always better. Read labels, look for third-party testing seals, store bottles away from heat and light, and take with a fatty meal so the vitamin actually absorbs. If you’re on meds, pregnant, or have health issues, call your clinician. I’ll nag you gently: test, choose wisely, dose sensibly.

    Practical Sunlight Strategies When It’s Cold or Overcast

    I’ll tell you how to snag sun even when it’s cold or gray: aim for midday rays, face a sunlit window, and take a brisk ten-minute walk with your sleeves rolled to let skin drink in what sunlight you can. Prop reflective surfaces—like a bright patio table or a white blanket—to bounce extra light onto your face, it’s cheap theater lighting for vitamin D. And if clouds or coats win, pair supplements with vitamin D–rich foods, so you’re covered without pretending a lamp is the sun.

    Maximize Midday Sun Exposure

    If the sky’s stubbornly gray, don’t sulk indoors—grab your coat and hunt for a bright patch of midday sun like it’s the last slice of pizza at a party. I’ll say it plainly: you want to work with sun position, and aim for ideal timing around local noon, when UVB peaks. Step outside, feel the cold air hit your face, and let a few minutes of cheek-and-forearm sun warm you. Take off your hat, roll sleeves, but don’t roast — short bursts beat long, chilly sittings. Walk to a bench, window, or courtyard that actually gets light, and stay 10–30 minutes depending on skin tone. I joke about pizza, but this is simple math: more direct light, more D, less drama.

    Use Reflective Surfaces

    When clouds or buildings steal the sun, don’t sulk—use what you’ve got: snow, windows, bright walls, even a shiny car hood will bounce precious UVB your way. I’m telling you, reflective surfaces are secret allies; sunlight reflection can boost exposure without a tropical passport. Stand where the light bounces, roll up sleeves, tilt your face, soak it in. It feels crisp, a mild zing on your cheeks, like a cheeky high-five from the sky.

    1. Snowfields: lie back briefly, let the glare hit your neck and forearms.
    2. Windows: find a sunlit pane, open it, face the light for a few minutes.
    3. Bright walls/cars: position yourself so reflection hits exposed skin.

    Try it, but don’t roast—be sensible.

    Combine Supplements and Diet

    Because sunlight takes a vacation in winter, you’ve got to be smart about where your vitamin D comes from, and I’m here to help you map the plan. You can combine supplements and diet, and you’ll thank me when your mood brightens and your bones stop whining. Start with a daily supplement, pick D3, and consider supplement combinations like D3 plus K2 if you want better calcium routing — check doses with your doc. Load your plate with dietary sources: fatty fish, egg yolks, fortified milk and cereal, mushrooms kissed by UV light. Snack: sardines on toast, lemon on top, crunchy and oddly triumphant. Track intake, test levels once or twice a year, adjust, and don’t panic; you’ve got this.

    Special Considerations: Age, Skin Type, and Health Conditions

    Although everyone needs vitamin D, your age, skin, and health whisper different orders to the rest of your body, and you’d be smart to listen; I’ll walk you through the main plot twists so you don’t accidentally under- or overdo it. You’ll notice age factors influence how well your skin makes D, and skin sensitivity changes how long you’ll dare the sun. I’ll be blunt, and helpful.

    1. Older adults: bones crave more, absorption drops, consider higher-dose supplements after a doc chats.
    2. Fair vs. dark skin: fair burns fast, dark needs longer sun, both have trade-offs — sunscreen’s a friend.
    3. Health conditions: obesity, kidney or liver issues, absorption problems — these tweak dose and testing plans.

    Signs of Low Vitamin D and When to Test Levels

    Curious what small, sneaky things your body does when it’s low on vitamin D? You might feel tired in a way that sleep won’t fix, muscles ache like you overdid a workout you never did, and bones can throb when the cold hits. Your mood may dip, you get more colds, and hair feels thinner—annoying, but telling. That’s vitamin D deficiency whispering, then nagging. I recommend tracking symptoms, jotting them down, and talking to your clinician about testing frequency; don’t wait for a crisis. A simple blood test—25(OH)D—gives clear results, fast. If you’re under treatment, check every few months until stable. If you’re guessing, get tested; it’s quick, precise, and oddly empowering.

    Lifestyle Habits That Support Healthy Vitamin D Status

    Okay, now that you know when to test and what the low-vitamin-D vibes feel like, let’s talk about what you can actually do every day to keep levels happy. I’ll be blunt: small lifestyle changes add up, and you don’t need to become a sun-worshipper. Get outside, feel the cold air on your cheeks, squint in weak winter light.

    1. Spend 15–30 minutes daily on outdoor activities, brisk walks or dog-play, skin exposed when safe.
    2. Eat vitamin-D rich foods, like oily fish, fortified milk, and egg yolks, and rotate supplements if needed.
    3. Layer smart: short sun breaks with exposed forearms, consistent sleep, and a reminder to test seasonally.

    You’ll feel steadier, brighter, less like a soggy sweater.

    Conclusion

    Think of winter as a sleepy sun you can still wake. I want you stepping into that cold light—15–30 minutes around midday, cheeks stinging, breath visible—so your skin soaks up UVB. Eat salmon, fortified milk, and yolks, or take D3 with a fatty meal. Test if you’ve got risks, adjust dose, and talk to your doc. You’ll feel warmer inside, literally and otherwise—sunny, steady, practical, like a small rebellion against gray.

  • How Do I Practice Mindfulness During Busy Times

    How Do I Practice Mindfulness During Busy Times

    You’re juggling a million things, I get it — breathe, but not like a yoga guru, just three slow counts while you hit send on that email; feel the keys under your fingers, the coffee warmth at your lips, the tiny sigh that follows. Turn traffic lights into tiny palates of calm, make washing dishes a mini-meditation (soap suds, cold water, steady breath), and whenever you shift tasks, pause for two seconds and name one solid thing you can see. Stick with that, and you’ll start to notice how the small pauses stack — like secret savings for your sanity — but there’s a smarter trick to make them automatic.

    Key Takeaways

    • Use 1–2 minute breathing resets (three slow breaths or a 4‑in/6‑out cycle) between tasks to quickly calm and refocus.
    • Stack tiny cues into routines: pause at red lights, before meetings, or after emails to inhale deeply and ground yourself.
    • Turn daily tasks (dishwashing, commuting, eating) into short mindful practices by focusing on sensations and single-tasking.
    • Replace five minutes of scrolling with a one‑minute sensory grounding—notice three sights, two sounds, and one physical sensation.
    • End the day with a three‑line gratitude note to shift perspective and build a sustainable mindfulness habit.

    Quick Breath Practices You Can Do Anywhere

    breath awareness anytime anywhere

    Anyone can steal a minute for breath, and I’m here to prove it won’t be weird. You sit, shoulders soft, eyes open or closed, and count inhales like a secret — one, two, three — then let the exhale be longer, like sighing out a small victory. You’ll practice breath awareness, noticing cool air at your nose, warmth in your chest, the tiny hitch of thought. I tell you to press pause between tasks, that’ll be your mindful shifts cue: finish an email, breathe, then move on. Try box breathing on the subway, lengthen exhales at red lights, or do a three-count belly breath before a meeting. It’s private, fast, oddly satisfying, and totally doable.

    Two-Minute Mindfulness Routines for the Workday

    quick mindfulness reset routine

    If you’ve got two minutes between calendar alerts, you’ve got time to reset—really. I want you to sit, feel the chair under you, plant your feet. Close your eyes if you can, or soften your gaze. Take three slow breaths, counting to four in, hold one, two out. That’s a quick mindful check in, plain and useful. Next, scan your body, notice tight shoulders, unclench your jaw, let sound come and go. Then try a gratitude pause: name one tiny good thing, the warm mug, a helpful coworker, the sunlight on your desk. Say it out loud if you want, smile. Two minutes, and you’re clearer, calmer, oddly heroic. Now return, slightly lighter.

    Turning Daily Tasks Into Mini Mindfulness Exercises

    mindful daily task transformation

    When I’m washing dishes, I don’t wash them—I tune them like a tiny orchestra. You can do mindful dishwashing too, feel suds warm, hear plates sing, breathe slow. Try attentive walking: notice shoe thuds, air on your face, a rhythm that steadies you. On focused commuting, let the seat hum and your breath be an anchor, no phone tugging. Make conscious eating vivid, chew textures, name flavors, savor one forkful longer. Present brushing becomes a five-count scalp massage, mint sharp, bristles whispering. Intentional showering is steam, skin, a timed minute of gratitude. Practice aware organizing by touching each object, deciding gently. Reflective gardening grounds you—soil scent, worm wiggles, small, steady joy.

    Using Transitions to Reset and Recenter

    You’re switching tabs, stashing a coffee mug, or signing off a call — pause for three slow breaths, feel the shoulders drop, notice the taste of coffee left on your tongue. I’ll bet you think that’s hardly heroic, but this tiny ritual clears the slate, like wiping fog from a bathroom mirror. Try it once, I promise you’ll notice the room smell fresher, your head less noisy, and you’ll actually enjoy the next thing you do.

    Pause Between Tasks

    Because shifts are tiny, magical dead zones, I treat them like secret breath breaks — quick, deliberate, and oddly luxurious. You stand, set down a pen, or close a tab, and that half-second becomes a tiny ceremony. Use task changes as gates: notice the weight of your shoulders, the sound of the heater, the taste of coffee left on your tongue. Say aloud, “Done,” or whisper, “Reset,” like a tiny spell. Those mindful moments stitch your day into readable paragraphs, not a blur. Tilt your face to the window, inhale cool air, stretch a shoulder, flex fingers. It’s simple, surprisingly satisfying, and feels like stealing a tiny, legitimate luxury — your day thanks you, even if you don’t.

    Short Breathing Ritual

    If a single breath could act like a friendly nudge, I’d call it the easiest life hack you’ll actually remember, so here’s one: steal thirty seconds between things. You stand, set shoulders, drop your phone, and close your eyes for a beat. Inhale for four, feel air cool your nose, exhale for six, notice warmth leave your chest. This tiny ritual trains breathing awareness, it makes shifts crisp, like a camera cut in a noisy movie. I say it’s sacred but goofy—your mini-ceremony, with ritual significance without the incense. Try a soft hum on the out-breath, or count colors on the ceiling. You reset, you recenter, you get back to work fresher, and yes, slightly smug.

    Micro-Meditations for High-Stress Moments

    You’re in the middle of a chaos storm, so let’s steal sixty seconds for a one-minute breathing reset—inhale four, hold two, exhale six—and feel your shoulders unclench like a stubborn jaw finally letting go. If your head’s racing, try sensory grounding: name three things you can see, two you can touch, one you can taste, and watch the room pull itself back into focus, like a messy photo snapping into place. Or stand up, roll your neck, sway your hips for thirty seconds—mini mindful movement that says, “Not today, stress,” with the elegance of someone who almost always trips over their own feet.

    One-Minute Breathing Resets

    When your inbox screams and your shoulders climb up to your ears, I want you to try a one-minute breathing reset—right where you are, no yoga pants required. I say this because tiny, mindful pauses cut chaos in half, and breath awareness is the simplest tool you own. Sit or stand, drop your jaw a notch, close your eyes if you can, and inhale for four—hold for two—exhale for six. Feel air cool at your nose, warm at your lips, shoulders melting like butter. Count silently, don’t judge. If a thought barges in, thank it, then return. One minute changes posture, tone, and choices. It’s embarrassing how effective it is, but hey, we all need cheats like this. Try it now.

    Sensory Grounding Techniques

    Though it sounds fancy, sensory grounding is basically your brain’s emergency reset button, and I’ll show you how to press it without rubbing your temples like a confused wizard. You stop, inhale, and tune into nature sounds nearby — birds, traffic as a distant drum, leaves whispering — they anchor you. Next, do a texture focus: press your fingers into a chair, feel the weave, count the bumps. Try scent awareness: cup your hands, breathe a scent — coffee, soap, rain — let it label you calm. For taste mindfulness, pop a mint or sip water, note sweetness, cool, surprise. Finish with color observation: name three colors in your view, loud in your head, and feel the room settle. Quick, doable, oddly effective.

    Mini Mindful Movement

    If you liked the sensory grounding tricks — that little brain reboot — you’ll love Mini Mindful Movement, because sometimes your body wants to lead the calm. You can do tiny micro-meditations anywhere, even at your desk, and they work fast. Try mindful stretching between emails, notice breath and tension, let shoulders drop. Body awareness turns fidgety panic into curious observation. I promise, it’s not woo—it’s practical.

    • Roll your shoulders slowly, feel the joints, release a surprised sigh.
    • Sit-to-stand with slow intent, notice toes, calves, the chair’s farewell.
    • Neck circles, gentle, like tuning a radio for clarity.
    • Finger taps on the desk, follow the rhythm, breathe with each tap.
    • Heel lifts under the table, press, hold, release, feel steadier, smile.

    Simple Sensory Grounding Techniques

    Think of grounding as a tiny emergency kit you carry in your pocket—no bandages, just senses. I tell you to breathe, but not the boring kind—slow, chest soft, belly filling, and count to four. Touch the chair, press your feet into the floor, notice texture, temperature, weight. Try scent awareness: cup a cup of coffee or sniff a hand lotion, name the smell, anchor to the moment. Do sound observation next: listen for three things, near and far, hum of fridge, distant chatter, birds—label them. Open your eyes, scan colors, find one vivid detail. Say, out loud or in your head, “Here, now.” You’ll feel steadier, like a phone regaining signal. Simple, fast, oddly heroic.

    Building Tiny Habits to Make Mindfulness Automatic

    Once you start small, your brain gets tricked into thinking mindfulness is just part of the furniture—so let’s rig the furniture in your favor. You’ll stack tiny cues into your day, then watch them snowball. I promise, it’s less heroic than a meditation retreat, more like sneaking spinach into a smoothie. Try pairing mindful eating with a single breath before each bite, or three lines of gratitude journaling at night, and you’ll build momentum without drama.

    Start tiny: stack little mindfulness cues—breath before bites, three gratitudes—so practice sneaks into your day.

    • Put a sticky note on your coffee mug, inhale deeply, sip slowly.
    • Swap scrolling for one minute of breath work by the door.
    • Chew with your non-dominant hand, notice texture.
    • Write three small gratitudes before sleep.
    • Pause at red lights, count five slow breaths.

    Conclusion

    You’ll claim you’re too busy, then steal three slow breaths at the coffee machine, and come back convinced you’ve done a full retreat. I do it, you do it — we pretend zen is a long hike, when really it’s a red light, a chewing breath, a two-minute reset. Smile at the small wins, notice your feet on the floor, savor the warmth of your mug, and keep collecting these tiny, ridiculous victories. They add up, promise.

  • How Do I Set Boundaries During the Holidays

    How Do I Set Boundaries During the Holidays

    Like a fire alarm in a cozy house, your boundaries are loud, necessary, and probably overdue. You’ll tell people when you can’t host, how long you’ll stay, and what topics are off-limits, with a calm voice and a comfort kit tucked in your bag—earplugs, gum, an exit line memorized—so you’re ready when Aunt Sue asks the third invasive question. Stick around; I’ll show how to say no without drama and keep your peace.

    Key Takeaways

    • Decide your non-negotiables (rest, time limits, or no-topic zones) before invitations go out.
    • Communicate limits early using calm “I” statements and clear alternatives.
    • Schedule downtime on your calendar and treat it as an unfilled commitment.
    • Create an exit plan and simple coping tools (headphones, water, text check-ins) for events.
    • Say “I can’t, but I can…” to redirect requests and protect energy without burning bridges.

    Why Setting Holiday Boundaries Matters

    embrace self care boundaries

    Even though you want everyone to have a “perfect” holiday, you can’t be everywhere, please everyone, and still keep your sanity — and that’s okay. You notice the clatter of plates, the stale perfume, the twinge behind your eyes when plans stack up. So you say no, you carve time for self care practices, you close the door for thirty minutes and breathe cinnamon-sweet air from your mug — tiny rebellion, huge relief. Boundaries cut holiday stress like scissors through ribbon. They keep you from becoming the frazzled elf, they let you enjoy one conversation, one cookie, one laugh fully. I’ll tell you, it feels weirdly luxurious to choose calm; try it, then smugly enjoy the quiet.

    Identify What You Need and Why

    self reflection for clear priorities

    Pick up the mug, smell the citrus and burnt sugar, and ask yourself what you actually need this season—because guessing won’t cut it. Sit down, cup warm between your hands, and try simple self reflection techniques: list three non-negotiables, note one thing that drains you, and name one joy you want more of. Think about your personal values—family, rest, creativity, peace—and rank them, fast. Picture a calendar with bright blocks you won’t let others fill. Say it aloud, even if you sound dramatic. I do this like a ritual, pen tapping, coffee cooling, laughing at my own stubbornness. That clarity makes decisions easy later. You’ll spot the yeses that matter, and let the rest fall away.

    Communicate Your Limits Clearly and Kindly

    communicate boundaries with kindness

    Tell people what you need early, so plans don’t surprise you like soggy stuffing at midnight. Use “I” statements—say “I need a quiet hour after dinner,” not “You’re too loud”—and mean it, with a calm tone and a little smile. Offer a gentle alternative, like “Let’s trade gifts earlier,” so you keep the peace, and your boundaries actually get respected.

    State Your Needs Early

    If you want the holidays to feel less like a reality show and more like a cozy movie night, state your needs early — and yes, that means before someone bottles out hot cider and starts rearranging your life. I tell you this because early communication prevents the sniffle of surprise arguments, and it saves you from last-minute heroic rescues you didn’t sign up for. Say it plainly, email the plan, or text a gif and a sentence: “I’ll join from 4–7, I can’t host, please no politics.” Smell the pine, hear the clink of mugs, picture your exit route. Be specific, kind, and firm. You’ll dodge awkward pauses, keep your energy, and actually enjoy dessert without guilt.

    Use “I” Statements

    I learned early that “you” statements turn family dinners into debate club, so I now say things like, “I get overwhelmed by loud political chats, I’ll sit out that part,” and watch eyebrows do a slow, confused samba. You’ll do the same, notice how an “I” line lands softer, it takes personal responsibility, it shows emotional awareness without assigning blame. Say, “I need a quiet corner for ten minutes,” not, “You’re too loud.” Point to your calendar, your breathing, your tight jaw — concrete signals help them get it. Speak with calm, a tiny smile, and short sentences. You’re not asking permission, you’re stating a fact. People adjust, sometimes awkwardly, often gratefully, and the holiday survives.

    Offer Gentle Alternatives

    You’ve just practiced an “I” line, felt the room ease, now let’s keep that good energy without sounding like a soggy apology. Picture the cookie table, lights soft, relatives hovering—smile, breathe, then offer gentle suggestions that steer the evening. Say, “I can’t do loud games tonight, but I’ll host a quiet movie after dinner,” or, “I need an earlier exit, how about a wrap-up walk instead?” Feel the texture of the mug in your hands, the warmth grounding you. Use alternative activities as a bridge, not a barricade. You’re not rejecting people, you’re redirecting the vibe. Keep your tone light, your options specific, and, if needed, add a quick joke—disarm, pivot, and preserve your peace with style.

    Plan Ahead: Logistics, Time, and Expectations

    Because the holidays are loud, cramped, and short on spoons, start by mapping the logistics like you’re staging a tiny military operation—except with more gravy. I tell you to do quick logistical check ins: who arrives when, who sleeps where, who’s bringing what, and which cousin needs a quiet room. Set hard time windows for visits, naps, and cleanup, and stick to them. You’ll text arrival times, confirm menu roles, and cue shifts with a cheerful buzzer (“dessert in ten!”). Time management isn’t glamorous, but it keeps chaos edible. Visualize where coats pile, where kids will play, where you can breathe. Plan buffers, pack a comfort kit, and rehearse a gentle exit line. You’ll thank me later.

    Say No Without Guilt

    If saying no feels like slamming a piano door, slow down, breathe, and picture yourself with both hands on the frame—firm, steady, unashamed. I tell you this because boundaries aren’t rude, they’re choreography. Say, “I can’t this time,” with a soft exhale, not an apology parade. Use short lines: firm, clear, kind. Taste the air, feel the weight lift. You’re practicing self care strategies, tiny rehearsals that add up. Offer an alternate, or nothing at all. Expect relief, maybe a raised eyebrow, not catastrophe. Keep a single phrase ready, like a script: polite, decisive, final. This is guilt free decision making: choose what nourishes you, then move on—no guilt, just plans.

    Handle Family Pushback and Emotional Reactions

    You’ll tell them what you expect, plain as the holiday lights on the porch, and you’ll mean it. When someone gasps or tears up, breathe, name the feeling out loud, and stay steady — you’re not here to fix their emotions, just to share your limit. I’ll coach you through the lines to say, the pauses to hold, and the tiny, brave exits you can use when things get loud.

    Set Clear Expectations

    When you announce a boundary, say it like you mean it—calm voice, steady eye contact, and one hand on the mug so your fingers remember to breathe; I promise, people notice that small theater. Say who, what, when, and why, plain and fast. Tell Aunt June you’ll skip midnight caroling, explain that certain holiday traditions aren’t on the table this year, or that you’ll attend only the main holiday gatherings, not the marathon potluck. Use specific times, locations, and alternatives—“I’ll come from 2–5, then I need quiet”—so there’s no guessing game. Expect questions, offer simple reasons, repeat your line like a chorus. Be firm, kind, and human; you’re not mean, you’re organized, and that’s wildly underrated.

    Manage Emotional Responses

    Even though family pushback can feel like a surprise ambush—tone raised, forehead vein doing its best impression of a stop sign—I keep my feet planted and my voice calm, because drama is contagious and I’m not buying it. You’ll notice your emotional triggers first: that cousin’s joke, that tone, that “why can’t you just…” breath. Name it aloud, quietly, whatever keeps you steady. Take a slow sip of cider, feel the glass, count to four, exhale. Say, “I hear you, I won’t argue,” and change the subject, or leave the room for five minutes. Those coping strategies are tiny, tactical, lifesaving. You’ll look ridiculous, maybe, but you’ll come back intact, and that’s the point.

    Protect Your Time and Energy During Events

    If I’m honest, holiday gatherings can feel like a full-contact sport—think too-bright lights, a chorus of clinking glasses, and Aunt Marge’s meatball that somehow appears on every plate; I’ve learned to protect my time and energy before the whistle blows. You’ll scope the room first, breathe, and claim small wins: a timed arrival, an exit plan, a quiet corner. Say, “I’m good for two hours,” and mean it. Use headphones as armor, sip water like it’s a lifeline, and text a friend for a quick retreat check-in. These self care tips cut holiday stress, they give you permission to leave before you’re frayed. You’ll laugh about it later, you’ll feel sharper, and you’ll survive the meatball.

    When to Adjust Boundaries and When to Hold Firm

    Because holidays are equal parts joy and chaos, you’ve got to be both flexible and militant about your limits, like a diplomatic bouncer who also knows how to dance. I tell you when to bend and when to stand tall: if a request drains you, and you taste exhaustion like burnt coffee, that’s not the time for adjusting boundaries, that’s time for holding firm. If someone asks for a small favor, and you feel light, say yes, smile, do the thing, savor the clink of mugs and cinnamon. If guilt shows up, send it to the coat check. Practice lines: “I can’t, but I can…” or “Not tonight, let’s plan.” You’ll keep peace, and your peace, intact.

    Conclusion

    You’ve got this. Picture your breath as a steady bell, calming the chaos—ring it when things go loud. Name what you need, say it with “I”s, set times, pack a comfort kit, and leave like you mean it. Expect pushback, practice your one-liner, and don’t apologize for preserving joy. I’ll cheer from the sidelines while you protect your peace, because boundaries keep the holiday bright, not brittle.

  • How Do I Prevent the Winter Flu

    How Do I Prevent the Winter Flu

    You can dodge most of the winter flu with a few simple moves: get your shot early, wash your hands like you mean it, and wipe down door handles until they sparkle, because viruses hate elbow grease; eat colorful food, sleep enough to feel human, and laugh (it helps), and if someone in your house gets sick, isolate, mask up, and call your doctor fast — I’ll walk you through exactly how to do each step so you don’t end up Googling symptoms at 2 a.m.

    Key Takeaways

    • Get your annual flu vaccine early in fall to build protection before winter flu peaks.
    • Wash hands for 20 seconds and cover coughs or sneezes with an elbow or tissue.
    • Clean high-touch surfaces daily with EPA-approved or bleach-based disinfectants.
    • Prioritize sleep, balanced nutrition, hydration, and regular exercise to support immunity.
    • Monitor symptoms, seek antivirals within 48 hours if eligible, and get urgent care for severe signs.

    Why Vaccination Matters and When to Get It

    get vaccinated early stay healthy

    If you want to skip the week of soup, sweat, and sitcom reruns, get your flu shot—seriously. I’ll tell you why: vaccination timing matters, because getting it before flu season peaks boosts vaccine effectiveness, plain and simple. Picture the jab, cold clinic air, a tiny pinch, then relief — you’ve done the smart thing. Aim for early fall, unless your local clinic advises otherwise, and don’t wait for panic to set in. I’ll admit I once procrastinated and paid for it with tissues and regret; don’t be me. You’ll help protect yourself, your coworkers, your neighbor’s cranky cat, and that barista who remembers your order. Walk in, roll up your sleeve, get it done, and enjoy winter with fewer worries.

    Daily Hand Hygiene and Respiratory Etiquette

    wash hands cover coughs

    You’ll want to scrub your hands like you mean it, twenty seconds of soap and warm water, fingertips, thumbs and under the nails getting a proper squeaky-clean. When you cough or sneeze, cover up with your elbow or a tissue, and toss the tissue right away — no theatrical wiping on your sleeve. Trust me, these small, slightly awkward moves let you keep friends and sniffles at arm’s length, and I promise the soap smells better than regret.

    Proper Handwashing Technique

    Alright, let’s scrub this up: I’m talking about handwashing like it’s a tiny, life-saving ritual you do three to ten times a day. You’ll learn handwashing benefits, and I’ll bust handwashing myths while we’re at it. Wet hands, lather with soap, count to 20—sing a quick chorus in your head if you must—scrub between fingers, under nails, thumbs, wrists, the works. Rinse, feel that slick, clean relief. Dry with a clean towel or air dryer; damp hands attract germs like moths. If you’re rushing, remember soap beats sanitizer for grime. Make it a visible habit: before eating, after public surfaces, after touching your face. Practice turns weird rituals into muscle memory, and you’ll thank yourself come flu season.

    Cover Coughs and Sneezes

    When you feel that tickle rising like a tiny trumpet in your throat, don’t be a hero—cover it. I say this because you’ll save noses, keyboards, and Aunt Mae’s casserole, and yes, you’ll look considerate, not weak. Use your elbow or a tissue, not your hand; tissues trap spray, elbows block the blast, hands spread it. That’s basic cough etiquette. If you’re stuck without either, turn away, cough into your sleeve, mumble a sheepish apology. Think of sneeze shields—masks, barriers, or a dramatic cupped-hand move if you’re theatrical—anything that keeps droplets off the party. Afterward, wash or sanitize. Quick, decisive moves, little theatrics, and you’ll keep the flu out of the room.

    Cleaning and Disinfecting High-Touch Surfaces

    disinfect high touch surfaces daily

    You’re the bouncer for your home, so start by eyeing the usual suspects — doorknobs, light switches, remote controls, and phone screens — wipe them down daily when things are busy, or after anyone’s been sick. I’ll say it straight: pick EPA-approved or bleach-based disinfectants that list coronavirus or flu viruses on the label, follow the contact time, and don’t skimp on a good microfiber cloth to lift grit before you zap germs. Keep a small spray and cloth by the door, mutter a one-liner about your newfound domestic heroics, and enjoy knowing you’re cutting off flu routes before they even knock.

    Target High-Touch Areas

    Because germs love to hitch a ride on the things you touch most, I make those spots my first line of defense—doorknobs, light switches, phone screens, and the remote that somehow never leaves the couch. You sweep the table, but do you actually target high touch surfaces, the germ hotspots where hands meet the world? Pause, look, and list: handles, faucet taps, keyboards, fridge pulls, and steering wheels. Carry a small spray or wipe, wipe in one direction, let surfaces air briefly, and go again if needed. Do this daily in busy rooms, more often if someone’s sick. It’s simple, tedious, satisfying—like flossing for your house. You’ll notice fewer sniffles, and yes, less drama.

    Choose Effective Disinfectants

    Three quick rules will save you time and keep your house from turning into a petri dish: pick a disinfectant that actually kills the flu virus, read the label like it’s a secret map, and give it the contact time it asks for. I’ll walk you through disinfectant types, then tell you how to match them to spots that matter. You’ll want bleach solutions, EPA-registered sprays, or alcohol wipes for quick kills, and gentle, nonabrasive cleaners for delicate surfaces. Test a hidden corner, smell for bleach, feel for residue. Let surfaces stay wet the full contact time; don’t swipe too soon, resist the urge to multitask. I fuss, you follow, and together we make your home safer, less sniffle-prone, and oddly satisfying.

    Strengthening Immunity With Sleep and Nutrition

    If you want your immune system to do the heavy lifting this winter, start with the two things most of us skimp on: sleep and food. I’ll be blunt: you can’t out-supplement an exhausted body. Aim for consistent sleep hygiene—same bedtime, cool dark room, no doomscrolling—so you wake sharp, not ragged. Eat bright, whole foods: leafy greens, citrus, yogurt, nuts—real immune boosting foods that taste like life, not cardboard. Snack on berries, roast a sweet potato, sip bone broth when it smells like comfort. Hydrate, cut back on booze, and treat meals like mini-recharge stations. You’ll notice your skin looks better, your energy steadier, and colds don’t camp out as long. It’s basic, but it works.

    Managing Stress and Staying Physically Active

    You’ve tightened your sleep and fed your body good stuff, now let’s handle what happens upstairs — the part of you that freaks out about weather forecasts and holiday plans. I’ll say this plainly: stress management isn’t woo, it’s science. Notice tension in your neck, breathe into it, let it go. Take brisk walks, stomp leaves, feel cold air on your face — that’s physical activity working. Mix short bursts of movement with steady walks, add stretches at your desk. Try a two-minute breathing break, say a goofy mantra, shrug your shoulders, laugh at yourself. Keep a tiny ritual, tea, coat, five-minute journal. These small acts lower stress hormones, boost immunity, and make you tougher against bugs. You’ve got this, awkward but effective.

    Protecting Children and Older Adults at Home

    Because kids and grandparents live at opposite ends of the sneeze spectrum, you’ll want to treat the house like a tiny airport — careful checkpoints, sensible rules, zero panic. You’ll do basic childproofing tips, and you’ll blend that with gentle elder care habits: wipes at the door, cozy masks on plane days, and hand-sanitizer stations that don’t look like science experiments. I say it like a drill sergeant with a soft heart, because you can. You’ll make routines, not rules.

    1. Schedule quick surface wipes, door handles, toys, and remote controls.
    2. Teach kids a silly cough song, make handwashing a game.
    3. Keep seating spaced, add extra blankets, warm tea nearby.
    4. Check meds, vaccines, and comfy pillows for neck support.

    What to Do If Someone in Your Household Gets Sick

    When someone in your house starts sniffling and sounding like a foghorn, act fast and act kind—think triage, not theatrics. You step in, I coach. Isolate the sick person in one room, close doors, open a window for fresh air if it’s not Arctic, and set up a clean zone with tissues, water, and a trash bag they can reach. Wear a mask, wash hands like you mean it, and wipe high-touch surfaces with disinfectant. Keep meal trays simple, warm, and labeled so you don’t play culinary roulette. Rest is medicine; hydrate like a champ. Note symptoms on your phone, so you can track trends. These caregiving tips will keep the rest of your sick household safer, and you marginally less dramatic.

    When to Seek Medical Care and Antiviral Treatments

    Okay, good job keeping the sick person corralled — now let’s talk about the next play: knowing when to call a doctor and whether antiviral meds might help. I’ll be blunt, you don’t need a panic button every sniffle, but you should watch for red flags, practice symptom recognition, and know your treatment options.

    1. Call now if breathing is hard, lips or face look blue, or they’re unusually drowsy — don’t wait.
    2. Seek same-day care for high fever that won’t drop, severe chest pain, or confusion.
    3. Ask a clinician about antivirals within 48 hours of symptoms; they cut severity, sometimes dramatically.
    4. Bring a list of meds, allergies, and a clear timeline of symptoms, temperature, and worsening signs.

    Conclusion

    I’ve given you the tools, now it’s on you: get your flu shot early, wash hands like a surgeon for twenty seconds, wipe door handles and phones, sleep enough, eat colorful food, move your body, and don’t let stress run the show. If someone gets sick, isolate them, clean surfaces, call the doctor if breathing’s hard. You can’t control everything, but you can stack the odds—don’t throw away your shot at staying healthy.