Category: Uncategorized

  • How Do I Declutter Before the New Year

    How Do I Declutter Before the New Year

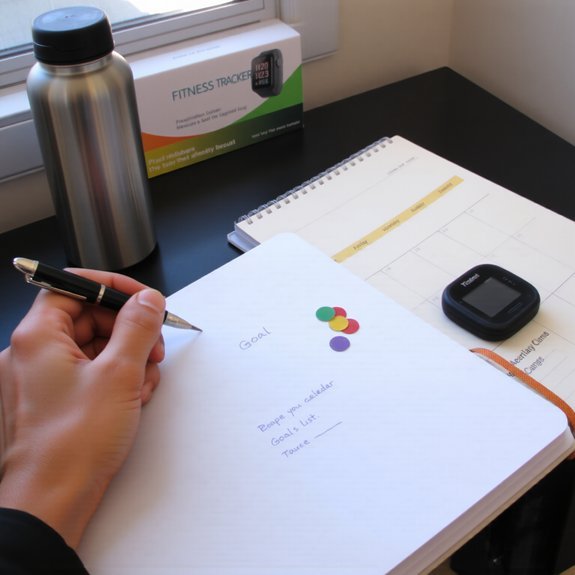
    You’re going to clear space before the New Year, and yes, you can do it without crying into a trash bag; I’ll be blunt and helpful. Start with your closet—feel the hangers, smell the sweaters, try on the one shirt you keep “just in case” and decide. Set a 20-minute timer, sort into keep, donate, recycle, trash, and celebrate the small pile that leaves. Keep reading for a simple room-by-room plan that actually works.

    Key Takeaways

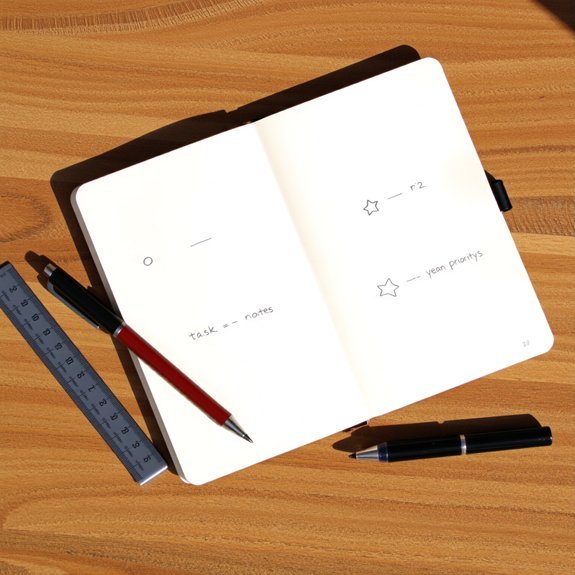
    • Start small: set a ten-minute timer per spot to tackle counters, drawers, or a shelf for quick, satisfying progress.
    • Sort fast using four bins — keep, donate, recycle, trash — and decide without overthinking.
    • Begin with your closet: remove items not worn in two seasons and box donations immediately.
    • Make daily 5-minute sweeps of surfaces and a weekly reset to prevent clutter from returning.
    • Celebrate tiny wins and visualize spaces as fresh starts to keep motivation and momentum.

    Why Decluttering Before the New Year Matters

    declutter for mental clarity

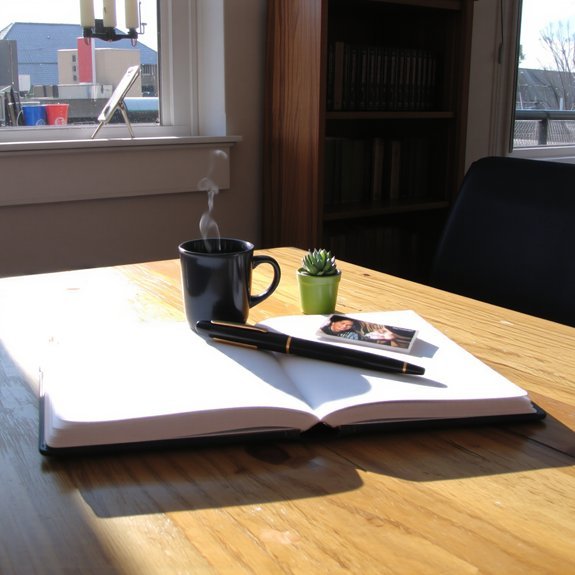
    Even if you’re not a minimalist, clearing stuff before the New Year gives you a weird little hit of freedom; I know, I’ve chased that high. You walk room to room, fingers dusty, and the air smells faintly of old paper and cinnamon from last month’s candle — small comforts, but they crowd your head. You’ll notice mental clarity settle like sunlight on a table when you toss or donate items that don’t spark joy or purpose. It’s a ritual, a tidy shove toward a fresh start, and yes, it feels oddly ceremonial. You’ll bin impulse buys, fold sweaters you forgot you owned, and feel lighter. I talk fast, you act, we both get the payoff: space, breath, and a grin.

    Quick Mindset Shifts to Make Decluttering Easier

    decluttering as playful rebellion

    If you treat decluttering like a chore, you’ll stall — but if you treat it like a tiny rebellion, you’ll actually have fun. I tell you this because mindset motivation matters; you’ll swap dread for curiosity, and that’s half the battle. Picture the drawer as a treasure chest, not a landfill; touch each item, listen to the small click of decision. Say aloud, “Keep, donate, toss,” like a quirky auctioneer, and move fast. Set a ten-minute timer, sprint through a shelf, feel the relief like cool air after a muggy day. Celebrate tiny wins with a silly fist pump, because your declutter mindset needs rewards. You’ll be surprised how playful choices turn chaos into calm, and yes, it’s oddly satisfying.

    Room-by-Room Decluttering Checklist

    ruthless closet decluttering process

    Alright, you’re starting with the closet — I’ll make you ruthless, quick, and slightly smug about it. Run your fingers across hangers, feel for the weights and memories, toss anything that pinches, stains, or hasn’t seen daylight in two seasons. Then sweep the surfaces, clear flat spots into labeled bins, and actually put things where they belong—no more mystery piles, promise.

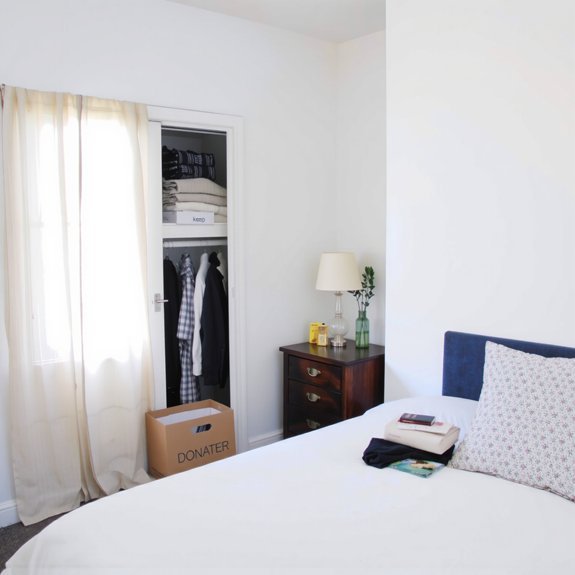
    Closet Purge Strategy

    One closet, one hour — that’s my promise and your tiny miracle. I tell you, grab a trash bag, two boxes, and a loud playlist. You pull everything out, feel the fabric, smell the season — yes, literally sniff that wool sweater — and sort into keep, donate, repair. I coach you through closet organization: uniform hangers, strategic shelves, labeled bins. Don’t overthink, try pieces on, be honest, and laugh when something still has a price tag. Make a seasonal rotation plan, stash off-season clothes in vacuum bags or high shelves, swap twice a year. You’ll wipe down the empty space, sweep, then rehanger with breathing room. One hour, less chaos, more mornings that actually feel calm.

    Surfaces and Storage

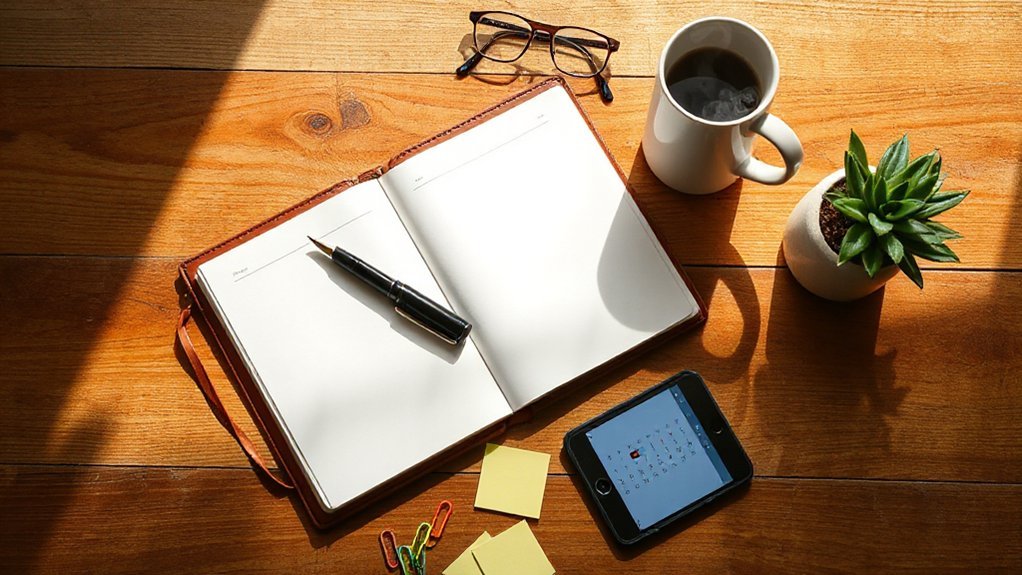
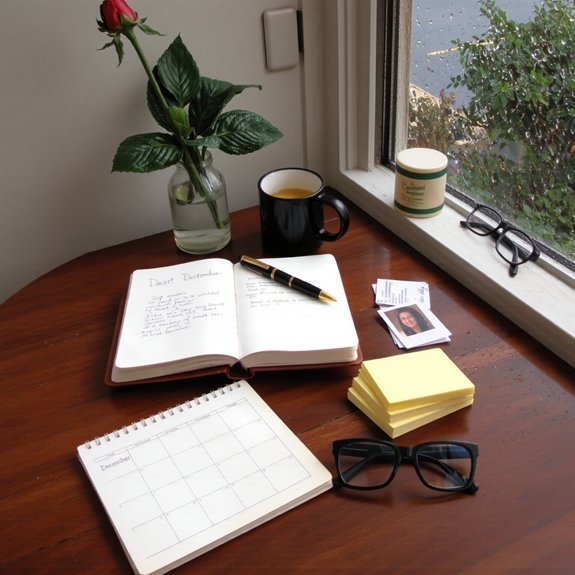
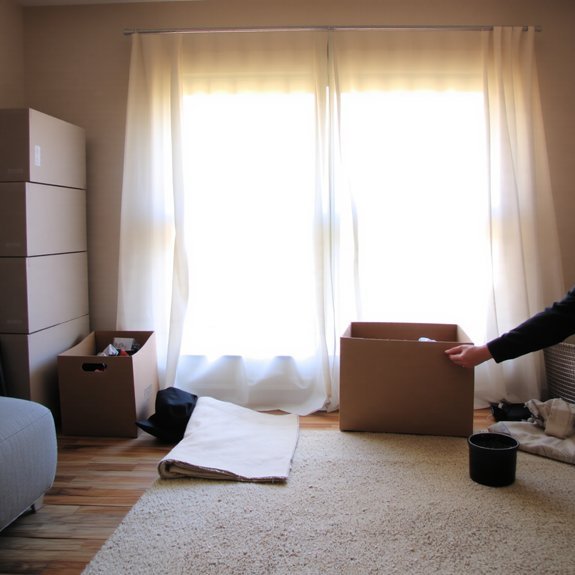
    Surfaces are where your life lands — keys, coffee rings, mystery crumbs, and the remote that always vanishes when you actually need it — and I’m here to make those flat lands behave. You’ll clear counters, tables, and dressers, touching each item, asking: keep, relocate, or ditch. Surface organization means defining zones — a morning station for keys and mail, a night zone for chargers and glasses — and refusing clutter’s slow creep. I’ll show you quick wins: tray corals for loose things, shallow baskets for mail, a catchall bowl for coins. Then you’ll pick storage solutions that match the room’s rhythm, label boldly, and commit: five minutes daily, one sweep nightly. It’s tidy, not tortured, and you’ll absolutely notice.

    Sorting Techniques: Keep, Donate, Recycle, Trash

    Think of sorting like triage for your stuff—you’ll touch fabrics, sniff old candles, hear the clink of glass, and make fast, honest calls. I tell you, decluttering strategies work best when you set four sorting categories: keep, donate, recycle, trash. Start loud: grab a box for each, label them, and move through a surface or shelf. If you use it weekly, keep it. If it’s intact but unloved, donate. If it’s paper, plastic, or broken glass, recycle. If it’s moldy, stained, or safety-risk, trash. Say aloud, “Nope,” like a tiny referee. I’ll nag you: don’t overthink. Feel textures, test zippers, sniff candles — decisions get easier with action, and your space thanks you.

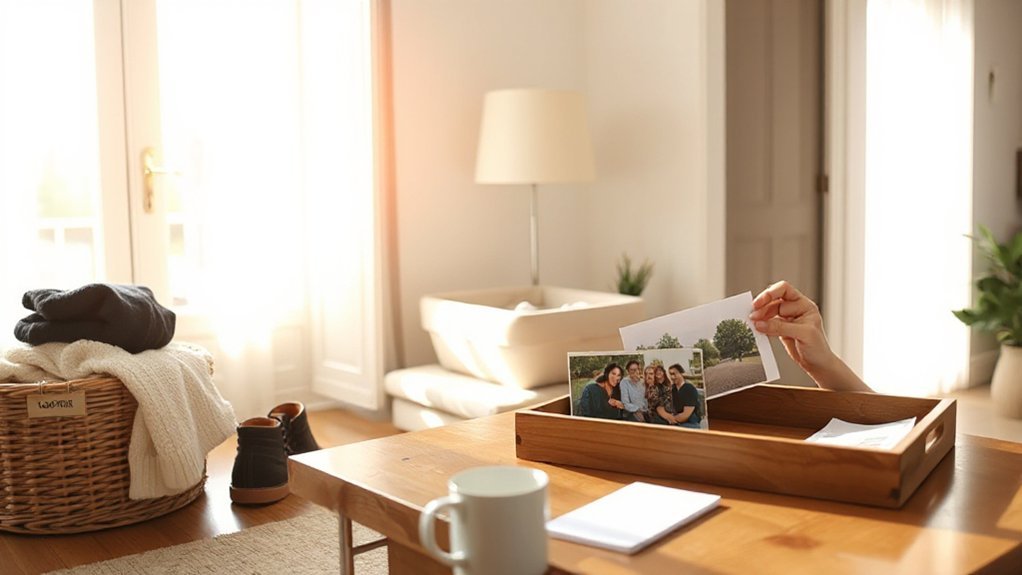
    How to Handle Sentimental Items Without Overwhelm

    When you open that box of childhood treasures, your stomach might do a tiny backflip — and that’s okay, I promise; I do the same thing, hands hovering, breathing in faded birthday cake and old marker, feeling the crinkle of paper and the dent in a plastic toy that once ruled your afternoons. You don’t have to keep everything. Touch each item, ask one sharp question: does this spark joy, or does it spark guilt? Photograph bulky things for memory preservation, tuck prints in a slim album, or pick one token to represent a set. Tell the story out loud, even if it sounds ridiculous. Set a small limit, label a “maybe” box, revisit in a month. Honor emotional attachment, not clutter. Simple, brave, done.

    Time-Saving Tools and Supplies to Have on Hand

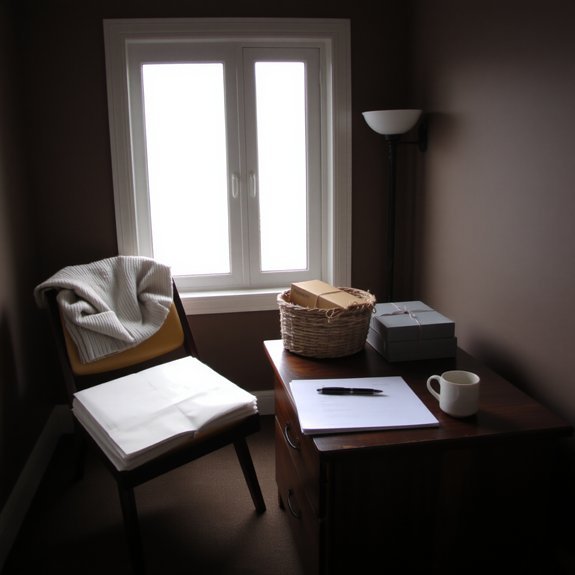
    I’ll show you the few supplies that make sorting fast and painless — think sturdy boxes, bright labels you can actually read, and a trash bag that gets used. You’ll want a couple of clever gadgets too, like a cordless label maker that sings your choices into tidy strips, and a timer so you don’t wander off mid-sort. Grab these, set a sixty-minute sprint, and we’ll turn chaos into a neat, sniffable victory.

    Essential Sorting Supplies

    Okay — let’s arm you for battle. I’ll hand you the kit: sturdy sorting bins for keep, toss, donate, and maybe “not sure”—they click, they stack, they make choices feel real. Grab labeling supplies, a bold marker, and colored tape; slap labels on lids like you mean it, your future self will thank you. Have a timer, gloves, a small trash bag, and a box for quick desk tools. Keep a microfiber cloth nearby, you’ll wipe surfaces and feel victorious. Play upbeat music, talk to the socks if it helps, I won’t judge. Move briskly, sort by sight and touch, toss what smells off, donate what sparks neutral. Celebrate tiny piles, they’re progress, not shame.

    Time-Saving Gadgets

    Because you want speed without chaos, arm yourself with gadgets that do more than look cool on a shelf — they save minutes, and minutes become hours. I tell you, start with smart organizers that clip, label, and hide chargers; you’ll feel the weight lift when cables stop staging a rebellion. Grab a portable label maker, a compact vacuum for crumbs and dust bunnies, and a cordless scanner for receipts — quick scans beat piles of paper every time. For screens, I swear by apps for digital decluttering, batch-unsubscribe, and one-touch file sorting — it’s like a spa day for your phone. You’ve got this, and these tools will make the job fast, oddly satisfying, and even a little fun.

    Where to Donate, Sell, or Recycle Unwanted Items

    Where do you start when every drawer feels like a small museum of things you don’t need? You grab a box, breathe, and whisper to yourself, “Be brave.” Donate items that still spark usefulness to local charities; you’ll feel lighter, and someone else will score a win. Sell higher-value stuff on online marketplaces—snap bright photos, write clear descriptions, price to move, and watch notifications ping like tiny triumphs. Recycle electronics at designated drop-offs, toss textiles at fabric bins, and take hazardous waste to scheduled events; smell-free, safe, responsible. If an item’s sentimental, bag it, date it, stash it—don’t altar your whole closet for old ticket stubs. I’ll cheer you on, and yes, we’ll laugh when you find that long-lost mug.

    Maintaining a Clutter-Free Home After the Reset

    Set three tiny rules and call it your new domestic religion—no dramatic vows required. I’ll be blunt: keeping a reset home means tiny, steady practices, not epic Saturday marathons. You’ll build decluttering habits that feel like breathing, not a chore. Touch surfaces, sniff the warm linen, decide fast. Use clear organization systems, bins you can open with one hand, labels you actually read.

    Set three tiny rules. Small, steady habits—touch, decide, stash—keep your home calm without heroic cleaning binges.

    1. Daily 5-minute sweep: counters, shoes, mail.
    2. One-item-in, one-item-out: clothes, gadgets, knickknacks.
    3. Weekly reset: laundry, surfaces, donation box.
    4. Monthly audit: toss, repair, reorder supplies.

    You’ll learn to spot clutter triggers, laugh at past hoarding, and keep the calm you earned.

    Conclusion

    You’ll sweep out more than dust; you’ll clear the attic of your mind. I’ve been there—half a box of memories, half a pizza slice—and you’ll sort with scissors and love. Set a timer, toss what’s stale, cradle what’s precious, give the rest a new home. The closet becomes a shoreline, each kept thing a smooth stone. Breathe in the clean air, smile, and step into the New Year lighter, louder, yours.

  • How Do I Make a Budget for the New Year

    How Do I Make a Budget for the New Year

    Most people underestimate how much they actually spend on little things — that latte and those three streaming trials add up fast. You can fix that without turning your life into bean-counting misery; start by logging every dollar for a month, feel the tiny shocks when you tally it, and decide what matters. I’ll show you how to set goals, carve categories, build an emergency cushion, and slay debt, so you end the year richer and calmer — but first, we pick a starting date.

    Key Takeaways

    • Tally all income (steady and sporadic) from paystubs and side gigs to know your real monthly cash flow.
    • Review three months of bank statements to categorize spending (groceries, subscriptions, takeout, impulse purchases).
    • Set 2–4 specific financial goals for the year with amounts and deadlines (emergency fund, debt payoff, vacation).
    • Assign spending limits to each category, automate savings transfers, and prioritize high-interest debt repayment.
    • Monitor weekly, review monthly, and adjust limits or goals while celebrating milestones to stay motivated.

    Assess Your Current Income and Spending

    assess income and spending

    Alright — let’s pull up your financial receipts and stop pretending the missing dollars are living a secret, glamorous life. You’ll list every income sources, paystub and side gig, feel the weight of paper and glowing app balances in your hands. I’ll nudge you: sort steady versus sporadic, circle totals, breathe. Then we’ll track spending habits — groceries, late-night takeout, subscriptions you forgot, that one chaotic impulse buy. Open bank statements, tap through three months, narrate what each charge tastes like (yes, your latte smells like regret). You’ll map money on a table, sticky notes like tiny boats, label leaks and anchors. It’s honest, tactile work, a little mortifying, oddly freeing — you’ll know where to steer.

    Define Your Financial Goals for the Year

    define specific financial goals

    Once you’ve faced the receipts and named the leaks, it’s time to tell your money where it’s allowed to go this year — and I promise, you can be both ambitious and reasonable. Start by naming your financial aspirations out loud, like a weird pep talk to your wallet. Say “emergency fund,” “vacation,” “debt-free,” whatever, and put timelines on them. Pick 2–4 yearly objectives, one short-term, one mid, one bold long-term. I suggest you write them down, feel the paper under your fingers, imagine the trip or zero balance, then prioritize. Be specific: amounts, deadlines, and a tiny reward when you hit milestones. Keep the goals flexible, revisit monthly, and don’t guilt-punish yourself — budgets are maps, not moral verdicts.

    Categorize Expenses and Set Spending Limits

    categorize expenses set limits

    Good—now that you’ve named the goals and given them deadlines, it’s time to decide what gets the money. You pull out last month’s bank statements, spread them like evidence on the kitchen table, and sort transactions into neat expense categories: rent, groceries, transport, subscriptions, fun. I nudge you to be honest—yes, even about that streaming pileup. For each category, set clear spending limits, a number you can live with and defend. Start tight where you can, leave breathing room where life surprises you. Tape the limits on the fridge, or set alerts on your phone, whatever wakes you up to reality. Review weekly, trim what leaks, reward small wins. You’ll feel lighter, in control, maybe even smug—guilt-free.

    Build an Emergency Fund and Plan for Savings

    If your budget is a map, consider an emergency fund the little bunker you hide your snacks in when the road goes sideways—I start mine by picturing the worst mildly plausible surprises, the car cough that turns into a tow, the furnace that gives up on a January morning, the sudden vet bill that makes you speak in capitals; then I set a weekly auto-transfer so saving feels like brushing my teeth, boring but non-negotiable, and I watch the number grow like a stubborn but obedient garden, green and reassuring. You’ll pick a target, three to six months of basics, then automate deposits into a separate account. Make a simple savings plan, label it clearly, and celebrate tiny milestones. Treat it like insurance you can hug.

    Create a Debt-Repayment Strategy

    Okay, here’s the plan: you’re going to attack the highest-interest balances first, like a stingy landlord collecting rent, while still keeping every other account’s minimums humming along. I’ll walk you through a simple payment schedule that shows exactly how much to send where, when, and why it makes your wallet breathe easier. Roll up your sleeves, grab a calculator or your phone, and let’s watch those interest charges shrink.

    Prioritize High‑Interest Debt

    Three simple rules: find the highest-rate debt, attack it like it insulted your coffee, and don’t stop until it’s toast. I tell you this because interest rates are the sneaky gremlins that eat your budget while you sleep. Look at each account, feel the sting when you see that APR, then point your money at the worst offender. You can use debt consolidation if it lowers the rate and simplifies bills, but don’t trade one monster for another. Make a plan that feeds extra dollars to that hot spot, visualize shredding statements, celebrate small victories with a silly fist pump. Keep a running tally, adjust as rates change, and stay ruthless with new charges. You’ll sleep better, I promise.

    Build Minimum Payment Plan

    Start with one simple promise: you’ll pay every minimum on time, every month, no excuses — even if it means eating instant ramen for a week. I’m with you, fork in hand, mapping out minimum payment strategies that keep lights on and stress down. First, list due dates, amounts, and interest rates, feel the relief when you see the whole picture. Automate where you can, set calendar pings for the rest. Then carve a tiny cushion, budgeting for flexibility — a $25 buffer can feel like a safety net. If a surprise hits, shift a nonessential meal out, not your mortgage. Say the tough no, reallocate that cash, watch balances breathe. Little steady moves win.

    Track Progress and Adjust Your Budget Regularly

    You’re going to check in every month, open your app or stack your receipts on the counter, and actually see what’s changed. Compare your goals to reality—if your savings aren’t growing like you planned, don’t feel bad, tweak the plan and reallocate funds where they’ll do the most work. I’ll hold you accountable with a nudge, you make the adjustments, and together we’ll keep this budget breathing.

    Monthly Check-Ins

    If you want your budget to actually work, check it every month—really look at it, like opening the fridge to find that mysterious jar of salsa. I sit down with my statement, a mug of coffee, and a pen; you should, too. Monthly accountability keeps you honest, it’s a tiny ritual that stops creep. Do quick financial reflections: what surprised you, what felt tight, what bought joy? Mark categories that blew up, highlight savings wins, and jot one tweak. Say aloud, “Okay, less takeout,” like a tiny promise. Close the file, feel lighter. If something needs bigger change, schedule it for a review, don’t panic now. Repeat, tweak, celebrate small victories — you’ve got this.

    Compare Goals vs. Reality

    When your goals and your bank account start arguing, don’t be a silent referee—pull up a chair, open your budget, and play detective. I want you to scan last month like a crime scene, smell the coffee, feel the receipts, note where intentions faded. Do a reality check: did you hit savings targets, or was impulse shopping louder than your well-meaning plan? Check goal alignment by lining each expense against a specific aim—emergency fund, vacation, debt payoff. Say it out loud, “Did I actually pay toward that?” Listen, adjust expectations, not morale. Mark wins, tiny and big, then note leaks. Be blunt, shrug when needed, laugh at mistakes, and record one clear tweak before you close the file and move on.

    Reallocate Funds as Needed

    Because budgets are living things, not stone tablets, I check mine like a nosy neighbor peeking through blinds—regularly, close, and with a little guilt. You’ll do the same. Track spending weekly, scan receipts, and listen for wobble in your cash flow. When a category overruns, make budget adjustments fast: trim dining out, shift a surplus from groceries, or pause a subscription with the flair of a magician vanishing a rabbit. That gives you financial flexibility without panic. Say aloud, “This month I move $50 from fun to rent,” and do it. Reallocate funds, set a brief trial period, then reassess. Small experiments teach more than heroic vows. Stay curious, honest, and a little ruthless. Your future self will thank you.

    Conclusion

    You’ve got this—really. I’ll say it: your budget won’t be boring, it’ll be your financial superpower, louder than a brass band. Start by checking last month’s receipts, feel the paper, then set one clear goal and guard it like treasure. Automate savings, chop one needless subscription, and pay extra on the highest-interest debt. Check in weekly, tweak when life shifts, and celebrate small wins with something you actually enjoy.

  • How Do I Start a Bullet Journal

    How Do I Start a Bullet Journal

    You want order, but not the boring kind—so grab a plain notebook and a pen that feels right, sit at your kitchen table with coffee cooling, and let me show you how to make a system that actually works for your messy life; I’ll teach you the three symbols that save time, how to set up an index and a future log in five minutes, build monthly and weekly spreads that you’ll actually use, toss in a habit tracker that won’t guilt you, and then—well, you’ll want to try one small trick I never admit in public.

    Key Takeaways

    • Choose a simple notebook and refillable pen to prioritize usability and sustainability over aesthetics.
    • Number pages and create an index so you can quickly locate collections and logs.
    • Set up a future log for major dates, then a monthly spread to map goals and events.
    • Use rapid-log symbols for tasks, events, and notes, and migrate unfinished tasks weekly.
    • Add a tiny weekly routine: habit tracker, a brief reflection, and five-minute weekly tidy maintenance.

    Why Bullet Journaling Works

    mental clarity through journaling

    Clarity greets you like warm sunlight through a cracked window, and I promise it’s not just fluff—bullet journaling works because it turns scattered brain-noise into a quiet, tidy map you can actually follow. You flip open pages, feel paper between fingers, and the chaos shrinks. You get mental clarity, stress relief, and a place for creative expression that doesn’t judge your doodles. You track goals with simple dots, you practice mindfulness, you carve out time for personal reflection. You sketch a to-do, feel your chest unclench. Time management becomes a game you can win, and self discipline grows, one checked box at a time. I’m telling you, it’s portable therapy with pens, and yes, it’s oddly satisfying.

    What You Really Need to Begin

    basic supplies for journaling

    You felt that neatness settle, right? I promise, you don’t need a shrine of stationery to start—just the basic supplies and a willing page. Grab a notebook you like, any size that fits your bag and mood, and a pen that glides without drama. A ruler helps for tidy lines, an eraser for human mistakes, and maybe a pencil for sketching ideas before they’re permanent. Keep it simple, keep it usable. Open the cover, breathe in the paper smell, feel the spine creak—this is yours. Don’t hunt for perfect pens, or color-coded chaos. Your bullet journal wants honesty, not fanfare. Start small, make it habitual, let it grow as you do.

    Understanding the Core Symbols

    core symbols enhance organization

    Think of symbols as the shorthand handshake between you and your future brain. You’ll pick a few core symbols—dot for tasks, circle for events, dash for notes—and you’ll feel pleasure, weirdly, when pages make sense. I tell you this while tapping a pen, hearing the paper whisper. Memorize essential meanings, keep them simple, change them if they lie to you. When a task turns done, fill the dot, hear a tiny victory. Migrate with a neat arrow, admit defeat with an X, mark priorities with an asterisk that winks. You’ll sketch them at the front, or on a sticky note, so they’re legal in your world. I promise, once they’re ritual, your chaos looks classy.

    Setting Up Your Index and Future Log

    Okay, let’s do this: grab your notebook, flip the first few pages, and make some room for the index—your bullet journal’s GPS. Start by numbering pages, run your finger along the edge, feel the paper. Reserve two to four pages, write “Index” at the top, leave spacing for sections. I’ll tell you what I do: jot topic titles, then their page numbers, update as you add spreads. Clean, quick index organization keeps you from hunting through a paper jungle.

    Now flip ahead, sketch a future log across two spreads. Block months, pencil in big dates, birthdays, appointments. Keep it sparse, revisit monthly. It’s the place for life’s bookmarks, simple and reliable.

    Creating Monthly and Weekly Spreads

    Once you’ve penciled in the future log, it’s time to get cozy with monthly and weekly spreads — they’re the map and the motor of your month. I like to start each month with a splash of color, a tiny doodle, and a clear monthly themes line, so the vibe’s obvious at a glance. Flip to weekly spreads next, lay out boxes or columns, and list weekly goals in bold, like little mission briefs. Write appointments, habit trackers, and a brain-dump corner that smells faintly of fresh paper and ambition. I talk to myself in the margins, make a joke, cross things out with satisfying violence. Keep it simple, tweak layouts as you go, and own the month—imperfections make it yours.

    Daily Logs That Keep You Focused

    If you want to actually get things done, daily logs are where the magic — and the mess — happens, and I promise they’ll save your week more often than your planner app ever will. You’ll open a fresh page, hear the scratch of pen, and decide what today deserves. Jot tasks, appointments, tiny wins, and the single big thing you’ll protect like a VIP. Use bullets, checkboxes, arrows, whatever feels good. Pause for daily reflections at evening, scan what stuck, what wandered off, and tweak tomorrow. This practice sharpens time management, keeps your rhythm, and prevents panic-sprints. I’ll admit, some days I scribble nonsense, then salvage gold. That’s the point: you’re building a habit, not a perfect museum piece.

    Simple Habit and Mood Trackers

    You’re going to love how simple this gets: draw a tiny checkbox grid for daily habits—drink water, stretch, read—and tick them off like a tiny, satisfying victory. I’ll show you a bright, color-coded mood key too, so one quick swipe of color tells you if today was sunny, moody, or full-on grumpy; it’s visually loud and strangely calming. Keep it small, keep it silly, and watch patterns pop up, like fingerprints of your life.

    Daily Habit Checkboxes

    Habit checkboxes are the tiny, ridiculous heroes of your bullet journal — I stick them on a page, tap the pen to paper, and suddenly habits look conquerable. You’ll feel clever, like you’ve tricked yourself into consistency. For habit tracking, draw neat rows of boxes, one per day, or a compact grid for the month, keep checkbox design simple so your eyes don’t cry. Use short labels — “water,” “walk,” “read” — and a satisfying marker stroke each evening. If you miss one, shrug, don’t self-flagellate; the visual will nudge you tomorrow. I like the scratch of ink, the small ritual of checking off, the tiny victory sound in my head. Start tiny, repeat, celebrate.

    Color-Coded Mood Key

    Okay, so you’ve been checking boxes like a tiny, determined robot. Now let’s add color, because feelings deserve flair. You pick a simple mood color schemes palette—five shades, vivid and named—and assign each one to a feeling. I’ll whisper my cheat sheet: sunny yellow for energized, calm teal for peaceful, mellow mauve for content, stormy gray for meh, and ember red for stressed. Draw a tiny legend, slap it on your monthly page, then color each day’s square or dot. You’ll see patterns pop, like constellations of your life. Emotional color meanings help you decode trends fast, they don’t judge. Repeat, tweak, and laugh when you realize Mondays are literally mauve. It’s low-effort, honest, and oddly satisfying.

    Custom Collections and Project Pages

    You’ll want collections that fit you, not some cookie-cutter template, so think habit lists, reading logs, recipe stashes, or a tiny travel brain-map—whatever sparks a little joy when you flip the page. For projects, I’ll show you a simple structure: a clear goal at the top, a short checklist of steps, deadlines and tiny milestones, plus a weekly progress box you actually update. Trust me, it’s satisfying to watch messy plans turn into neat wins, like making a cluttered closet suddenly behave.

    Personalized Collection Types

    Think of a custom collection like a tiny, stubborn room in your journal that you get to decorate and lock down with purpose; I’ll show you how to build those rooms so they actually earn their keep. You’ll make themed collections for hobbies, travel, or book lists, and seasonal collections that shift with pumpkin spice and sunscreen. Pick a title, sketch a border, drop down a quick index, then fill it with sensory cues: the scratch of pen, the smell of paper, a doodle that makes you laugh. Use sticky tabs, color codes, tiny checkboxes. I swear it’s satisfying. When you open that page, you should feel a plan, a mood, a tiny ritual—like brewing tea before tackling life.

    Project Page Structure

    Three parts, tops: a clear goal, the next actions, and a progress snapshot—anything else is just decorative confetti. I tell you this like a drill sergeant who loves glitter. Your project layout should sit on one spread, bold title, deadline, and a one-line purpose that smells like sunlight and fresh paper. List the next actions, short bullets, checkboxes—no essays. Add a tiny timeline, a splash of color for urgency, and a progress bar you can actually fill with a marker. For goal tracking, log wins and setbacks in the margin, honest and small. Flip back weekly, update, celebrate with a dramatic pen flourish. This is your custom collection, your project page, functional, forgiving, and oddly satisfying to stare at when you need courage.

    Tips for Keeping It Sustainable

    If you want your bullet journal to stick around longer than a good intention and a fancy pen, treat it like a low-maintenance pet, not a high-drama masterpiece. I tell you, pick sustainable materials and eco friendly options—recycled paper, refillable pens, a sturdy cover that won’t cry after three trips in your bag. Keep spreads simple, habit trackers small, and color splashes intentional, not accidental explosions. I write a one-line daily check, tuck receipts behind a page, press a leaf now and then for texture. Set a five-minute weekly tidy, don’t edit every thought. You’ll avoid burnout, save money, and feel smugly responsible. It’s practical, tactile, and yes, oddly comforting—like a plant you remember to water.

    Creative Ideas Without the Pressure

    Anybody can make a spread that looks like it took hours, and I’m here to prove you can do it in ten minutes flat without crying into your markers. You grab a pen, flip to a blank page, breathe in that paper-smell, and decide to play. I toss in three creative prompts: a color you felt today, a tiny triumph, and a doodle you’ll brag about. No perfection, just texture — a smear of watercolor, a sticker, a ruled box. That tiny ritual gives pressure relief, honestly. If you mess up, turn it into a border, or confess to your page, like a dramatic roommate. You’ll laugh, you’ll tinker, and your bujo will look lived-in, not staged. Try it, ten minutes.

    Conclusion

    You’ve got this — grab a simple notebook, a comfy pen, and plunge into it; I promise it’s less scary than a dentist visit and twice as satisfying. I’ll walk you through an index, a future log, monthly and weekly spreads, few symbols, and a tiny habit tracker, then step back so you can make it yours. Keep it playful, keep it useful, and don’t sweat perfection — beauty’s in the messy details.

  • How Do I Plan My Goals for the New Year

    How Do I Plan My Goals for the New Year

    You’re standing by a calendar, coffee cooling, and I’ll tell you straight: you don’t need grand resolutions, you need a map. Start by naming what matters, pick one bold goal, then chop it into tiny, embarrassing steps—daily habits you can actually do before lunch. I’ll show you how to set deadlines, spot traps, and build a tiny accountability army, so you won’t bail when life gets loud—but first, pick the one thing that scares you most.

    Key Takeaways

    • Clarify values and write three personal truths to anchor goals that truly matter.
    • Convert visions into specific outcomes with numerical targets and deadlines.
    • Break each goal into weekly, manageable tasks and set three-month checkpoints.
    • Build habits using cue–routine–reward, tie them to existing routines, and track progress daily.
    • Anticipate obstacles, create recovery plans, and celebrate small wins to sustain momentum.

    Clarify What Truly Matters to You

    clarify your true values

    If you’re tired of chasing bright, shiny goals that fizz out by February, let’s clear the fog right now. You’ll start with a quick, honest values assessment, like sniffing coffee to see if it’s actually fresh — hands-on, not airy. I’ll prompt you: what lights you up, what grinds you down, what would you defend at dinner? Jot three truths. Then we move to vision creation: picture a morning five years out, you’re there, what’s different? Smell the air, hear the keys, feel the weight of that success. Write a headline for that scene. These tiny, tactile moves anchor goals to what you actually want, not what looks shiny, and they make January stick for once.

    Review the Past Year With Honest Reflection

    reflect celebrate learn plan

    You’ll want to cheer for the real wins you had this year, the moments that made your chest tighten with pride, even if they were small. Then, point out the setbacks that kept repeating, the same sticky spots you tripped over, and ask yourself why you kept going back there. I’ll call you on your excuses, you’ll get honest, and together we’ll turn those lessons into sharper, sillier plans for next year.

    Celebrate Real Wins

    Alright—let’s be honest: I’m not here to hand out participation trophies. You earned wins, so celebrate achievements that matter, not every tiny checkbox. Sit with a mug, spread your calendar, point to the dates that shocked you—in a good way—and name them aloud. Tell a friend one specific victory, let the warmth of their “hell yes” land like sunlight. Photograph a finished project, frame a note, or dance for thirty seconds in your kitchen, because ritual makes success stick. Acknowledge progress by comparing who you are now to last January, not to some impossible ideal. Be precise: list three things you changed, one skill you leveled, and one habit you’ll keep. Reward honestly, laugh at the mess, then move forward.

    Identify Recurring Setbacks

    Nice—you’re basking in wins, and now it’s time to play detective. You scan last year’s notes, feel the paper’s crinkle, smell old coffee—start with simple self reflection techniques: timeline lists, sticky-note clusters, quick voice memos. Spot the patterns. Did workouts fade every March? Does your focus dissolve when meetings stack, like sugar melting in tea? Say it out loud, don’t be precious. I joke, you grimace, then you map triggers and blame together. For each recurring setback, jot one tiny countermeasure: alarmed calendar blocks, 10-minute reset walks, a buddy text. Those small habits teach grit, they turn stumbling blocks into stepping stones. This is honest work, and yeah, it’s where overcoming challenges actually begins.

    Set Specific, Measurable, and Meaningful Goals

    set measurable meaningful goals

    You’re going to pick one clear outcome, like “run a 10K” not “get fit,” so you can see the finish line and smell the victory sweat. Then you’ll set numbers and timelines—how many workouts a week, what pace, by when—so success is something you can count, not wish for. Finally, make it mean something to you, tie it to a value or a scene you care about, and I’ll hold you accountable with gentle mockery and a high-five.

    Define Clear Outcomes

    Clarity is a small, stubborn light I keep on when I plan—because vague wishes turn into forgotten notes on my phone. You’ll start by picturing the finish line, practicing outcome visualization like a short mental movie: smell the new gym kit, hear the click of a finalized draft, taste victory coffee. Speak the outcome aloud, write it on a crisp card, tape it where you brush your teeth. Set realistic expectations, trim the fluff, and tell yourself what success actually looks like tomorrow, next month, next quarter. I’m blunt: vague goals are sneaky time thieves. So you name the scene, pick an action, and schedule the first tiny step. Celebrate small wins, adjust as needed, and keep that stubborn light on.

    Quantify Success Criteria

    Numbers are your friend, even if they scare you a little—think of them as tiny, honest witnesses that cheer when you actually do the work. You’ll pick success indicators, concrete and simple. I’ll help you name them, set targets, and sketch deadlines, like mapping checkpoints on a hike. Hear the click of a checkbox, feel the small thrill. Use metric evaluation: choose a primary metric, a secondary sanity check, and one progress pulse you’ll check weekly. Say “lose 10 pounds by June,” or “publish 12 essays this year,” not vague wishes. Write the number, date, and how you’ll measure it. Test it, tweak it, celebrate micro-wins with a silly dance. Numbers won’t lie, and they make it fun.

    Align With Values

    Because goals that feel like someone else’s to-do list never stick, you’ll start by asking what actually matters to you—then make those values the boss of your plan. I’ll walk you through a quick value assessment: grab a pen, sit by a window, name five things that light you up, then rank them. Say “family,” “growth,” “health” out loud, feel each word in your chest. Now translate them into goals that are specific and measurable—“walk 30 minutes, three times weekly” not “exercise more.” Values alignment keeps you honest when motivation dips; it’s the tug on your sleeve that reminds you why. Keep checking in monthly, tweak targets, celebrate tiny wins, and don’t be afraid to drop what feels fake.

    Break Big Goals Into Small, Actionable Steps

    If a mountain-sized goal makes you gape and reach for snacks, don’t panic—you’ll climb it one careful step at a time. I break goals down like a map, you follow trails. Start with a clear goal breakdown, then carve it into tiny, helpful tasks. You’ll feel incremental progress, a tap-tap rhythm, not a monster roar.

    • List the final outcome, smell it, name it.
    • Split into weekly tasks you can actually do.
    • Set tiny deadlines, celebrate oddball wins.
    • Adjust as you go, shrug, redo the plan.

    I tell you to touch a task, do five minutes, taste success. Scene change: you’re moving, not staring. Those small steps add up, and suddenly the peak looks do-able, maybe even fun.

    Prioritize and Limit Your Focus Areas

    When your to-do list starts wagging its tail and demanding breakfast, you narrow your world down like a chef choosing three ingredients for a killer soup: pick the flavors that matter, and everything else stays on the counter. You’re the chef here, so sniff, taste, and pick. Limit your focus areas to two or three, the ones that make your chest buzz and your calendar less ridiculous. Say no to shiny distractions, yes to steady progress. Write the focus areas on a sticky note, tape it to your laptop, and glare at anything that tries to distract you. Prioritize tasks by impact, not by urgency. Tackle the meat first, save garnish for later. I’ll remind you when you wobble — you won’t drown in options today.

    Create a Realistic Timeline and Milestones

    You can’t sprint an ultramarathon, so don’t schedule one; instead, sketch a timeline that feels like your pace, not a motivational poster’s. I’ll say it straight: timeline strategies are about nudges, not shocks. Feel the calendar under your fingers, block realistic chunks, and breathe when dates wobble. Use milestone mapping to chop big goals into tasty bites, each with a clear deliverable you can actually touch.

    • Pick three-month checkpoints, small wins that glitter.
    • Set weekly actions you’ll do without drama.
    • Plan buffer weeks, for life’s curveballs and pizza nights.
    • Mark celebration points, however tiny, and savor them.

    You’ll get farther, with less guilt, and a better story to tell.

    Design Habits and Routines That Support Progress

    Because good intentions fade faster than leftover takeout, I build tiny rituals that actually stick—coffee that’s more than caffeine, a five-minute inbox triage that feels like folding clean laundry, and a single “do-not-skip” action that lives on every to-do list like a stubborn sticker. You’ll design habits and routines that nudge progress, not punish you. Start by anchoring a new action to something you already do, smell the mug, breathe, do the move. Use habit formation science: cue, routine, reward. Trim rituals weekly, practice routine optimization, swap steps that stall. Keep sessions short, sensory, and silly enough to enjoy—say a victory dance after one Pomodoro. Repeat, tweak, forgive slip-ups, and your goals get muscle.

    Build Accountability and Track Your Progress

    If you want goals to grow up, they need witnesses — not just hope and good vibes. You’ll lean on accountability partners who call you out, cheer, and guilt-trip you nicely. Keep progress journals, tactile and messy, where you scribble wins, stumbles, and the coffee stains that prove you showed up. Do simple, repeatable tracking so momentum feels satisfying, not punishing.

    • Schedule weekly check-ins, short and honest.
    • Share measurable mini-goals with a partner.
    • Use a visible tracker, paper or app, daily ticks win.
    • Write one-line reflections in your progress journals every evening.

    I’m blunt: the squeaky wheel gets oiled. Make your progress noisy, visible, and inconvenient to ignore.

    Prepare for Obstacles and Plan Recovery Strategies

    When plans hit potholes—and they will—you want a map, a toolkit, and someone who won’t let you wallow in the breakdown lane. I tell you this because obstacle anticipation isn’t guessing doom, it’s scouting the road ahead. Picture a rain-slick night, your sneaker squelching, and you already know where the slick spots hide. List likely snags, timeline slips, and energy crashes, then assign quick fixes and signals to call for help. For recovery planning, sketch short rescue routines: a one-day reset, a trimmed-to-do list, a friend’s “don’t quit” text. Test them like fire drills, celebrate small returns, and adjust. You’ll stumble, you’ll laugh, and you’ll get moving again—probably with mud on your shoes.

    Conclusion

    You’ve got the map, now walk it. I’ll cheer, you’ll stumble — like a clumsy Victorian corset, we’ll adjust and breathe. Pick one clear goal, chop it into tiny, do-able steps, build a daily habit, and set a weekly check-in that smells faintly of coffee and resolve. When setbacks hit, shrug, recover, and keep moving. I’ll keep nudging; you keep trying. By year’s end, you’ll surprise yourself.

  • How Do I Create a Vision Board for 2026

    How Do I Create a Vision Board for 2026

    A blank board is a promise you can touch, like a map that smells faintly of glue and possibility. You’ll pick goals—health, work, joy—then cut photos, pin affirmations, and color-code tiny habits into doable bites; I’ll coach you through layout tricks and weekly rituals so it actually sticks. Ready to make something you’ll want to wake up to every morning—and not hide in a drawer?

    Key Takeaways

    • Choose three clear 2026 goals (health, work, joy) and break each into tiny, testable weekly habits.
    • Pick a reachable medium—physical for tactile presence, digital for easy edits, or both combined.
    • Collect emotionally resonant images, colors, words, and short sensory affirmations; cut ruthlessly to keep only what moves you.
    • Place bold images where the eye lands, arrange with intention, and pin index-card habits for daily visibility and touch.
    • Build simple accountability rituals: five-minute morning scans, weekly reviews with a tally, and small rewards for wins.

    Clarify Your Intentions for 2026

    set concrete future goals

    If you’re anything like me, you’ve scribbled “be better” on a sticky note and called it a plan—cute, but vague. You’re going to do better by practicing intention setting, not wishful thinking. Sit down with a mug that smells like burnt coffee, close your eyes, and name three concrete future goals: one for health, one for work, one for joy. Say them aloud, like you mean it. Break each into weekly habits, tiny and testable. Write the habits on index cards, pin them where you’ll see them, and give yourself a tiny reward when you follow through — a five-minute dance, applause, whatever. I’ll admit, you’ll fumble. That’s the point. Keep it tactile, visible, and honest.

    Choose Between a Physical or Digital Vision Board

    choose your vision board

    Because you’re about to make something that’ll live on your wall or your phone, decide whether you want glue under your fingernails or paper cuts—or neither. I’ll say it straight: pick the medium you’ll actually use. If you like tactile stuff, feel the paper, the scissors, the glossy magazine smell, choose physical—those physical advantages include touch, presence, and a real-life anchor you can hang and see every day. If you’re always on a screen, opt for digital; the digital benefits are searchability, easy edits, and portability, no tape required. Combine them if you must — print a favorite collage, keep a polished version on your phone. Trust me, whatever you pick, make it reachable, visible, and slightly irresistible.

    Gather Images, Words, and Symbols That Resonate

    collect resonant images words

    You’re going to hunt for images that make your pulse quicken, colors you can almost feel, photos that smell like summer or coffee. I’ll challenge you to pick words that crackle—single verbs, tiny mantras—and toss in symbols that mean something only to you, even if I have to wink and pretend I understand. Gather, pair, and rearrange them on your board until the whole thing feels honest, funny, and undeniably yours.

    Choose Meaningful Imagery

    Alright—grab a stack of magazines, your phone’s photo roll, or that box of travel flyers you’ve been hiding under the bed; I’m about to make you ruthless about picking images. You’ll look for imagery significance, little moments that hit your gut, the kind of visual inspiration that sparks a grin. Trust your eyes, trust the tug.

    • A sunlit kitchen you actually want to cook in, warm light, chipped mug.
    • A city street you imagine walking, sneakers, breeze, coffee aroma.
    • A quiet desk corner, plant, pen, paper ready.
    • A laughing face that feels like “yes,” candid, imperfect, alive.
    • A destination scene that smells like salt or pine, vivid color.

    Cut ruthlessly, arrange boldly, test the emotion — if it doesn’t move you, toss it.

    Curate Powerful Words

    You’ve torn up the pictures that didn’t sing, now let’s give those keepers words that actually pull. You scan magazines, sticky notes, your phone, and your own stubborn heart, picking phrases that make your spine straighten. Paste an inspirational quote in bold, smell the glue, feel the paper edge. Add empowering phrases — “I show up,” “I choose joy,” “More play, less panic” — handwritten in colors that make you grin. Whisper them aloud, test the rhythm, swap fonts like socks until one fits. Toss in a single raw word — “root,” “launch,” “breathe” — as an anchor. I nudge you to mix script and block letters, symbols and doodles, and step back to see the story, not a list.

    Select Affirmations and Short-Term Milestones

    If you want your vision board to actually work, pick words that feel like tiny promises and milestones that make you grin when you say them out loud. You’ll do affirmation selection with gusto, choose short lines you can whisper in the shower, and pair each with a reachable checkpoint. Think sensory — crisp paper, a scribble of blue ink, the small thrill of checking a box.

    • Say it: “I’m calm during chaos” — practice breathing for two minutes daily.
    • Claim it: “I finish projects” — set a 3-day mini-deadline.
    • Feel it: “I move joyfully” — try three 20-minute walks this week.
    • Notice it: “I save $200” — automate a weekly transfer.
    • Share it: “I connect more” — text one friend each Monday.

    Affirmation selection and milestone setting, nailed.

    Decide on Size, Layout, and Materials

    You’ll want to pick a board size that fits your space and your ambition — poster board for a quick boost, cork or foam core if you want to rearrange like a nervous interior decorator. Grab materials that feel good to your hands and eyes: glossy magazine clippings, textured paper, a crinkly ribbon, a sharpie that glides, and lay them out in a grid, a spiral, or a happy mess until it sings. I’ll guide you through choices and tricks, and we’ll laugh at my terrible glue-smudges as you build something that actually makes you want to get up in the morning.

    Choose Board Size

    Pick a size that feels like a promise, not a chore — something you’ll actually look at every morning without sighing. You’ll pick board dimensions that fit your wall, your energy, and your snacks-on-the-sofa habits. Think about visibility, where light hits, and whether you want daily peeks or weekly rituals. I’ll be blunt: don’t pick something huge just to impress your future self.

    • Small poster (11×17): intimate, portable, easy to hide
    • Medium foam core (18×24): statement without overwhelming
    • Large cork board (24×36): room to grow, pins that click
    • Gallery frame size (16×20): classy, tidy, dust-free
    • Collage folder: portable, private, tucked-away

    Trust your personal preferences, measure once, smile, then commit.

    Pick Materials & Layout

    Nice choice — size decided, now we get to the fun part: the stuff that makes your vision board feel like you and not a Pinterest shrine to other people’s lives. Pick a board type — cork, foam, poster, or framed canvas — touch each, feel the texture, imagine pins or glue, hear the soft thud of photos landing. Lay out sections: goals, daily habits, joy. Try a grid, a freeform collage, or a radial sunburst. Mix artistic styles, bold minimalism with doodles, vintage clippings with neon stickers. Gather scissors, glue stick, washi tape, markers, thumbtacks. Play, step back, squint — if it makes you smile, it’s right. I promise, you’ll adjust as you live with it.

    Arrange Elements With Emotion and Focus in Mind

    Even if it feels a little silly, treat your vision board like a movie set — I’m the director, you’re the lead, and every picture, color, and quote gets placed for a reason. You’ll use emotion driven design to pull feelings forward, and focused energy to guide where your eye lands. Think texture, scent memories, bright focal images, quiet corners for reflection. Move pieces around until your chest tightens with yes, or relaxes with calm.

    • Put the boldest, happiest image where your gaze first lands.
    • Anchor goals with tactile items, like fabric swatches.
    • Group related images, make tiny story clusters.
    • Use emptiness as a breath, don’t clutter.
    • Add one whimsical item to make you smile.

    I joke, I prod, but you’ll know when it sings.

    Place Your Vision Board Where You’ll See It Daily

    You’ve got the board, you’ve arranged the feels, now don’t hide it like a guilty snack—put it where you’ll actually see it every day. I’ll say it bluntly: daily visibility is the secret sauce. Pick spots you pass without thinking—above your desk, next to the bathroom mirror, or by the kitchen coffee station. Mount it at eye level, not tucked behind books or in a drawer. Touch it, smell the paper, lean in and read a headline. Board placement should force small, repeat encounters, not big, rare ceremonies. I love a door-hang for rude awakenings; you might prefer a bedside peg. Test it for a week, move it if you dodge it, and keep what makes you smile—no guilt, just results.

    Use Rituals and Review Sessions to Stay Accountable

    If you want this board to actually do anything, treat it like a living thing — check in with it on purpose. You’ll build simple rituals for accountability, little cues that pull you back, and honest review techniques that keep you honest. I peek, I touch, I say one line aloud — “What’s one tiny move today?” — because ritual beats willpower, every time. Set a short ritual, then a focused review session weekly, clear-eyed, coffee in hand. Track wins, tweak actions, celebrate small shocks of progress.

    • Morning five-minute scan, fingers on images, breathe deep
    • Weekly sit-down, notebook open, rate each goal
    • Monthly tally, mark wins with a sticker
    • Text a buddy, share one checkpoint
    • Quick visual tidy, remove anything stale

    Refresh and Adjust Your Board as Priorities Evolve

    I still check my little ritual spot every morning, breathe in the paper-and-ink smell, press a finger to a photo and ask, “What’s one tiny move today?” — but plans shift, people change jobs, and desires sneak sideways, so your board should too. You’ll glance at images, notice a faded want, and get honest. Rip, rotate, rewrite. Evolving priorities mean some goals age out, others shout louder. Schedule regular updates — monthly quick-touches, quarterly deep-cuts — and treat it like pruning, not punishment. Swap a photo, add a receipt from a class, tape in a new postcard. Say aloud, “This no longer fits,” then laugh and move on. Your board stays truthful, tactile, and oddly forgiving, just like you when you mess up.

    Conclusion

    Think of your vision board as a garden you tend—I’m the awkward gardener nudging seeds into neat rows. You’ll plant small habits, water them with daily glances, prune expectations when stuff wilts. Place images where sunlight hits your eyes, whisper your affirmations like fertilizer, and celebrate tiny sprouts with ridiculous victory dances (I don’t judge). Keep it visible, tweak plots each season, and remember: growth is messy, fragrant, and stubbornly worth it.

  • How Do I Set Realistic New Year’s Resolutions

    How Do I Set Realistic New Year’s Resolutions

    You’re not starting with a blank slate, you’ve got habits, tastes, and a cozy pile of excuses—so let’s pick goals that actually fit your life. I’ll help you choose one to three values-driven priorities, chop them into ten-minute moves, set small milestones you can see, and plan for the potholes—plus celebrate tiny wins so you don’t bail at week two. Stick with me and you’ll have a plan that feels doable, not punitive, and a sweet little victory to chase first.

    Key Takeaways

    • Choose one to three goals that reflect your core values and excite you, not what others expect.
    • Define clear, measurable outcomes and deadlines so success is objectively trackable.
    • Break each goal into tiny, prioritized tasks you can do in ten minutes or less.
    • Anticipate obstacles, create backup actions, and plan quick recovery steps after setbacks.
    • Track progress daily or weekly with simple logs and celebrate small wins to sustain motivation.

    Choose Goals That Reflect Your Values

    reflect personal values authentically

    Pick one, or three—whatever feels honest. I’ll say this plainly: you’re picking goals that should sit right in your chest, not in someone else’s calendar. Do a quick personal reflection, sit by a window, smell coffee, jot what matters—kindness, curiosity, sleep. Test each idea for value alignment: does it match your day-to-day choices, your awkward jokes, the way you spend Saturday mornings? If not, toss it. Pick specific actions: call once a week, walk twenty minutes, read one chapter. Say them out loud, feel them in your mouth, imagine the small wins. I’ll admit I sometimes aim too high; you’ll laugh, adjust, and keep the ones that actually fit your life. Simple, honest, steady.

    Focus on a Few Priorities, Not Everything at Once

    focus on key resolutions

    Pick one to three resolutions you actually care about, not a laundry list that makes you sneeze just looking at it. I’ll help you break each into measurable milestones—small wins you can touch, track, and high-five when they happen. Then we’ll schedule regular check-ins, a quick calendar ping and a sit-down with your coffee, so you can course-correct before enthusiasm goes extinct.

    Pick One to Three

    One to three goals—no more, no less—are all you need to start the year without collapsing into overwhelm. I want you to pick the sharpest resolution types, the ones that buzz when you think of them, and forget the rest. I’ll show goal examples that feel possible, not heroic. You’ll touch them daily, like tasting coffee—small, precise sips.

    1. Choose one health goal, say morning walks, and schedule them.
    2. Pick one skill, like 20-minute guitar practice, and keep a log.
    3. Select a money habit, maybe automate savings, watch it grow.
    4. Reserve one social aim, call a friend weekly, notice the warmth.

    You’ll focus, you’ll breathe, you’ll actually finish something.

    Set Measurable Milestones

    Good—you’ve narrowed your list to a handful of buzzy goals that actually feel doable; now let’s give them a map. You pick the priority, I cheer wildly, we get specific. Break each goal into bite-sized milestones, name measurable outcomes like “lose 8 pounds” or “read 12 books,” and set dates that make sense. Picture stickers on a calendar, the satisfying tug of a checked box. Use simple tools for progress tracking—a notebook, app, or sticky notes on the fridge—whatever you’ll actually use at 6 p.m., tired. Celebrate small wins, adjust if a milestone feels ridiculous, and be honest when you slip up. You’ll build momentum, not guilt. I promise, it’s more rewarding than whining about vague ambitions.

    Schedule Regular Check-Ins

    Think of this like date night with your goals — regular, predictable, and slightly romantic in its commitment. I tell you, set a clear check in frequency, weekly or biweekly, so momentum smells like fresh coffee, not panic. Pick a quiet corner, calendar visible, phone off. Bring concrete wins, failures, and next steps. Loop in accountability partners, a friend or coach, someone who asks the blunt questions.

    1. Choose frequency: weekly for fast habits, monthly for big projects.
    2. Keep it short: 20–30 minutes, focused on progress, not excuses.
    3. Bring specifics: numbers, receipts, photos — sensory evidence.
    4. Debrief and reset: decide one micro-action, set a deadline, celebrate small wins.

    You’ll laugh, adjust, and keep moving.

    Make Goals Specific and Measurable

    set measurable fitness goals

    You’ll want to name what success looks like, not just hope it happens — “lose weight” is fuzzy, “lose 10 pounds in three months” tells you when to celebrate. Mark progress with measurable checkpoints you can actually see and feel, like weighing in every two weeks, logging workouts, or counting servings of veggies. I’ll hold you to it, gently, with reminders, tiny rewards, and the occasional sarcastic cheer.

    Define Clear Success Criteria

    If you want that New Year’s promise to actually stick, don’t mumble a wish—define success like a tiny referee with a clipboard. I want you to name success indicators, set goal benchmarks, and picture the win so clearly you can almost hear the confetti. Be concrete, not vague. Say, “I’ll hit X,” not “I’ll do better.” Measure outcomes you can see, touch, or count. Commit to one clear finish line, then describe it.

    1. List the exact outcome, with numbers or visible proof.
    2. State the deadline, calendar date, and final scene.
    3. Note what counts as partial wins, and what’s a fail.
    4. Keep the rules simple, review them weekly, adjust if needed.

    You’ll thank yourself later, trust me.

    Set Measurable Progress Markers

    A few clear checkpoints will save your goal from becoming a dusty promise in drawer three of life—trust me, I’ve checked. You’ll pick tiny, measurable outcomes, like “run 3 miles twice a week” instead of “run more.” I’ll nudge you to name the numbers, deadlines, and evidence you’ll show yourself, a sweaty shoe, a calendar sticker, a spreadsheet row. That’s progress tracking, plain and useful. Set weekly mini-goals, log them, review every Sunday, celebrate with a treat that doesn’t undo progress. If a marker’s too hard, shrink it; too easy, stretch it. I promise bluntness: you won’t guess your way to change. Do the small checks, watch momentum build, and feel the satisfying click of real progress.

    Break Each Goal Into Small, Actionable Steps

    While big goals feel thrilling, they also choke on vagueness—so I break them down into tiny, chewable bites you can actually swallow without gagging. You’ll laugh, then act. Start with a clear goal breakdown, naming the outcome, then slice it into actionable steps you can do in ten minutes. Picture sticky notes, a pen that squeaks when you press too hard, and a timer clicking like a tiny coach.

    Big goals choke on vagueness—break them into ten-minute bites, sticky notes, squeaky pen, tiny-timer momentum.

    1. Define the exact win you want, write it down, smell the paper.
    2. Split that win into daily micro-tasks, each under 15 minutes.
    3. Order tasks by effort, tackle the smallest first, build momentum.
    4. Track one completed step, celebrate with a dramatic fist pump.

    Build Routines and Cues to Support New Habits

    Because habits don’t just happen, I build tiny rituals that nudge me like a polite but persistent roommate. You’ll do the same: link a new habit to something you already do, that’s habit stacking, and it’ll feel oddly inevitable. Put your running shoes by the door, brew one coffee right when you wake, leave a sticky note on the bathroom mirror. Use environmental cues—sight, smell, touch—to trigger action, not guilt. Start tiny, celebrate instantly, then add five extra seconds. I whisper, “You’ve got this,” to my toothbrush and mean it. Set a simple sequence: cue, action, reward. Repeat until it’s automatic. It’s boring, steady work, like folding laundry, but way more satisfying.

    Plan for Obstacles and Setbacks

    You’ll hit a snag — and sooner than you think — so let’s plan like a tiny, cheerful army would. I picture you, coffee cup in hand, spotting the first obstacle identification on the path — a late meeting, a cold, a snack attack — and you sigh, then smirk, then act. You’ll name the snag, breathe, and pick a simple counter.

    You’ll hit a snag — smile, name it, breathe, and pick a tiny, cheerful counter to keep moving.

    1. Anticipate: list likely obstacles, sensory triggers, times of day, people involved.
    2. Reduce friction: lay out clothes, prep snacks, set buffer time, make the default easy.
    3. Backup plans: three tiny alternatives you can do in five minutes.
    4. Recovery script: a quick pep line and a next-step you can actually do.

    These setback strategies keep you moving, not stalled, with dignity intact.

    Track Progress and Celebrate Milestones

    Now that you’ve sketched the path, track it like a friendly detective: eyes on the breadcrumbs, coffee mug next to your notebook, pen tapping when you spot progress. I want you to log tiny wins, snap a photo, jot a sentence, or tick a box. Progress tracking isn’t glamorous, but it’s proof. Set weekly check-ins, calendar alerts, and a simple chart you’ll actually update. Reward yourself, not with guilt, but with small milestone celebrations — a favorite snack, a movie night, a new pair of socks that make you feel heroic. Say aloud, “I did that.” Celebrate, then reset the aim. Keep it sensory, honest, and slightly ridiculous; you’ll laugh, and you’ll keep going.

    Conclusion

    You’ll nail this, I promise — maybe not on day one, but like, probably by day seven if you’re honest. Pick what matters, chop it into tiny ten-minute wins, and set a little alarm that smells like progress (figuratively). I’ll check in with a calendar cue, you’ll do the short task, we’ll high-five over coffee. Adjust when life sneaks up, celebrate the tiny victories, and keep the goals real — you’ve got this, seriously.

  • How Do I Build a Capsule Winter Wardrobe

    How Do I Build a Capsule Winter Wardrobe

    You know that cozy sweater that feels like a hug? Imagine your whole closet built around that vibe — warm, practical, and a little stylishly lazy — and you’ll get where I’m going, but I’ll show you how. You’ll pick a calm color palette, sweaters that layer without puffing you up, a dependable coat that actually blocks wind, shoes you can stomp through slush in, and a few accessories that finish outfits like punctuation. Stick with me and we’ll make mornings painless.

    Key Takeaways

    • Define your winter style (minimal, romantic, or practical) and a color palette of 2–3 neutrals plus one or two accent shades.
    • Start with core layering pieces: snug thermal base layers, slim turtlenecks, crewnecks, and an oversized cardigan in neutral tones.
    • Invest in one weather-appropriate coat and two versatile shoes: insulated boots and all-season sneakers with good traction.
    • Build bottoms around wool-blend trousers, dark jeans, warm leggings, and one statement wide-leg or culotte for variety.
    • Care and store seasonally: wash gently, air out items, repair seams, and pack sweaters with cedar in breathable boxes.

    Defining Your Winter Style and Color Palette

    winter style and color

    Where do you want to feel cozy and look like you meant to? You stand in front of your closet, fingers grazing wool and denim, and I’ll say it: your personal style shouldn’t be an accident. Start by naming three vibes—minimal, romantic, practical—then toss out anything that doesn’t belong. Use color psychology as your cheat sheet; warm browns soothe, deep blues steady, mustard sparks joy without yelling. Hold garments to your face, watch skin and mood change, that’s decision-making, not vanity. Picture a rainy commute, textured scarf against your cheek, and pick pieces that survive the scene. Be ruthless, keep what comforts and flatters, swap the rest. You’ll end up with a winter capsule that feels like you, but smarter.

    Choosing Versatile Knitwear and Sweaters

    versatile knitwear care tips

    You’ll start with core neutrals—think oatmeal, charcoal, and navy—that let everything mix and match, like reliable friends at a small, well-dressed party. Pick layering-friendly silhouettes, slim enough under a coat but roomy enough for a shirt or tee, so you’re warm without looking like a marshmallow. I’ll also show simple fabric-care essentials—gentle wash, reshape while damp, and store folded—so your favorites last and stop silently pillowing into sad sweater lumps.

    Core Neutral Colors

    Think of neutrals as the quiet backbone of your winter closet—steady, forgiving, and oddly magnetic when you get them right. You pick warm camel, cool gray, navy, and true black, laying them out like a small, reliable army; you’ll mix neutral color combinations that feel fresh, not boring. I tell you to test each sweater in daylight, rub the knit between fingers, smell the wool—yes, really—so you know its character. Ignore every seasonal color trends panic, but note one or two accent shades for fun. Choose textures that speak: chunky, fine, brushed, ribbed; they keep looks alive without shouting. Buy pieces that fit your life, mend small snags, and wear them until they earn hero status.

    Layering-Friendly Silhouettes

    Now that you’ve built a neutral foundation, let’s talk shapes that actually play nice together. You’ll want sweaters that layer without bulking, so pick crewnecks, slim turtlenecks, and slightly oversized cardigans you can slip under coats. Think contrast: a fitted knit beneath a boxy jacket, or a longline sweater over tapered trousers. I like mixing textures, you’ll feel the cozy weight, see the clean lines. Practice simple layering techniques: thin base, mid-weight knit, structured outer layer. Watch proportions—short tops with high waists, long sweaters with slim bottoms. Those silhouette shapes keep outfits balanced, easy to tweak. Try combinations on, move around, sit, sip coffee, and you’ll know which knits actually behave.

    Fabric Care Essentials

    While I love a fluffy sweater as much as the next person, caring for knitwear properly keeps it looking sharp and smelling like victory instead of attic, so pay attention. You’ll pick pieces by fabric types—merino, cashmere, cotton blends—because each behaves differently. Read labels like a detective, feel the knit, sniff for stubborn funk. For washing techniques, hand-wash or use a gentle cycle in a mesh bag, cool water only, mild detergent, no bleach, no drama. Press water out, don’t wring; roll in a towel, breathe relief. Lay flat to dry, reshape while warm, avoid hangers that make sad shoulders. Store with cedar or lavender, check for pills and de-pill with a razor or comb. You’ll wear them longer, look smarter, feel smug.

    Selecting Essential Layering Pieces

    snug base layers cozy midlayers

    You’ll start with snug base layers that hug your skin, wick moisture, and don’t make you feel like a damp, soggy burrito. Then pick midlayers that trap heat without ballooning your silhouette — think cozy fleece or a slim wool cardigan you can shrug on between errands. Top it off with a versatile outer layer that fends off wind and wet, packs or hangs neatly, and makes you look purposefully put-together even if you just rolled out of bed.

    Base Layers: Fit & Fabric

    Because the things closest to your skin do the heaviest lifting, pick base layers like they actually matter — because they do. I tell you to start with thermal materials, merino or synthetic blends that feel smooth, not scratchy, against your neck; think soft hug, not woolly chokehold. Follow fit guidelines: snug, but not sausage-tight, with enough stretch for reaching, bending, and dramatic coffee-reaching. I like a slim long-sleeve and a fitted tee for variety. Smell, dampness, and movement tell you what works; if it clings when you sweat, dump it. Keep neutral colors, stash an extra in the day bag, and layer with intent. Trust me, get this right and you’ll stop fidgeting, start enjoying winter outfits, and feel smarter for doing so.

    Midlayers: Warmth Without Bulk

    If you want warmth without turning into a puffed marshmallow, start with midlayers that do the heavy cozy lifting and nothing more. I pick thin fleece, merino sweaters, and light synthetic puffs that hug your torso, trap heat, and shrug off bulk; you’ll feel soft, warm, not stifled. Think insulating materials as tools: wool for smell resistance, fleece for quick-dry comfort, and down or PrimaLoft where warmth-to-weight matters. Use smart layering strategies—zip or snap for venting, roll sleeves, stash a scarf—so you control microclimates on the move. I recommend neutral colors that mix with everything, slim cuts for clean silhouettes, and one statement knit for personality. You’ll stay warm, nimble, and oddly stylish, promise.

    Outerwear: Versatile Protective Pieces

    You’ve got your midlayers doing the heavy lifting, hugging your torso like a mildly possessive koala; now let’s talk about the outer shell that actually faces the weather. You want pieces that protect, polish, and vanish into outfits when needed. Think windproof cuts, slick linings that whisper against your sweater, and hoods that actually stay put.

    1. A waterproof rain jacket, lightweight, packable, with taped seams — for wet commutes and soggy dog walks.
    2. A tailored trench coat, classic, waist-defining, that dresses up jeans and quiets city noise.
    3. A puffer with a matte finish, warm pockets, that cradles you on freezing days.
    4. A minimalist wool overcoat, structured shoulders, that upgrades everything instantly.

    Choose neutral tones, test movement, and imagine weather before you buy.

    Investing in Outerwear That Works for Your Climate

    Pick a coat that actually matches the weather where you live, not the one you romanticize over in Instagram photos—trust me, that parka will feel like a sauna in a mild coastal winter. You’ll thank me later. Think climate considerations first: humidity, wind, salt air, how often you bike or commute. Aim for weather adaptability — layers, removable liners, roll-up hoods — so one piece handles drizzle, sleet, or sudden gusts. Feel the fabric, zip it up, swing your arms. If it breathes, you won’t stew; if it sheds water, you won’t freeze. Choose neutral tones, sturdy hardware, pockets that actually fit your phone. I’m blunt because wardrobe mistakes sting, and a sensible coat saves you money, time, and a lot of shivering dignity.

    Picking Footwear for Warmth and Versatility

    You’re not going to get far in slush and ice with flimsy shoes, so let’s talk insulated boots that keep your toes toasty and sneakers that actually survive rainy days. I’ll show you rugged soles with serious grip for slippery sidewalks, and lighter all-season kicks that look good with everything, because yes, you can have comfort and style without frostbite. Picture stomping through crunchy snow, feeling the tread bite in, then swapping to a slick sneaker for coffee—practical, cozy, and slightly smug.

    Insulated Boot Types

    Boots matter. You want warmth, grip, and style, without lugging a closet full of clunky shoes. I’ll be blunt: pick boots that do the job, then disappear into your outfit like a helpful neighbor.

    1. Insulated lace-ups — rugged warmth, insulated boot materials like Thinsulate or fleece lining, cinch the ankle, keep snow out, you stomp happily.
    2. Chelsea winter boots — sleek, easy on, add a wool sock, waterproof boot features protected seams, smarter look for errands and dates.
    3. Parka-style boots — tall, cozy collars, sled-ready traction, you feel hugged, plow through slush without drama.
    4. Lightweight insulated hikers — breathable, grippy soles, versatile on trails and city sidewalks, practical and quietly handsome.

    All-Season Sneakers

    If you want sneakers that work from drizzle to light snow, think of them like a reliable sidekick—quiet, clever, and unfazed when things get messy. I’ll walk you through choosing sneaker materials that block chill but breathe, like coated leather, treated canvas, or bonded mesh with a water-resistant finish; they feel snug, break in fast, and don’t scream “winter clodhopper.” Pick neutral colors, simple lines, and minimal branding for style versatility, so you can pair them with jeans, layered knits, or a sleek parka without eyeballs rolling. Tread lightly on embellishments, test the liner for warmth, and try them on with thicker socks. You’ll end up with comfy, practical sneakers that actually get worn.

    Sole Traction & Grip

    Three things matter most when your feet meet ice: grip, confidence, and the tiny voice in your head that says, “Don’t face-plant.” I’m saying this because soles aren’t just rubber—you want tread that bites into slush, channels that spit out water, and a compound that stays flexible when the temperature drops, so you don’t feel like you’re walking on frozen paddles. I’ve slipped, learned, adjusted. You’ll want to check traction technology claims, feel sole materials under your thumb, and imagine steps on wet pavement. Think loud tread, not slick polish. Here’s what to prioritize:

    1. Deep lugs and siping for bite and water channeling.
    2. Soft, low-temperature sole materials that stay grippy.
    3. Heel braking patterns to stop on slopes.
    4. Tested outsole blends with traction technology badges.

    Building a Selection of Winter-Ready Bottoms

    Because cold weather loves to sneak up on you, I’ve learned to treat my bottoms like battle gear—warm, flexible, and not afraid to look good; you’ll want the same. Start with classic stylish trousers in wool blends, they hold shape, block wind, and feel crisp against the knee. Toss in a pair of warm leggings for layering, soft against skin, stretchy, and surprisingly dressy under skirts. Include a dark skinny jean, rigid yet forgiving after a long walk. Pick one insulated culotte or wide-leg for flair, roomy enough for thermal tights. Prioritize fit, durable seams, and easy care. When you try them on, squat, sit, stomp—make sure nothing pinches, rides up, or whispers “cold” when you move.

    Adding Functional and Stylish Accessories

    Want to know the secret weapon of a capsule winter wardrobe? It’s accessories, the tiny things that punch up function and flair. I like gear that works hard and looks good — you will too. Think textures you can feel, colors that cheer, and pieces that snap an outfit together.

    1. Choose stylish scarves — wool, cashmere blends, bold prints — wrap them, tuck them, let them billow.
    2. Pick functional hats — beanies with fleece lining, brimmed wool hats — they block wind and polish an outfit.
    3. Add leather gloves with touchscreen tips, they glide on, keep your fingers, and your texts, warm.
    4. Grab a compact umbrella and a neutral crossbody bag, quick, useful, weather-ready.

    Accessorize with intent, not clutter.

    Care and Storage Tips to Extend Garment Life

    If you treasure your winter pieces, treat them like hard-working friends — mend a snag, air out that wool, and they’ll stick around. You’ll inspect seams, feel for pills, and decide: tug or trim? I show you simple garment maintenance — tiny stitches, gentle detergent, cool-water washes, steam instead of iron. Smell matters, so hang items to breathe after wear, don’t cram them in a heap. For seasonal storage, pack sweaters folded in breathable bags, cedar blocks for moth-banishing, and silica pouches to keep damp away. Label boxes, date them, and store in a cool dark spot; your future self will thank you. Quick fixes save money, and neat storage keeps your capsule feeling like new.

    Creating Outfit Formulas for Quick Dressing

    Usually, mornings are rushed, cold, and emotionally uncooperative, so I’ve learned to build outfit formulas that make dressing feel like a tiny triumph instead of a quest. You’ll thank me when you stop staring into the void and actually step outside warm and styled. Think of outfit combinations as recipes: base (sweater + jeans), layer (coat or cardigan), accent (scarf or boot), finish (hat or gloves). That’s your shortcut, palette, and pep all in one.

    1. Base + layer = cozy office-ready, swap sneakers for boots.
    2. Monochrome base + textured accent = instant polish.
    3. Jeans + chunky knit + statement coat = weekend power.
    4. Dress + tights + short coat = date-night warmth.

    Practice quick styling, repeat, tweak, and you’ll win mornings.

    Shopping Priorities and Investment Pieces

    Because you’ll wear them the most, start with the pieces that earn their keep: a warm coat, a pair of boots that actually fit your feet, and a sweater you can hug without itching—these are your wardrobe workhorses, not fashion show pieces. You decide what matters, then align your shopping budget accordingly; I promise you’ll thank me when mornings are painless. Prioritize quality materials—wool, leather, sturdy knits—feel them, squat in them, sniff for realism (yes, really). Buy fewer things that last, not more that scream “sale rack.” Split your budget: invest in outerwear and shoes, skimp on trendy accessories. When you try items on, move around, brisk walk, sit—if it survives real life, you’ve won. Treat shopping like rescue, not sport.

    Conclusion

    So you want a capsule wardrobe to save time, money, and dignity—adorable. You’ll pick a mood, choose a cozy palette, layer like a pro, and buy one good coat that actually blocks wind. Mix, match, mend, and repeat. You’ll smell cashmere, feel warm, and look like you didn’t try too hard. I promise you’ll survive winter — stylishly, comfortably, and with fewer “what do I wear?” melodramas.

  • How Do I Choose Winter Wedding Guest Attire

    How Do I Choose Winter Wedding Guest Attire

    You’re heading to a winter wedding, and you want to look sharp without turning into an icicle—fair. I’ll help you pick fabrics that actually warm, layers that tuck neatly under a coat, and shoes that don’t stage a betrayal on icy steps, while keeping color and sparkle that suit the party; imagine velvet against your skin, a cashmere wrap you’ll want to borrow, ankle boots that click not slip—stick around and I’ll walk you through exactly what to wear.

    Key Takeaways

    • Check the invitation for formality (black-tie, cocktail, casual) and choose fabric and silhouette to match the dress code.
    • Prioritize warm fabrics like velvet, wool, or heavy silk, and layer thermals or cardigans discreetly underneath.
    • Opt for jewel tones, deep neutrals, or metallics to suit winter lighting and add seasonal richness.
    • Coordinate polished outerwear (tailored wool coat or belted wrap) and weather-resistant footwear with grip.
    • Finish with functional accessories—cashmere shawl, lined gloves, tights, and a clutch—to stay warm and stylish.

    Understanding Winter Dress Codes

    winter formal dress guidelines

    If you’re staring at an invite that says “black-tie optional” in the dead of January, don’t panic — you can look stunning without turning into a walking icicle. I’m here to walk you through winter themes, and how they tweak dress etiquette so you don’t overdress like it’s a movie premiere, or underdress like you’re in the backyard. Think jewel tones, velvet sheen, little sparkles that catch low light, and silhouettes that flatter while letting you slip on a warm coat between photos. I’ll nudge you toward formality cues, point out when boots are cheeky or sacrilege, and show how accessories finish the picture. You’ll arrive confident, warm-ish, and charmingly season-appropriate—no frostbite required.

    Choosing Fabrics and Warm Layers

    warm layers stylish fabrics

    When winter wedding temps threaten to turn you into a shivering statue, think fabrics and layers like your personal survival kit — and yes, you can still look gorgeous while wrapped in sensible warmth. I tell you, start with fabric textures that trap heat: wool, cashmere, velvet, even heavy silk. Feel them; they hug you, they mute the wind. Then use layering techniques like a pro: thin thermal top, dress or skirt, a cardigan, and a tailored coat. Add tights, lined boots, a scarf you actually want to wear. Mix textures for interest, not bulk. If you get warm, peel a layer and stash it in a chic bag. Trust me, you’ll stay cozy, stylish, and slightly smug.

    Seasonal Color Palettes and Patterns

    colorful elegance with balance

    Color is your secret weapon, and I’m here to make you wield it like a pro — no timid pastels allowed unless you’re intentionally softening the look. Think jewel tones for depth, smoky neutrals for elegance, and a shot of metallic for sparkle that catches candlelight. Use color psychology to signal mood: deep emerald says luxe, burgundy reads romantic, navy keeps things classic. Don’t be scared to layer shades—scarves, wraps, and a clutch are your paintbrushes. For pattern mixing, anchor one bold print with a subdued companion, like plaid with tiny florals, keep shared tones, and let texture do heavy lifting. I’ll nag: balance is everything. You’ll look intentional, warm, and utterly wedding-appropriate—no fashion faux pas required.

    Footwear and Outerwear That Work for Weddings

    Because you’ll be standing on icy sidewalks and probably doing the cha-cha at the reception, footwear and outerwear matter more than your lipstick (sorry), and I’m here to make sure you arrive warm, stable, and stylish. Pick boot styles that grip—chunky heels, lug soles, or dressy ankle boots—so you can stomp through slush and still dance. Match the boot height to your outfit: knee boots under a midi, ankle boots with tights. For coat options, think tailored wool or a belted wrap for polish, or a short puffer for casual comfort; avoid anything that swallows your silhouette. Keep wet-weather-proof fabrics, a non-slip sole, and easy removal in mind. You’ll look intentional, not clumsy, and you’ll actually enjoy the night.

    Accessories to Stay Stylish and Warm

    Alright, boots and coats handled—now let’s accessorize like you mean it. You want warmth that reads as chic, not bulky. Start with chic shawls in cashmere or wool blends, drape one over your shoulders, feel the soft weight, watch people think you’re effortless. Add texture, maybe a subtle fringe, maybe a deep jewel tone that pops against winter light. Then, think statement necklaces — one bold piece lifts a simple dress, catches candlelight, makes conversations start. Gloves in leather, lined with fleece, let you sip champagne without frozen fingers. A felt hat for outdoor photos, a velvet clutch to tuck lip balm and tissues. I’ll say it: accessories are your winter armor, stylish and practical, yes, even heroic.

    Conclusion

    You’ve got this—dress for warmth first, style second, and fun third. Remember Claire, who wore a velvet emerald dress with a thermal camisole, ankle boots, and her grandmother’s chunky gold necklace; she was warm, comfortable, and everyone complimented her color. Layer smart, pick rich fabrics, tuck a cashmere shawl in your clutch, grip your heels, and smile through the cold. I promise, you’ll look intentional, not overdressed—just the right kind of dramatic.

  • How Do I Style Metallic Clothing

    How Do I Style Metallic Clothing

    Let’s call metallics “mood-bright” so you don’t panic—yes, you can wear them without blinding anyone. I’ll walk you through choosing the right finish, balancing shine with soft neutrals and textures, and dialing things down for daytime or cranking them up for nights out, with simple swaps that actually work; picture a silver skirt paired with a cashmere sweater, or bronze boots anchoring a slip dress, and you’ll see why less fuss beats loud accessories every time—but first, pick one statement piece.

    Key Takeaways

    • Choose a metallic finish (gold, silver, bronze, rose) that flatters your skin tone and personality.
    • Anchor metallic pieces with calm neutrals like oatmeal, charcoal, or denim to avoid overpowering shine.
    • Mix textures—pair smooth metallics with matte knits or worn leather to create balanced contrast.
    • For daytime, mute shine with soft layers; for evening, embrace full metallics paired with muted accessories.
    • Keep accessories minimal and pick one focal metallic piece to maintain a polished, intentional look.

    Choosing the Right Metallic Finish for Your Style

    metallic finish style guide

    If you’re nervous about diving into metallics, don’t worry—I’ve been there, squinting at sequins under harsh dressing-room lights and wondering if I looked like a disco ball or a carefully lit sculpture. You’ll start by sampling metallic color palettes, hold them up to your skin, and watch how warmth or coolness changes the whole mood. Try bronze for a lived-in glow, silver for crisp pop, rose gold when you want charm. Feel the fabric choices, too — smooth lamé sings differently than a hammered leather or subtly threaded jacquard. Touch everything, turn under different lights, walk and see how the finish moves. Trust your gut, keep one focal metallic, and wink at your reflection — you’ve got this.

    Balancing Metallics With Neutrals and Textures

    metallics balanced with neutrals

    When I want metallics to feel chic and not shouty, I always anchor them with calm neutrals—think creamy knit, worn denim, or a matte camel coat—and then let the metal be the punctuation mark. You’ll use metallic layering techniques like pairing a silver skirt with an oatmeal sweater, or a bronze jacket over a soft white tee, and it reads polished, not costume. Texture matters, so mix matte with shine, fuzzy with sleek, rough with polished. Play with color combinations sparingly; one bold metal, one neutral, one texture.

    Anchor metallics with calm neutrals—creamy knits, worn denim—let the metal be the polished punctuation.

    • Pair a gold bag with gray wool, touch the leather.
    • Layer a sequined top under a cotton blazer.
    • Match pewter boots to stone-wash denim.
    • Soften chrome with cashmere, fingers relieved.

    Daytime Looks: Toning Metallics Down

    metallics with soft neutrals

    I’ll tell you how to wear metallics in daylight without looking like a disco ball. Start by pairing that shiny skirt or jacket with soft neutrals — think oatmeal sweaters, faded denim, or a camel trench — so the metal reads chic, not shouty. Then pick matte textures, like a brushed cotton tee or suede boots, to mute the gleam and make the look feel lived-in and totally wearable.

    Pair With Neutrals

    One golden rule: pair your shiny pieces with calm, boring neutrals and watch the look go from disco overload to effortlessly chic. I tell you this because metallic color combinations sing louder when you give them a quiet stage. You’ll feel the cool weight of a silver skirt, the soft hum of a bronze heel. Try neutral outfit ideas that make metal the star, not the circus.

    • white tee and camel trench for contrast
    • charcoal blazer with a gold belt, subtle drama
    • beige linen trousers and a bronze sandal, breezy daywear
    • navy sweater, metallic clutch, no-fuss polish

    You’ll look put-together, relaxed, and oddly powerful, like you meant to sparkle.

    Opt for Matte Textures

    Because bright metal can read like a disco ball that got lost on its way to brunch, I pull the shine back with matte textures so your outfit looks intentional, not theatrical. You’ll grab a dull cotton tee, a brushed-wool blazer, or suede boots, then pair them with one metallic piece—maybe a silver skirt or bronze bag. The dull pieces tame metallic fabrics, they absorb light where metal reflects it, creating texture contrast that reads stylish, not shouty. Try layering: matte knit under a lame jacket, or a leather moto with a satin top. You’ll feel balanced, confident, and slightly less dramatic, like you meant to sparkle but got there by accident. Trust me, it’s the chicest kind of nonchalance.

    Evening and Event Styling: Embracing Full Shine

    You’re stepping into evening, so lean into the shine—think a moonlit silver dress against a matte black coat, that contrast making the metal sing. I’ll tell you how to balance bold pieces with neutral anchors, then show how one statement clutch or chandelier earring can lift the whole look, no sparkle overload required. Trust me, you’ll feel like the room’s spotlight without looking like you swallowed a disco ball.

    Balance Shine With Neutrals

    When you’re heading into an evening event and want to wear full-on metallic, don’t panic — steer it with neutrals like a pro. I’ll show you how to calm shine without killing the fun. Think metallic layering with matte blacks, creams, or denim; it mutes glare, adds depth, and feels intentional. Play with color combinations that whisper, not shout.

    • Pair a bronze skirt with a soft camel sweater, for warmth and balance.
    • Anchor silver tops with charcoal trousers, clean and cool.
    • Use a white blouse under gold, to breathe and brighten minimally.
    • Add a muted shoe or clutch to ground the look, nothing flashy.

    You’ll glow, not blind, and still own the room—confident, composed, slightly smug.

    Elevate With Statement Accessories

    You’ve tamed the shine with neutrals, so now let’s have some fun—accessories are where metallic outfits stop being clothes and start being a performance. I say pick one bold piece, a sculptural cuff or a mirror-finish clutch, and let it lead. Layer thin chains with a chunky choker for metallic layering that sings, not fights. Mix textures, too—velvet gloves, patent boots, silk scarves—contrasting fabrics keep the look rich, tactile, and intentional. Don’t drown in sparkle; balance a bright earring with a matte belt. For evening, add a feathered stole, snap a bold lip, walk like you own the room. Yes, it’s loud. Yes, people will stare. You’ll smile, because you know exactly why you dressed this way.

    Accessory and Shoe Pairings for Metallic Pieces

    If you’re going to let metallic pieces steal the show, don’t let accessories fight for the spotlight — guide them like a good stage manager. I tell you this because metallic footwear already hums; you don’t need a choir. Pick one focal accessory, keep jewelry layering minimal, and let textures converse, not argue. Feel the cool gleam under lights, hear the shoe clicks, savor that confident click-clack.

    • Match metallic footwear to your outfit’s mood: sleek for night, brushed for day.
    • Balance shimmer with matte leathers or soft knits, so shine feels intentional.
    • Use jewelry layering sparingly: one chain, one bracelet, tiny studs.
    • Anchor with neutral bags or belts, they calm the look, like a good coffee.

    Don’t overcompete; let the metal do the talking.

    Styling Metallics for Different Body Types

    So you’ve let the metallics sing and tamed the accessories—now we’ll make the shine work for your shape, not against it. I’ll walk you through metallic silhouettes that flatter, not blind. If you’re pear-shaped, pick A-line skirts or tailored jackets to balance hips, choose matte panels to calm the chrome. Apple shapes get V-necks and structured waists, a gleaming blazer open over a soft tee—instant lift. Hourglass? Hug the waist, stretch the lines, think pencil skirts or wrap dresses that let the shimmer follow curves. Athletic builds gain movement from pleats and fluid lamé, try shimmering trousers that soften angles. Petite? Keep proportions tiny: cropped metallics, slim cuts, minimal bulk. Play, tweak, and wear what makes you grin.

    Conclusion

    You’ve got this—think of metallics like a secret superpower, not a spotlight-stealing diva. Mix a silver top with soft gray, toss on a matte knit, and breathe; you’ll tame the glare and still sparkle. For nights, let the shine lead, keep accessories calm, and walk like you own the room. I’ll cheer from the sidelines, slightly embarrassed but very proud, as you turn heads without trying too hard.

  • How Do I Dress for an Office Holiday Party

    How Do I Dress for an Office Holiday Party

    You can make a suit sing with a velvet pocket square or keep it low-key and let a silk dress do the talking; either way, you’ll want to look sharp and feel cozy. I’ll walk you through simple swaps for every dress code, from strict business to laid-back office nights, with easy pairings, tiny flair tricks, and grooming notes that stop awkward small talk. Stick around—your outfit’s about to earn compliments (and avoid HR).

    Key Takeaways

    • Match the event’s dress code (business formal, business casual, or casual) by checking invites or asking organizers.
    • Choose tailored, polished pieces like a suit, sheath dress, or dark trousers with a blazer.
    • Favor muted tones and one tasteful accent — avoid loud, overly revealing, or gimmicky outfits.
    • Prioritize comfort and appropriate footwear for standing, mingling, and any planned activities.
    • Keep grooming and accessories understated: one statement piece, fresh hair, minimal fragrance.

    Decoding the Dress Code: From Conservative to Casual

    dress code decoding tips

    If you’re wondering whether your blazer counts as “festive,” don’t worry — I’ve stood in that exact hallway mirror, practicing my smile and judging sleeve lengths like it’s an Olympic event. You’ll read invites for clues, because dress code essentials hide in tiny phrases: “business casual” means neat slacks and a blouse, “conservative” leans toward suits and muted tones, “casual” lets you breathe, but don’t wear pajamas. I tell you to scan the guest list, imagine the lighting, hear the clinking glasses, and pick fabrics that survive standing-room conversations. Follow office party normsmirror colleagues, nod at managers, and skip anything that screams attention-seeking. You’ll look polished, feel comfortable, and avoid becoming the anecdote by dessert.

    Outfit Ideas for a Business-Formal Office Party

    tailored elegance with accents

    Okay, so you’ve mastered the “don’t be a walking meme” part of office attire—nice work. For a business formal party, pick a tailored suit or a sheath dress that fits like it was made for you, not borrowed from a mannequin. Go for rich textures — matte wool, silk blouse, a velvet blazer — they photograph nicely, and feel good on the skin. Neutral tones with one bold accent work: deep green tie, ruby clutch, satin pocket square. Keep accessories deliberate, polished shoes, subtle perfume, clean nails. If you want outfit inspiration, scout classic icons, then tweak small details to show personality. Walk in confident, smile, offer a witty hello, and remember: elegance beats loud gimmicks every time.

    Polished Looks for Business-Casual Celebrations

    polished business casual celebration attire

    When you want to look put-together without shouting “board meeting,” reach for pieces that whisper confidence: tailored trousers that skim the ankle, a crisp button-down with a soft cashmere sweater over the shoulders, or a midi skirt that swishes when you cross the room. You’ll pick classic silhouettes, add one tiny surprise. A velvet blazer, metallic loafer, or jeweled brooch says festive attire without trying too hard. Keep makeup polished, not party-stage; a swipe of mascara, soft blush, maybe a berry lip. You’ll move, you’ll chat, you’ll laugh — and nothing will need adjusting. If someone asks if you’re “dressed up,” wink, say, “Just enough.” You’ll nail business casual, with style and a little mischief.

    Stylish and Comfortable Options for Casual Work Parties

    Think comfort, not compromise — I want you to feel like you could dance, sneak the last canapé, and still answer an email without unbuttoning anything. I say this as your wardrobe wingperson. Pick breathable, comfortable fabrics that move when you do — soft knits, cotton blends, a drapey rayon blouse. Layer with purpose: a fitted blazer over a tee, a cardigan tied at the waist, stylish layering that hides crumbs and crime-scene lipstick. Choose dark jeans or tailored trousers, shoes you’ve actually walked in, and accessories that whisper, not shout. Toss a scarf for texture, slip into loafers or low boots, test your pocket for phone fit. You’ll look relaxed, capable, and too comfy to care about approval, which is the point.

    Tasteful Ways to Add Festive Flair Without Overdoing It

    If you want to be festive without looking like you lost a bet to a tinsel factory, start small and smart — I promise you can sparkle and still answer an email without glitter in your keyboard. You’ll keep it office-ready by using festive color palettes, a single playful print, and subtle holiday motifs that whisper, not scream. Pick one focal piece, tone the rest down, and move confidently through the room without jingling.

    • Choose a jewel-toned blazer or dress for warmth and shine
    • Add a silk scarf with tiny festive motifs, not cartoon Santas
    • Wear metallic flats or loafers, muted, comfy, polished
    • Use a pocket square or tie in seasonal hues, subtle contrast
    • Try a single sparkly button or brooch, small and deliberate

    Grooming, Accessories, and Etiquette to Complete Your Look

    You’ll want a quick grooming checklist—fresh shave or trimmed beard, neat nails, a spritz of subtle cologne—so you don’t smell like you slept in your coat. Pick accessories that pop but don’t scream for attention, like a tasteful watch or a single sparkly earring, and skip anything that jingles every time you move. I’ll walk you through the dos and don’ts, with real examples and a few jokes so you don’t end up as the office disco ball.

    Grooming Checklist

    Because a polished outfit can fall flat if your grooming doesn’t match, I always treat the last fifteen minutes before an office holiday party like a tiny, joyful mission—quick, focused, and mildly brave. You’ll tidy hair care with a quick brush, fix flyaways with a light mist, and run a mini skincare routine so your face looks awake, not painted. Check breath, nails, and jacket lint. Move fast, stay calm, grin like you mean it.

    • Brush and style hair, tame flyaways
    • Five-second skincare routine: cleanse, moisturizer, SPF
    • Quick breath mint, floss if you can
    • Trim or wipe nails, remove fuzz from sleeves
    • Spray lightly with scent, one spritz only

    Accessory Dos and Don’ts

    You’ve handled your hair, freshed your face, and blitzed lint off your jacket—now let’s talk the tiny things that finish the look. I’ll be blunt: accessories can make you sing, or make you sound like a broken car horn. Pick one statement piece—bold necklace, glittery cuff, or a lapel pin that starts conversations—then stop. Balance it with minimalist accessories: thin bands, simple studs, a clean watch. Touch your cuff, check the shine, tuck stray threads. Smell your scarf, not like perfume glacier, just subtly cozy. If you jingle when you reach for the punch bowl, tone it down. Remember, less is often more; your confidence should be the loudest thing in the room.

    Conclusion

    You’ll nail the party by balancing buttoned-up with just a wink—think velvet blazer and sensible shoes. I tell you this like a friend: look sharp, feel comfy, add one bold piece, don’t overdo the sparkle. You’ll sip the punch, laugh at the boss’s joke, and not worry about your hem or your halo. Stay groomed, stay polite, stand tall, and enjoy it—work party, not runway, but you’ll still shine.