Category: Uncategorized

  • Best Places to Eat in Austin for Breakfast and Brunch

    Best Places to Eat in Austin for Breakfast and Brunch

    You’ll want to wake up early, or at least pretend to, because Austin’s breakfast scene refuses to be boring. I’ll steer you from flaky pastries in East Austin to hearty Tex‑Mex tacos that’ll stain your napkin, and I’ll whisper where the best patio seats are for your dog. Think coffee that snaps awake, pancakes that hug your fork, and lines worth the wait — and I’ve saved the best surprise for last.

    Key Takeaways

    • Seek popular coffee houses for artisan brews and flaky pastries served by friendly local roasters.
    • Visit classic brunch diners for pancakes, biscuits, Tex‑Mex favorites, and lively patio vibes.
    • Explore neighborhood gems offering seasonal, artisanal dishes in cozy, vintage settings.
    • Try breakfast trailers and casual spots for creative twists and vibrant, sizzling flavors.
    • Choose vegan/vegetarian cafes for chickpea omelettes, tofu scrambles, avocado toasts, and fluffy vegan pancakes.

    East Austin Coffee Houses and Pastry Stops

    cozy coffee and pastries

    If you wander into East Austin on a Saturday morning, I’ll bet you’ll smell coffee before you see the storefronts — dark, nutty, a little caramel, like someone stole a hug from a bakery and bottled it. You’ll follow that scent, like I always do, and find cozy counters where local roasters pull shots with confident hands. Sit, watch tamping, listen to steam hiss, then bite into flaky artisan pastries that flake all over your shirt like confetti. You’ll trade knowing smiles with baristas, ask for recommendations, and get something honest. I’ll warn you: you’ll try to be healthy, then surrender to a croissant. No shame. This neighborhood keeps mornings simple, loud, and delicious — exactly how I like them.

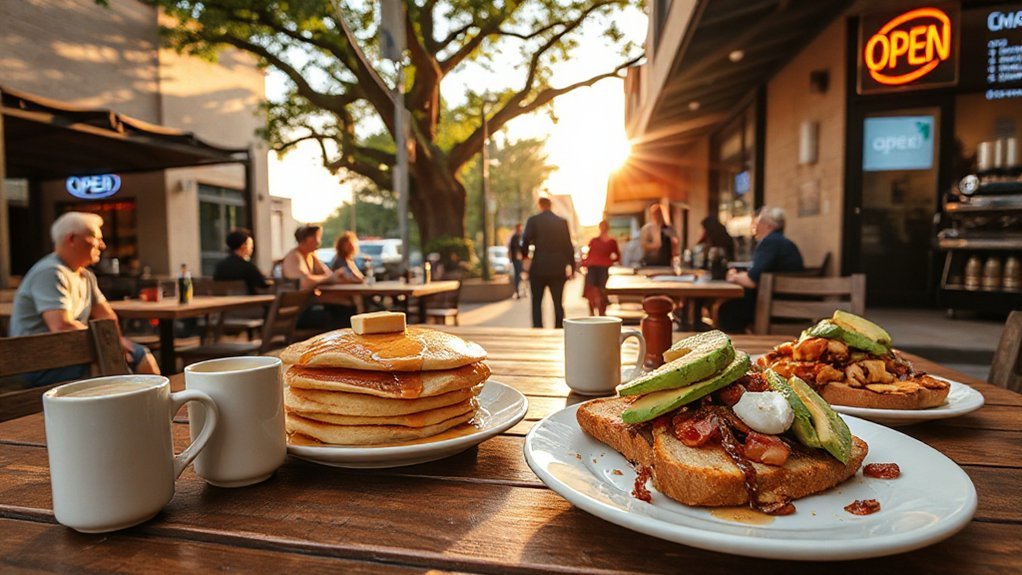
    South Congress Brunch Classics

    austin s breakfast legends await

    You’ll find South Congress is where Austin’s breakfast legends live, the kind of places that smell like sizzling bacon and strong coffee before you even hit the sidewalk. I’ll point you to the iconic spots and Tex‑Mex morning favorites, we’ll sip patio coffee, trade elbow room at booths, and I’ll admit I sometimes order too many tacos. Stick with me, you’ll leave full, a little happier, and ready to brag about the perfect sunrise migas.

    Iconic Breakfast Spots

    Morning sunlight hits South Congress like a spotlight, and I’m here for the encore — coffee steaming in my hands, the smell of cilantro and sizzling bacon already making promises. You wander in, take a booth, and feel the buzz; these iconic diner experiences wear their neon proudly, they’re loud, honest, and delicious. I order eggs the way my grandma frowned at, you watch the server slide over a plate, steam curling, yolks gleaming. Classic breakfast dishes show up—pancakes like soft clouds, hash browns with perfect crunch, biscuits that threaten commitment. We trade bites, make goofy faces, pretend we don’t want syrup on everything. You leave full, smiling, a little greasy, already planning the next return.

    Tex‑Mex Morning Favorites

    When I wander down South Congress on a sun-scraped Saturday, my nose leads the way before my feet do — cilantro, charred onions, and a whisper of cumin tug at me like a siren with a spatula. You’ll want those mornings, the ones where breakfast enchiladas steam on plates, where chilaquiles specials crunch and soak up salsa like tiny, joyous sponges. I grab a seat, napkin ready, and marvel at how tortilla chips can be heroic.

    • A plate of red-sauced breakfast enchiladas, melty cheese, tangy crema
    • Green chilaquiles specials, bright, herby, with a runny egg
    • Pickled onions that snap your senses awake
    • Zesty salsa verde, not shy at all
    • Warm corn tortillas you’ll steal from the basket

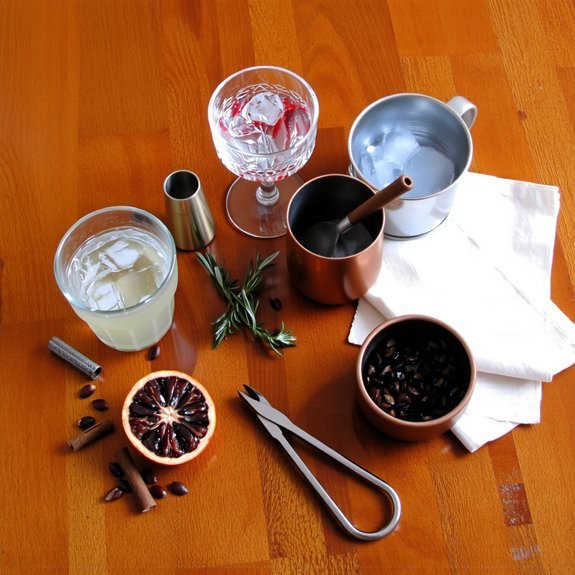
    Coffee & Patio Vibes

    After you’ve licked the last smear of crema off your napkin and the chilaquiles crunch is a fond memory, South Congress changes gears like a barista pulling a perfect shot — slower, sunnier, and scented with espresso. You’ll wander patios rimmed with string lights, sit where the breeze flirts with your napkin, and overhear someone declare their first sip a revelation. The coffee culture here isn’t pretentious, it’s proud — beans roasted nearby, baristas who know your name, milk steamed just so. Patio aesthetics matter: cemento floors, succulents in chipped pots, mismatched chairs that somehow agree. I’ll point you to spots where lattes arrive hot, conversations stay easy, and brunch stretches into a golden, caffeine-fueled afternoon.

    North Loop Neighborhood Favorites

    north loop culinary treasures

    Curious what your taste buds have been missing? I’ll walk you through North Loop’s hidden gems, where vintage vibes meet artisanal dishes and local favorites rule. You’ll find brunch spots and breakfast joints that feel like community hangouts, with unique menus that surprise you, and plates that make you grin.

    • Spot a sunlit patio, sip bold coffee, bite into flaky pastries.
    • Hear clinking forks at eclectic eateries, smell herbs, taste comfort.
    • Trade jokes with staff, sample seasonal specials, leave happier.
    • Hunt for vinyl, antique signs, murals, cozy booths.
    • Discover chef-driven dishes, clever twists, small-batch syrups.

    Go hungry, bring friends, expect warmth, expect flavor, and yes, expect to return.

    Downtown Breakfast for Early Risers

    You’ll want to be downtown before the sidewalks fully wake, because the best early coffee spots greet you with hot steam, bold espresso, and the kind of music that makes mornings tolerable. I’ll point you to places where you can snag a flaky croissant or a protein-packed breakfast taco in under five minutes, so you don’t miss your train or that awkward elevator small talk. Trust me, I’ve survived Austin mornings on too-strong drip and perfect to-go pastries, and I’m happy to steer you to the good stuff.

    Early Morning Coffee Spots

    If you’re up before the sun and craving coffee that’ll actually wake up your brain, downtown Austin has you covered like a friend who brings bacon to a 7 a.m. meeting. You’ll smell beans roasting, see steam curl from cups, and find counter smiles that feel like a hug. I point you to spots where local roasters pour heart into every shot, and bakers plate flaky, artisanal pastries that snap when you bite. You’ll sip, savor, and plan your day.

    • Small-batch espresso bars with single-origin flavors
    • Cozy windowside seats for people-watching
    • Baristas who chat, then brew like they mean it
    • Morning playlists that don’t assault your ears
    • Citrusy cold brews for when you need a jolt

    Quick Grab-and-Go Options

    After a cup that actually woke you up, sometimes you don’t want to sit — you want to grab, bolt, and conquer the morning. You’ll love downtown’s quick breakfast bites: warm kolaches steaming in paper, egg tacos wrapped tight, and flaky croissants that crunch like tiny triumphs. I point you to counters where staff call your name, where coffee slaps against your palm, where sidewalks become picnic tables. Choose portable brunch options, tuck a napkin under your chin, keep walking, smile at strangers who look jealous. I talk fast, you move faster. Bite, sip, repeat. If you spill, I’ll laugh with you, not at you — then we’ll hunt a nap later. This is breakfast, Austin-style: efficient, tasty, unstoppable.

    Food Trailer Gems for Creative Morning Eats

    One of my favorite Austin habits is hunting down breakfast trailers before the city fully wakes—there’s something electric about a neon menu board flickering against a pink dawn, coffee steam curling like a secret. You’ll follow aroma trails, get distracted by sizzle, and laugh when your plan becomes a pancake detour. Trailer trends mean mashups, bold sauces, and unexpected combos; morning creativity shows up in jalapeño maple, kimchi hollandaise, and breakfast tacos that flirt with brunch. You’ll chat with cooks, swap recommendations, and leave crumbs on your shirt like a badge of honor.

    • Breakfast taco with a surprise salsa
    • Sweet-savory pancakes stacked high
    • Herbal coffee blends, fragrant and warm
    • Savory crepes folded to go
    • Mini biscuits dripping butter

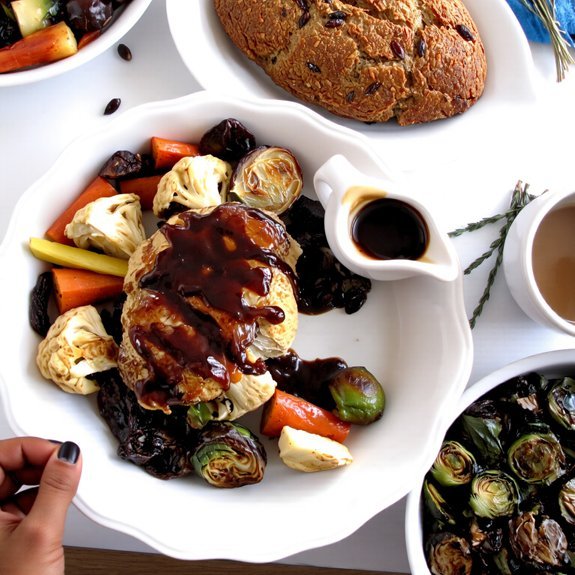
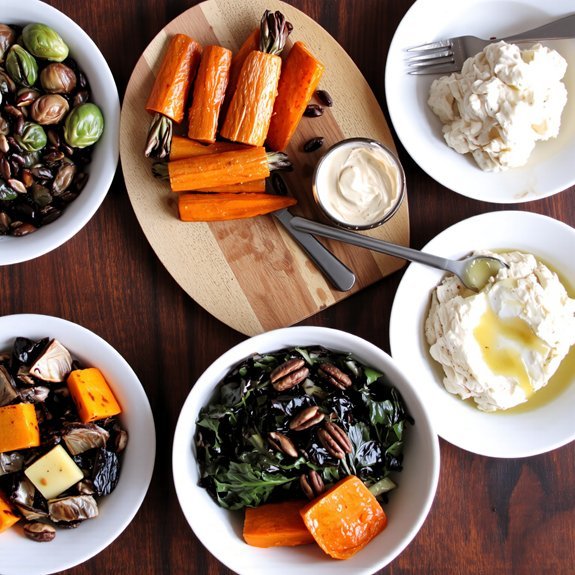
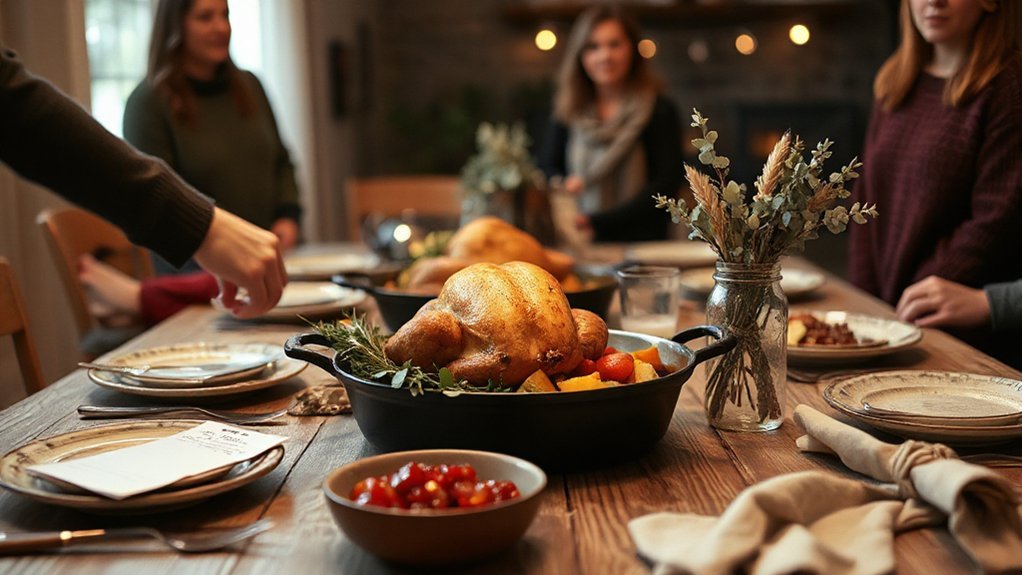
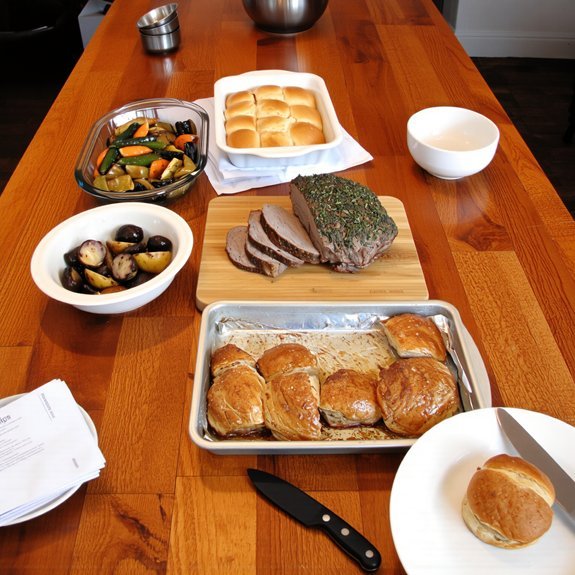
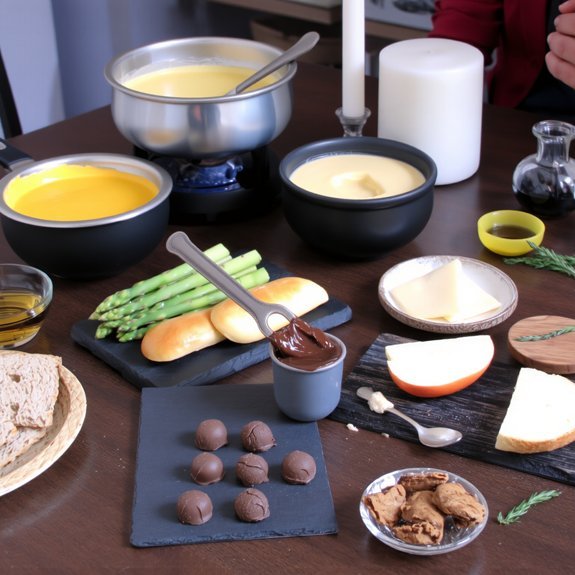
    Farm-to-Table Brunches and Seasonal Menus

    When I spot a chalkboard menu listing “farm-to-table” in big, confident letters, I slow down—because you know the drill, right? You push open the door, inhale roasted coffee, fresh herbs, warm butter. The menu changes with the weather, seasonal ingredients shining like little surprises, and you feel clever for arriving early. Servers tell you where the eggs came from, they actually say the farmer’s name, and you nod like you care more than you do. Local sourcing isn’t a tagline, it’s a promise—greens picked that morning, citrus that still smells like sunshine. Sit at the window, fork through brightly dressed salads, listen to clinking plates, and smile because food this honest makes you optimistic, and slightly smug.

    Vegan and Vegetarian Morning Options

    You’ll love how Austin’s plant-based breakfast spots make veggies sing, steam, and sizzle on your plate — I promise, it’s not sad rabbit food. I’m talking chickpea omelettes that wobble with flavor, avocado toasts piled like small green sculptures, and brunch menus that swap bacon for bold, smoky tempeh with zero compromise. Stick with me and I’ll point you to spots where veg-friendly choices are the main event, not an afterthought.

    Plant-Based Breakfast Spots

    If you think plant-based means cardboard and regret, think again — Austin’s vegan and vegetarian breakfast scene is loud, proud, and full of flavor that actually wakes you up. You’ll find fluffy vegan pancakes that flop with syrup and crisp edges, and plant based smoothies that slap you awake with mango and hemp. I’ll point you to spots where you can nosh, sip, and feel virtuous without pretending kale is dessert.

    • Squeeze a citrusy smoothie, watch the blender spin, feel the buzz.
    • Bite into pancakes, syrup dripping, smile unavoidable.
    • Order tofu scramble, heat and smoke, herbs bright.
    • Try a savory biscuit, crumbly, buttery-ish, surprisingly comforting.
    • Grab a chia parfait, crunchy, tart, perfectly balanced.

    Veggie-Friendly Brunch Menus

    Because mornings deserve more than sad toast, I’ll steer you straight to veggie-friendly brunch menus that actually sing—think bright avocado, smoky tempeh, and pancakes that hold syrup like they mean it. You’ll find plant based pancakes so fluffy they practically high-five your fork, berries popping, maple pooling. Order tofu scrambles that mimic the real deal, seasoned sharp, dotted with charred peppers, herbs, and a hit of tangy hot sauce. Sit by a sunlit window, spoon a citrus yogurt, watch a barista steam oat milk into a silky cloud. I’ll admit, I used to be skeptical, now I bookend weekends around these spots. Trust me, you won’t miss the meat, you’ll miss nothing but sleep.

    Tex‑Mex and Breakfast Taco Destinations

    When morning light hits Austin, my mouth goes on autopilot toward salsa and warm corn tortillas — it’s like the city smells of cumin and possibility. You’ll find breakfast burritos that hug your hands, queso that shimmers like a dare, and taco trucks sizzling before sunrise, where the grill hisses like a good secret. I’ll point you to spots that serve huevos crujientes, chiles charred until they sing, and coffee that keeps you making bad life choices with confidence.

    • Al pastor so smoky it whispers your name
    • Migas folded into a buttery tortilla hug
    • Egg-and-potato combos that fix everything
    • Green salsa so bright it wakes you up
    • Tiny diners with long lines, totally worth it

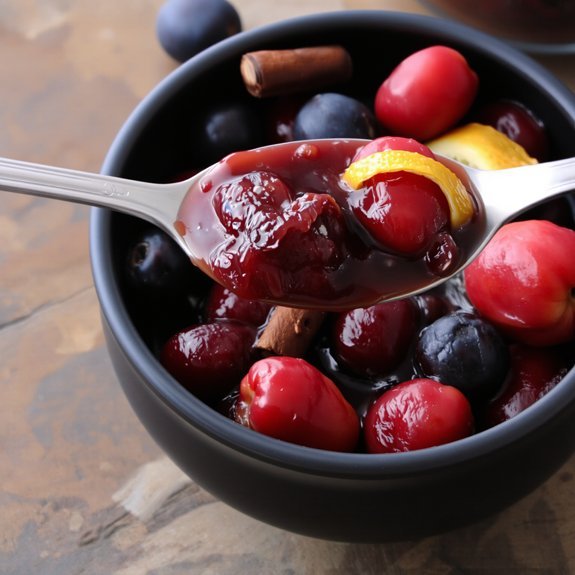
    Cozy Cafés for Lazy Weekend Brunches

    Slip off your shoes of urgency and follow me to booths bathed in late-morning sunlight, where the coffee smells like a warm apology and the pastries glisten with buttered intent. You’ll find cozy corners that hug you, vinyl benches that squeak history, and a chalkboard menu that reads like a love letter. Order something simple, sit back, watch sunlight drape over your plate, and don’t pretend you’re not delighted. I’ll nudge you to try the jam, it’s homemade, yes I sampled it for scientific reasons. Servers move like friendly conspirators, refilling mugs without drama. You read, you sketch, you whisper to your phone, lazy mornings here stretch without guilt. These cafés promise gentle rhythms, honest food, and an excuse to stay a little longer.

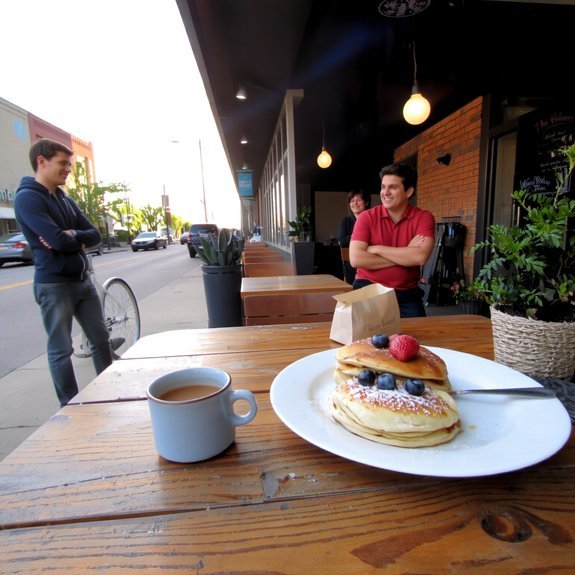
    Spots With Outdoor Seating and Dog-Friendly Patios

    If you like sunshine on your face and the sound of paws padding beside your chair, this is your scene—I’ve scoped out patios where the coffee’s hot, the breeze is steady, and dogs get a menu of affection (not literal menu, though they’d love that). You’ll stroll in, snag a shady table, and watch your pup negotiate for crumbs like a pro. These dog friendly eateries mix easygoing vibes, iced lattes, and breakfast tacos that don’t judge.

    • Patio with string lights and fans, great for lingering
    • Shaded courtyard where dogs nap, you read, you sip
    • Rooftop tables with skyline views and water bowls
    • Garden nook with herb scents and fresh-squeezed juices
    • Sidewalk cafe, brunch music, friendly servers who love dogs

    Pick a spot, leash up, brunch happy.

    Conclusion

    You’ll want to hit these spots with a growling stomach and an open mind, I promise they won’t disappoint. Walk into a sunlit patio, inhale coffee steam and cinnamon, order boldly, and let the first bite do the talking. I’ll be honest, I’ve had breakfast regrets, but not here—you can’t make an omelet without breaking eggs, right? Go early, bring friends (and your dog), and savor every messy, glorious mouthful.

  • How Do I Make Cinnamon Rolls From Scratch

    How Do I Make Cinnamon Rolls From Scratch

    You think scratch cinnamon rolls are too fussy? They’re not — they just ask for a little patience and good butter. I’ll walk you through warming milk, proofing yeast, kneading till the dough’s silky, spreading a spiced-sugar blanket, rolling tight, and cutting perfect spirals, with tips for gooey centers and a glossy glaze that makes neighbors jealous; stick around and you’ll be baking warm swirls that smell like Sunday morning.

    Key Takeaways

    • Make enriched dough using warm milk, yeast, egg, melted butter, salt, and sifted flour, then knead until smooth and elastic.
    • Let the dough rise in a warm place until doubled, about 45–90 minutes, for light, pillowy rolls.
    • Roll dough into a rectangle, spread softened butter, then evenly sprinkle cinnamon mixed with brown sugar and a pinch of salt.
    • Roll tightly, slice into even rolls, place in a greased 9×13 pan, proof briefly, then bake until golden and set.
    • Finish warm with a glaze—cream cheese, vanilla-sugar, maple, or citrus—add toasted pecans or flaky salt if desired.

    Ingredients and Equipment You’ll Need

    essential baking ingredients and equipment

    Before we plunge in, grab an apron — you’ll thank me later when you’re elbow-deep in dough and smelling butter and cinnamon like heaven. You’ll start with smart ingredients selection: flour, yeast, milk, eggs, butter, brown sugar, cinnamon, salt, and a touch of vanilla. Buy fresh yeast, full-fat milk, and real butter, don’t skimp. Equipment essentials are simple: a mixing bowl, rolling pin, bench scraper, 9×13 pan, measuring cups, and a stand or hand mixer. I’ll remind you: a digital scale helps, a kitchen towel speeds proofing, and a pastry brush makes glazing neat. I talk like I’ve burned a tray or two, so trust me — get good basics, and you’ll laugh all the way to the oven.

    Making the Dough: Step-by-Step

    combine ingredients knead dough

    One good dough starts with a little swagger and a clean counter, so clear a space and wash your hands — we’re getting tactile. I’ll walk you through combining warm milk, yeast, beaten egg, melted butter and a pinch of salt, then sifting in your dry mix. Pick your flour types — all-purpose is friendly, bread flour gives chew, pastry flour makes it tender — I won’t judge your choice. Measure sugar options next: brown for depth, granulated for neutral sweetness, or a mix if you’re indecisive like me. Stir until shaggy, scrape the bowl, and turn the mass onto the counter. Form it into a rough ball, tuck edges under, and let it rest briefly before the next step.

    Kneading and First Rise Techniques

    gentle dough kneading techniques

    You’re going to feel the dough change under your hands, that tacky, smooth pull that tells you it’s building strength — trust that. I’ll show you a gentle stretch technique that protects the gluten, so you knead with purpose, not brute force. Then we’ll find the cozy, slightly-warm spot for the first rise, watch the dough bloom, and pretend we didn’t just feed it like a needy pet.

    Proper Dough Development

    Trust me, patience is a flavor. I tell you this as you mix liquids and flour, noticing dough hydration change from shaggy to smooth; that shift matters. You’ll knead by hand or machine, feel the dough warm, slightly tacky, elastic. Don’t rush — gluten development happens in seconds and minutes, not in a hurry. Press, fold, turn, repeat, watch the windowpane test tease you with success. Then bowl it, cover it, let it proof in a cozy spot, away from drafts, where air smells faintly of yeast and promise. Rise time varies; I check rather than clock. When the dough doubles, gently poke — it should spring back slowly. That’s your cue, and you’ll smile, because it worked.

    Gentle Stretch Technique

    Reach for the dough like you mean it, but don’t bully it — we’re coaxing, not arm-wrestling. I tell you to cup it, fold it, then press with the pads of your fingers, because gentle stretching trains the gluten without tearing it. You’ll feel resistance, then give; that’s dough elasticity talking, like a sleepy accordion waking up. Turn the ball, fold, press again. Keep motions smooth, almost lazy, and stop when the surface looks satiny and springs back slowly to your touch. If it fights you, relax—rest ten minutes, then try again. This isn’t macho kneading, it’s patient care. You’ll know it’s ready when the dough holds shape, feels airy, and hums with subtle spring.

    Optimal Rise Environment

    If the dough’s been treated right, now you’re in charge of the spa: warm, humid, and politely indulgent. I tell you, nothing wakes a sleepy dough like the right atmosphere. Aim for an ideal temperature around 75–80°F, or use the oven with the light on, a pan of hot water beneath the bowl, or a proofing box if you’re fancy. Monitor humidity levels; you want moist air so the surface won’t crust, but not soggy. Cover dough with oiled plastic or a damp towel, tuck it into its cozy spot, and resist poking—temptation, I get it. In 60–90 minutes it’ll double, soft and pillowy. That’s your cue: gentle hands, a gratified sigh, and onward to rolling.

    Preparing the Filling and Spreading It Evenly

    Once your dough’s rolled into a neat rectangle, you’re ready to make the filling—this is where the cinnamon rolls stop being homework and start being breakfast party. Mix your filling ingredients: softened butter, brown sugar, cinnamon, a pinch of salt, maybe a dash of nutmeg. I tell you, the butter should be spreadable, not soup. Scoop dollops across the dough, then use an offset spatula or the back of a spoon to smear it toward the edges, leaving a slim border. Work in straight, confident strokes, press gently so the sugar sticks, don’t gouge the dough. Aim for even distribution, no clumps, no sad empty corners. Taste a stray smear—chef’s privilege—and grin.

    Rolling, Cutting, and Placing the Rolls

    Start at the long edge and roll the dough up tight, like you’re trying to tuck in a very cuddly burrito that smells amazing—don’t dawdle, keep steady pressure so the layers stay snug. I press gently as I roll, feeling the cinnamon spiral form, it’s oddly satisfying. Use simple rolling techniques: hands close, even pressure, roll away from you for control. When the log’s sealed, chill briefly if it’s soft, that helps cutting. For cutting tips, use a sharp knife or unflavored dental floss—slide under, cross over, pull taut, clean slice. Aim for even rounds, about 1 to 1½ inches. Place rolls snugly in the pan, seams down, space for rise, not a shove-fest. Trust me, they’ll look proud.

    Proofing Before Baking

    You’ll know your yeast is awake when the dough gets pillowy, faintly yeasty, and shows little bubbles under the surface — don’t be shy, poke it and watch it spring back. I’ll tell you how long to wait, but expect about 45–90 minutes depending on room warmth, how active your starter is, and whether you’ve been generous with the sugar. Trust your senses more than the clock, and if it’s not quite there, give it a few more minutes instead of rushing the oven.

    Yeast Activation Signs

    If your yeast’s doing its job, you’ll see it fizzle and foam like it’s auditioning for a bubble bath commercial, and yes, I judge it the way a picky lifeguard judges swimmers. You’ll know which yeast types you grabbed by the speed and smell, active dry pops faster, instant sneaks in quieter. Watch the foam swell, smell the warm, slightly beer-ish tang, and feel tiny bubbles tickle your spoon. That’s the fermentation process talking, turning sugar into gas and aroma. If nothing happens in ten minutes, toss it, don’t nurse it like a sick plant. If it’s sluggish, try warmer water, but not hot — you’ll kill the party. Trust your senses, trust the fizz, and don’t overthink it; yeast tells you what it needs.

    Dough Rise Timing

    Because dough needs time to think, I always give it a proper rise before it earns its spot in the oven — you’ll see the texture go from tight and shy to pillowy and confident. Let it rest in a warm spot, not hot, around 75–80°F, that rise temperature keeps yeast happy without cooking it. I cover the bowl with a towel, whisper encouragement (kidding, mostly), and walk away for 60–90 minutes. Check by poking gently; if the dent bounces back slowly, it’s ready. Underproof and you’ll get dense rolls, overproof and they collapse like bad promises. If your kitchen’s cold, use an oven with the light on. You’ll smell sweetness, see air pockets bloom, and finally, you’ll bake perfection.

    Baking for Soft, Gooey Centers

    When the timer’s counting down and that sweet, cinnamony steam starts fogging the oven glass, don’t panic — embrace it; I promise your center can stay soft and gooey without turning into a doughy mess. I keep things simple: use a touch of butter and a splash of cream as softening agents in the filling, they melt into syrupy pockets. Lower baking temperatures, by 25°F from a standard roast, give the heat time to penetrate without overcooking the middle. Tent loosely with foil if the tops brown too fast. Test with a skewer; it should come warm, not raw. Let rolls rest five minutes after the oven, that pause lets juices settle, and you avoid the tragedy of runny filling. Trust me, you’ll be proud.

    Glazes, Toppings, and Serving Suggestions

    You’ve coaxed the centers into gooey perfection, so now let’s dress them up and make people swoon. I’ll walk you through glaze variations and topping ideas that turn good rolls into unforgettable ones. Warm glaze drips, butter scent rises, you grin like it’s your fault.

    1. Classic cream cheese glaze — tangy, silky, spread while warm.
    2. Vanilla-sugar drizzle — thin, glossy, a pretty shine.
    3. Maple-bourbon glaze — deep, boozy warmth, adult-friendly.
    4. Citrus icing — bright, zesty, cuts the richness.

    Serve on a warm platter, napkins handy, coffee steaming. Sprinkle toasted pecans or flaky salt for contrast. Tell guests “try this first,” then watch polite manners evaporate. You’ll love the applause, modestly.

    Conclusion

    You’ll pull warm, sticky dough from the bowl, and somehow the house will smell like your grandma’s kitchen and a bakery at once — coincidence, right? I’ll tell you, it’s not magic, it’s butter and patience. You’ll roll, slice, and line them up like sleepy soldiers, then watch them puff into golden pillows. Glaze them, inhale deeply, and admit you made something ridiculous and perfect. Eat one, don’t share.

  • How Do I Bake the Perfect Pie Crust

    How Do I Bake the Perfect Pie Crust

    You’ll want cold butter, just the right flour, and a little stubborn patience — trust me, I’ve ruined more crusts than I’ll admit — and you’ll feel the dough change under your fingertips, cool and granular, like sandy silk. Keep everything chilled, cut fat into flakes, don’t overwork it, and laugh at the mess; roll gently, dock or weigh before baking, and listen for that faint, golden whisper in the oven. There’s one trick I save for last.

    Key Takeaways

    • Use cold butter (or a mix of butter and shortening) and keep ingredients chilled to create flaky layers and prevent melting.
    • Measure by weight with about a 2:1 flour-to-fat ratio for consistent dough structure and texture.
    • Work the dough minimally until pea-sized butter bits remain, then rest chilled 30–60 minutes to relax gluten.
    • Roll from the center outward on a lightly floured, chilled surface, flipping and rotating to maintain even thickness and shape.
    • Blind-bake with parchment and weights for wet fillings, shielding edges with foil to avoid burning and ensure a crisp crust.

    Ingredients That Make a Flaky Crust

    flour fat chill patience

    Flour is the backbone, and you’ll thank me later for saying that up front. You pick a good all-purpose, feel it sift through your fingers, and know the crust’s fate. I’ll nag about butter types, because they matter: stick butter gives flavor, European adds richness, and shortening keeps you flaky on bad days. You measure, eyeball, then cut cold cubes in, listen for that clinking chorus against zinc. Fat ratios are your secret map—about two parts flour to one part fat by weight, with a splash of cold water for cohesion. Salt wakes things up, sugar tints the browning. Don’t overwork it, trust the chill, and let the dough rest; patience rewards you with shatter and sighs.

    Tools and Prep You Shouldn’t Skip

    essential tools for baking

    One thing I learned the hard way: the right tools make the difference between a crust you brag about and one you quietly toss. I’ll be blunt: you need essential tools — a sturdy rolling pin, a bench scraper, a good pie dish, a pastry blender or food processor, and a ruler or small offset spatula for neat edges. Prep matters, too; chill your butter, flour, and workspace, and have a bowl of cold water ready. These preparation tips save you grief, they save time, and they keep dough from sulking. I talk, I joke, I mess up, then I fix it. You’ll thank me when your crust sings, edges golden, scent warm, buttery, exactly as you meant it.

    Techniques for Mixing and Handling Dough

    chill ingredients for flakiness

    Keep your butter icy and your hands cool, because flaky layers start with cold ingredients—trust me, your future self (and flaky crust) will thank you. Work the dough just enough to bring it together, don’t over-tamper; think gentle presses and quick folds, like you’re flirting with it, not wrestling it. Then wrap it up, let it nap in the fridge until it’s firm and forgiving, and you’ll be rewarded with a crust that snaps and sings.

    Keep Ingredients Cold

    If you want a crust that snaps like a good joke, start by chilling everything down—your butter, your bowl, even your attitude. I mean it: cold fat makes flaky layers, so you’ll keep ingredients cold, and you’ll keep chilled water ready in the freezer, not the tap. Work fast, feel the butter like pebbles, and stop if it warms.

    • Excitement: the clink of frozen cubes, the breath you hold before pinching dough.
    • Relief: when bits of butter still glint, promising lift.
    • Pride: your hands smell of butter and victory.
    • Anticipation: the oven hum, the crust puffing.

    I narrate, I joke, I remind you to chill, then to assemble, confidently.

    Minimal Handling Counts

    Because you want flaky layers, not a brick, treat the dough like a shy animal—light, patient, and a little bit nervous. I whisper to it, then I work fast. Use minimal handling tips: measure, cut fat, toss with flour, then fold gently. Don’t overmix, don’t knead like you’re making bread. Press with fingertips, pulse in the food processor, or rake with a fork, until pea-sized butter bits remain. Keep surfaces floured, use a bench scraper, lift don’t stretch. These dough handling techniques keep pockets of butter intact, they puff, they sing. You’ll feel cool bumps of butter under your palms, see flecks of fat like tiny islands. Do less, enjoy more—your crust will thank you, in crisp, buttery applause.

    Rest and Chill Dough

    When you’ve coaxed the dough into a shaggy, flour-speckled mass, I make it stop and sit down—literally; folding it into a disk and tucking it into the fridge is the single act that turns slapdash pastry into something that sings. You’ll feel calmer after 30–60 minutes, because resting benefits are real: gluten relaxes, butter firms, flavors settle. I wrap the disk tight, press out air, and label the time like a scientist who also loves dessert.

    • Quiet patience, the dough breathes, you exhale.
    • Cold butter, tiny pockets, steam magic during baking.
    • A brief nap, then confidence, less tearing.
    • The chill is sacred, you’ll thank me later.

    Aim for a chilling duration that suits your schedule, don’t rush.

    Rolling, Shaping, and Fitting Into the Pan

    One good roll is all it takes to feel like a pastry superhero, and you’re about to prove it. I walk you through rolling techniques, showing how to roll from center outward, flip the dough, dust sparingly, and keep it cool so it won’t stick or snap. You’ll hear the faint flour whisper, see the edge thin just so, and learn shaping tips for neat rims, crimps, or a rustic fold. Ease the disk into the pan, don’t stretch—stretching shrinks. Press gently to fit corners, patch tears with a dab of water, trim a neat overhang, then tuck and flute or fork the edge. You’ll finish feeling smug, confident, and oddly heroic, pie tin in hand.

    When and How to Blind-Bake

    You’ll blind-bake when a wet filling or a super-crisp bottom is on the menu, because soggy crust is the enemy of happy pies. I’ll show you how to weight the shell with parchment and beans so it holds its shape, and tell you when to remove the weights for that golden finish. Heat matters too — I’ll give you the right timing and temperature so the crust’s flaky, not burnt, and your nose gets that buttery, toasty reward.

    Why Blind-Bake Matters

    Because flaky crusts don’t magically happen on their own, I always blind-bake for pies that have wet fillings or need a crisp bottom — and you’ll thank me when the filling doesn’t turn your crust into a soggy canoe. I tell you, blind baking saved many a Thanksgiving, it’s simple, and it’s about control: blind baking, benefits explained. You preheat, dock, line with foil, weight it down, bake until set. The result? A golden, crunchy shell that sings when you cut it.

    • Relief, when the filling stays put.
    • Pride, at that perfect fork-crisp edge.
    • Joy, hearing the crust snap.
    • Confidence, knowing your pie won’t flop.

    Do it, you’ll feel like a pastry wizard, slightly smug, deservedly so.

    How to Weight Crust

    When the crust needs a head start — like for custard pies, fruit pies with juicy fillings, or anything you don’t want soggy — I grab my foil and pie weights and get down to business; blind‑baking with weight keeps the pastry flat, flaky, and gloriously crisp, instead of bubbling up into sad little pastry balloons. You line the shell with foil, press it snug to the edges, fill with pie weights, dried beans, or rice if you’re improvising, and slide it into the oven. The weights press the dough so steam escapes, you get even browning, and the crust protection is immediate. Remove weights carefully, peel back foil, and if the center needs firming, bake a bit more without them. You’re halfway to pie glory.

    Timing and Temperature

    If you want a crust that snaps and sings, timing and temperature are the backstage crew you can’t ignore; I treat them like a ticking metronome and a mood light. You preheat, you watch, you trust rhythm—because blind-baking isn’t guesswork. Set oven temperatures precisely, use a lower start to set fat, then crank heat to toast. Baking times matter: dock, weigh down with beans, then remove weights to brown. You’ll feel the crust firm, smell butter turning golden, see edges blush.

    • The hiss of steam leaving, relief that you nailed it.
    • The quick squeeze of crust between fingers, proud and smug.
    • The bright pop when flaky layers separate.
    • The cozy warmth that says, done right.

    Troubleshooting Common Pie Crust Problems

    Once your golden crust comes out lopsided, shrunk, or soggy, don’t toss the rolling pin in dramatic defeat—I’ve wrecked more pies than I’d like to admit, and you’ll survive this. You’ll spot soggy crusts when steam pools, fillings weep, or the bottom feels like damp cardboard; blind-bake, dock the dough, and brush with beaten egg or melted chocolate to seal it, crisping the base. Crumbly texture? Chill the dough, handle it gently, and add a tablespoon of ice water at a time until it holds; too much flour will make sand castles, too little butter, dry sawdust. If edges burn, shield them with foil. Give fixes a try, taste often, and laugh when a crust rebels — you’ll perfect it.

    Conclusion

    You’ve got this—keep ingredients cold, treat the dough like a shy friend, and don’t overwork it. I’ll warn you: patience is the secret spice. Roll with confidence, dock and chill, then blind-bake with weights until it sings golden and crisp. If it cracks, patch it; if it’s soggy, try hotter oven and longer bake. Practice makes flaky, and every pie is a classroom—taste the lessons, laugh at mistakes, then eat the evidence.

  • How Do I Make Vegan Holiday Dishes

    How Do I Make Vegan Holiday Dishes

    Like Dickens at a kitchen counter, you can turn humble ingredients into a festive story—I’m serious, you’ll want to narrate this to guests. You’ll swap butter for creamy cashew or oat, use aquafaba for fluff, and roast vegetables until they sing, all while building a show-stopping centerpiece that even skeptics will admire. I’ll guide you through pantry essentials, mains, sides, desserts, and timing—so grab an apron and don’t panic yet.

    Key Takeaways

    • Replace dairy and eggs with cashew or oat creams, aquafaba, and nutritional yeast for texture and cheesy flavor.
    • Build a show-stopping main like herb-crusted nut roast or mushroom-walnut loaf, using searing and resting for depth.
    • Roast seasonal vegetables until caramelized, then toss with citrus, toasted nuts, and bright herbs for savory sides.
    • Offer creamy sides such as garlic white-bean purée or lemony farro, and finish with herb oil or cranberry compote.
    • Prepare desserts like coconut-cream ganache tarts or spiced pear compote, and time prep by batching and reheating gently.

    Essential Swaps and Pantry Staples for Plant-Based Holiday Cooking

    plant based holiday cooking essentials

    Because holiday food should feel familiar, not like punishment, I’m here to show you the swaps that actually work—and taste good—without turning your table into a science experiment. You’ll swap dairy for creamy cashew or oat bases, use aquafaba to mimic eggy lift, and stash nutritional yeast for that savory, cheesy wink. Think essential ingredients like miso, tahini, and good olive oil; they rescue texture and soul. Toss in citrus, smoked paprika, and maple as subtle flavor enhancers, don’t be shy, they sing. You’ll toast nuts, sauté shallots until sweet, and rub spices on roasted veg, simple moves that smell like home. I joke a bit, mess up once, then nail it—the payoff is everyone asking for seconds.

    Show-Stopping Main Courses That Impress a Mixed Crowd

    impressive vegan main courses

    One show-stopper that never fails is a herb-crusted nut roast that looks fancy but barely breaks a sweat to make—I’ll show you how to get a golden, crunchy exterior and a moist, savory center that even your omnivore aunt will ask about. You’ll also learn to build other vegan roasts that steal the spotlight, from mushroom-walnut loaves to seitan crowns, each with bold seasoning and confident textures. I’ll walk you through searing, glazing, and resting, so flavor locks in and slices hold firm. Don’t skip gourmet toppings—herb oil, tangy cranberry compote, toasted seeds—small additions, huge applause. You’ll plate with swagger, hand it to the table, and watch skeptical faces turn into delighted murmurs.

    Crowd-Pleasing Sides and Vegetable-Forward Dishes

    flavorful vegetable side dishes

    If you want the sides to steal the show, lean into big flavors and textures that make people forget there’s no meat on the plate—I promise they won’t notice, or they’ll pretend to for manners. I’ll say it plain: roast the seasonal vegetables until their edges caramelize, toss them with bright herbs, a squeeze of citrus, and crunchy toasted nuts. Serve a bowl of flavorful grains—farro, quinoa, or herbed rice—dressed in lemony vinaigrette, studded with dried fruit or savory capers. Add a silky, garlicky bean puree, and a crisp salad with bitter greens and warm vinaigrette. You’ll mix colors, layers, and aromas, hear the compliments, shrug modestly, and secretly plan your encore.

    Decadent Vegan Desserts to Finish the Feast

    You’ve plated the roasted veg, heard the polite oohs, and now you get to close the show with something everyone will actually fight over. You’ll reach for vegan chocolate first, melt it glossy, stir in coconut cream, and suddenly you’ve got silk. Make a tart, a molten cake, or chocolate peppermint bark — think bold, not fussy. Offer spiced pear compotes, citrusy cashew cream, roasted nuts for crunch. Serve warm slices, let steam carry the aroma, watch faces brighten. I’ll nudge you to taste as you go, blame the extra spoonful on quality control. Keep a simple fruit-forward option for wary guests, but don’t skimp on spectacle. These holiday treats should dazzle, comfort, and spark real dessert envy.

    Timing, Prep, and Serving Tips for Stress-Free Holiday Entertaining

    When the oven’s humming and the house smells like cinnamon and triumph, I want you to breathe, make a plan, and trust the clock — not your panic. You’ll map a simple holiday scheduling plan: what cooks when, who brings what, and which dishes can chill. Start with a preparation timeline, write it on a sticky, and stick it to the fridge where guests can’t miss your masterpiece. Do big batches early, freeze sauces, and chop veg the day before — your future self will high-five you. Reheat with steam, serve with flourish, and keep platters warm in a low oven. Ask for help, accept weird requests, and smile — you made this possible, wildly and deliciously.

    Conclusion

    You’ve got this—swap in cashew creams and aquafaba, roast the heck out of roots, and build a nut roast that even your carnivorous uncle will compliment, begrudgingly. I tested a theory: if you pile on texture and bold seasoning, skeptics melt faster than vegan gravy on mashed potatoes. Trust taste, prep ahead, and keep dessert dramatic. I’ll be honest, it’s fun to watch faces change at first bite—mission accomplished.

  • How Do I Keep Food Warm for a Party

    How Do I Keep Food Warm for a Party

    You’ve got people coming, plates clattering, and food that can’t go cold—don’t panic, plan. I’ll show you simple gear—chafers, thermal carriers, low oven tricks—and timing hacks that keep gravy glossy and veggies crisp, not sad and soggy; you’ll learn to stagger dishes, wrap trays, and taste just before service so nothing gets dull. Stick with me, and your buffet will steam, smell amazing, and actually stay hot—here’s where we start.

    Key Takeaways

    • Use chafing dishes or insulated carriers to hold and transport hot food above 140°F.
    • Preheat serving pans, keep lids closed, and use hot water baths beneath pans for consistent heat.
    • Stagger cooking and serve-by times; set up hot-holding stations near the serving area.
    • Wrap trays in thermal blankets or towels and pad slow-cooker lids to reduce heat loss during transport.
    • Monitor temperatures with thermometers and rotate or replenish trays to maintain safe, hot food.

    Equipment Essentials for Keeping Food Warm

    essential equipment for warmth

    You’ll want the right gear before the first guest asks, “Is this supposed to be lukewarm?” I’m talking chafing dishes that actually hold heat, insulated carriers that don’t leak warmth like a bad toupee, and a few smart gadgets that make you look like you planned this. You’ll grab sturdy food warmers, place pans in water baths, and stir occasionally so sauces don’t skin. Wrap trays in thermal blankets when you move between rooms, they trap heat like a cozy blanket on a couch. I’ll admit, I once forgot a lid and paid in sad napkins, so lids matter. Keep thermometers handy, set temps, and arrange buffet flow so steam rises and aromas do the inviting work for you.

    Timing and Staging Your Dishes

    plan stagger hold serve

    You’ll want a serve-by time plan so everything lands hot and in the right order, no last-minute smoke signals from the oven. Stagger your cooking schedule—start the slow-simmers early, prep the quick sizzles later, and let me be your guilty-pleasure timer while you sip something strong. Set up hot-holding stations—chafers, insulated carriers, even a warm oven shelf—and you’ll keep steam, sizzle, and bragging rights intact.

    Serve-By Time Plan

    Alright—think of the clock as your co-host. I’ll help you map a serve time plan so dishes hit the table at peak food temperature, not lukewarm sadness. Start by listing each dish, note ideal serve time, and the temp it needs to hold. I cue ovens, chafers, and slow cookers like stage managers, nudging things forward, back, or into a warming drawer. Taste-test one minute before serving, stir sauces, tent meats to trap steam, and give sides a quick reheat if needed. Call out a five-minute warning to guests — dramatic, useful. You’ll look calm, I’ll take the credit, and everyone eats hot food. Bravo, you timed it perfectly.

    Staggered Cooking Schedule

    If you want everyone to eat hot food without turning into a frantic oven jockey, start by staging your dishes like a small, well-rehearsed theater—I’m the director, you’re the stagehand, and the timer is the diva. I break the menu into acts, deciding what roasts, sides, and sauces need finish times, then plan staggered preparation so nothing crowds the oven. You’ll brown, rest, and tent meats while veggies get their turn, you’ll reheat sauces last. Coordinated timing means set alarms, write a simple timeline, and prep mise en place so you’re nudging each dish on cue. You’ll hear the sizzle, smell butter, and feel calm—not frazzled. Trust me, it’s theater with snacks, and you nailed opening night.

    Hot-Holding Stations

    When the oven’s quiet and guests are circling like hawks, hot-holding stations are your backstage crew, quietly keeping everything delicious and drama-free; I set up zones like a tiny restaurant, and you get to look like the culinary genius who planned it all. You’ll assign hot holding techniques by dish — soups in insulated pots, roasted veg on warm trays, meats under a tented foil on low racks. Label zones, jot ideal temperatures, and check with an instant-read thermometer, don’t guess. Rotate plates, replenish steam pans with a splash of stock, and stir sauces so they don’t sulk. Talk to your helpers like a director, hand off trays, cue arrivals. Guests eat warm food, you take a bow, I accept applause.

    Slow Cookers, Crockpots, and Insulated Carriers

    slow cook keep warm

    Because I can’t stand lukewarm chili at a party, I reach for a slow cooker like it’s my trusty, heated sidekick—thick steam curling up, aroma of cumin and garlic filling the room, guests drifting in on scent alone. You’ll love slow cooker benefits: set it, forget it, and still look like a culinary genius. Toss in ingredients, pick a crockpot recipes twist, then wander back to mingle. Use insulated carriers to move food, they hug heat tight, no awkward reheating on a hotplate. Keep lids sealed, pad with towels for extra insulation, and label each vessel so Aunt Mae doesn’t spoon salsa into the mashed potatoes. I bring tongs, ladles, napkins, a smile, and zero patience for cold food.

    Using Oven, Stove, and Chafing Dishes Safely

    I’ll walk you through keeping pans and dishes cozy without turning your kitchen into a sauna, starting with oven temps that keep food warm, moist, and not rubbery. Don’t guess with chafing dishes—use the right fuel, check water levels, and keep flames low so nothing scorches or goes cold mid-toast. Stay nearby, stir or tent as needed, and you’ll look like a pro while I take the blame for any singed napkins.

    Oven Temperature Tips

    If you want your roast to stay juicy and your gravy to stop sulking in a cold pan, you’ve got to treat heat like a guest — polite, predictable, and not allowed to scream into the room. I set the oven low, then tweak, because oven settings matter; you’ll want steady heat, not drama. Check food temperature with a probe, aim for holding temps (140–160°F) depending on dish, and resist cranking to reheat fast.

    • Preheat to 200–250°F for casseroles and roasts.
    • Use an oven-safe dish with a lid to keep steam.
    • Tent with foil for crusted items, remove to refresh.
    • Place a tray of hot water for moist heat.

    You’ll taste the difference, and your guests will pretend it’s magic.

    Safe Chafing Dish Use

    When you’re juggling an oven, a stove, and a row of chafing dishes, think of me as the friend who won’t let the party become a slow-motion disaster — I’m standing by with tongs and a fire extinguisher (metaphorically, mostly). You set fuel cans snug, light them carefully, and listen for the gentle hiss, not a roar. I tell you to preheat inserts, stir lids-open to avoid steam surges, and keep thermometers in every pan so chafing dish safety isn’t a guess. Maintain safe food temperature above 140°F, rotate trays, and replenish hot water beneath pans to avoid cold spots. When a flame sputters, swap the can, not the pan. Speak up, move fast, and trust the thermometer — you’ll look calm, I promise.

    Maintaining Texture and Flavor While Holding

    Keeping food warm isn’t just about heat, it’s about mercy — for your guests and for your carefully prepared dishes. I say that because you want texture preservation and flavor enhancement, not sad, soggy leftovers masquerading as dinner. Keep lids on, stir gently, and check temps often. Rotate trays, don’t overcrowd pans, and rest fried items on a wire rack to keep crisp.

    • Use low, steady heat, avoid wild temperature swings.
    • Add butter or broth sparingly, to revive dryness.
    • Hold sauced items separately, toss just before serving.
    • Use vents or foil tenting to balance moisture.

    You’ll taste the difference when crunchy stays crunchy, sauces stay bright, and your ego survives the party.

    Serving Strategies and Guest-Friendly Setup

    Since you want guests to eat like they care, set up stations that do more than just hold food — they invite folks to mingle, customize, and grab what they actually want. I tell you, layout matters. Place warmers near conversation hubs, label bowls, stack plates so people don’t hunt, and keep serving utensils obvious. For guest interaction, add a build-your-own taco or noodle bar, whispering spice choices and crisp textures. Use chafing dishes for steady heat, lamps for roast sheen, and insulated carriers where hands reach. Food presentation should look effortless: colorful garnishes, steam that beckons, neat spoons. Stand back, watch the flow, swap trays before emptiness happens. You’ll look like a pro, while I secretly enjoyed the chaos.

    Conclusion

    You’ve got this—think of your kitchen as a warm, humming stage and you’re the director, cueing chafers, ovens, and crockpots. Wrap trays, label them, and tuck carriers into thermal blankets like tiny sleeping dragons. Test temps, stir sauces, taste as you go. Keep hot-holding stations simple, let guests graze, and refresh textures with a quick oven blast. I’ll be over here, spoon in hand, cheering you on—don’t burn the garlic.

  • How Do I Meal Plan for Holiday Guests

    How Do I Meal Plan for Holiday Guests

    Steam fogs the windows while you shred Brussels sprouts and wonder how three picky eaters and a vegan cousin became your culinary responsibility. You’ll start by counting people and allergies, pick a few big, forgiving dishes that scale, and stash easy make-ahead sides so you’re not frantically roasting at midnight; I’ll show you how to shop in stages, timetable the oven, and rope in guests without sounding bossy, and yes, you’ll taste-test the gravy—because priorities—so keep your apron on and your phone silenced.

    Key Takeaways

    • Count guests, confirm arrivals, and collect dietary restrictions and preferences before planning the menu.
    • Choose scalable, crowd-pleasing recipes (one-pot roasts, casseroles, hearty sides) that are easy to multiply.
    • Mix make-ahead dishes that improve overnight with a few fresh, day-of items for texture and presentation.
    • Build a shopping and prep timeline: nonperishables weeks ahead, perishables last 48 hours, stagger daily tasks.
    • Delegate dishes and responsibilities to guests, label foods for allergens, and coordinate arrival/serving times.

    Assess Guest Numbers and Dietary Needs

    guest count and dietary needs

    Okay — first things first: count the bodies. You jot names, note arrivals, and picture chairs scraping the floor, because headcount drives portions, pans, and pacing. Ask about guest preferences now, don’t guess; someone loves spice, another hates mushrooms. Text, call, or send a cheeky poll—people respond to humor. Then flag dietary restrictions: gluten, nuts, vegan, severe allergies—write them bold, tape them to your menu. Visualize plates: steam rising, a fork clinking, a relieved smile. That helps you balance crowd-pleasers with safe swaps, plan separate sides, and label dishes so nervous eaters relax. I’ll admit, it’s tedious, but this groundwork saves chaos, keeps everyone fed, and earns you genuine, smug applause.

    Choose Scalable, Crowd-Pleasing Recipes

    scalable crowd pleasing recipes

    Great—now that you’ve got your headcount and the allergy list taped to the fridge like battle orders, it’s time to pick dishes that scale without drama. You want crowd pleasing appetizers that arrive hot, crunchy, and impossible to resist, things you can toss on a sheet pan or stack on platters. I choose recipes that multiply easily: double the roasting trays, triple the dips, no mysterious fiddly steps. For mains, lean on scalable main dishesone-pot roasts, casseroles, big braises — the kind that feed a crowd and improve as they sit, like a humble superhero. Make portions predictable, prep a staging plan, and breathe; you’re building a feast, not performing surgery. Guests will cheer, you’ll take a bow.

    Mix Make-Ahead and Day-Of Dishes

    balanced holiday meal preparation

    When I plan a holiday menu, I split the workload like a parent divvying Halloween candy: some treats are stashed away for later, others are handed out steaming on the doorstep. I tell you, this mix is your secret weapon. Pick make ahead options that actually improve overnight — casseroles, braised meats, sauces that taste richer after a nap. Label, chill, and rehearse reheating, because you’ll thank me later. Then choose a few day of preparation stars — crisp salads, roasted vegetables, bread pulled hot from the oven — things with texture and theater. You’ll balance calm with showmanship, flavor with timing. Serve warm dishes that smell like home, while relaxed guests chat, wine uncorks, and you look heroic.

    Build a Shopping and Prep Timeline

    You’ll want to buy staples like flour, stock, and coffee a few days ahead so you’re not frantically hunting for oregano while the turkey’s resting. I’ll walk you through simple prep tasks by day—what to chop the night before, what to assemble the morning of, and what you can freeze in advance—so you can sip wine, not stress. Trust me, with a little scheduling you’ll smell rosemary and butter instead of panic.

    When to Buy Staples

    Once your guest list is written and the menu’s mostly nailed, it’s time to map out when to buy the staples so you don’t end up making midnight runs for flour and butter. Buy nonperishables early: grab pantry essentials like flour, sugar, canned goods, coffee, and spices two to three weeks ahead, especially if you’re doing bulk purchases for crowd-pleasing recipes. I’ll stock snacks and booze early, stash them out of sight like a squirrel with better taste. Pick up semi-perishables—nuts, dried fruit, olives—about a week before, so they’re fresh but not frantic. Save fresh dairy, herbs, and bread for the last two days. Trust me, timing is your secret weapon; you’ll feel smug, serene, and shockingly well-fed.

    Prep Tasks by Day

    If you want to glide through holiday hosting without looking like a frantic extra in a cooking show, plan the prep by day and treat your kitchen like mission control. I map a timeline, you follow it, and miracle: dinner happens. On three days out I buy perishables, check the spice rack, and wash linens—small wins that quiet the chaos. Two days out I chop, marinate, and label containers; your counter will smell like garlic and victory. The day before is all reheats, sauces, and set-the-table rehearsal, I taste and adjust, you breathe. Morning of, I roast, baste, and finish salads; quick tweaks only. Meal prep splits into bite-sized daily tasks, so hosting feels skilled, not stressful.

    Delegate Tasks and Coordinate Contributions

    You tell people what to bring, I tell the timers and the wine — nobody likes duplicate sweet potato casseroles, and your fridge will thank you. Tell guests an arrival window, set serving times loud and proud, and remind the aunt who runs late that gravy waits for no one. I’ll hold the oven, you herd the salads, and together we’ll pull off a meal that smells like home and looks like we meant to.

    Who Brings What

    Who’s bringing what, and more importantly, who’s washing the pan afterward? I tell guests up front their guest responsibilities, I ask about food preferences, and I keep it breezy. You can assign mains, sides, drinks, desserts, even napkins — clear, simple labels work wonders. Say, “You bring the green bean casserole, I’ll handle the gravy,” and watch people relax. Text threads help, photos of portions help, and I laugh when someone brings eight loaves of bread because they heard “bring carbs.” Offer swaps, suggest quantities, note allergies, and mark who’s bringing serving ware. Don’t haggle over favors; be direct, keep tone light, and hand out tasks like party confetti — cheerfully, precisely, and slightly bossy.

    Set Arrival & Serving Times

    When exactly should everyone arrive — fashionably late or on-the-dot hungry? I say tell them a clear time, then tempt them with snacks if they wander in early, because arrival coordination beats awkward doorways and empty plates. You call out arrival windows, staggered if needed, and text reminders that read like charming ultimatums. Next, nail down serving logistics: who brings platters hot, who sets the buffet, who mans the oven. Assign one friend to carve, another to plate kids’ portions, and you keep timing, like a conductor with a casserole. I’ll admit, I sometimes over-plan, then laugh when gravy betrays me; still, guests eat together, conversations flow, and the meal lands warm, on time, and delicious.

    Plan for Leftovers and Easy Reheats

    Three smart moves will save your sanity the day after: plan leftovers like a tiny army, label them, and rehearse the reheats. I tell you, nothing beats a fridge organized like a military parade. Pick airtight containers, note contents and date, and stash similar flavors together so your leftover storage actually makes sense. Slice gravy into ice cube trays, shove herbs in oil, portion sides into single-meal packs.

    Then test reheating methods—oven for crisp, microwave for speed, stovetop for saucy revival. I’ll talk you through temperatures, cover tricks, and timing: 350°F for casseroles, medium heat with a splash for stews, a quick broil to re-crisp. Your morning-after coffee will taste like victory, trust me.

    Conclusion

    You’ve turned chaos into a casserole: invite, note diets, pick reliable recipes, and prep like a pro. I promise, the turkey isn’t judging. You’ll bake ahead, buy staples early, and keep fresh things for last-minute sparkle. Hand out simple jobs, label dishes, stash reheats, and savor the mess — it’s the holiday’s confetti. When guests arrive, you’ll serve warmth, not stress, and leftovers will taste like victory the next day.

  • How Do I Make Festive Cocktails

    How Do I Make Festive Cocktails

    You’ll want a few solid tools, bright seasonal ingredients, and a tiny bit of bravado—trust me, you can fake a professional-looking cocktail with a peeler and good ice. Start by smelling spices, squeezing citrus, and tasting syrup until it makes you grin; swap gin for aged rum, add a rosemary sprig, or float sugared cranberries for drama. I’ll show you easy twists, mocktail swaps, and batch tips that save your night—but first, grab a shaker.

    Key Takeaways

    • Choose seasonal ingredients (cranberry, apple, citrus, herbs, spices) and fresh citrus to create bright, festive flavor balances.
    • Use proper tools and chilled, fingerprint-free glassware to enhance aroma, texture, and presentation.
    • Balance sweet, sour, and bitter elements; adjust syrups, acids, and spirits by tasting as you mix.
    • Apply appropriate techniques—shake for froth, stir for clarity, muddle herbs/fruits, and layer for visual impact.
    • Batch cocktails and mocktails ahead with labeled, chilled dispensers, garnishes, and a simple self-serve setup for guests.

    Essential Tools and Glassware for Holiday Drinks

    essential cocktail preparation tools

    If you want your holiday cocktails to taste as good as they look, you’ve got to arm yourself with the right tools—no excuses. I’ll say it plainly: good gear saves you from sad drinks. Grab a sturdy shaker, know the shaker types, a Boston for speed, a cobbler for neatness. Get a jigger, long-handled spoon, and a muddler that doesn’t fall apart when you press zest into the glass. Choose glass styles that match the mood —coupe for sparkle, rocks for whiskey, highball for fizzy fun—clean, chilled, and fingerprint-free. I’ll coach you through set-up like a bossy friend, toss in a towel, clink ice, and remind you: presentation is half the sip.

    Flavor Pairings and Seasonal Ingredients

    seasonal flavors enhance cocktails

    When winter fruit hits the market and the air smells faintly of pine, you should be thinking in taste teams, not solo acts—because drinks that sing do it by pairing, not shouting. You’ll match tart citrus with warm seasonal spices like cinnamon and clove, balance rich apple with a squeeze of lemon, or cut syrupy cranberry with dry vermouth. Use herb infusions—rosemary, thyme, or basil steeped in simple syrup—to add green brightness. I’ll tell you to taste as you go, stir, sip, adjust; don’t be precious. Smell matters, too: rim glasses with orange zest, toast spices briefly for depth. You’ll build cocktails that feel like a hug, not a sugar coma, and that’s my kind of holiday miracle.

    Easy Classic Cocktails With a Festive Twist

    festive classic cocktail variations

    All that talk about tart citrus and toasted spices? You’ll take classics—Old Fashioned, Martini, Mule—and nudge them festive, fast. I tell you, swap plain bourbon for holiday spirits like spiced rum or cinnamon-infused whiskey, stir with orange peel, smoke a rosemary sprig, and you’ve got magic. Try cranberry simple syrup in a vodka soda, or steep clove in vermouth for a warm Martini riff; those cocktail variations sing. You’ll rim glasses with sugar and crushed ginger, toss in a star anise, muddle pomegranate seeds until they pop, then sip slowly, smiling. I’ll coach you through proportions, timing, and garnish tricks, you’ll impress friends, and we’ll both pretend it was effortless—cheeky, but true.

    Nonalcoholic Versions and Crowd-Pleasing Mocktails

    You’re not missing out if you skip the booze — I’ll show you how bright citrus syrups, spiced shrubs, and sparkling herbal teas can stand in and sing. Picture a punch bowl rimmed with sugared cranberries and rosemary sprigs, everyone reaching in with festive paper straws, laughing because the drinks look as good as they taste. I’ll walk you through simple swaps and show how bold garnish and theatrical serving make mocktails the star of the party.

    Festive Flavor Bases

    If you’re planning a party and want everyone to feel included, start with a flavor base that sings even without the booze—I’ve learned the hard way that weak mocktails get mocked. You’ll build depth with bright acids, textured syrups, and a bitter note for grown-up balance. I test tastes loud, stir slow, and steal sips.

    • Use holiday syrups like cinnamon-vanilla or cranberry-reduction for warmth and body.
    • Add seasonal bitters, a few dashes, to mimic cocktail complexity without alcohol.
    • Layer citrus, fresh herbs, or roasted fruit for aroma and chewable interest.
    • Finish with fizzy water, sparkling tea, or spiced shrub to lift flavors and add sparkle.

    Trust your palate, keep it bold, and don’t be shy to tweak until it sings.

    Crowd-Pleasing Presentation

    How do you make a mocktail feel like the star of the party? You grab attention with looks first, because people eat—and sip—with their eyes. I love layering hues in a clear glass, tucking in colorful ice that melts into a slow, pretty gradient. Sprinkle edible flowers on top, or float a citrus wheel, and suddenly everyone assumes you spent hours. Talk to guests, offer a stirring straw, joke, “No ID needed, just charm.” Set up a small garnish bar, labels and little spoons, so folks customize without wrecking your vibe. Serve on a tray that clinks, use short, confident pours, and watch people light up. Mocktails shouldn’t hide; they should parade, wink, and get selfies.

    Garnishes, Presentation, and Themed Serving Ideas

    You’ll want to start with bright, skewered fruit and sugared citrus wheels that pop against the drink, because sight and scent get guests salivating before the first sip. I’ll show you how to rim glasses with sugar, spice, or cocoa for a tactile kick, then swap in themed vessels—mason jars for cozy nights, coupe glasses for glam, or mini pumpkins for full-on holiday theater—to set the mood. Trust me, it’s easy to turn a simple mocktail into a showstopper with one clever garnish and a wink of presentation.

    Festive Fruit Garnishes

    When I tuck a bright orange twist or a sugared cranberry onto a glass, guests lean in like it’s a tiny, edible invitation; they’ll taste the fruit before they taste the drink, and that little theatrics kick the whole party into gear. I show you simple, punchy tricks: use festive berries threaded on picks for color, citrus slices and citrus twists for zing, herb sprigs for aroma, edible flowers for whimsy. You’ll love the contrast—pomegranate seeds glint like rubies, spiced apple slices steam with nostalgia, candy canes clack against glass, mint snaps fresh. Try these small moves and the room shifts; people smile, photograph, sip slower. You’ll learn to garnish like a pro, without trying too hard.

    • Threaded festive berries
    • Citrus slices & citrus twists
    • Herb sprigs & edible flowers
    • Pomegranate seeds, spiced apple, candy canes

    Rimmed Glass Styling

    A rimmed glass is your party’s handshake—bold, a little flirtatious, and impossible to ignore. You grab citrus, flip the glass, coat the lip—sugar rimming for sweet cocktails, crystal catch on your teeth, glittery and fun. For margaritas, you go classic with salt rimming, crisp and bracing, it wakes the sip. Try spice rimming when you want warmth; cinnamon, chili flakes, smoked paprika, they tickle the nose before the first taste. Don’t be shy with chocolate rimming on dessert drinks—dip, chill, shave a curl, you just upgraded dessert to showstopper. I’ll remind you: keep rims thin, test flavors with a straw, and match rim to mood. You’ll look like you meant to do this all along.

    Themed Serving Vessels

    You’ve got the rim down — sugar, salt, spice, drama — now let’s talk about the cup that carries the whole show. You pick a vessel, and the mood lands. Use themed mugs for cozy nights, coupe glasses for flirty fizz, or mason jars when you’re charmingly lazy. Add a garnish that smells like winter, a peel that snaps, a sprig that sways. Don’t forget decorative straws, because tiny details punch up selfies.

    • Pick texture: matte ceramic for warmth, crystal for sparkle.
    • Match color: contrast drink hue, or echo party palette.
    • Think scale: big mug = hug; tiny glass = tease.
    • Layer aroma: charred citrus, cinnamon stick, herb bouquet.

    Serve with a grin, accept compliments, pretend you meant it.

    Batch Cocktails and Party-Ready Prep Tips

    If you want to actually enjoy your party instead of living behind a shaker, I’ll show you how to win the night with big, bold batches that taste like you worked twice as long; trust me, it’s the easiest kind of kitchen sorcery. You’ll learn batch preparation that saves time, cuts stress, and scales flavor without fallout. I pre-make cocktail infusions—ginger-vanilla vodka, rosemary citrus gin—then strain and chill. Label jars, pour into a pretty dispenser, add a frozen fruit block, and relax. Set out simple garnishes, ice buckets, and a measured ladle. Tell your guests “help yourself,” then mingle. You look competent, they’re happy, and you get to drink something that tastes like effort, not panic.

    Conclusion

    You’ve got the tools, the flavors, and the cheeky tricks to turn a quiet night into a merry mini-spectacle. Mix bright citrus, warm spices, or a cheeky splash of spiced rum, taste as you go, and don’t be shy with rosemary or sugared cranberries — they whisper “fancy” without shouting. Offer a lovely mocktail sibling, batch a pitcher, and relax. I’ll take the messy spills; you’ll take the applause.

  • How Do I Host a Fondue Party

    How Do I Host a Fondue Party

    You’re hosting a fondue party, and yes, you can pull it off without setting the table on fire. I’ll walk you through picking cheeses that melt like silk, chocolates that cling to strawberries, the right pot and fuel, and a spread of dippables that’ll make guests ooh and swat at their napkins; we’ll cover safety, diet swaps, drinks, and timing so you’re calm when the first fork drops — but first, let’s pick your signature fondue.

    Key Takeaways

    • Choose three fondues (cheese, oil or broth, and chocolate) with complementary flavors to please varied tastes.
    • Pick a stable pot and fuel (electric for control) and test heat and melt before guests arrive.
    • Prep dippables ahead: bread, blanched veg, fruits, cured meats, and gluten- or dairy-free options clearly labeled.
    • Set safety rules: long forks, adult supervision, a clear kid perimeter, and a nearby extinguisher or lid.
    • Serve cheese first, pause between courses, finish with chocolate, and pair drinks for balance.

    Choosing the Right Fondue Style

    fondue styles for gatherings

    Wondering which fondue will make your guests swoon first? You’ll want to pick between classic comfort and adventurous bites, and I’ll walk you through it like a picky friend who actually cooks. Start with traditional fondue styles — think gooey Swiss cheese, nutty, tangy, melts that pull long strings, you’ll hear little gasps. Then flirt with modern fondue variations: spicy chili oil for dipping, chocolate blended with espresso, even broth bowls for skewered meats. Picture steam rising, the clink of forks, someone stealing the last cube of bread while you pretend not to notice. I’ll nudge you toward combos that balance texture and temperature, suggest bold dippers, and make sure everyone leaves licking their fingers, content and slightly smug.

    Selecting the Perfect Fondue Pot and Fuel

    choose pot and fuel

    If you want your fondue night to feel like a cozy science experiment instead of a kitchen fire drill, start by picking the right pot and fuel — they’re the unsung heroes. I recommend thinking about pot materials first: ceramic holds heat gently, cast iron keeps things roaring, stainless steel is modern and forgiving. Each feels different, sounds different when you stir, and changes how your fondue behaves. Next, match fuel types to your mood and setup: tea lights for calm, gel or canned fuel for steady heat, and butane for outdoor speed. I’ll admit, I’ve singed an eyebrow once, so test flame size before guests arrive. Keep tools handy, adjust heat slowly, and enjoy the glow.

    cheese chocolate oil selection

    Pick three crowd-pleasers and you’re already ahead of the game — I usually go one cheese, one chocolate, one oil-based option, and then improvise with whatever looks lonely in my fridge. You’ll pick cheese varieties by thinking texture and melt: tangy, gooey, and a firmer gratable option, and you’ll taste as you go, because science and stubbornness matter. For sweets, choose chocolate types that melt smooth, dark for bite, milk for comfort, maybe white for whimsy — chop, stir, rehearse a dramatic swirl. Oil options need heat tolerance, neutral flavor or herby promise, and a clean pan. Think about flavor profiles loud enough to sing, but flexible enough to let your guests flirt with choices. You’ll wink, serve, and enjoy the chaos.

    Best Dippables and Pairings

    When you’re laying out the dippables, think like a generous librarian who also happens to love butter — arrange, label, and let chaos bloom. I tell guests to start with fruit options: crisp apple slices, juicy pear wedges, and strawberries that pop. Then offer bread varieties — crusty baguette, soft sourdough cubes, rye for attitude. Add veggie choices: blanched broccoli, roasted peppers, crunchy baby carrots. For the carnivores, present meat selections: cocktail sausages, thin steak strips, prosciutto folds. Save room for dessert ideas: marshmallows, pound cake bites, banana slices that melt into chocolate. Finally, station robust sauce pairings — garlicky oil, tangy vinaigrette, spicy mustard, sweet caramel. You’ll look like a legend, I promise.

    Diet Restrictions and Allergy-Friendly Options

    You’ll want to have options so everyone can dig in without worry, so I’ll show you dairy-free “cheeses” that melt like a dream and taste like you didn’t rob the fondue pot. Bring gluten-free dippers — think toasted buckwheat, sturdy rice crisps, and roasted veggie spears — and label them like a polite bouncer. I’ll also point out how to keep nuts and shellfish far from the communal fork, with clean utensils and a separate pot, because nothing kills a party faster than an allergic reaction (or my cooking ego).

    Dairy-Free Cheese Alternatives

    If you’re skipping dairy for allergies or diet reasons, don’t write off fondue night — I’ve dug into plenty of dairy-free cheese options and some of them actually melt and taste good, shockingly. You’ll want to know the nutritional benefits, and which popular brands behave like real cheese when heated. I recommend almond- or cashew-based melts for creaminess, oat cheeses for mild sweetness, and cultured coconut blends if you like tang. Stir, whisk, and coax them over low heat, add a splash of white wine or a squeeze of lemon, and they’ll stretch more than you expect. I’ve burned one batch, then nailed the next — you’ll laugh, dip boldly, and surprise your guests.

    Gluten-Free Dipping Options

    A handful of swaps and you’ll hardly miss the crusty baguette—trust me, I tested this by eating my weight in dips. You’ll want texture and crunch, so lay out a colorful spread. I talk, you dip, we celebrate small rebellions against crumbs.

    1. gluten free bread and gluten free crackers — warm slices, buttery aroma, snap and crumble that say “party.”
    2. rice cakes and gluten free pretzels — light, airy crunch, great with a thick cheesy swirl.
    3. vegetable skewers and fruit dippers — roasted peppers, apple wedges, grapes, vivid flavors that cut richness.
    4. tofu cubes and chickpea snacks — savory bites, firm or crunchy, soak up sauce like champs.

    Label items, separate tongs, and reassure guests—everyone eats happily, no guessing.

    Nut and Shellfish Safety

    Okay, before we cheerfully toss another apple wedge into the fondue pot, let me put on my very small, very serious hat: food allergies need more than good intentions. You ask guests about nut allergies up front, write it on the invite, and remind them again when they arrive—no shame, just care. Set aside a clearly labeled station without nut oils or nut-based dips, wipe surfaces, swap utensils, and open a window if perfume’s involved. For shellfish precautions, keep seafood on a separate platter, separate tongs, separate timer—don’t mingle steam or splashes. Announce what’s in each pot loudly, like a town crier with better hygiene. If someone’s unsure, offer a covered bowl and a smile; safety tastes better than surprise.

    Setting Up Your Fondue Station

    Pick a sturdy pot you can actually stir without making a mess, I prefer one with a heavy base that holds heat and won’t wobble when guests get enthusiastic. Lay out forks, small plates, napkins, and a little tray for used skewers so people know where to put things, and don’t forget separate serving spoons for any communal add-ins. Keep your heat source stable and low, check the flame or burner often, and tell guests with a wink to treat the fondue like a calm campfire—no sudden moves.

    Choosing the Right Pot

    Think of the pot as the party’s lead singer — it sets the tone, holds the heat, and gets everyone dipping. You want a pot that looks good, cooks evenly, and won’t bail on you mid-song. I’ll tell you what to watch for.

    1. Choose fondue pot materials that match your menu: ceramic for cheese, stainless or cast iron for oil, and copper for heat control.
    2. For pot size selection, pick 1–1.5 quarts for 2–4 people, 2–3 quarts for a small crowd, bigger only if you’re feeding a chorus line.
    3. Check for a sturdy burner, tight lid, and easy-clean surfaces.
    4. Test balance and handles, you don’t want molten drama at the table.

    Arranging Serving Tools

    While you’re picking plates and pokers, remember the tools do more than look pretty — they keep the party running and prevent melted chaos. Lay out fondue forks by color, one per guest, so nobody battles for their stabber. Place dipping bowls nearby, shallow and stable, for oils, herbs, or spicy mustard—easy reach, no spills. Stack serving platters with cooked veggies, bread cubes, and cured meats, label them if you’re feeling fancy, or if guests ask what’s vegan. Keep a block of cheese knives on the side for last-minute shredding, I promise you’ll need one. Arrange napkins, small plates, and a trash bowl. I talk you through it, casual command center, everything within arm’s reach, mood set, forks ready.

    Safe Heat Management

    Because hot cheese and battery-operated enthusiasm don’t mix, you want your fondue station set up like a tiny, elegant command post — I promise it’s less boring than it sounds. I’ll walk you through safe heat management so nothing gets scorched, sticky, or dramatic.

    1. Choose heat sources wisely: butane, electric, or tea-light alternatives. I prefer electric for steady control, but portability matters.
    2. Position your pot on a stable, heatproof surface, away from edges and high-traffic zones; I say this like a drill sergeant, but kindly.
    3. Mind flame safety: keep a small extinguisher or lid nearby, and never leave an open flame unattended — even for a selfie.
    4. Use long forks, napkins, and a designated tongs station to keep fingers and linens safe from splatter.

    Safety Tips for Hot Fondue and Kids

    If you want kids at your fondue party and also want all your eyebrows to stay intact, set some ground rules before anyone dips a marshmallow. I’ll be blunt: hot fondue and little hands don’t mix without rules. Keep a safe perimeter, teach kids to stay seated, and explain why poking a fork into boiling cheese is a terrible life choice. Use long-handled forks, stable burners, and clear supervision tips—stand nearby, not scrolling. For kids safety, assign an adult to monitor turns and hold plates, so chaos doesn’t become calamity. Emphasize burn prevention: cool dippers on the side, test bites for heat, and have a first-aid kit ready. You’ll relax more, and the kids will still have fun, honestly.

    Timing and Serving Order

    Once the cheese’s silky and the chocolate’s glossy, don’t just fling bowls at people and hope for the best — you want a rhythm, not a food fight. I tell you this because timing strategies matter: start savory first, let guests graze, then clear a breath before dessert. Pace keeps forks out of eyes.

    1. Prep platters ahead — cubed bread, blanched veg, cured meats, fruit.
    2. Serve cheese first, communal and slow, encourage small skewers.
    3. Pause 15–20 minutes, reset plates, offer palate cleansers like apple slices.
    4. Bring chocolate last, dim lights, light a candle, make it theatrical.

    These serving suggestions make the night feel curated, relaxed, and memorable, not frantic. Keep commands simple, laugh at mishaps, own the party.

    Drinks and Cocktail Pairings

    You’ve paced the cheese and wooed the chocolate, now let’s talk drinks that’ll keep the night humming — I’ll help you pair booze to bite so nothing fights the fondue, including the guests. You want balance: crisp, acidic white for cheese, bright citrus cocktails for salty dippers, and a low-proof cherry or orange spritz with chocolate. I’ll hand you easy cocktail recipes, simple swaps, and a tiny bar station so guests don’t camp at the pot. Offer sparkling water, too, for palate resets. Use citrus twists, rosemary sprigs, or chocolate shavings as drink garnishes, they lift presentation and aroma. Keep a pitcher cocktail, a neat wine, and one fun mocktail — you’ll look like you planned it.

    Cleanup and Storage Strategies

    Because nobody wants to face a mountain of crusty cheese and sticky chocolate at midnight, I’ll walk you through cleanup like a pro who once set a fondue pot on fire — so you learn from my mistakes and get out of the kitchen faster. You’ll scrub while the pot’s warm, not hot, and scrape with a silicone spatula so you don’t chip anything. I’ll show you easy cleaning techniques, and how to stash leftovers safely.

    1. Rinse pots promptly with warm water, loosen residue.
    2. Soak stubborn bits in hot, soapy water for 20 minutes.
    3. Wipe burners and cords with a damp cloth, dry immediately.
    4. Portion leftovers into airtight storage containers, label and chill.

    Trust me, quick moves save your night.

    Conclusion

    You’ll light the burner, stir the cheese until it sighs, and watch friends gather like moths to warm light. I promise, you’ll fumble a fork, laugh, and taste something glorious. Let chocolate drip slow, let garlic tease the air, offer safe swaps for guests who need them. This night becomes a small ritual — bread as boats, cherries as fireworks — and you’ll realize hosting isn’t perfect, it’s deliciously human.

  • How Do I Make Homemade Cranberry Sauce

    How Do I Make Homemade Cranberry Sauce

    Cranberries are tiny flavor grenades, and you’re about to disarm them—careful, they pop. I’ll walk you through rinsing the berries, zesting an orange, and simmering everything until the kitchen smells like bright, tangy candy; you’ll hear pops, see the sauce thicken, and taste-test like a pro (or a very picky uncle). Stick around — there’s a trick for perfect sweetness and a make-ahead move that’ll save your holiday.

    Key Takeaways

    • Simmer cranberries with water (or orange juice) and your chosen sweetener until berries pop and mixture thickens, about 10–15 minutes.
    • Start with less sugar, taste as it cooks, and adjust sweetness plus a pinch of salt to balance tartness.
    • Add orange zest/juice and optional warm spices (cinnamon stick or vanilla) for brighter, layered flavor.
    • Mash some berries with a spoon for texture while leaving others whole for visual and textural contrast.
    • Cool completely before transferring to jars; refrigerate for up to 2 weeks or freeze for longer storage.

    Ingredients You’ll Need

    cranberry sauce ingredient lineup

    If you’re anything like me, you’ll want to see everything laid out before you start—so let’s do that. You’ll need a bag of fresh cranberries, bright and poppy, they smell like tart candy when you rinse them. Pick a sweetener: granulated, brown, maple syrup, even honey—think of sugar options as mood choices, each one changes the vibe. Salt? A pinch, yes. Citrus zest and juice wake the berries up, orange is classic. A cinnamon stick or a split vanilla bean add warmth, if you’re feeling fancy. Water or a splash of orange juice for simmering. Measuring cups, a sturdy saucepan, and a wooden spoon that’s seen better casseroles. That’s your lineup, nothing dramatic, just honest ingredients ready to sing.

    Step-by-Step Basic Recipe

    homemade cranberry sauce preparation

    You’ll start with bright, glossy cranberries and a few simple fresh ingredients that make the sauce sing, I promise—no mystery jars here. Then you’ll cook and stir them until they pop and thicken, that bubbling scent filling the kitchen and making you grin. Finally, you’ll let it cool, scrape it into a jar, and tuck it in the fridge so it’s ready to impress.

    Fresh Ingredients First

    One bowl, a handful of bright cranberries, and me trying not to overcomplicate things—let’s start where every good sauce does: with fresh ingredients first. You want berries that smell tart and look glossy, not wrinkled; that snap is nonnegotiable. Knowing fresh cranberries benefits helps—more fragrance, firmer texture, cleaner flavor, less need for fixes. I pick through them, toss soft ones, and imagine the zing. Consider organic ingredient options for sugar and citrus if you care about pesticides or flavor purity; it’s a small splurge that sings. Chop zest, measure sugar, and line up water and a pinch of salt like soldiers. You’re prepping a tiny orchestra; do it with intention, a grin, and maybe one quick taste-test.

    Cooking and Stirring

    Okay — stove on, pot ready, and no solemn vows about “perfect texture” yet; we’re here to cook, stir, and pay attention. You’ll heat sugar and water, listen for the first simmer, then toss in cranberries; they’ll pop like tiny fireworks, smell bright, tart, and gloriously alive. Use basic cooking techniques, don’t panic, and keep your eyes on the pot.

    • Start low heat, then raise to gentle boil, you want bubbling but not chaos.
    • Stir with a wooden spoon, scrape the bottom, learn simple stirring methods that keep sauce smooth.
    • Taste early, adjust sugar, wink at your inner critic.
    • Mash some berries for texture, leave a few whole for charm.

    I narrate, you cook, we both eat soon.

    Cool and Store

    Let the pot sit off the heat for a minute, breathe in that tart-sweet steam, and don’t be tempted to plunge in with a spoon like it’s the last slice of pie—hot sauce burns. I watch the bubbles calm, I nudge the pan to loosen any jammy bits, then I choose a cooling methods plan: shallow pan transfer for quick chill, or jar funneling for slow-set texture. Spoon into clean, warm storage containers, leave a little headspace, wipe rims—no crusty lids, thanks. Let jars cool on a rack until just warm, then cap. For fridge use, they’re good two weeks; for freezer, three months. Label, date, and try not to taste-test every hour. You’ll thank me later.

    Texture and Flavor Variations

    cranberry sauce texture variations

    If you like your cranberry sauce singing with texture, you can coax it into everything from jammy spread to bristling bead-studded relish—I do it depending on mood and what I’m hiding in the fridge. You’ll play with sweetness levels and honor your texture preferences, tweaking sugar and cooking time. I like a glossy, spoonable jam; you might want jewel-like berries that pop. Stir in orange zest for perfume, ginger for a bite, or chopped nuts for crack. Chill to firm up, or serve warm to slurp with gravy.

    • Cook longer for thick, spreadable jam, stir often, resist the urge to wander.
    • Smash half the berries for rustic body, leave the rest whole.
    • Fold in citrus or spice at the end.
    • Add seeds or nuts for crunch.

    Tips for Balancing Sweetness and Tartness

    You’ve got your texture sorted—jammy gloss or jewel-bright berries—and now it’s time to tame the flavor so the sauce actually sings at the table. I’ll be blunt: you want sweetness balance, not saccharine glue. Start with less sugar than the recipe says, simmer, taste hot and cold. If it’s too tart, stir in a spoonful of sugar, maple, or honey, then wait—sweetness softens as it cools. For tartness adjustment, add a squeeze of orange or lemon, or a splash of cranberry juice, which brightens without dumping sugar. Salt is magic, a pinch brings everything forward. Keep a tasting spoon handy, and adjust in small steps. Trust your palate, not panicking measures.

    Make-Ahead and Storage Advice

    You can cool the sauce until it’s glossy and chilled, pop the lid on, and relax—flavors settle and textures firm up best after a good nap in the fridge. If you want to stash extras, freeze in single-serving tubs or a loaf pan, label them, and thaw slowly in the fridge so the berries don’t turn into sad mush. Trust me, I’ve thawed a tray too fast and learned the hard way; chill first, reheat gently, and you’ll get that bright, spoon-ready shine every time.

    Chill Before Serving

    Three hours in the fridge works wonders, trust me—I’ve learned the hard way that warm cranberry sauce is a fork-sinking, table-ruining tragedy. You want apple-bright snap, glossy sheen, and the right serving temperature so flavors pop, not flop. Chill time firms the jammy texture, and cooling calms the sweet-tart fight into harmony.

    • Put the pot in a shallow bowl, cover loosely, slide it into the center shelf, and set a timer.
    • Taste after the minimum chilling time, nudge longer if it’s still too soft, and remember cold dulls sweetness slightly.
    • For prettier slices, chill overnight, then bring out 20 minutes before plating to lift the aroma.
    • Store in a sealed container on the shelf’s coldest spot, label, and you’re golden.

    Freezing and Thawing

    Cold-stored sauce is great, but sometimes life (and guests) demand planning ahead, so let’s talk freezing and thawing—my freezer and I have a complicated relationship. You can freeze cranberry sauce in airtight containers or heavy-duty freezer bags, leaving a little headroom because it swells, and label with date. Those freezing techniques keep bright color and zing, if you don’t overcook first. Thawing methods matter: move the jar to the fridge overnight for gentle thawing, or sit a sealed bag in cold water for an hour if you’re sprinting. Reheat gently on low, stir to revive texture, add a squeeze of orange if it’s flat. Taste, adjust sugar, and serve; it’ll forgive you, eventually—usually.

    Serving Ideas and Pairings

    When the cranberry pot cools and the whole house smells like bright citrus and late-autumn sugar, I like to get a little dramatic with how it shows up at the table. You’ll use it for festive gatherings, sure, but also for weekday rescue missions — it’s a tiny jar of joy and flavor enhancements. Spoon it beside roast turkey, dollop on warm biscuits, or slide it under creamy goat cheese on crostini; it sings every time.

    • Spread on leftover turkey sandwiches, with crunchy apple slices.
    • Swirl into Greek yogurt, top with toasted walnuts.
    • Serve as a glaze for roasted carrots or Brussels sprouts.
    • Pair with sharp cheddar on a charcuterie board, olives optional.

    Conclusion

    You’ve got this—homemade cranberry sauce is simple, bright, and way better than the canned stuff, I promise. Grab fresh berries, sweeten to taste, simmer till they pop, and let the tang mellow; I always sneak a spoonful warm, because patience is for saints. Store it chilled, it keeps beautifully, and it’ll steal the show at your table. Make a batch, stash it, and watch guests come running like bees to honey.

  • How Do I Cook Prime Rib

    How Do I Cook Prime Rib

    The first time I nailed a prime rib, it behaved like a diva—lots of fuss, then a standing ovation when it sliced cleanly—so you can expect drama and reward. You’ll pick a well-marbled cut, season it boldly, roast it steady, and watch the thermometer like a hawk, and yes, you’ll smell butter and garlic before anyone sits down. I’ll walk you through timing, temp, and the resting trick that makes it sing, but first—stop fretting.

    Key Takeaways

    • Choose a well-marbled, bone-in rib roast (USDA Prime or Choice) sized 10–12 oz cooked per person.
    • Trim excess silverskin, leave ~1/4″ fat cap, and tie the roast for even cooking and neat presentation.
    • Season generously with coarse salt, freshly ground pepper, and an herb-garlic rub; let rest after seasoning.
    • Roast low and slow (about 15–20 minutes per pound) or reverse-sear, using an instant-read thermometer to target desired doneness.
    • Rest the roast 20–30 minutes tented in foil, then slice against the grain and serve with jus or horseradish.

    Choosing the Right Cut and Grade

    choose quality meat wisely

    Okay, let’s get picky. You’ll start by eyeballing the rib section, feeling the marbling under your fingers, because cut selection matters—don’t pick a sad-looking slab. I’ll tell you straight: better marbling equals juicier bites, richer aroma when it hits the pan, and that glorious crust you’ll brag about. Know the grade differences, USDA Prime pushes flavor, Choice is solid and wallet-friendly, Select you’ll politely decline at dinner. You’ll imagine the sizzle, the butter pooling, the rosemary scent—sales pitch? Nope, sensory homework. Trim minimal fat, leave the cap for flavor, tie if it flops. You’ll shop with purpose, not panic, ask the butcher one confident question, and walk out like you own Sunday dinner.

    Understanding Bone-In Vs Boneless Roasts

    bone in flavor vs boneless convenience

    One clear choice you’ll face is whether to keep the bones — and yes, those ribs change everything. I’ll tell you straight: bone in benefits aren’t just bragging rights. The bones add flavor, they steady the roast on the rack, and they make a prettier, more dramatic carve. You’ll hear richer aromas as it roasts, see juicier slices, and feel proud handing it to guests. But I get it, I’ve slipped on a carving knife too. Boneless convenience wins when you want faster prep, easier carving, and neater portions. You’ll trim and tie, slide it onto the pan, and relax. So pick what fits your ego and your kitchen skills—either way, you’re about to eat very well.

    Calculating Portion Sizes and Cooking Time

    calculating prime rib portions

    Think of servings like a shopping list for happiness: plan on about 10–12 ounces of cooked prime rib per person if you want generous portions, 6–8 ounces if you’re pairing it with hearty sides and frugal guests. You’ll do quick portion calculations, then factor cooking times by weight and desired doneness. I’ll walk you through it like a friendly drill sergeant.

    1. Weigh the roast, subtract ~20% for bone and shrinkage.
    2. Divide edible ounces by desired portion size.
    3. Estimate oven time: about 15–20 minutes per pound for medium-rare after sear/low-heat phases.
    4. Use a probe thermometer, rest 20–30 minutes, slice against the grain, serve steaming.

    Trimming and Tying the Roast

    Grab a sharp knife and a length of butcher’s twine—this is where the magic (and the mild swearing) starts. You trim silverskin and excess fat, feel the meat under your fingertips, hear the scrape of the blade, and breathe a tiny sigh of victory. Use simple trimming techniques: pare fat to about 1/4 inch, remove funky bits, leave the cap if you want juiciness. Then tie. I loop twine every inch or so, snug but not strangling, tuck loose ends, and make a neat butcher’s knot. Tying methods matter: single loop for stability, figure-eight for shape, trussing for even roast. It’s hands-on, a little theatrical, and yes, oddly satisfying—your roast now looks like you mean business.

    Seasoning and Marinades for Maximum Flavor

    You’re about to build flavor like a pro, starting with a simple salt-and-pepper crust that snaps and stains the air with toasty, savory perfume as it sears. Then we’ll smear on an herb-garlic rub—bright parsley, thyme, minced garlic, a splash of olive oil—that melts into the meat and gives each slice a fragrant, garlicky hug. Trust me, it’s bold, easy, and a little showy, but that’s the point: big taste, no drama.

    Salt-And-Pepper Crust

    Salt-and-pepper crust is the short, brilliant trick that turns a good roast into something people whisper about—trust me, I learned this the hard way with a sad, rubbery rib that tasted like regret. You’ll start by thinking about salt selection and why coarse salt sticks and seasons differently than fine; grab kosher or flaky sea salt, it gives texture and bite. Then press freshly ground black pepper into the meat, really massage it, watch the crust formation happen as proteins meet heat. Follow this quick checklist:

    1. Pat meat dry, room temperature.
    2. Generously salt, let sit 45–60 minutes.
    3. Press pepper into surface, don’t be shy.
    4. Roast hot, finish at lower temp, rest well.

    Herb-Garlic Rub

    One good rub can make a prime rib sing, and I’m talking herbs and garlic that hit like a chorus line—bright, savory, and impossible to ignore. I want you to pick herb selection like it’s a playlist: rosemary for punch, thyme for depth, parsley to freshen the aftertaste. Smash garlic, choose from garlic varieties —soft-roasted for sweetness, raw for bite—then mix with coarse salt, cracked pepper, olive oil, maybe a squeeze of lemon. Rub every crevice, press hard, don’t be shy, you’re massaging flavor in. Let it rest, fridge overnight if you can. When you roast, aromas will rise, the crust will sing, and you’ll wink because yes, you did all that.

    High-Heat Searing Techniques

    You’ll want to pat the roast bone-dry, no dampness left to steam your crust away, because a dry surface gives you that snap. I preheat the pan or oven spot until it’s screaming hot, you should see heat shimmer and a faint scent of oil just before it smokes. Then we hit every side, flip with confidence, and listen for that loud, caramelized sizzle that says you nailed the sear.

    Dry the Surface

    Think of the crust as the coat of armor for your prime rib — the part that snaps, sizzles, and makes people stop mid-bite. You’ll want to remove surface moisture before searing, I promise it pays off. Pat the roast dry with paper towels, press firmly, keep at it until no damp spots remain. Use drying techniques like air-dry in the fridge for a few hours, towel patting, gentle blotting with a clean cloth, or a quick saline brine that you dry off completely.

    1. Pat thoroughly.
    2. Air-dry uncovered.
    3. Don’t crowd the pan.
    4. Salt early, then dry.

    This creates a brown, crackly crust, not a sad, steamed mess. You’ll thank me when everyone goes silent.

    Preheat Extremely Hot

    You’ve dried that roast until the skin snaps under your fingers, so now we crank the heat and make the crust happen. I tell you, you don’t mess around here: preheat oven to an ideal temperature that’ll torch the exterior without overcooking the middle later. I set mine high, wait until the gauge sings, and watch the light go steady — that’s your cue. Use a sturdy rack, a roomy pan, and gloves like a grown-up, because this is hot, glorious work. The room smells like promise, you hear the metal sigh as it warms, and your confidence rises. Quick, decisive action wins—get that oven screaming, then we’ll move fast, no hesitations.

    Sear All Sides

    Grab that roast like you mean it, then slap it onto a screaming-hot surface and let the magic begin. You’ll hear that sizzling technique sing, and you’ll smile — I do. You’re building flavor fast, sealing juices, creating a brown crust that snaps when you slice.

    1. Heat pan or grill until it smokes lightly, oil it, don’t crowd the meat.
    2. Press each face to the heat, count to 45–60 seconds, flip with confidence.
    3. Use tongs, not forks, keep your hands back, watch for flare-ups.
    4. Finish edges upright, hit fat cap last, rest the roast before carving.

    I’ll give you searing tips: watch color, trust smell, don’t overcook, and own the process.

    Low-and-Slow Roasting Method

    If you want a prime rib that’s tender all the way through and cooks to a perfect rosy edge, low-and-slow roasting is your secret weapon, and yes, it’s worth the patience—trust me. You’ll set a low temperature, slide the rib in, and let time do the heavy lifting. The gentle heat breaks down collagen, keeps juices where they belong, and rewards you with a butter-soft bite. I pat the roast dry, season boldly, then pop it fat-side up so flavors baste as it goes. Expect long, quiet hours, fragrant steam, the kitchen smelling like success. You’ll resist peeking, I know, but that restraint equals better moisture retention and a uniformly pink center. Slice slowly, savor loudly.

    Using a Thermometer for Perfect Doneness

    One tool will save your roast more reliably than prayer or Pinterest tips: a good instant-read thermometer, and I’ll tell you how to wield it like a pro. You’ll poke the thickest part, avoid bone, and watch for temperature accuracy — that tiny difference decides everything. I’m blunt: don’t guess.

    A good instant‑read thermometer will save your roast — probe the thickest part, avoid bone, and stop guessing.

    1. Calibrate first, ice-water or boiling check, so readings don’t lie.
    2. Probe depth matters, mark the spot, steady hand, quick read.
    3. Know doneness levels, aim for targets, and trust the numbers over feel.
    4. Sweep multiple spots, record temps, adjust oven time as needed.

    You’ll hear a sizzle, smell roasted fat, and relax when numbers match intent, because precision beats luck every time.

    Resting and Carving Like a Pro

    You’ve got the thermometer out, the roast hit your target temp, and yes, you can finally stop hovering like a nervous hawk — now comes the part that makes or breaks dinner: resting and carving. Sit the prime rib on a carving board, tent loosely with foil, and let those juices redistribute — that’s basic resting techniques, and yes, patience is a flavor. I pace, I sip, I stare at the couch like it’s doing work. After 20–30 minutes, reveal the glorious crust. Use a sharp slicing knife, steady your hand, cut against the grain, and aim for even slices. My carving methods are simple: thin for tenderness, thicker for show, keep a pan ready for jus. Don’t rush, savor the reveal.

    Serving Suggestions and Leftover Ideas

    Lots of ways to plate prime rib so it looks like you meant to be fancy. You slice across the grain, watch the juices bead, and drape meat over roasted veggies like it’s a tuxedo. Serve it with horseradish cream, au jus, or a chunky chimichurri, and don’t be shy about browned butter asparagus — it sings.

    1. Thin slices, warm plate, bright chimichurri — instant elegance.
    2. Thick cuts, jus on the side, roasted potatoes — stick-to-your-ribs comfort.
    3. Leftover sandwiches: shred cold meat, add mustard, pickles, toasted ciabatta.
    4. Prime rib salads: mixed greens, shaved beef, blue cheese, vinaigrette.

    You’ll have dinner applause, and tomorrow’s lunch will taste like a happy accident.

    Conclusion

    You’ve got this—season well, roast steady, and watch the thermometer like a hawk. I once under-salted, learned quickly, then nailed a perfect 130°F medium-rare that made my neighbor applaud mid-bite (yes, really). Rest it, slice against the grain, smell that buttery crust, taste that juicy pink center. Serve with horseradish or pretend you planned the sides. Leftovers? Sandwiches that’ll make you forgive past mistakes. Cook, enjoy, repeat.