You’ve got mountains of turkey, mysterious casseroles, and gravy that could fuel a small boat, so let’s sort this chaos before it mutinies. I’ll show you how to toss the sketchy stuff, stash the good bits in clear, stackable tubs, and label like a boss so weeknight dinners stop being archaeological digs. You’ll learn quick cool-down tricks, what freezes well, and a few rescue recipes that actually taste better than they sound — but first, grab a marker.
Key Takeaways
- Sort leftovers by type (meats, sides, sauces) and discard anything with off smells or texture.
- Cool hot dishes quickly in shallow containers or ice baths, then refrigerate or freeze within two hours.
- Label clear, stackable containers with date-first labels and planned meals to prioritize eating.
- Portion into meal-sized servings and vacuum-seal or wrap meats for longer freezer life.
- Reheat gently to 165°F, add moisture (stock/water), and repurpose into new dishes like casseroles or frittatas.
Quick First Steps: Sort, Toss, and Prioritize
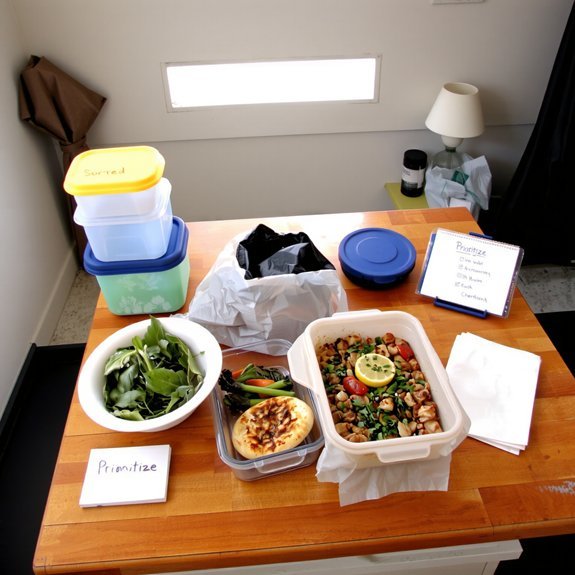
One quick sweep and you’ll feel like a culinary superhero—caped in Tupperware. You grab containers, scissors, and a marker, you open the fridge like it’s a mystery box, and you start sorting leftover types: meats here, sides there, sauces in tiny jars. You toss anything that looks sad or smells off, no guilt, I promise. Next, you name priority meals — what eats first, what can wait — and label containers with dates and meal plans. You taste a spoonful, make a face, decide it’s a science experiment, not dinner. You stack, you zone, you make a “eat ASAP” shelf. You step back, breathe in rosemary and reheated gravy, and feel triumphant, slightly sticky, but totally in control.
Safe Cooling and Storage Times for Common Dishes
You’re about to tame the leftover chaos, and I’ll walk you through cooling tricks that stop bacteria in their tracks — think ice baths, shallow pans, and stirring that hot gravy until it chills fast. I’ll tell you how long things can safely sit in the fridge, from mashed potatoes to cranberry sauce, and which dishes you should freeze ASAP to keep texture and flavor. Stick with me, you’ll get freezer tips that save meals (and dignity), plus simple timing rules so nothing turns into a science experiment.
Rapid Cooling Techniques
Even if you’d rather nap than deal with compost-scented Tupperware, get those hot pans out of the counter now—hot food left to sit is a bacteria convention nobody invited. I’ll show you quick tricks that actually work. For soups and sauces, use an ice water bath: set the pot in a sink of ice water, stir frequently, watch steam fade, feel relief. For casseroles or big roasts, slice into smaller portions so heat escapes faster, then cool uncovered briefly. Try the fan method: place shallow containers under a fan, rotate lids after they’re tepid, and don’t garden-toss condensation back in. I’m blunt because I care: cool to safe temps fast, cover, label, and move to cold storage before you nap.
Refrigerator Storage Times
Three rules, no drama: cool fast, stash smart, and respect the clock. I tell you this because your fridge isn’t a time machine. Keep refrigerator temperature at 40°F or below, check the dial, and don’t trust vibes. Divide big roasts into shallow pans, stir stews to release heat, then label containers with dates — I even scribble my initials like a food cop. Most cooked meats, casseroles, and gravy? Eat within 3–4 days. Pasta, potato salad, and egg dishes, treat them like divas: 3–5 days tops. Soups often last 3–4 days. If you see off-smells, slime, or color shifts, toss without guilt. That’s food safety: rule the clock, and your holiday leftovers survive — tasteful, safe, and still brag-worthy.
Freezing Guidelines and Tips
Okay, so you’ve mastered the fridge clock and avoided science experiments in Tupperware — nice work, food sheriff. Now, you’ll want smart freezing techniques to keep flavor, texture, and food safety intact. Cool dishes within two hours, portion into shallow, airtight containers, label with dates, and press out air — that crunchy seal matters. Soups and casseroles freeze beautifully; cream sauces can split, so stir in cream after thawing if needed. Slice breads, wrap turkey in foil then plastic, and flash-freeze loose items on trays before bagging. Defrost in the fridge or microwave, never on the counter. I’ll admit, I’m clingy about labels, but the payoff is real: less waste, more dinners you actually look forward to eating.
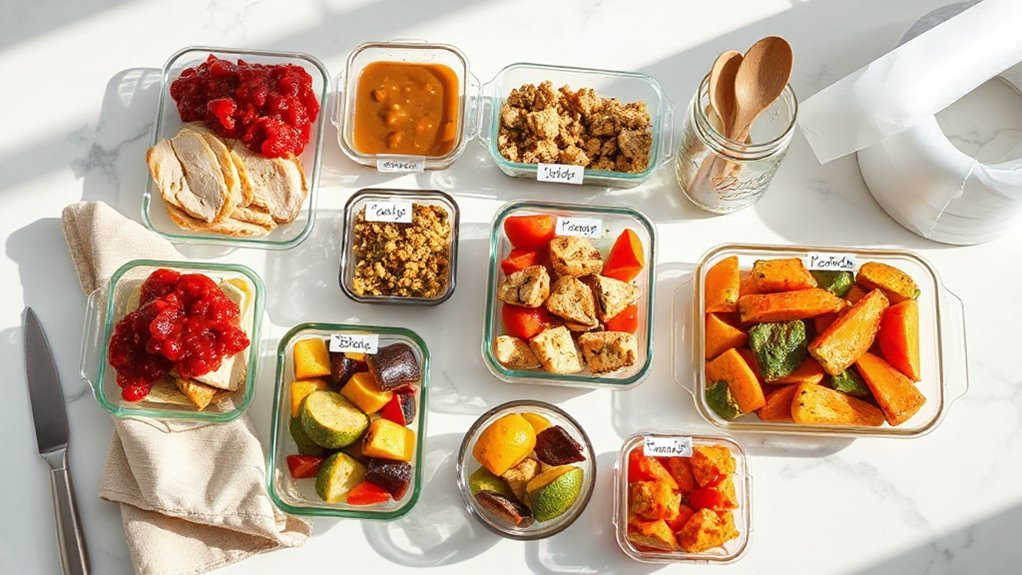
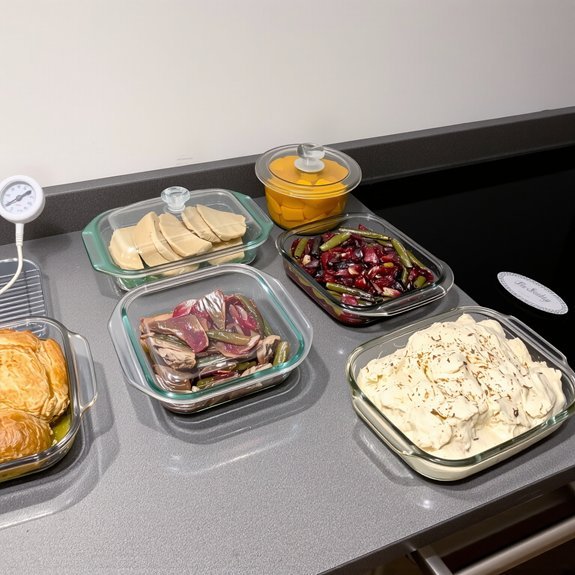
Best Containers and Packing Techniques
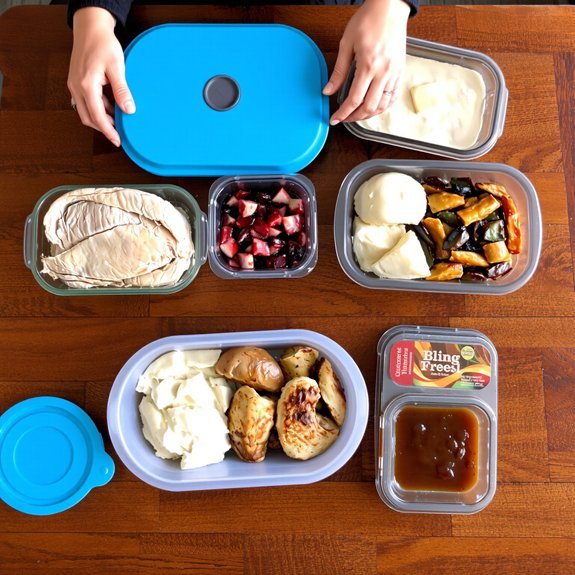
If you want your fridge to feel like a five-star buffet instead of a chaotic leftovers graveyard, start by picking the right containers—trust me, I’ve saved more cranberry sauce from freezer burn than I care to admit. I reach for vacuum sealing for long-term meats, it removes air and keeps texture, flavor, even that gravy sheen. For daily access, use clear stackable containers, they let you eyeball portions and save space, no digging required. Choose glass for reheating, ceramic for salads, and shallow pans for quick cool-downs; hot food chills faster, safer. Wrap irregular items in beeswax or cling, tuck sauces separately to avoid soggy stuffing, and always seal tightly—your future self will thank you, probably with leftovers.
Smart Labeling and Date-Tracking Methods
You’ll thank me later when every container has a bold, readable label that tells you what’s inside before you lift the lid, no scary surprises. Start with the date-first format—2025-11-21 Turkey—and you’ll always see what expires first, plus it makes scanning your fridge a one-second victory. And don’t forget to note reheating limits, because I’ve nuked mystery casserole into cremation more than once, so a simple “reheat once” saves taste buds and dignity.
Label Contents Clearly
Because nothing kills leftover joy faster than opening the fridge and finding a science experiment, label clearly—your future self will thank you. I tell you this while squinting at a jar of suspicious casserole. Start with label design that’s bold, legible, and color-coded; a plain white strip won’t save dinner. Use short tags: dish name, key ingredient, reheating note. I group similar items—turkey, sides, desserts—so content categorization is instant, like a librarian for mashed potatoes. Stick labels on lids and sides, so you see info whether you grab or peek. Write with a permanent marker, not a crayon; nobody worships smudged ink. Add one-line notes: “saute, 5 min” or “eat within 3 days.” Simple, clear, saved meals.
Use Date-First Format
Alright, you’ve labeled everything like a neat-freak librarian—nice work—now let’s get militant about dates. You’ll thank me when dinner smells fabulous three days later, not sour. Date-first tags read “2025-11-21 Turkey” at a glance, they prioritize freshness, and they make leftover etiquette simple: oldest out first, no guessing games.
- Write the date first, then contents, in bold handwriting you can read at 2 a.m., scrape off gravy, stick on lid.
- Add who it’s for or reheating notes in tiny print—kids’ lunches, Dad’s portion—so holiday meal planning flows, less drama.
- Use consistent format, rotate containers with the earliest dates forward, toss anything past safe timelines, guilt-free.
Track Reheating Limits
If you want leftovers that taste like a dream and not a science experiment, track reheating limits like a tiny food cop who also brings cider—trust me, your future self will send you a gratitude text. I slap a sticker on each container with the reheating methods I’ll use, microwave for quick, oven for crisp, sous-vide for oddly fancy cravings. I jot the safe reheating time and simple temperature guidelines—165°F for poultry, 165°F for mixed dishes, different temps for steaks if you’re picky—so you don’t guess and ruin dinner. Keep a marker by the fridge, note who’s bringing what back, and cross off items as you reheat. It’s stupidly satisfying, smells better, and saves the culinary trauma.
Refrigerator and Freezer Organization Tips
When you swing open the fridge after a holiday marathon, the first thing that hits you isn’t just cold air — it’s a Tetris puzzle of foil, plastic, and mystery casseroles, and yes, I’m judging that one unlabeled Pyrex like a crime scene. You can fix this. Start with fridge organization: clear containers, labeled dates, grab-ready shelves. Freeze extras flat in zip bags so portions stack, not pile, and you’ll actually find things. I talk to my freezer like it’s a small, stubborn roommate.
- Clear bins for types: proteins, sides, sauces — see stuff fast, toss expired guilt-free.
- Label, date, rotate: oldest forward, new back.
- Portion, flatten, stack: better freezer management, less thaw drama.
Reheating Safely and Keeping Food Moist
Because soggy turkey and molten casserole aren’t exactly comfort food, you’ve gotta be strategic about reheating so leftovers taste like a sequel, not a crime scene, and yes, I speak from experience — I once nuked gravy into lava. You heat gently, low and slow, whether oven or stovetop, and you add a splash of stock or water to aid moisture retention. Cover tightly, steam does wonders. For mashed potatoes, a pat of butter and a splash of milk revive creaminess, for turkey, a drizzle of pan juices brings flavor enhancement and juiciness back. Use a thermometer, aim for 165°F, no guessing. Crisp skin? Hit it under broiler for a minute. Taste as you go, adjust salt, and don’t overcook — mercy matters.
Creative Recipes to Transform Leftovers
One great trick I’ve got up my sleeve is turning last night’s turkey and sad sides into something that makes you sit up and cheer, not sigh and reach for takeout. I’ll walk you through three fuss-free flips that smell like home and taste like a small miracle. You’ll heat, chop, stir, and slit open joy.
Turning last night’s turkey and sad sides into three fuss-free miracles that smell like home and spark pure joy
- Turkey enchilada bake: shred turkey, fold in leftover casseroles bits, roll in tortillas, top with cheese, bake until bubbly — crisp edges, molten center.
- Stuffing-crusted frittata: press stuffing into pan, pour beaten eggs and veggies, nestle turkey, cook low, finish under broiler for bronzed cheer.
- Brothy mash soup creations: sauté aromatics, add mashed potatoes, turkey, stock, simmer, blitz for silky, cozy spoonfuls.
Portioning and Meal-Prep for Easy Weeknight Meals
If you want weeknights to feel like a sitcom where dinner magically appears, start by portioning like a boss—I’m talking clear containers, measured scoops, and labels you actually read at 7 p.m. hungry-and-harried o’clock. I quarter pies, slice roasts, and crowd small bowls with vibrant sides, so smells pop when you open the fridge. You’ll do simple meal planning: map three dinners, pack portions, stash sauces separately. Portion control keeps calories sensible, prevents soggy salads, and saves time. Hear me: chop, cool fast, and seal; label with date and dinner idea. Reheat crisply, add fresh herbs, maybe a squeeze of lemon. You’ll laugh when leftovers feel fresher than takeout, and you’ll high-five yourself.
Reducing Waste: Composting, Sharing, and Donation Options
When the holiday leftovers start taking over your fridge like tiny, festive squatters, you’ve got options that do more than just shove food into a sad Tupperware graveyard. I’ll walk you through simple, satisfying choices that cut waste, and make you feel less guilty about sneaking pie for breakfast.
- Composting: Set a counter bin, label it, and toss peels, bones, and scraps. You’ll notice compost benefits fast — less trash, richer soil, and a satisfying, earthy smell when you turn the pile.
- Sharing: Text neighbors, knock on doors, or create a labeled shelf. Smiles, clinking mugs, thank-you hugs — instant holiday currency.
- Donation: Use local donation resources, pack safely, drop off promptly. Feed people, not landfills, and sleep better tonight.
Conclusion
You’ve got this. Toss anything sketchy, sort meats, sides, sauces, and stash them in clear, labeled containers—remember, 1 in 4 Americans wastes food weekly, so you’re saving cash and conscience. Chill fast, use an “eat ASAP” shelf, or freeze portions for later. Reheat with moisture, and turn extras into casseroles, tacos, or soups. Share, compost, or donate what you won’t eat. I’ll cheer you on—just don’t reheat gravy like a science experiment.
Leave a Reply