You’ve got this — but let’s be real, winter will test you. Walk each room, feel for drafts, listen for rattles from old windows, and jot the stubborn spots down; caulk, weatherstrip, and add a cozy throw to hide your thermostat’s insecurities. Insulate pipes, service the furnace, shut off outdoor faucets, and stash the garden hose; simple moves, big payoff. I’ll show the quick wins next — and the one thing people always forget.
Key Takeaways
- Inspect roof, sweep gutters, and secure loose shingles to prevent ice dams and leaks.
- Seal drafts around windows, doors, and attic hatch with caulk, weatherstripping, and insulation.
- Insulate and protect exposed plumbing with foam sleeves, heat tape, and allow faucets to drip during extreme cold.
- Service the heating system: replace filters, check thermostat calibration, clean vents, and schedule a professional tune-up if needed.
- Shut off and drain outdoor faucets, store hoses indoors, and cover exterior spigots to prevent freezing.
Assessing Your Home’s Winter Readiness
If you’ve ever woken up to a frosted window and a wallet that forgot what “heating bill” means, trust me—we’re doing this right now. You grab a mug, I grab the checklist, we start a quick home inspection together, flashlight and gloves in hand. Look at vents, test the furnace, listen for odd clanks, sniff for diesel-strong smells—don’t panic, note them. Walk the roof for loose shingles, sweep gutters, peek at attic access, feel for cold spots by doors and windows. Tick off each item on your winter checklist, take photos, set reminders for repairs, call a pro if something’s beyond your toolbox. We’re thorough, we’re practical, and we’ll laugh at the thermostat later.
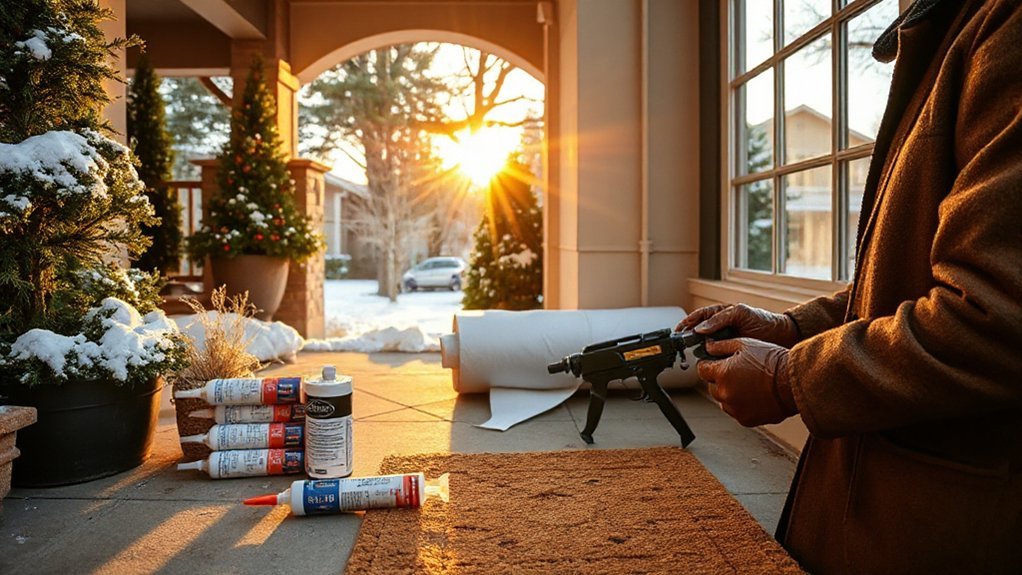
Sealing Drafts and Improving Insulation
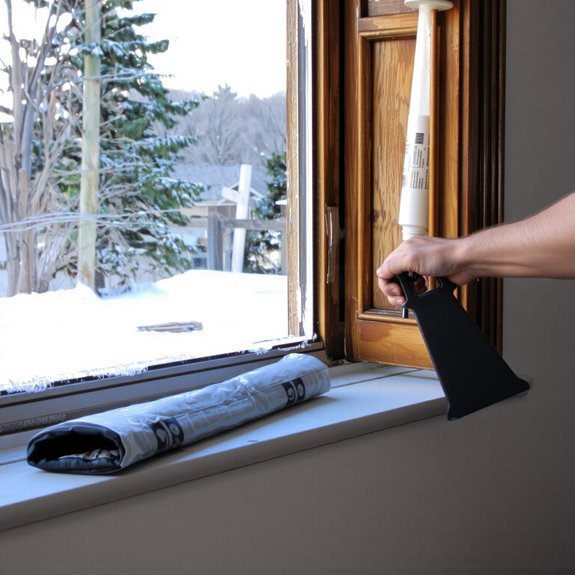
Okay—roof walked, vents checked, furnace grumbled at us and survived; now let’s go room by room and stop the wind from crashing our cozy party. You’ll feel the difference fast, like someone turned down a noisy fan. Start at windows and doors, press fingers along frames, listen for hiss, then seal with caulk or weatherstripping. Roll in draft stoppers for under-doors, they’re cheap, smugly effective, and kind to bare toes. Check attic and walls, add insulation materials where the cold seems to sneak through—batts, spray foam, or blown-in, pick what fits your budget and skill.
- Patch gaps, seal cracks, and embrace patience.
- Prioritize attic and attic hatch first.
- Use simple tools, buy good tape, wear gloves.
Protecting Plumbing and Preventing Frozen Pipes
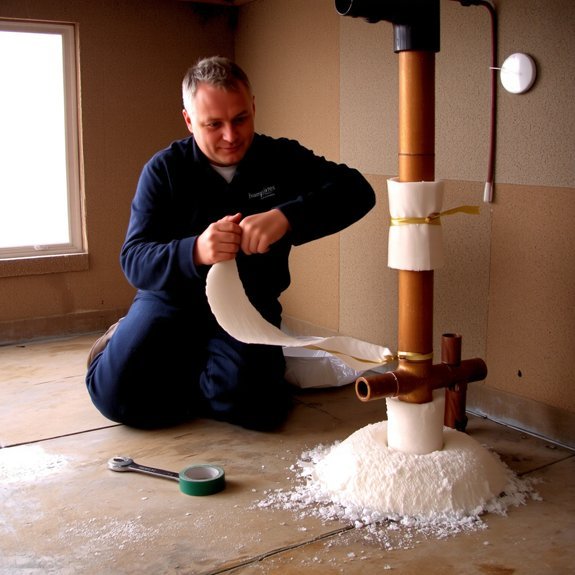
When cold weather rolls in and your pipes decide to stage a drama, you don’t get to be passive — you’ve got to suit up and outsmart them. I’ll walk you through simple moves: locate exposed pipes in basements, crawlspaces, attics, and along exterior walls, feel for drafts, tap for cold spots. Add plumbing insulation around vulnerable runs, foam sleeves for easy installs, and heat tape where freezing is likely — follow manufacturer instructions, don’t improvise with toaster cords. Let faucets drip during extreme cold, open cabinet doors to share warmth, and shut exterior valves then drain hoses before a freeze. If you spot a frozen pipe, warm it gently with a hairdryer, never open a torch near plumbing. You’ll thank me later.
Servicing Heating Systems and Thermostat Tips
You don’t need to be a furnace whisperer to keep your heat humming, and I’ll show you the simple stuff that actually matters: swap that dusty filter — yes, the one you’ve been pretending not to see — check the pilot light or electronic ignition for a steady blue burn, and listen for odd clanks or whistles that say “service me.” I’ll walk you through quick checks, give thermostat calibration tips, and help squeeze better heating efficiency from what you’ve got, no hoodoo required.
- Verify thermostat calibration with a reliable thermometer, adjust if it drifts, don’t argue with numbers.
- Clean vents and registers, feel the airflow, note cold spots, seal leaks.
- Schedule a pro tune-up if noises persist, save energy, sleep warmer.
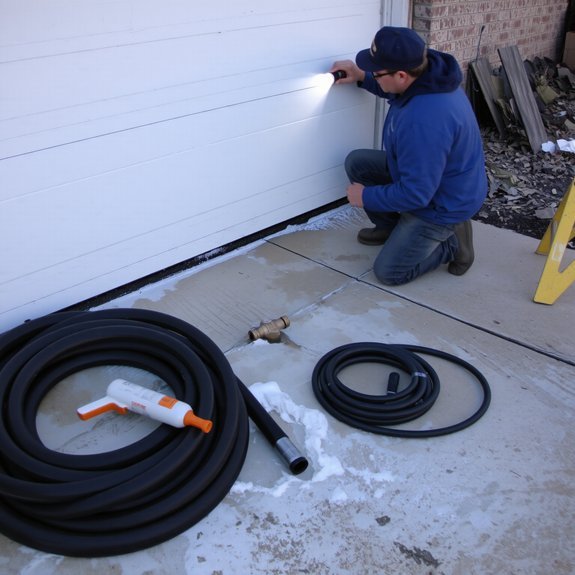
Preparing Exterior Elements and Outdoor Faucets
You’ll want to shut off your outdoor water at the interior valve, then open the spigot to drain any trapped water—trust me, frozen meters are no fun. I’ll show you how to wrap and insulate exposed pipes, tuck away hoses, and spot vulnerable spots where cold will creep in like an unwelcome guest. Follow these simple steps, and you’ll hear less clanking, see fewer leaks, and sleep a lot warmer.
Shut off Outdoor Water
Before frost nails the yard, let’s shut off the outdoor water and spare yourself a plumbing horror show. You walk out, taste cold air, and act fast: turn the interior shutoff for exterior spigots, open the outdoor faucet to drain leftover water, then close it. Remove hoses—no tugging, just a firm twist—and coil them dry inside, where they won’t become frozen garden snakes. Slip on foam faucet covers over the spigots for extra peace of mind, they’re cheap insurance and stupidly easy.
- Do the interior shutoff first, then open the spigot to bleed lines.
- Store hoses indoors, dry and coiled, to avoid cracks and mildew.
- Fit faucet covers, check seals, and call a pro if anything leaks.
Protect Exposed Pipes
Even if the frost hasn’t moved in yet, act like it’s already camping on your porch—those exposed pipes fry fast. You’ll want to feel the metal with gloved hands, spot the skinny runs under eaves and along foundation walls, and imagine them cracking like brittle candy. Wrap those lines in foam pipe insulation, secure with tape or zip ties, snug but not strangling. For really chilly spots, run heat tape along the pipe, follow the instructions, plug it into a GFCI outlet, don’t improvise. Cover outdoor faucets with insulated caps, drain the lines after you shut the valve, listen for the tiny gurgle that says you did it right. I sound bossy, I know, but your future thawed-out self will thank you.
Energy-Saving Upgrades and Budget-Friendly Fixes
If you’re anything like me, staring at last winter’s heating bill makes you want to invent a money-saving time machine, so let’s do the next-best thing: smart, affordable fixes that actually cut energy use. You’ll feel the difference, like a warm blanket for your wallet. Start small, get visible wins, and brag to your thermostat.
Stare down that heating bill—use smart, affordable fixes, start small, and let your savings feel like a warm blanket.
- Upgrade to energy efficient appliances, swap incandescent bulbs for LEDs, and let savings pile up.
- Seal drafts, add cost effective insulation in the attic, and plug leaks around windows for immediate warmth.
- Install a programmable thermostat, lower water heater temps, and embrace simple habits that keep bills down.
I’ll hold you accountable, and yes, we’ll celebrate with hot cocoa.
Conclusion
You’ve got this—seal the drafts, tuck pipes in, and tune the heater. I once taped a crooked window, heard the wind sigh less, and saved $40 on one bill—small victory, big grin. Do the easy fixes now, call a pro for the stubborn stuff, and document what you did. Walk around, listen for whistling, feel for cold spots, and know you’re making your home snug, safer, and ready for snow.
Leave a Reply