
You’d think untangling lights is the worst part, until half the strand refuses to glow — ugh. Start by turning the power off, smell the plug for singed plastic, and feel along the cord for cuts; you don’t want sparks or surprises. I’ll show you how to swap bulbs, test fuses, and chase continuity like a detective, so you can stop glaring at your dark wreath and actually get that warm, ridiculous twinkle back — but first, check the outlet.
Key Takeaways
- Turn off power, inspect plugs and sockets for melted plastic, scorch marks, or exposed wires before touching the strand.
- Test the outlet and reset breakers or try a known-good outlet to rule out a dead power source.
- Replace loose or burned-out bulbs with exact-match bulbs and tighten sockets or adjust metal contact tabs.
- Open the plug to check fuses and replace with identical voltage/amp-rated fuses if the filament is broken.
- Use a multimeter to find open circuits, bypass bad sockets in series strands, or isolate sections to locate faults.
Safety First: Power Off and Inspect for Damage
Before you get anywhere near the ladder, turn the lights off and actually smell the plug—yes, I mean take a real second to do that. I want you to notice burnt plastic, scorched wire, that faint ozone tang; call it paranoia, I call it common sense. You’ll wear gloves, keep a dry cloth handy, and practice safety precautions like a boring superhero. Don’t touch frayed cords with wet hands. Look for melted sockets, exposed copper, or weird heat spots, they scream electrical hazards. I’ll say it plainly: if it smells wrong or looks wrong, stop. Take a photo, mark the strand, retreat like a sensible person, and get the right replacement or pro help. You’re cautious, not cowardly—good.
Confirm the Power Source and Outlet
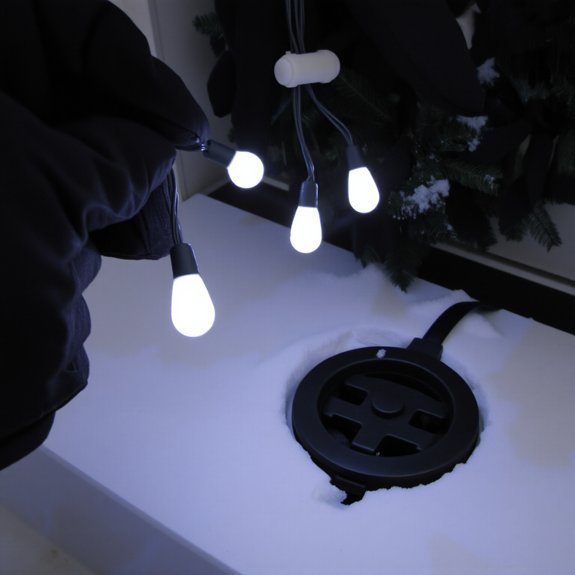
If the strand won’t light, don’t blame the bulbs yet—check the plug and outlet first, please. I tell you this like a friend who’s tripped over extension cords, because the simplest power supply problem is sneaky. Unplug, glance at the prongs, smell for burnt plastic, then plug into a known-good outlet; you’ll feel the tiny click of certainty. Do a quick outlet inspection: test with a lamp, wiggle the plug, flip the wall switch, or use a tester if you’ve got one. Indoors or out, dry hands, steady footing. If the outlet’s dead, trace breakers, reset GFCIs, or try another circuit. No lights? Great—now you’ve ruled out the socket, one less mystery to haunt you.
Check and Replace Burned or Loose Bulbs
Okay, here’s the plan: scan the strand with your eyes and fingers until you spot the dead or loose bulb, you’ll see a dark filament or feel a wiggle. Swap in an exact-match replacement — same size, voltage, and base — so the circuit stays happy, and don’t force it, snug it gently. If a bulb keeps popping loose, twist the socket slightly or bend the tiny metal tab inward, and grin while you pretend this is all part of the holiday charm.
Locate the Faulty Bulb
Because those strings usually die right when you’re five minutes from finishing, I’ll walk you through finding the guilty bulb without drama. You’ll need gloves, steady light, and patience. I use simple bulb identification tricks and basic troubleshooting techniques so you don’t overthink it.
- Scan the strand slowly, touching each bulb base, looking for darkened glass, loose fit, or a flicker.
- Wiggle suspects gently; a snug click often revives the circuit.
- Swap a suspect with a nearby working bulb to isolate the dead one, listen for tiny electrical pops.
- Use a battery tester or inexpensive bulb tester for a quick confirmation, no guesswork.
You’ll find it, fast, with less cursing than expected.
Replace With Matching Bulb
Anyone who’s ever wrestled a string of stubborn lights knows the next step: swap the bad bulb for a matching one and watch the magic happen. You peel back the greenery, squint at the sockets, and pop the dead bulb out, fingers smelling faintly of plastic and pine. Match the bulb types — size, base, wattage — or you’ll get a sad flicker, or worse, nothing. Fit the new bulb snugly, don’t force it, just a confident push. Check color temperature too, unless you like a disco of cold blues and warm ambers. I talk like I’ve done this in a blizzard at midnight; you’ll laugh, you’ll curse, and then you’ll plug in a perfect, steady line of glow.
Secure Loose Bulb Connections
One quick trick I learned the hard way: a loose bulb can kill the whole string, so don’t just stare at the dark patch like it’s going to feel guilty and fix itself. I tug each bulb gently, smell for hot plastic, and squint for the tiny scorch mark. If it wiggles, you’ve found the culprit.
- Turn power off, remove bulb, inspect base for corrosion or a broken filament.
- Use bulb replacement techniques: swap with a matching bulb, test the string.
- For stubborn sockets, clean contacts with a cotton swab and a dab of rubbing alcohol.
- Re-seat firmly, don’t over-tighten, then plug in and watch the show.
These troubleshooting tips save season and sanity, trust me, you’ll feel triumphant.
Test Fuses in the Plug and Replace If Needed
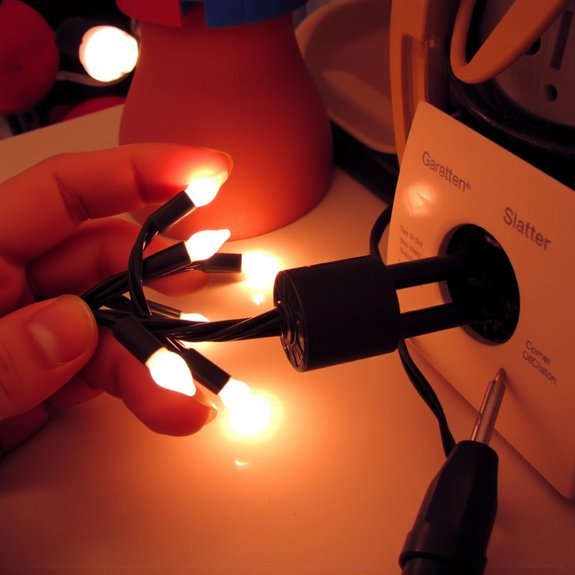
Okay, let’s pop the plug open and play detective. You’ll hear the tiny spring click, smell a faint plastic tang, and squint at two little glass fuses like tiny bones. For fuse testing, gently remove each fuse, hold it up to the light, and look for a broken filament or dark smear. I say “gently” because I’ve killed more fuses with brute force than any kid in a slapstick show. If one’s fried, that’s your culprit. For fuse replacement, match voltage and amp ratings stamped on the plug, slide the new fuse in, snap the cover closed, and test the string. If it still won’t glow, don’t blame the fuses—there’s more sleuthing ahead.
Use a Bulb Tester or Multimeter to Find Faults
Grab a bulb tester or multimeter and let’s get hands-on — you’ll test individual bulbs by swapping or probing each socket until the dead one fesses up. Then, run continuity checks along the wiring, listening for that satisfying beep or watching the meter needle after you clip on the leads. It’s fiddly, a little like detective work with tiny lightbulbs, but you’ll see exactly where the fault hides and you’ll feel smug when it’s fixed.
Test Individual Bulbs
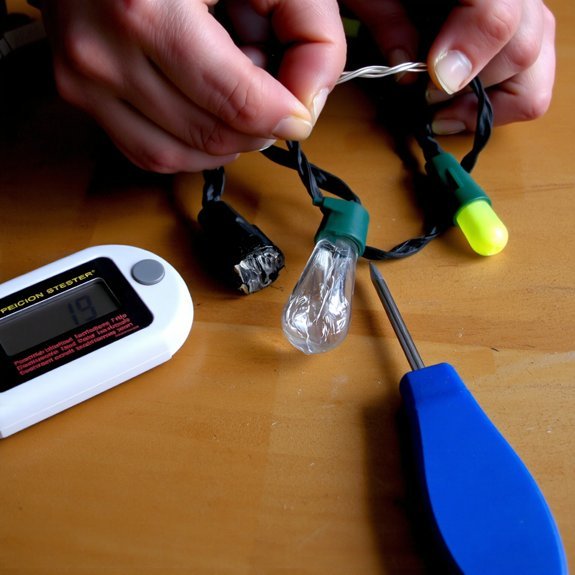
Think of testing bulbs like detective work for your string lights — and yes, I’m the slightly frazzled sleuth holding a multimeter in one hand and a bulb in the other. You’ll learn bulb types, testing techniques fast, and I’ll walk you through poking, probing, and listening for life. Start with power off, pop a bulb, inspect filament or base, then test.
- Use a bulb tester for quick pass/fail — it lights the good ones.
- Set your multimeter to continuity or ohms, touch contacts, watch for reading.
- Wiggle the bulb gently, listen for loose bits, smell for burnt ozone.
- Replace dead bulbs with exact matches, snap them in, power up.
You’ll feel victorious, like a tiny holiday surgeon.
Check Wiring Continuity
Since the lights that won’t glow usually blame a tiny break in the wiring, I start by tracing continuity like I’m following a trail of crumbs — only with a multimeter instead of enthusiasm — and you’ll do the same. Grab basic wiring tools, the bulb tester or multimeter, and a steady hand. Unplug, separate sections, touch probes to socket contacts, listen for the beep, feel the cool metal, see the display jump. If continuity testing fails, wiggle the cord, inspect crimps and tape, note any darkened insulation. Mark the broken spot, cut and splice with solder or twist-on connectors, seal with heat-shrink. Re-test, smile when the beep returns. It’s fiddly, but you’ll fix it, and brag to anyone who’ll listen.
Locate and Repair Broken or Frayed Wires
Alright — you’re about to play wire surgeon on your holiday lights, and yes, it’s going to be messier than you imagine. You’ll smell old plastic, feel sticky tape under your nails, and squint at tiny copper like a jeweler. Start by finding exposed conductors, melted spots, or crushed sections in the wire insulation.
You’re about to play wire surgeon on holiday lights—expect sticky tape, tiny copper, and a bit of plastic smoke.
- Unplug, spread the strand flat, and run fingers along the cord to feel breaks.
- Cut out the damaged section, strip back clean insulation, exposing just enough copper to twist.
- Use solder or crimp connectors, then seal with heat-shrink tubing or quality electrical tape.
- Test the repair, flex it gently, and re-inspect after a few lights-on cycles.
These repair techniques keep things safe and bright.
Troubleshoot LED String Specific Issues
Okay, you fixed the frayed cord and resealed that sad little splice — now the lights still blink like a disco possessed. I’ll walk you through LED troubleshooting techniques that cut the mystery fast. First, unplug, inspect each bulb for chips or loose bases, and swap suspected bad LEDs with known-good ones; you’ll hear tiny clicks, see gaps close, or spot a dull filament. Check the driver box for heat, bulging caps, or a burnt smell, touch it carefully, replace if warm and flaky. Wiggle the plug, test the fuse, and clean contacts with alcohol; corrosion kills glow. For String light maintenance, store strands untangled, avoid kinking, and label tested sets — you’ll thank me later when everything shines.
Restore Continuity in Series and Parallel Circuits
Alright, let’s get your lights glowing again — first, you’ll check each bulb and the inline fuse with a tester or multimeter, feeling for that tiny break like hunting for a missing button in the couch cushions. If a socket’s dead, you’ll bypass it, bridge the contacts, and listen for the satisfying click as continuity returns, picturing the whole string snap back to life. I’ll walk you through the quick tricks and safety checks, no fuss, just results — and yes, we’ll try not to electrocute the cat.
Check Bulb and Fuse Continuity
One quick trick before you start swapping bulbs like a sleep-deprived elf: check the continuity of the bulbs and fuse, because a single open circuit can turn a whole string into sad, dark garlands. I’ll walk you through it, gloves on, multimeter ready, no mystic electrician vibes required. Know your bulb types and check fuse ratings first, those labels matter.
- Set your multimeter to continuity, touch bulb contacts, listen for beep.
- Test each fuse, replace if open, match fuse ratings when buying spares.
- For series strings, find the open link by halving the string, isolate the dead section.
- For parallel sections, check individual branches, a bad bulb won’t darken others.
You’ll feel victorious when everything lights up, promise.
Bypass Faulty Sockets
So you’ve found the dead bulb or blown fuse and you’re feeling like a holiday troubleshooting hero — nice work. Now, if a socket’s gone bad, don’t panic; you can do socket replacement or simple circuit bypassing to get the strand glowing again. First, unplug, then cup the cool plastic, pull the bulb, inspect the tiny metal tab; if it’s flattened or corroded, pry it up or swap the socket. For series strands you’ll bypass a faulty socket with a short jumper wire, careful to match polarity, and tape it snug. On parallel sections, isolate the bad socket and replace it outright. I’ll admit, it feels oddly satisfying, like dental work for decorations, and yes, you’ll hear that reassuring snap when continuity returns.
Prevent Future Problems: Proper Storage and Handling
If you want your lights to survive another holiday season without turning into a sad, tangled necklace, treat storage like a little ritual, not an afterthought—I do a quick inventory the moment the last bulb comes down. You’ll thank me next year. Proper storage starts with clean, dry strands and careful handling; wipe sockets, remove broken bulbs, and let everything air-dry. Then pack smart.
Treat holiday lights like a ritual: clean, dry, coil neatly, label, and bin them—your future self will thank you.
- Coil each strand on a sturdy spool or cardboard, tuck ends into the loops.
- Label by length and location, a sharpie saves time and sanity.
- Use plastic bins with dividers, keep moisture and critters out.
- Store in a cool, dark spot, away from heat and heavy boxes.
I joke, but this tiny ritual prevents untangling drama and blown fuses.
When to Repair, Replace, or Call a Professional
When’s it worth wrestling with a stubborn string of lights, and when should you admit defeat and call in a pro? You’ll try a quick fix first — squinting at bulbs, tugging gently, testing fuses — because cheap thrills beat hiring help. Use repair timing as a rule: if one or two bulbs fail, you can patch them in minutes; if many bulbs are dark, sockets smell burned, or wires fray, don’t keep betting on luck. If your ladder work makes you dizzy, or the lights are on a tall roofline, call for professional help; electricians bring tools, confidence, and insurance, plus they hate heights less than you do. I’ll grumble, you’ll sigh, but safety wins every time.
Conclusion
Think of your string of lights as a grumpy old rowboat, and you’re the stubborn captain who won’t quit till it floats. You turn off the power, sniff for burnt plastic, swap bulbs like trading cards, poke fuses, and hum with a multimeter until continuity purrs. If LEDs act picky, you pry open the problem gently. You’ve fixed more than wires—you’ve rescued holiday glow. If it’s beyond you, call a pro and hand over the oars.
Leave a Reply