You think scratch cinnamon rolls are too fussy? They’re not — they just ask for a little patience and good butter. I’ll walk you through warming milk, proofing yeast, kneading till the dough’s silky, spreading a spiced-sugar blanket, rolling tight, and cutting perfect spirals, with tips for gooey centers and a glossy glaze that makes neighbors jealous; stick around and you’ll be baking warm swirls that smell like Sunday morning.
Key Takeaways
- Make enriched dough using warm milk, yeast, egg, melted butter, salt, and sifted flour, then knead until smooth and elastic.
- Let the dough rise in a warm place until doubled, about 45–90 minutes, for light, pillowy rolls.
- Roll dough into a rectangle, spread softened butter, then evenly sprinkle cinnamon mixed with brown sugar and a pinch of salt.
- Roll tightly, slice into even rolls, place in a greased 9×13 pan, proof briefly, then bake until golden and set.
- Finish warm with a glaze—cream cheese, vanilla-sugar, maple, or citrus—add toasted pecans or flaky salt if desired.
Ingredients and Equipment You’ll Need
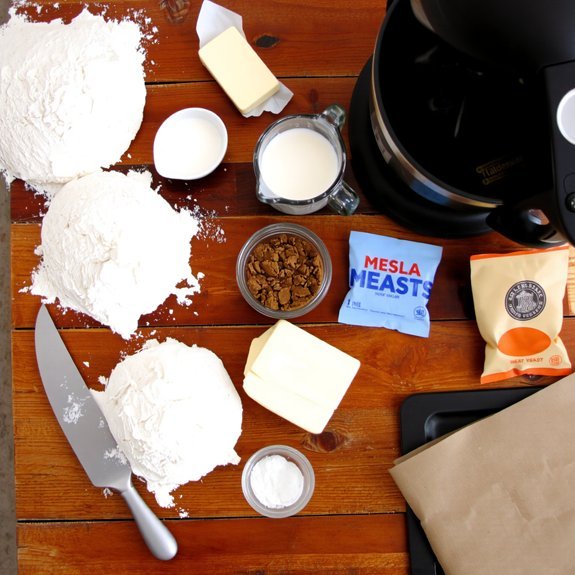
Before we plunge in, grab an apron — you’ll thank me later when you’re elbow-deep in dough and smelling butter and cinnamon like heaven. You’ll start with smart ingredients selection: flour, yeast, milk, eggs, butter, brown sugar, cinnamon, salt, and a touch of vanilla. Buy fresh yeast, full-fat milk, and real butter, don’t skimp. Equipment essentials are simple: a mixing bowl, rolling pin, bench scraper, 9×13 pan, measuring cups, and a stand or hand mixer. I’ll remind you: a digital scale helps, a kitchen towel speeds proofing, and a pastry brush makes glazing neat. I talk like I’ve burned a tray or two, so trust me — get good basics, and you’ll laugh all the way to the oven.
Making the Dough: Step-by-Step

One good dough starts with a little swagger and a clean counter, so clear a space and wash your hands — we’re getting tactile. I’ll walk you through combining warm milk, yeast, beaten egg, melted butter and a pinch of salt, then sifting in your dry mix. Pick your flour types — all-purpose is friendly, bread flour gives chew, pastry flour makes it tender — I won’t judge your choice. Measure sugar options next: brown for depth, granulated for neutral sweetness, or a mix if you’re indecisive like me. Stir until shaggy, scrape the bowl, and turn the mass onto the counter. Form it into a rough ball, tuck edges under, and let it rest briefly before the next step.
Kneading and First Rise Techniques

You’re going to feel the dough change under your hands, that tacky, smooth pull that tells you it’s building strength — trust that. I’ll show you a gentle stretch technique that protects the gluten, so you knead with purpose, not brute force. Then we’ll find the cozy, slightly-warm spot for the first rise, watch the dough bloom, and pretend we didn’t just feed it like a needy pet.
Proper Dough Development
Trust me, patience is a flavor. I tell you this as you mix liquids and flour, noticing dough hydration change from shaggy to smooth; that shift matters. You’ll knead by hand or machine, feel the dough warm, slightly tacky, elastic. Don’t rush — gluten development happens in seconds and minutes, not in a hurry. Press, fold, turn, repeat, watch the windowpane test tease you with success. Then bowl it, cover it, let it proof in a cozy spot, away from drafts, where air smells faintly of yeast and promise. Rise time varies; I check rather than clock. When the dough doubles, gently poke — it should spring back slowly. That’s your cue, and you’ll smile, because it worked.
Gentle Stretch Technique
Reach for the dough like you mean it, but don’t bully it — we’re coaxing, not arm-wrestling. I tell you to cup it, fold it, then press with the pads of your fingers, because gentle stretching trains the gluten without tearing it. You’ll feel resistance, then give; that’s dough elasticity talking, like a sleepy accordion waking up. Turn the ball, fold, press again. Keep motions smooth, almost lazy, and stop when the surface looks satiny and springs back slowly to your touch. If it fights you, relax—rest ten minutes, then try again. This isn’t macho kneading, it’s patient care. You’ll know it’s ready when the dough holds shape, feels airy, and hums with subtle spring.
Optimal Rise Environment
If the dough’s been treated right, now you’re in charge of the spa: warm, humid, and politely indulgent. I tell you, nothing wakes a sleepy dough like the right atmosphere. Aim for an ideal temperature around 75–80°F, or use the oven with the light on, a pan of hot water beneath the bowl, or a proofing box if you’re fancy. Monitor humidity levels; you want moist air so the surface won’t crust, but not soggy. Cover dough with oiled plastic or a damp towel, tuck it into its cozy spot, and resist poking—temptation, I get it. In 60–90 minutes it’ll double, soft and pillowy. That’s your cue: gentle hands, a gratified sigh, and onward to rolling.
Preparing the Filling and Spreading It Evenly
Once your dough’s rolled into a neat rectangle, you’re ready to make the filling—this is where the cinnamon rolls stop being homework and start being breakfast party. Mix your filling ingredients: softened butter, brown sugar, cinnamon, a pinch of salt, maybe a dash of nutmeg. I tell you, the butter should be spreadable, not soup. Scoop dollops across the dough, then use an offset spatula or the back of a spoon to smear it toward the edges, leaving a slim border. Work in straight, confident strokes, press gently so the sugar sticks, don’t gouge the dough. Aim for even distribution, no clumps, no sad empty corners. Taste a stray smear—chef’s privilege—and grin.
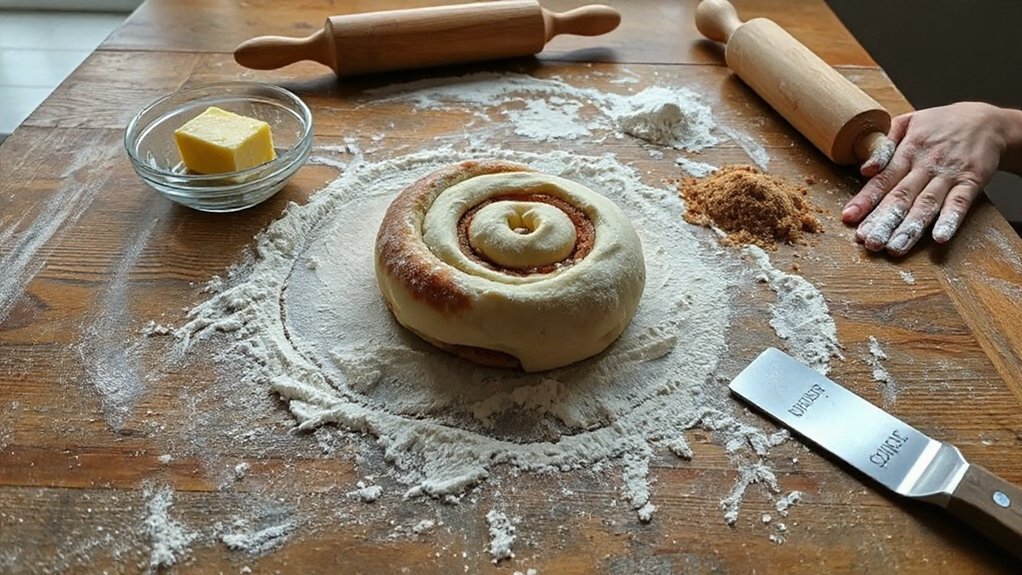
Rolling, Cutting, and Placing the Rolls
Start at the long edge and roll the dough up tight, like you’re trying to tuck in a very cuddly burrito that smells amazing—don’t dawdle, keep steady pressure so the layers stay snug. I press gently as I roll, feeling the cinnamon spiral form, it’s oddly satisfying. Use simple rolling techniques: hands close, even pressure, roll away from you for control. When the log’s sealed, chill briefly if it’s soft, that helps cutting. For cutting tips, use a sharp knife or unflavored dental floss—slide under, cross over, pull taut, clean slice. Aim for even rounds, about 1 to 1½ inches. Place rolls snugly in the pan, seams down, space for rise, not a shove-fest. Trust me, they’ll look proud.
Proofing Before Baking
You’ll know your yeast is awake when the dough gets pillowy, faintly yeasty, and shows little bubbles under the surface — don’t be shy, poke it and watch it spring back. I’ll tell you how long to wait, but expect about 45–90 minutes depending on room warmth, how active your starter is, and whether you’ve been generous with the sugar. Trust your senses more than the clock, and if it’s not quite there, give it a few more minutes instead of rushing the oven.
Yeast Activation Signs
If your yeast’s doing its job, you’ll see it fizzle and foam like it’s auditioning for a bubble bath commercial, and yes, I judge it the way a picky lifeguard judges swimmers. You’ll know which yeast types you grabbed by the speed and smell, active dry pops faster, instant sneaks in quieter. Watch the foam swell, smell the warm, slightly beer-ish tang, and feel tiny bubbles tickle your spoon. That’s the fermentation process talking, turning sugar into gas and aroma. If nothing happens in ten minutes, toss it, don’t nurse it like a sick plant. If it’s sluggish, try warmer water, but not hot — you’ll kill the party. Trust your senses, trust the fizz, and don’t overthink it; yeast tells you what it needs.
Dough Rise Timing
Because dough needs time to think, I always give it a proper rise before it earns its spot in the oven — you’ll see the texture go from tight and shy to pillowy and confident. Let it rest in a warm spot, not hot, around 75–80°F, that rise temperature keeps yeast happy without cooking it. I cover the bowl with a towel, whisper encouragement (kidding, mostly), and walk away for 60–90 minutes. Check by poking gently; if the dent bounces back slowly, it’s ready. Underproof and you’ll get dense rolls, overproof and they collapse like bad promises. If your kitchen’s cold, use an oven with the light on. You’ll smell sweetness, see air pockets bloom, and finally, you’ll bake perfection.
Baking for Soft, Gooey Centers
When the timer’s counting down and that sweet, cinnamony steam starts fogging the oven glass, don’t panic — embrace it; I promise your center can stay soft and gooey without turning into a doughy mess. I keep things simple: use a touch of butter and a splash of cream as softening agents in the filling, they melt into syrupy pockets. Lower baking temperatures, by 25°F from a standard roast, give the heat time to penetrate without overcooking the middle. Tent loosely with foil if the tops brown too fast. Test with a skewer; it should come warm, not raw. Let rolls rest five minutes after the oven, that pause lets juices settle, and you avoid the tragedy of runny filling. Trust me, you’ll be proud.
Glazes, Toppings, and Serving Suggestions
You’ve coaxed the centers into gooey perfection, so now let’s dress them up and make people swoon. I’ll walk you through glaze variations and topping ideas that turn good rolls into unforgettable ones. Warm glaze drips, butter scent rises, you grin like it’s your fault.
- Classic cream cheese glaze — tangy, silky, spread while warm.
- Vanilla-sugar drizzle — thin, glossy, a pretty shine.
- Maple-bourbon glaze — deep, boozy warmth, adult-friendly.
- Citrus icing — bright, zesty, cuts the richness.
Serve on a warm platter, napkins handy, coffee steaming. Sprinkle toasted pecans or flaky salt for contrast. Tell guests “try this first,” then watch polite manners evaporate. You’ll love the applause, modestly.
Conclusion
You’ll pull warm, sticky dough from the bowl, and somehow the house will smell like your grandma’s kitchen and a bakery at once — coincidence, right? I’ll tell you, it’s not magic, it’s butter and patience. You’ll roll, slice, and line them up like sleepy soldiers, then watch them puff into golden pillows. Glaze them, inhale deeply, and admit you made something ridiculous and perfect. Eat one, don’t share.
Leave a Reply