You’ve survived another merry chaos of lights and glitter, so let’s get those decorations tucked away like a pro — no sad tangled lights, no shattered glass, and yes, fewer trips to the attic. I’ll show you how to clean, pad, label, and stack everything so it’s ready and un-gnarly next year; think plastic bins, wrapped ornaments, wound lights, and a flat-proof plan for wreaths. Stick with me and your future self will thank you — loudly.
Key Takeaways
- Inventory and checklist all decorations, quarantining damaged or smoky items for cleaning or disposal before storage.
- Wrap fragile ornaments individually with soft cloth or tissue and use padded dividers in clearly labeled boxes.
- Coil and secure string lights on cardboard spools or reels, test bulbs, and store cords untangled in a dry place.
- Store wreaths flat in round containers or oversized boxes and loosely coil garlands, using pegboards or tall bins to avoid crushing.
- Use sealed plastic bins when possible, add cedar/moth repellents, photograph damaged items, and inspect storage monthly.
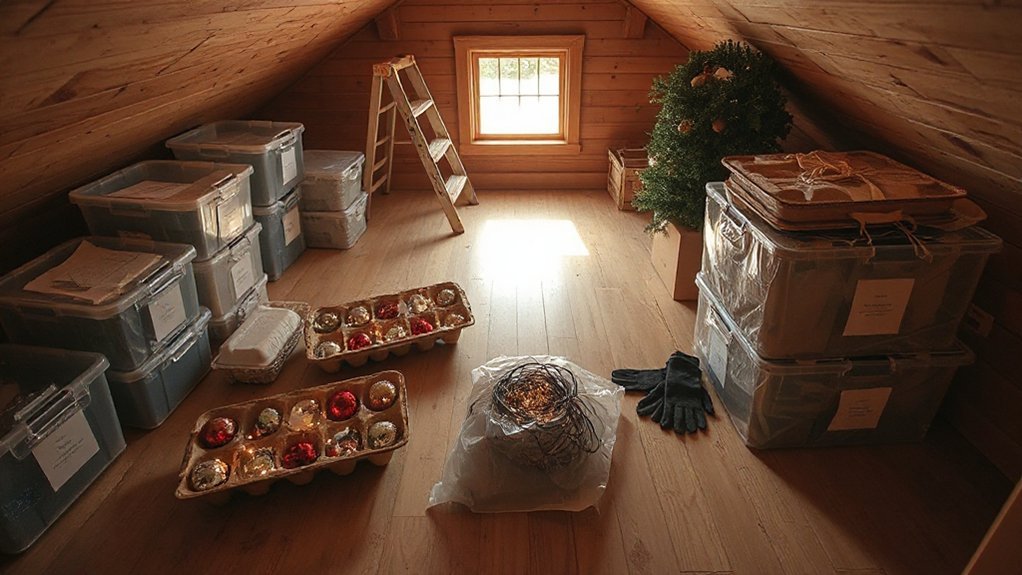
Preparing Decorations Before Packing
Even though it feels like sacrilege to box up the twinkle lights, you’ve got to start by taking stock—so I do a quick inventory, squinting at tangled garlands like they’ve offended me personally. You’ll pull out a decorations checklist, jotting down strands, wreaths, and oddball items you forgot existed. I tell you what to toss: broken hooks, melted candles, anything smelling like last year’s smoke. Lay things out by type, feel the plastic, metal, fabric under your fingers, and decide what needs special packing materials. Wrap fragile-looking bits in soft cloths, coil lights loosely to avoid stress, label bins loud and proud, and promise yourself a reward once the last box is sealed.
Protecting Fragile Ornaments
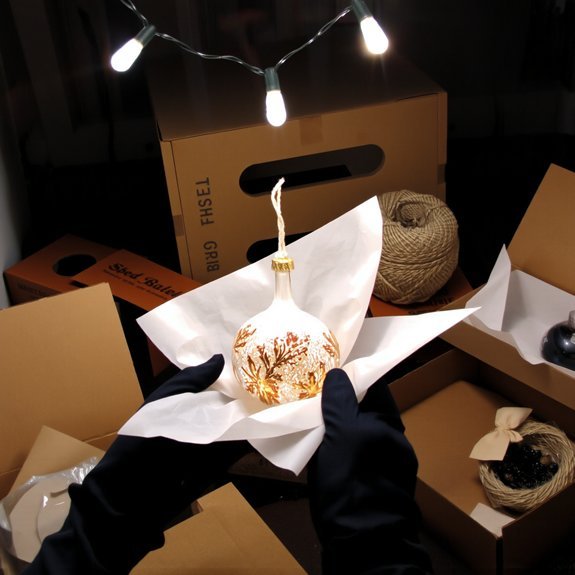
You’ll want to sort ornaments by type first, stacking glass with glass, plastic with plastic, so nothing surprises you like a broken bulb in December. I stuff padded dividers and soft tissue between each piece, hear the muffled clink stop and breathe easier — I’m not proud, but it works. And label the boxes clearly, front and top, because when you’re hunting for the star at midnight you’ll thank both of us.
Separate by Ornament Type
1 thing I learned the hard way: fragile ornaments hate being lumped together. You’ll sort by ornament categories, not by whatever box is nearest, and you’ll think about display preferences as you pack. Put glass balls with glass, wooden figures with wood, and sentimental glitter baubles in their own corner — you’ll thank me when you unpack. Handle each piece like it’s auditioning for a museum, breathe, and tuck it into a soft nest (tissue, cloth), label the cluster, and note where it hangs on the tree. Talk to yourself if you must — “don’t drop Grandpa’s angel” — I certainly do. When you separate intentionally, you cut chaos, save memories, and make decorating a calmer, merrier ritual next year.
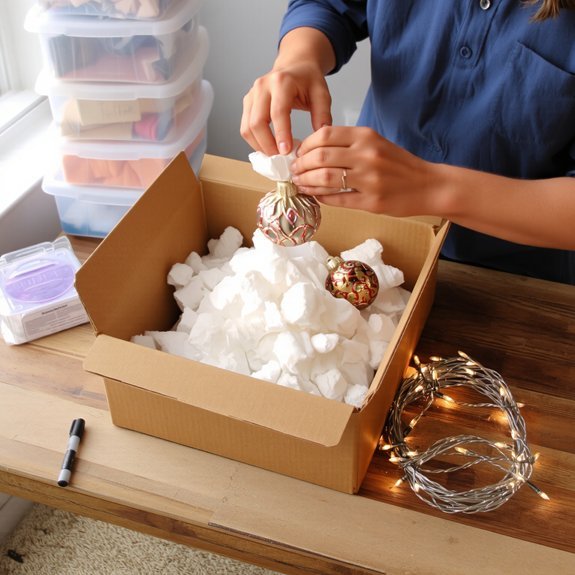
Use Padded Dividers
Okay, so you’ve separated the glass from the wood and saved Grandpa’s angel from a tragic carpet landing — nice work. Now, you’ll protect those fragile favorites with padded boxes and ornament trays, and yes, you’ll look like a professional elf. I talk you through it, quick and practical.
- Line each compartment with soft fabric, felt, or bubble wrap, press gently, no squeezing.
- Nest ornaments snugly in ornament trays, stems up, so nothing knocks against glitter or paint.
- Use padded boxes for oddly shaped pieces, cushion gaps with tissue, foam, or socks.
- Stack thoughtfully, heavier boxes below, lighter on top, give each item breathing room.
You get safety, easy unpacking, and fewer tears next December.
Label Boxes Clearly
If you want to avoid a December scavenger hunt and the horror of crushed baubles, label boxes clearly before they go into storage. I tell you this while I dust glitter from my sweater. Use simple labeling techniques: write contents, room, and fragility level on the lid and side, big and bold. Color coding helps—red for delicate glass, green for lights, blue for wreaths—so you can spot the right box at a glance. Tape a quick inventory inside the lid, I promise you’ll thank me. Add a “handle with care” sticker, and sketch a tiny ornament if words fail you. When you lift, you’ll feel secure, not nervous. Less guessing, more cocoa. That’s smart storage, with fewer shattered memories.
Organizing and Storing String Lights
Because you’ll curse less next holiday if you tame your light chaos now, let’s talk string lights like grown-ups—well, slightly tipsy grown-ups who know their way around a spool. I’ve wrestled tangles, blamed the cat, and learned fast. You’ll thank me when bulbs don’t snap.
Tame your holiday light chaos now—because fewer curses, fewer snapped bulbs, and slightly tipsy spool mastery await.
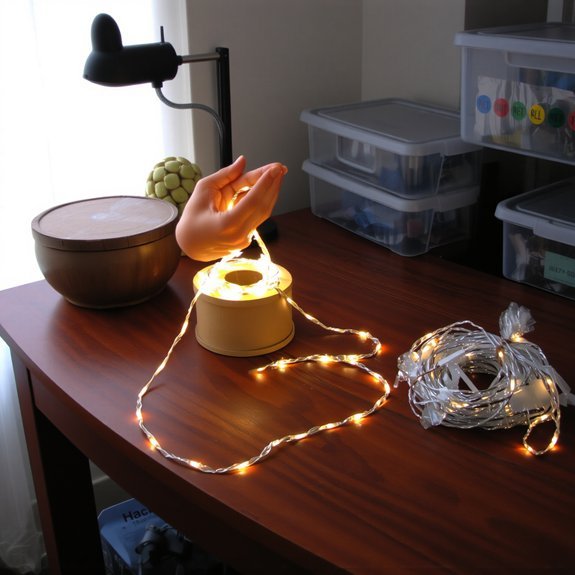
- Wrap each strand on a cardboard spool or plastic reel, secure ends with a twist tie, label for length and color.
- Coil mini lights on a hanger or tube, slide into a clear bin, so you can see twinkles without excavating.
- Test bulbs and replace before storing, tape spare bulbs to the cord for easy rescue.
- Store in a dry, cool bin, keep cords untwisted, stash extension cords together.
These light storage solutions are simple, smart, and almost cathartic.
Compact Storage Solutions for Wreaths and Garlands
Alright, we’ve tamed the light jungle, so let’s wrestle wreaths and garlands next — they look harmless until you try to shove a pine ring into a shoebox and hear it cry. I’ll show you compact tricks that save space and sanity. Use flat, round wreath storage containers or an oversized pizza box, line with tissue, tuck fragile ornaments between branches, and label like you mean it. For garland organization, coil loosely, secure with soft ties, and hang on a pegboard or inside a tall bin to avoid crushing scent and needles. If you’re feeling smug, store scented pieces separately in breathable bags. You’ll open them next year smelling of cedar triumph, not crushed plastic regret.
Storing Trees and Tree Accessories
One good rule: treat your tree like a divorcée — give it space, respect, and a decent place to hang its hat. I tell you, you’ll thank me when unboxing feels like gentle reunion, not archaeological dig. For tree storage and ornament organization, follow this quick checklist:
- Disassemble branches, wrap each section in breathable tree bag or old blanket, label wraps with position.
- Store trunk vertically, off concrete, on wood blocks; keep dry, cool, and away from pests.
- Pack lights coiled on hooks or reels, tested before you tuck them in their box.
- Keep ornaments cushioned in egg cartons or padded dividers, layer tissue between, avoid crushing.
You’ll save time, sanity, and a few baubles — and that’s worth bragging about.
Labeling and Inventory Strategies
Okay, now that your tree’s bundled like a retired movie star and the ornaments aren’t playing Jenga, let’s talk labels and inventory — the bit that makes next year less archaeology and more déjà vu. I tell you, start with an inventory checklist, simple, tactile, a sheet you can thumb through while you tap boxes closed. Write box contents, room destination, fragility level. Use clear labeling techniques — big letters, color-coded tape, durable tags you can read in a dim attic. Snap a phone photo of each box’s contents, I do it, because memory lies. Tape tags to lids and sides, so you can scan without unpacking. Store the checklist digitally, too; I email mine to myself. You’ll thank me next November.
Seasonal Maintenance and Pest Prevention
Before you stash the boxes, give each ornament a quick once-over — wipe off dust, check for cracks, and flake away dried garland glue with a soft cloth so nothing surprises you next year. I’ll say it straight: pests love cozy clutter, so seal cardboard seams with tape, swap to plastic bins when you can, and tuck in cedar blocks or moth-repellent sachets to keep critters out. You’ll thank me when you open pristine lights and unchewed ribbons, and I’ll take a tiny bow for the nagging that saved your tinsel.
Inspect and Clean Items
Roll up your sleeves and get your hands dusty — we’re about to play backyard detective with your decorations. You’ll unfold boxes, sniff for must, and follow a simple inspection checklist, because neglect is how spiders throw parties. Use gentle cleaning techniques: soft brush, damp cloth, mild soap for plastic, vinegar mix for glass. Handle tinsel like confetti with a sense of urgency.
- Spot-check for mold, tears, rust.
- Dust bulbs, polish metal, fluff garlands.
- Replace burnt bulbs, mend loose hooks, photograph damaged items.
- Quarantine funky pieces, air them outside, note repairs.
I’ll narrate, you’ll act. We’ll make everything sparkle, save memories, and avoid surprises next season — you’ll thank me, probably.
Seal and Deter Pests
You did the dirty work—cleaning, fixing, airing out the funky stuff—and now you’ve got tidy boxes and a victory-scent of vinegar in the air. Now seal and deter pests. I tell you straight: nothing ruins holiday magic like mice nesting in tinsel. Use sturdy storage containers, airtight bins, or heavy-duty plastic tubs with tight lids. Add pest deterrents—like cedar blocks, silica sachets, or non-toxic moth strips—inside, not touching delicate ornaments. Wipe rims before closing, tape seams if you’re extra paranoid, label everything bold and obvious. Store off concrete, on shelving, away from heat and damp. Check every month, like a nosy neighbor. If you find trouble, isolate, clean, and replace the container. You’ve got this.
Conclusion
You’ll thank yourself next year when you open a crisp bin, sniff the faint pine of last season’s wreath, and find every bulb wrapped and labeled, not a tangle in sight. I once shoved lights in a drawer and learned the hard way—don’t be me. Do the inventory, pad the glass, spool the cords, seal the boxes, and check monthly. Keep it simple, keep it smart, and enjoy the surprise of a stress-free holiday.
Leave a Reply