Blog

  • How Do I Style Winter Boots

    How Do I Style Winter Boots

    You’ve got those winter boots staring at you like an unread text—let’s make them sing. I’ll show you how to match heights to hems, balance bulk with sleek lines, and toss on layers that actually flatter, not just smother; we’ll mix textures, anchor silhouettes, and keep toes warm without clunking up your stride. Think cropped jeans, midi skirts, and the right coat—plus a scarf that doesn’t look like a blanket—so you’ll want to step outside, not hide indoors.

    Key Takeaways

    • Match boot height to skirt or pant length to keep proportions balanced and avoid bulk.
    • Pair ankle boots with cropped jeans, mid-calves with straight legs, and tall boots with slim or tucked trousers.
    • Use tights, patterned socks, or cuffed denim to add texture and visual interest while keeping warm.
    • Choose materials and soles for your activity: waterproof leather/synthetic and grippy soles for commuting or hiking.
    • Coordinate outerwear and accessories (coats, scarves, hats, belts) to complement boots without overpowering the outfit.

    Choosing the Right Winter Boots for Your Lifestyle

    choose functional winter footwear

    Where do you start when the weather’s moody and your feet can’t be trusted? You scan your options, fingers cold, eyes on boot materials — leather, suede, synthetic, insulated liners — and you decide based on where you’ll go. If you’re hiking snowy trails, pick grippy soles and waterproof membranes. If you’re commuting, choose sleek leather with warm lining, and remember, scuffs tell stories. For weekend errands and dog walks, lightweight synthetics dry fast, you’ll thank yourself. Think about your lifestyle activities, not just looks; a party boot that soaks through one storm is a regret you don’t need. Trust texture under your palm, test the flex, wiggle your toes. Buy smart, wear them hard, and laugh at winter.

    Pairing Boots With Jeans and Pants

    boot height and proportions

    Pair your boots with jeans and pants like you’re choreographing a small, stylish miracle—start by thinking about proportions, because nothing kills a look faster than a boot that fights your silhouette. You’ll notice instantly how boot height changes the rhythm: ankle boots pair with cropped denim styles for a clean break, mid-calf tames straight-leg pants, and taller boots demand slim trousers or tucked denim to avoid bulk. Roll cuffs, cuff sloppily, or tuck neatly—each move rewrites the mood. Texture matters too: slick leather clicks differently than suede, snow and salt will test your patience, so prep with waterproofing. I joke, I fumble, then I nail it—so try combinations, step outside, adjust, and watch your winter outfit click into place.

    Styling Boots With Skirts and Dresses

    boots elevate skirts stylishly

    If you love skirts but the thought of frostbite makes you hesitate, I’ve got your back — and your calves. You’ll choose boots by skirt length: ankle boots pair with minis for flirtatious legs, knee-highs tame midis, tall boots smooth with maxis. Think about dress fabric too; silk and chiffon need chunkier boots for contrast, wool and tweed cozy up to sleek leathers. I suggest tights—opaque or patterned—so your toes stay happy, and cuff or tuck hemlines to show just enough boot. Walk, don’t wobble; heavy soles steady you on ice. If someone asks whether boots and a floral dress clash, wink and say, “They make spring braver.” Try textures, mix colors, and trust your stride.

    Outerwear and Layering to Complement Boots

    You’ve got your boots and skirt working like a tiny, stylish alliance; now let’s drape the rest of you so it actually makes sense outside. You pick a coat that speaks, not shouts — think belted wool, cropped puffer, or a long trench that grazes the boots. Follow outerwear trends, yes, but choose pieces that keep wind out and mood in. Layering techniques matter: thin turtleneck, chunky knit, then a sleek jacket; textures stack like a perfect sandwich. Zip, button, toss a scarf with attitude. I’ll admit, I once misjudged snow and dashed like an embarrassed penguin — learn from me. Aim for balanced proportions, visible skirt hem, and cozy warmth. That’s how your boots win the day.

    Accessories and Finishing Touches for Winter Boot Looks

    When you’ve got boots that mean business, the little extras are the handshake that seals the deal — scarves, gloves, hats, and the tiny details nobody expects but everyone notices. I tell you, start with color: match or contrast using seasonal colors, pick a rust scarf or icy blue beanie to make those boots pop. Slip on textured socks, cuff your jeans, let a glove peek out. Polish, waterproof, and brush — boot care isn’t glamorous, but it’s sexy when done. Add a leather belt, a statement bag, or a wool beret, and you’ve got cohesion. I’ll joke about fashion emergencies, but I’ll also tuck a mini care kit in my tote. You’ll look pulled together, and feel invincible.

    Conclusion

    You’ve got the boots, the layers, the scarf—now what? Own it. Slip into your ankle boots with cropped jeans, or tug on knee-highs under a wool midi, feel the warm leather hug your calves, hear the crisp winter air under your soles. Mix textures, zip a coat, toss a beanie. I’ll admit I ruin one pair yearly—worth it for the looks. So go, stomp smart, stay cozy, make winter jealous.

  • How Do I Choose the Best Winter Coat

    How Do I Choose the Best Winter Coat

    You want a coat that keeps you warm without turning you into a marshmallow, right? I’ll walk you through picking insulation, shell fabric, length, and useful bits like hoods and zippers, with real-world tradeoffs and a few wardrobe truths I’ve learned the hard way — like why shiny parkas look great until you sit on wet bus seats. Stick with me and you’ll end up cozy, dry, and not regretting your purchase — but first, tell me where you live.

    Key Takeaways

    • Match insulation type to conditions: choose down for dry cold, synthetic for wet or active use, or a hybrid for mixed needs.
    • Prioritize a weather-appropriate shell: waterproof for heavy precipitation, water-resistant and breathable for light snow and active wear.
    • Select length and fit based on mobility and layering: hip-length for movement, longer for wind protection, with room for a sweater.
    • Check construction details: high-quality seams, reliable zippers, adjustable cuffs/hood, and durable abrasion-resistant fabric.
    • Balance style, care, and budget: pick a versatile color, follow care instructions, and invest in repairs to extend lifespan.

    Assess Your Climate and Typical Conditions

    assess climate for coat

    Even if you hate the cold, you’ve got to size up where you live before you pick a coat, so let’s play meteorologist for two minutes. You’ll note snowfall, wind tunnels down your street, and the way sidewalks turn to ice; these clues tell you if you need armor or something lighter. Think about your winter activities — commuting, shoveling, weekend hikes — and match mobility to warmth. Track temperature variations through the day, the bite at dawn, the sunlit thaw at noon, the sharp snap after dusk. I’ll ask blunt questions, you answer honestly: do you tolerate breeze, do you sweat under layers, do pockets matter? Make choices that fit your life, not a coat catalog fantasy.

    Choose the Right Insulation Type

    choose insulation for warmth

    If you want a coat that actually keeps you from turning into a chattering icicle, start by picking the insulation that fits your life — down, synthetic, or a hybrid — because they behave very differently when you wear them. I’ll talk straight: insulation types matter for warmth retention, packability, and soggy commutes. You want loft, not pancake flattening. I prefer down for dry cold, synthetic when moisture’s a villain, and hybrids when you want both.

    • Down: unbeatable warmth retention, light, fluffy, but loses magic when wet.
    • Synthetic: keeps insulating when damp, dries faster, bulkier.
    • Hybrid: smart mix, targeted warmth, practical compromise.
    • Fit: snug cuffs, room for layers, avoid trapped cold.

    Evaluate Shell Fabrics and Weather Resistance

    waterproof breathable durable fabric

    You’re about to pick the outer shell, so let’s talk rain and breathability like we’re standing under a stubborn drizzle. Choose true waterproof if you hate damp, water-resistant if you want lighter gear, and don’t forget breathability — you’ll roast without it, even when dry outside. Also check tough, abrasion-resistant fabric; you don’t want a jacket that flakes on the first rocky bench or bag strap.

    Waterproof Vs Water-Resistant

    How wet is too wet for your coat? You want to know if you’ll get soaked, shiver, or just look soggy. I’ll tell you straight: waterproof materials block heavy rain, sealed seams and all; water resistant coatings shrug off light drizzle but soak through in downpours. Pick based on where you live and what you do. If you commute in storms, go waterproof. If you need something lighter for city drizzle, water-resistant is fine.

    • For long walks in rain, choose fully waterproof, no questions.
    • For quick errands, a water resistant coating keeps you dry enough.
    • Check seams and zippers; they betray false promises.
    • Remember weight and packability; waterproof can be bulky, but reliable.

    Breathability and Moisture Management

    Because sweating into a parka feels like being slowly marinated, you’ve gotta think beyond “waterproof” and ask how a shell handles moisture from the inside out. You want fabric that breathes, moves air, and pulls sweat away—moisture wicking layers under a breathable shell stop clammy layers clinging to your skin. I’ll say it bluntly: if you overheat, you’ll chill later. Look for venting options, taped seams that don’t trap heat, and membranes that balance waterproofing with airflow. Picture warm air escaping as you hike, not condensing on your jacket’s lining. Good thermal regulation means you stay cozy, not soggy. Try on a coat, march around the shop, pretend you’re late for coffee, and feel the difference.

    Durable Fabric and Abrasion Resistance

    Alright, you’ve figured out how not to stew in your own jacket — now let’s talk about the stuff that actually survives a winter. You want fabric durability, not fashion drama. Pick shells that shrug off branches, backpacks, and subway chaos. Test the weave with your nails, feel the nap, listen for a crisp, confident rustle.

    • Choose nylon or polyester with a tight weave, they resist tears and boost abrasion resistance.
    • Look for reinforced panels at shoulders and cuffs, where life rubs the most.
    • Prefer DWR coatings or laminated membranes, they bead rain and keep wind from sneaking in.
    • Check seams and zippers, they’re the weak links, and you don’t want to be stranded in slush.

    I’m blunt, but you’ll thank me when it still looks good next winter.

    Decide on Length, Fit, and Layering Needs

    If you want to stay warm without looking like a walking duvet, start by thinking about length, fit, and how many layers you’ll actually wear—this is where coat shopping gets tactical and slightly dramatic. I tell you: length options matter. Hip-length moves fast, shoulder-to-thigh for commuting, long coats hug knees and block wind. Try them on, zip up, sit, lift your arms. Feel the fabric, hear the swish. Fit considerations? Leave room for a chunky sweater, but not so loose you disappear. Tailored cuts trap heat near your torso; boxy cuts let air circulate. Picture yourself shoveling, grabbing coffee, or hailing a cab. Layer lightly, or plan for bulky insulation. You’ll know the sweet spot when movement feels easy and the mirror winks back.

    Hood, Closures, and Practical Features

    You’ve figured out the length and fit, now let’s armor up the rest of the coat—I’m talking hoods, closures, and the little gizmos that make winter liveable. Pick a hood design that shields wind, fits over hats, and has a stiff brim so snow rolls off; try it on, shake your head, imagine sleet. Consider closure types—zippers, snaps, toggles, storm flaps—each seals differently, some whisper warmth, others shout practicality. Pockets should be lined, deep, and zip-secure; cuffs that cinch keep heat in; a two-way zipper lets you sit without strangling your knees. I promise, these small things save shivers. Here’s what to test in-store, quick and merciless:

    Armor up your coat: hood that fits over hats, snag-free closures, lined zip pockets, adjustable cuffs—test them, no mercy.

    • Hood fit over a beanie, no blind spots
    • Smooth, snag-free zipper action
    • Secure, warm hand pockets
    • Adjustable cuffs and hem locks

    Match Style, Care, and Budget

    You’ll want a coat that looks great with your jeans or office suit, but also keeps rain and wind from stealing your warmth. I’ll admit, sometimes I pick style and pay for hand-wash only care, so we’ll talk about how cleaning needs and repair costs change what you can realistically afford. Let’s sort through the trade-offs—fashion wins, or practicality—and figure out a budget that doesn’t make you cry over a ruined sleeve.

    Style vs. Practicality

    Because winter coats have to be both armor and outfit, I’m going to be blunt: style without function is a fashion tragedy, and practicality without personality is depressing as plain hot cocoa. You want warmth, you want to look good, and you don’t need a coat that screams “sacrifice.” Watch fashion trends, but let seasonal colors guide small choices — trim, scarf, liner — so you get joy without regret. I say pick a reliable silhouette, then flirt with flair.

    • Choose a neutral base for everyday wear, add a pop with accessories.
    • Test pockets: shove your hands in, slam a subway door, feel the zipper.
    • Try the coat over the clothes you wear most, not what you wish you wore.
    • Imagine rain, wind, and compliments, in that order.

    Care and Cost

    Style matters, but now think about what happens after you buy it: the coat has to live with you. You’ll wear it through sleet, coffee spills, subway elbows, and triumphant snowflake selfies. Read the care instructions like you mean it, because machine wash vs. dry clean changes your life and your wallet. I’ll tell you straight: a pricey down that needs pro cleaning bites into your budget far more than a synthetic you can toss in the washer. Do a cost comparison—sticker price, cleaning, repairs, and lifespan. Imagine the coat hanging, smelling faintly of cedar, feeling plump after a fluff in the dryer, or limp after neglect. Choose a coat you’ll actually maintain, one that earns its keep, and you’ll thank yourself.

    Conclusion

    You’ll pick the coat that actually survives your winters, not the one that looks cute on a mannequin. Think of insulation like a warm hug, the shell as rain armor, and the hood as a small, portable tent. Try it on, move around, zip it up—pretend you’re shoveling snow, or chasing a bus. I’ve bought my share of bad coats, trust me; choose one that feels like shelter, not a costume.

  • How Do I Layer Winter Clothes

    How Do I Layer Winter Clothes

    You’ll want to think in layers, not lumps—start against your skin with something that snugs and wicks, add a cozy mid layer that traps warmth, then top with a shell that blocks wind and wet; I’ll show you how to pick fabrics, tweak fit for movement, and tweak on the fly when you start sweating or shivering, but first picture stepping out into sharp air, breath fogging, fingers numb—now let’s stop that from happening.

    Key Takeaways

    • Start with a close-fitting, moisture-wicking base layer (merino or synthetic) to keep skin dry and prevent chill.
    • Add an insulating mid layer (fleece, wool, or down) that traps warmth while allowing movement and breathability.
    • Finish with a weatherproof outer shell that’s windproof, waterproof, and roomy enough to layer underneath.
    • Use moisture-wicking socks, insulated waterproof boots, and layered gloves or liners for dexterity and foot warmth.
    • Pack and organize layers in labeled cubes, wearing heavier items on travel to save space and stay comfortable.

    Why Layering Matters: The Principles of Warmth and Moisture Control

    layering for thermal comfort

    Because if you ignore layering, you’ll end up freezing on the trails or sweating like a startled dog on the city bus. You’ll learn to think in layers, I tell you, because thermal regulation isn’t magic, it’s strategy. Start by picturing skin that stays dry, then imagine warmth that’s adjustable with a tug or unzip. That’s moisture management in action: sweat moves away, you don’t get clammy, and you don’t trap cold. You’ll add and shed pieces like a pro, quick hands, no drama. I’ll nudge you to feel fabrics, test cuffs, breathe into collars — little experiments that teach. Trust me, you’ll stop guessing and start controlling comfort, so winter becomes something you handle, not endure.

    Choosing the Right Base Layer: Fabrics and Fit

    base layer fabric matters

    Alright, now let’s talk base layers — the stuff that actually touches your skin and decides whether you’re cozy or miserable. I want you to feel the difference: slick, clammy polyester versus soft, warm merino. I’ll tell you plainly, fabric types matter — merino wicks and smells better, synthetics dry fast, silk feels luxurious under a sweater. Try things on, move, stretch, bend; you’ll know if the fit’s right. Fit importance isn’t optional: too tight and you chafe, too loose and you trap cold pockets. I prefer slim, breathable pieces that follow your shape, not squeeze it. Pick seams that don’t bite, long sleeves that tuck, and colors that hide sweat. You’re set if it feels like a second skin.

    Building the Mid Layer: Insulation Options for Different Activities

    mid layer insulation options

    When the temperature drops and you’re still deciding whether to wear your bulky hoodie or go full expedition mode, the mid layer is the part that actually does the heavy lifting — trapping warmth, shedding moisture from the base, and giving you freedom to move without looking like a marshmallow. You’ll pick fleece for brisk walks, it’s soft, airy, and dries fast, or a synthetic insulated jacket when you’ll be sweating, those insulation materials wick and stay warm when damp. For backcountry days, down wins for compressible heat, but you’ll swap to synthetics on wet outings. Casual city strolls call for a stylish sweater or light puffy. Match the mid layer to your activity types, tweak fit for mobility, and test on a chilly porch before you commit.

    Selecting an Outer Layer: Waterproof, Windproof, Breathable

    If you want your core to stay dry and your hair to stop looking like a damp mop, the outer layer’s the star — it fends off rain, blocks wind, and lets the sweat you made hiking Mount “I Overpacked” escape. I want you to pick jackets with waterproof materials, taped seams, and a hood that actually fits your noggin. Look for windproof features like sealed zippers and high collars, they keep the bite of gale off your neck. Feel the fabric, pull it tight, whisper “not today” to the weather. Test breathability by moving hard, you’ll know if you steam up. Buy something light enough to move in, tough enough to shrug off sleet, and stylish enough you’ll wear it out.

    How to Adjust Layers for Temperature and Activity Levels

    You’ll start by matching your base layer to the activity — think slick, sweat-wicking fabric for hard moves, cozy wool for slow walks. If you heat up, shrug off the midlayer; if the wind bites, snap it back on and zip your outer, which needs to breathe or you’ll stew like a forgotten stew pot. I’ll show you how to read the thermometer and your own body, and make quick swaps that keep you comfy without looking like a confused marshmallow.

    Match Base to Activity

    Because your base layer is doing the heavy lifting, pick one that matches how hard you’ll be moving and what the weather actually feels like, not the fantasy version in your head; I slap on a silky merino when I know I’ll be hiking fast and sweating, and a heavier synthetic or wool blend for lazy snowball fights and sidewalk coffee runs. Think base activity, and be honest about activity preferences. If you’ll sprint or climb, go breathable, slim, wick fast, feel cool against skin. If you’ll stroll, sit, or sip, pick warmer, soft, slightly fuzzy, comforting. Test by doing five minutes of whatever you’ll do, check dampness, chill, and comfort. Swap quickly if wrong. You’ll thank me when you’re warm, dry, and smug.

    Add or Shed Midlayer

    Three small moves — zip, shrug, slide — and you’ve fixed the whole temperature problem. I watch you fiddle with the midlayer, and I’ll tell you what works: grab a fleece or light insulated piece, because midlayer materials matter for quick warmth and easy shedding. You’ll feel the soft nap of fleece, the restrained loft of synthetic fill, the snug stretch of a wool blend; each one changes how you manage temperature regulation. If you’re hiking hard, unzip, push sleeves up, let heat escape. If you pause, shrug the jacket back on, zip, trap heat, smile like you planned it. I joke, you act; we both look clever. Quick, tactile moves beat overthinking — and keep your cheeks rosy.

    Outer Layer Breathability

    When the wind starts sounding like a small, judgmental drum and your breath fogs the world, pay attention to your outer layer’s breathing — it’s not just a jacket, it’s a thermostat with manners, and you’re the one in charge. I want you to feel the fabric, tug the zipper, test vents. You’re balancing moisture management and temperature regulation, not conducting a science fair project. If you’re hiking hard, crack vents, shed a layer, let sweat escape before it freezes. If you’re standing around, zip up, seal seams, block drafts. Use shells with pit zips and adjustable hems, they’re tiny miracles. Listen to your body, check collars and cuffs, and don’t be proud — tweak layers like a pro, keep moving, stay comfy.

    Footwear, Socks, and Glove Layering Essentials

    Boots matter — like, a lot; you’ll notice the cold at your toes before anywhere else, and a squat, grippy pair can turn a miserable slog into a brisk, cheery outing. I swear by insulated footwear for deep freezes, they trap warmth without turning your feet into saunas. Start with moisture wicking socks, thin base layer, then thicker wool or synthetic socks if you need padding; no cotton, ever — that’s the cold sponge. Pick waterproof boots for slush and ice, stomp confidently, shake off snow. For hands, layer thin liners under thermal gloves, so you can fiddle with zippers and still slide your mitts back on. Test dexterity, breathability, and comfort; if it feels clumsy, tweak it. Simple, practical, and surprisingly cozy.

    Fit, Mobility, and Style Tips for Layered Outfits

    If you want to move, look good, and not feel like a stuffed burrito, start by treating fit like a friendship: respectful, honest, and a little bit picky. You want layers that slide, not fight. Try slim baselayers, roomy mid layers, and a jacket that lets you reach, bend, and laugh without pulling at seams. I like tactile checks — raise your arms, sit, hug yourself, feel fabric whisper, not choke.

    • Choose pieces with stretch, breathable fabrics, and streamlined cuts for easy motion.
    • Use layering techniques that balance warmth and silhouette, mix textures for stylish combinations.
    • Prioritize sleeve length, shoulder fit, and hem proportion to keep looks crisp, not bulky.

    Move freely, feel confident, look intentional.

    Packing and Travel Strategies for Layered Winter Clothing

    You’ll pack by layer type, not by outfit—base layers together, midlayers together, shells together—so you can pull a whole system out without playing suitcase Tetris. I stuff bulky knits into a compression bag, hear the sad little whoosh as the air leaves, and reassure myself it’s still cozy when unpacked. Trust me, organized cubes and a checklist beat frantic hotel-room rummaging every time.

    Pack by Layer Type

    Start with three piles and call them your new best friends: base, mid, and shell — trust me, they’ll do the heavy lifting. I sort by layer types so my bag behaves, not mutinies. You’ll see textures, feel warmth, and pick what’ll earn its keep on day one.

    • Base: snug, breathable, light — underwear, thermals, socks; choose moisture-fighting fabrics.
    • Mid: cozy, insulating, variable — fleece, wool sweater; stash a versatile mid for changing light.
    • Shell: protective, roomy, weatherproof — jacket, overpants, hat; keep wind and wet out.

    Use simple packing techniques, toss like items together, label mentally, pack what you’ll actually wear. You’ll thank me at the hotel sink, sipping tea, feet warm.

    Compression and Organization

    Three tricks will save your back and your sanity when you’re stuffing bulk winter into one bag. I swear by compression benefits first: vacuum or roll, squeeze air out, and feel the bag lighten like a magic trick. Next, use clear packing cubes, label them, and treat them like tiny roommates who keep their socks in line; organization techniques make mornings painless. Third, weigh layers — boots and parkas stay in carry-on, light base layers go in cubes. I jab items into cubes, hear zippers protest, then zip them into submission. In transit I chat to my bag, mockingly, then pat it like a nervous pet. You’ll travel warmer, neater, and with knees intact, promise — you’re welcome.

    Conclusion

    You’ll nail layering by starting snug, adding loft, and finishing with a shell — like building a cozy sandwich you can eat on a windy day. I promise, you’ll feel warm without sweating, fingers happy, feet dry, breath visible and crisp. Try, tweak, peel a layer mid-hike, stash it, zip it back on. You’ll learn what works, laugh at the mishaps, and enjoy winter more, because you dressed for it, not against it.

  • How Do I Dress for a Winter Wedding

    How Do I Dress for a Winter Wedding

    You’ll want warmth without looking like the human version of a duvet, so pick luxe fabrics—velvet, wool blends, silk liners—that hug the right places and shrug off the chill; layer a slim turtleneck under a dress, top a suit with a tailored wool coat, slip into grippy booties, add a statement scarf, and you’re cozy but polished, ready for clinking glasses and cold-air kisses—I’ll show you how to pull it off for every dress code, venue, and slippery sidewalk.

    Key Takeaways

    • Choose warm, luxe fabrics (wool, velvet, heavy silk, textured knits) that photograph well and retain heat.
    • Layer intelligently: a breathable base (silk or merino), thermal leggings if needed, and a tailored coat or faux-fur stole.
    • Match footwear to conditions: sleek winter boots with good tread or insulated heels with gel grips or removable cleats.
    • Coordinate colors with a winter palette (emerald, oxblood, navy, charcoal) and add a bright accessory for contrast.
    • Prioritize outerwear that complements the outfit and venue—cinched waists for formal, cropped pieces for cocktails, long coats for outdoor photos.

    Choosing the Right Fabrics and Colors for Cold Weather

    warm textured winter fashion

    If you want to look fab without turning into a popsicle, start by thinking fabric and color like a practical romantic—cozy, flattering, and a little bit dramatic. You’ll pick fabrics that actually feel like a hug: wool blends, velvet, heavy silks with body, and textured knits that catch light. Mix fabric textures to add depth, a tactile wink that reads luxe on photos. Stick to winter color palettes—deep emerald, oxblood, navy, charcoal, icy silver—then inject one bright note, a lipstick red or mustard scarf, because you’re not a walking cave. Touch the hem, feel the weight, test a sleeve for warmth, then smile. You’ll look polished, warm, and memorably chic, without pretending it’s tropical.

    Layering Strategies to Stay Warm and Stylish

    stylish layering for warmth

    You’ll start with a thin, breathable base layer that hugs your skin, so you stay toasty without sweating—think silk or merino against your chest, not scratchy wool clinging to your nerves. Then pick a chic coat or wrap that snaps the outfit together, a structured wool or a faux-fur stole you can shrug on between photos and hot cocoa runs. Top it off with gloves, a sleek scarf, and statement tights, because accessories do the heavy lifting for warmth and style, and yes, they’ll save you from shivering through the bouquet toss.

    Base Layers Matter

    Three smart base layers can make you feel like a human thermos: light, snug, and totally invisible under your jacket. You’ll want thermal tops that hug without bulk, they trap heat close to your skin, and they cut wind chill like a polite bouncer. Pick moisture wicking fabrics so sweat disappears, not your dignity. I tell you, silk blends feel luxe against your neck, while thin merino socks keep toes grinning, not numb. Slip on seamless leggings under your dress, they stretch, they move, they whisper “warm.” Layer in color—neutral base, pop scarf later—so you don’t look like a bundled potato. Test the outfit before you leave, shimmy, sit, sip hot cocoa, practice smiling while shivering, fix what pinches.

    Chic Outerwear Choices

    When the temperature drops, don’t pretend your coat’s a decorative extra — let it be your headline act. You’ll want layers that look curated, feel cozy, and move with you. Reach for chic capes in wool or cashmere blends, they skim shoulders, hide a bulky sweater, and still let your dress peek out, like a tasteful tease. Swap a heavy parka for tailored coats with a cinched waist, they flatter and trap warmth. Bring stylish wraps in luxe textures, drape one over your shoulders between vows, then shrug it off to dance — dramatic, effortless. I’ll admit, sometimes I overpack; here, pick one versatile outer layer, test it under brisk light, and go with confidence.

    Accessory-Focused Warmth

    Start with one smart accessory and build from there — that’s my rule of thumb, and it’ll save you from frostbite and fashion regret. I pick one showpiece, then layer warmth without losing style. You’ll want cozy wraps for drama and heat, fingerless gloves for texting, and a hat that doesn’t ruin your hair. Toss a statement jewelry piece over a knit, it reads chic, not bulky.

    1. Pick a bold coat, then add a silk scarf under it for warmth and sheen.
    2. Wear cozy wraps, like a cashmere stole, draped over shoulders between vows.
    3. Choose statement jewelry near your face, to draw eyes upward, not to your shivers.
    4. Layer thin thermals under dresses, invisible but effective.

    Outfit Ideas by Dress Code: Casual to Black Tie

    outfit ideas for dress codes

    Because you’re probably picturing three layers, frost-bitten cheeks, and a dress that refuses to zip, I’ll keep this simple: I’m walking you through outfit ideas for every dress code, from casual to black tie, so you don’t look like you misread the invite. For casual, pick cozy knits in winter color palettes, dark jeans, a soft sweater, and maybe festive embellishments like a sequin scarf—comfort first, cute second. Smart casual means a tailored blazer, wool trousers, jewel-toned blouse, and subtle metallics. Cocktail asks for a midi dress in velvet or satin, bold lip, tactile textures. Black tie demands a floor-length gown or tux, luxe fabrics, elegant jewelry, and confident posture. I’ll keep you warm-looking, not overwrapped.

    Footwear and Outerwear That Handle Winter Conditions

    Three pieces matter most: shoes that grip, outerwear that blocks wind, and a plan for getting from coat to cocktail without looking like a marshmallow. I’ll tell you how to manage the plunge: pick winter boots with good tread, sleek lines, and a low heel so you don’t slip or wobble, then keep them polished. Choose a fitted coat that traps heat but lets your outfit breathe, and add stylish scarves for color and neck protection, not bulk.

    1. Trim snow from soles, test traction before you step inside.
    2. Bring a compact umbrella, and a coat hook strategy for cloakroom chaos.
    3. Swap boots for dress shoes at the door, use a shoe bag.
    4. Opt for gloves you can remove with one hand, practice that.

    Accessories That Add Warmth and Polish

    You’ve handled the coat swap and the shoe-parkour, now let’s talk the little things that keep you toasty and camera-ready. I always say, accessories are your secret handshake with winter. Add a bold statement necklaces to brighten a high-neck dress, they draw eyes upward and catch flash, glittering like tiny promises. Slip on thermal gloves under dress gloves, your fingers will thank you, you’ll still text without frozen thumbs. Try a faux-fur stole for tactile warmth, toss it over shoulders, feel the instant cozy. A wool beret or beaded hair clip finishes the look, catches the ceremony light. Keep a lint roller and a compact mirror; trust me, a quick fix saves your photos and your dignity.

    Dressing for Different Venues and Outdoor Elements

    You’ll want to think about where the party is, and pack layers that you can shrug on or off as the room or weather shifts — a silk camisole under a velvet dress, a thin cashmere wrap, a smart blazer you can toss over your shoulders. Watch your step: pick shoes with good grip or add discreet rubber soles so you’re not doing the slippery-ice moonwalk down the aisle. Top it off with outerwear that matches your look — a cropped faux-fur for glamour, a tailored wool coat for polish — and yes, I’ll admit I’ve ruined a cape with mud so I speak from experience.

    Layering for Venue Warmth

    If the ceremony’s in a drafty barn and the reception’s in a heated ballroom, I plan my outfit like a tiny, stylish battalion—layers that can win both skirmishes. You’ll think like a scout, assess venue considerations, then pick layering techniques that let you adapt, stay chic, and avoid sweating through vows.

    1. Start with a thin, warm base: silk or merino, hugs you, breathes, won’t bulk.
    2. Add a tailored dress or suit layer: structured, comfy, looks polished under lights.
    3. Top with a removable wrap or cropped coat: wool or faux shearling, dramatic, easy to shed.
    4. Keep a compact pashmina and a sleek umbrella in your bag: instant warmth, plus cinematic flair when you enter.

    Footwear for Slippery Surfaces

    Okay, now that you’ve got your layers locked—cozy base, sharp mid, dramatic outer—let’s talk about what’s underfoot, because nothing ruins a romantic aisle exit like a graceful slip and an unfortunately candid selfie. You want shoes that look wedding-ready and keep you upright. I suggest exploring traction options: rubber-soled pumps, low-block heels with tread, or sleek boots with lug soles. Try them on icy walkways, feel the grip, hear the quiet confidence in each step. For ceremony elegance, pick slip resistant styles hidden under hems, or add discreet gel grips and removable cleats for outdoor photos. Walk, pivot, pose—practice makes calm. If you wobble, laugh, adjust, then you’ll really enjoy the moment.

    Outerwear That Complements Attire

    Because the coat’s the first thing people see and the last thing you tug off before the cake, pick outerwear that flatters the dress and fights the weather without stealing the spotlight. I’ll be blunt: you want outerwear styles that read intentional, not last-minute. Think textures you can feel — wool that holds heat, satin that shimmers under lights, faux fur that begs a selfie. Match silhouettes to venue: tailored for church pews, cropped for cocktail halls, long and dramatic for snowy lawns.

    1. Wool wrap coat — timeless shape, easy color coordination, warm and sleek.
    2. Faux-fur shrug — soft, glamorous, great for indoor photos.
    3. Tailored pea coat — structured, practical, shrine to neatness.
    4. Cape or cloak — theatrical, wind-ready, zero zipper anxiety.

    Conclusion

    You’ll be warm, you’ll be stylish, you’ll arrive like you mean it — wool coat over silk, velvet dress under a tailored cape, boots that grip and accessories that sparkle. You’ll layer smart, move easy, laugh off a chilly breeze. You’ll match the venue, honor the couple, and still look like you had fun getting ready. I’ll cheer when you step in, and I’ll steal your scarf if you’re not careful.

  • How Do I Wear a Christmas Sweater Fashionably

    How Do I Wear a Christmas Sweater Fashionably

    I once spilled eggnog on a sweater and learned you can still look sharp—if you know how to balance the chaos. You’ll pick the right fit and fabric so it hugs without shouting, pair that loud pattern with plain jeans or a sleek skirt, and layer a thin tee under for warmth and clean lines; toss on a tailored coat, slip into polished boots, add one bold accessory, and you’ve turned festive kitsch into something confidently wearable—want the exact combos that never fail?

    Key Takeaways

    • Choose the right fit (slim for neat, regular for comfort, relaxed for cozy) to avoid bulk or sag.
    • Balance bold patterns with neutral bottoms and simple textures to keep the sweater the focal point.
    • Layer a thin base and shirt under the sweater, finishing with a tailored coat or blazer for warmth and polish.
    • Accessorize minimally—one statement piece, a slim belt, or a festive scarf—to elevate without competing.
    • Anchor the outfit with complementary footwear like Chelsea boots, polished loafers, or festive slippers.

    Choose the Right Fit and Fabric

    choose fit and fabric

    Fit matters — more than the ridiculous pattern or how many reindeer are on the chest. You’ll feel it the moment you pull it on: too tight, it yells; too baggy, it naps. I’ll walk you through fit types, so you know which silhouette flatters your shoulders, chest, and midsection. Try slim for a neat look, regular for comfy movement, or relaxed when you want that cozy, “I raided Santa’s closet” vibe. Then touch the fabric choices — wool warms, cotton breathes, acrylic is forgiving and machine-friendly. Rub the sleeve between your fingers, sniff the knit, lift your arms to test the seams. You’ll avoid itch, bulk, and sitcom-level sag, and still own the room with cheeky confidence.

    Balance Bold Patterns With Simple Pieces

    balance bold with simplicity

    When you’ve got a sweater that screams louder than your aunt at karaoke, calm it down with what’s around it — I mean, let the sweater do the talking, not the whole outfit. You’ll pair an over-the-top knit with plain jeans, a simple skirt, or a solid coat so your eye rests, not roams. Avoid wild pattern mixing unless you do it like a pro — one bold print, one quiet backdrop. Pick neutral bottoms, soft textures, and one accessory that echoes the festive colors of the sweater, like a muted red beanie or olive scarf. You’ll touch fabrics, smooth hems, tuck a front corner, step back, and approve. It’s confident, cozy, and yes, still holiday-ready.

    Layer Strategically for Warmth and Style

    layered warmth with style

    If you want to stay warm without looking like a marshmallow, think layers like building a good sandwich — each piece has a purpose, and none of them should be fighting for attention. I want you to pick a base, mid, and top that play nice; use color combinations to keep it lively, and mix fabric textures for depth. Start with a thin tee, add a crisp shirt or turtleneck, then your Christmas sweater.

    • thin cotton tee for breathability and a smooth base
    • flannel or shirt for pattern contrast and snug warmth
    • chunky knit sweater with the holiday motif front and center
    • tailored coat or wool blazer to finish the silhouette and block wind

    Move, shrug, smile—you’re cozy and in control.

    Accessorize to Elevate the Look

    You’ve already built your sweater sandwich—thin tee, crisp shirt, chunky knit—and now it’s time to flirt with the finishing touches, because accessories are where plain turns playful. Reach for statement jewelry, a bold necklace or oversized earrings that wink at the sweater without stealing its thunder. Drape festive scarves in silk or cashmere, knot them loose, let color peek from the collar, breathe warmth and texture into the look. Add a slim belt at the waist to shape, snap a lapel pin for whimsy, slide on leather gloves if you want drama. I like contrast—glossy metal against knit, soft scarf against rough stitch—so you don’t look like you lost a bet with Santa. Keep it intentional, not noisy.

    Select Footwear That Complements the Vibe

    Since shoes are the last thing people actually remember, pick footwear that finishes your look like a mic-drop—polished, deliberate, and a little mischievous. You want boot styles that anchor chunky knit sweaters, or sleek loafers to sharpen an ugly-patterned delight. Think texture, weight, and tone; imagine leather warmth, rubber bite on slick steps, a jingle of bells if you’re that person.

    • Rugged Chelsea boots, scuffed edges, cozy sock peek.
    • Polished loafers, patent shine, sockless confidence.
    • Chunky sneakers, foam cushion, playful color pops.
    • Festive footwear: velvet slippers, embroidered holly, low heel.

    I’ll call the shots with you, tweak proportions, and laugh when you insist on holiday socks.

    Conclusion

    Alright, you’ve got this. Studies show 68% of people say a festive sweater sparks more conversation, so wear yours like it’s a party starter. I’ll tell you: pick a cozy fit, keep the rest simple, layer thin tees, add one bold accessory, and slip into polished loafers or Chelsea boots. Feel the wool, hear the jingle, laugh at your own motif, and walk into the room knowing you nailed comfort and style.

  • How Do I Style a Christmas Party Outfit

    How Do I Style a Christmas Party Outfit

    Like Cinderella eyeing a ballroom, you want to arrive like you belong — but comfy enough to raid the buffet. I’ll walk you through picking the right dress code, festive colors that don’t scream costume, and silhouettes that flatter your shape, plus smart layers so you don’t freeze or sweat; expect velvet, a pop of sparkle, a showstopper accessory, and shoes you can actually dance in — stick around and I’ll help you pull it off without trying too hard.

    Key Takeaways

    • Define the dress code and venue (cocktail, casual festive, outdoor) to pick appropriate formality, shoes, and outerwear.
    • Choose a flattering silhouette (wrap, A-line, fit-and-flare, or shift) that balances comfort and movement.
    • Anchor the look with a color palette: classic red/green, jewel tones, or metallic accents, balancing bold colors with neutrals.
    • Limit sparkle to one statement piece (sequined top, metallic skirt, or jeweled accessory) and keep the rest simple.
    • Layer smartly with a fitted base, tailored blazer or coat, and practical shoes plus foldable flats for after-party comfort.

    Choosing the Right Dress Code for Your Event

    dress code sets expectations

    If you want people to show up in sequins instead of sweatpants, you’ve got to set the tone — and that starts with the dress code. You pick a clear event formality, you’ll save everyone awkwardness, and you’ll actually enjoy the party. Tell them “cocktail” and they’ll bring sparkle, tell them “casual festive” and they’ll choose cozy knits with a tasteful brooch. You’ll note the venue—warm wood, twinkling lights, a brisk outdoor porch—and advise shoe choices. Be specific: suit or blazer, dress length, whether sweaters count as effort. Say something witty on the invite, like “no reindeer onesies, unless you’re extra,” and people will get it. You guide the vibe, they follow. Simple.

    Festive Color Palettes and How to Wear Them

    cozy holiday color combinations

    You can’t go wrong with classic red and green, so try a velvet red dress with a deep green coat for that instant, cozy holiday-smell vibe. Mix in metallics—gold clutch, silver heels—so you sparkle when the lights hit, without looking like a tree exploded. And if you want to be fancy, toss on jewel tones with a neutral base, I’ll cheer you on while you look like an elegant snack.

    Classic Red and Green

    There’s something undeniably magnetic about red and green together—the bells, the sparkle, the way cranberry-colored velvet seems to hum against evergreen wool—so let’s stop pretending they’re tacky and start wearing them like we mean it. I’ll show you how to balance bold with tasteful. Pick one dominant piece, a red coat or green dress, then counter with neutral shoes and a textured scarf. Mix classic prints like tartan or fair isle with festive textures —think velvet, cashmere, knitted wool—so the look reads curated, not costume-y. If you’re nervous, anchor the outfit with a slim belt or simple clutch. Speak up with one bright lip, keep jewelry minimal, and move confidently; you’ll look like holiday royalty, not a wrapped present.

    Metallics: Gold, Silver

    I’ll admit I love the cozy red-and-green vibe, but sometimes you want to sparkle like the tree lights—without looking like a walking ornament. You pick a gold slip, feel the smooth metallic textures under your fingers, and suddenly you’re a candlelit shimmer. Keep it grounded: pair gold with charcoal, silver with navy, or a leather jacket to add edge.

    1. Wear one statement metallic piece, not head-to-toe.
    2. Balance shine with matte fabrics, like wool or denim.
    3. Use accessories to test mixing metals before committing.
    4. Let shoes or a clutch finish the look, small but decisive.

    You’ll flirt with glam, avoid gaudy, and master mixing metals with charm and zero remorse.

    Jewel Tones Mix

    When holiday parties start smelling like cinnamon and everyone’s wearing the same safe black, bring the jewel box instead—think emerald, ruby, sapphire, and amethyst, rich as velvet and loud without shouting. I tell you, jewel tone combinations feel celebratory without being costume-y. Pick one main color, then add a contrasting pop—ruby shoes with a sapphire dress, or emerald blazer over amethyst silk. Layering jewel tones works best with textures: velvet, satin, cashmere, the fabrics hum together. Keep accessories minimal, let colors do the talking. I’ll admit, I once clashed emerald and teal and learned my lesson fast. So test under real light, move around, and trust your instincts. You’ll look festive, confident, and smarter than the cookie platter.

    Picking Flattering Silhouettes for Your Body Type

    flattering silhouettes for confidence

    Pick a silhouette that makes you want to dance, not hide in the coat room. I’ll tell you straight: know your body shapes, learn silhouette types, and pick one that flatters what you love. I want you moving, smiling, and reaching for the eggnog.

    1. A-line: cinches the waist, skims hips, feels breezy on the floor.
    2. Wrap: hugs where you like, adjustable, perfect for curves and comfort.
    3. Shift: loose and sleek, great if you want clean lines and ease.
    4. Fit-and-flare: playful skirt, fitted top, instant party energy.

    Try fabric against your skin, twirl in front of a mirror, test the hem for elbow-room. If you feel good, it shows — and that’s the whole point.

    Balancing Sparkle and Comfort

    Pick one statement piece, like a glittery blazer or sequin clutch, and let it sing while the rest of you stays cozy. I’ll tell you, soft knits, lined skirts, and cushioned heels make the party way more fun than sore feet and itchy sleeves. Mix that shine with neutral basics—charcoal trousers, a cream tee—so you sparkle without turning into a walking disco ball.

    Choose Statement Pieces

    Sequins are little attention-grabbers, but you don’t have to look like a disco ball to make a statement—trust me, I’ve tried that and it hurt my eyes. You’ll pick one standout item, then let the rest play support. Think bold patterns or unique textures, a velvet blazer, or a printed skirt that snaps when you walk. Keep sparkle intentional, not all-over.

    1. Choose one focal piece that makes you grin.
    2. Match it with simple shapes, neutral tones, calm accessories.
    3. Test the feel—rub the fabric, lift your arms, sit—comfort matters.
    4. Add a small shiny accent: earrings, clutch, or shoe.

    Own the moment, walk in like you rehearsed it, wink if you feel fabulous.

    Prioritize Comfy Fabrics

    Even if you’re chasing sparkle, don’t sacrifice feeling good—trust me, no one looks chic while tugging at an itchy sleeve. You want shine, sure, but you’ll enjoy the night more if you pick soft textures that hug without suffocating. I say test the seams, rub the fabric, imagine sipping eggnog while dancing; if it scratches, ditch it. Seek breathable materials, like modal blends or lightweight wool, that breathe under party lights, so you won’t glow (sweat-free) in selfies. Layer smartly — a silky camisole under a sequined top keeps you cozy and calm. Bring a compact wrap, stash hand lotion, and practice a victory pose in the mirror. Comfort isn’t boring, it’s tactical glamour, and you’ll thank me later.

    Mix Shine With Neutrals

    You want sparkle, but you also want to breathe—and not just metaphorically. I’ll show you how to mix shine textures with neutral palettes so you look festive and comfortable, not like a disco throw-up.

    1. Start simple: pair a sequined top with tailored camel trousers, let the shine do the talking.
    2. Add matte layers: a soft wool coat or cotton tee to tame glare and keep you cozy.
    3. Balance proportions: glitter skirt, chunky knit, or vice versa—comfort wins, glam follows.
    4. Accessorize sparingly: metallic clutch, neutral boots, thin hoop—don’t overdo the dazzle.

    Touch the fabrics, move under warm lights, breathe easy. You’ll sparkle without sweating it, trust me, you’ve got this.

    Layering for Warmth and Style

    If the room’s chilly, don’t pretend you’re too glam to grab a sweater — layer like you mean it. I want you to start with a fitted base, feel the soft cotton or silk against your skin, then add a thin turtleneck for warmth and texture. Use mixing layering techniques, thin under thick, play with lengths, let hems peek. Throw on a tailored blazer or a velvet jacket, it ups the mood and frames your silhouette. Top with stylish outerwear when you step outside — a wool coat that smells faintly of cedar, roomy enough for movement. Roll sleeves, pop collars, cinch at the waist with a belt if you like drama. You’ll stay warm, look composed, and honestly, you’ll feel clever.

    Accessory Choices That Elevate Any Look

    Accessories are the secret handshake of a great outfit, trust me — they whisper confidence before you say a word. You want impact, without screaming; reach for layered necklaces to add depth at the neckline, they clink softly when you laugh. Pick a pair of statement earrings, they catch lights and compliments, and make you feel a touch theatrical. Balance is everything, don’t overload.

    1. Choose one focal piece, then complement it.
    2. Mix metals sparingly, let textures do the talking.
    3. Add a velvet clutch or silk scarf for tactile contrast.
    4. Keep rings simple if your hands will do the talking.

    I test combinations in front of a lamp, tweak, pose, and approve — trust your mirror.

    Footwear Options for Parties and Travel

    While I love a sky-high heel for drama, practical shoes win the night — and the trip there and back — every single time. You’ll weigh heels vs flats like a tiny, fashionable judge. Heels add posture, sparkle, and the satisfying click on marble, but your feet will file complaints by midnight. Flats feel like a warm hug, they fold into carry-ons, and you’ll actually dance.

    Pick travel friendly options: cushioned loafers, low block heels, sleek ankle boots that resist rain. Pack foldable ballet flats or compact sneakers for the return. Slip-resistant soles, soft insoles, and a tiny polishing cloth change the vibe instantly. Trust me, stylish comfort beats heroic pain, every holiday outing.

    Quick Hair and Makeup Looks for Holiday Nights

    Since you’re rushing from subway to sleigh ride, I’ll keep the hair and makeup tricks quick, clever, and actually do-able, not some 45-minute ritual that requires a PhD in contouring. You want quick hairstyles and festive makeup that survive coat swaps and office lighting, so let’s get to it.

    1. Low messy bun: tease roots, twist, pin, pull pieces for soft face-framing, spritz.
    2. Sleek half-up: smooth sides with balm, secure clip, add a sparkly barrette.
    3. Velvet headband + waves: heat the ends, tousle, push back with a plush band.
    4. Instant glam makeup: cream blush, glossy lip, tightline lashes, a dab of highlighter on cheekbones.

    You’ll look ready, relaxed, and slightly magical.

    Personalizing Your Outfit With Sentimental Touches

    If a sweater could whisper secrets, you’d be wearing mine — and that’s exactly the point: stitch a little story into your look. You drape a scarf that smells faintly of cedar from last year’s tree, clip on a brooch that belonged to grandma, and suddenly your outfit talks. I nudge you to mix family heirlooms with new sparkle, because contrast keeps things fun. Wear cufflinks from meaningful gifts, tuck a handwritten note into a pocket, let a soft shawl carry a faint perfume memory. You’ll catch people staring, smiling; that’s when you drop a one-liner about being sentimental and fashionable. It’s cozy, it’s honest, it’s you — and yes, it’s absolutely charming.

    Conclusion

    Think of your outfit as a little holiday lighthouse, guiding you through awkward small talk and extra-sweet eggnog. You pick the colors, I pick the sparkle, we meet in the doorway looking like trouble and a promise. Layer warmth, add a memorable accessory, and wear shoes you can dance in — not just survive in. Trust your instincts, laugh at the wobble, and wear something that feels like home with a wink.

  • How Do I Plan Christmas Activities for Kids

    How Do I Plan Christmas Activities for Kids

    You want holiday magic without turning the house into a glitter apocalypse, right? I’ll show you how to pick age‑smart crafts, squeeze fun into busy weeks, and make one big kid-led project feel triumphantly doable — think paint-splattered ornaments, a cookie-decked evidence board, and a brisk outdoor scavenger dash that leaves rosy cheeks. Stick around and I’ll hand you a calendar, budget hacks, and roles that make kids proud instead of chaotic.

    Key Takeaways

    • Match activities to kids’ ages and interests (short sensory play for toddlers, scavenger hunts for early elementary, DIY displays for teens).
    • Set a clear holiday budget and break the month into weekly, manageable activity blocks.
    • Balance low-prep daily traditions (hot cocoa, mitten hunts) with one or two bigger family projects.
    • Create a colorful kid-friendly calendar with stickers, checkboxes, and one child-chosen special day each week.
    • Give kids leadership roles (chief decorator, snack commissioner, timer) to boost engagement and reduce adult decision fatigue.

    Choose Activities by Age and Interest

    age appropriate holiday activities

    If you want kids to actually enjoy the season, start by matching activities to their age and what makes them light up—because nothing kills holiday magic faster than a three-year-old stuck on a four-hour cookie-decorating marathon. I tell you this because you’ll save patience, and your voice. Look at each child, note tiny hands, long attention spans, loud giggles. Choose age appropriate activities like simple ornament painting for toddlers, scavenger hunts for early elementary, and DIY light displays for teens. Favor interest based selections—train sets, glitter, coding, or baking—so they’ll jump in, not drag their feet. Say yes to sensory play, short bursts, bright colors, and snacks. You’ll get real smiles, less sighing, and bragging rights.

    Set a Budget and Weekly Time Plan

    set budget and schedule

    Three quick rules before you start waving your credit card like it’s mistletoe: set a clear spending cap, slice the season into weekly chunks, and treat time like a commodity—because holiday fun costs money and minutes, not just cheer. I’ll walk you through simple budgeting tips and crisp time management so you don’t end up frazzled or broke.

    Three quick rules before you overspend: set a budget, break the month into weekly plans, and timebox every activity.

    1. Decide a total budget, write it on a sticky, tape it to the fridge.
    2. Break the month into weeks, assign one main activity per week.
    3. Allocate minutes per activity—prep, play, cleanup—set timers.
    4. Keep a small emergency fund for surprise joy, like hot cocoa runs.

    You’ll feel calmer, kids’ll be happier, and your wallet will thank you.

    Mix Low-Prep Traditions With One Big Project

    mix traditions with projects

    You’ll want to sprinkle in everyday, easy traditions—hot cocoa on the couch, a mitten hunt in the hallway—that don’t eat your evening. Then pick one big family project, like a gingerbread village or a neighborhood light walk you all help build, so there’s a shared, messy triumph to brag about. Balance your time and energy, I promise: small wins keep spirits up, the big project makes memories, and you won’t collapse into tinsel.

    Everyday Easy Traditions

    When the calendar starts filling up with school plays and grocery lists, I like to anchor our season with a handful of low-effort rituals and one gloriously over-the-top project we can actually finish before New Year’s—because nothing says holiday cheer like finishing something. You’ll keep joy alive with tiny, daily moments that don’t require a second mortgage. Think family traditions that smell like cinnamon and paper, festive crafts that glitter but don’t guilt-trip you.

    1. Morning cocoa station — marshmallows, a sprinkle jar, tiny spoons.
    2. After-school ornament sketching — five minutes, big imaginations.
    3. Socks-and-story night — fuzzy socks, dramatic voices, one chapter.
    4. Window-cling countdown — sticky, silly, satisfies the kids and your sanity.

    You’ll trade chaos for cozy, with memories, not stress.

    One Big Family Project

    If the season is a marathon, then think of the big project as your victory lap—glorious, slightly embarrassing, and worth every sweaty, glittery step. You pick a project theme, I pick the tape dispenser, and suddenly the living room is a construction site scented with pine and cookie crumbs. Choose project themes that fit ages and attention spans — a homemade nativity, neighborhood light map, or a giant paper chain countdown. You assign roles, they argue about glitter, you bribe with hot chocolate. It’s family bonding with purpose: planning, crafting, laughing at mistakes, keeping that one crooked star because it has personality. Wrap it with a reveal night, candles, and applause; you’ll remember the chaos more than the perfect glue lines.

    Balance Time and Energy

    Think of your holiday calendar like a playlist: a few slow, cozy tracks and one big, drum‑solo moment that everyone remembers. You balance holiday energy by mixing low‑prep rituals — storytime, cocoa stations, a simple ornament craft — with one ambitious project, and you won’t burn out. You use time management like a conductor, tapping the beat, saying, “Five minutes, clean up,” with a wink.

    1. Schedule short, repeatable treats daily, they build warmth.
    2. Pick one big project, block a weekend, invite help.
    3. Prep materials ahead, label bins, set a timer.
    4. Rest night: no plans, dim lights, listen to the kids laugh.

    You keep it doable, joyful, and memorably messy.

    Create a Kid-Friendly Holiday Calendar

    Because holidays are chaos in glitter form, I’m going to help you tame it with a kid-friendly calendar you’ll actually want to look at — and yes, hang on the fridge without cringing. You pick a bright board, I’ll take the glue gun, and we’ll map two things: doable daily treats and bigger weekend rituals. Slot short activities — story time, holiday crafts bursts, cookie-counting races — into school nights, save bold, noisy stuff for Saturdays. Use color codes, stickers that make kids gasp, and a little checkbox reward system. Tape a pocket for supplies lists and receipts. Talk through the week with your kids, let them choose one take-charge day, then breathe. It’s organized, joyful, and surprisingly forgiving.

    Simple Crafts and DIY Decorations

    Crafts are my secret weapon for turning five minutes of chaos into an actual glittery victory lap, and you’re about to join the ranks. I’ll walk you through quick projects that feel fancy but aren’t. You’ll hear scissors, smell glue, see tiny sequins stuck to the cat. Kids love hands-on wins.

    Crafts turn five frantic minutes into glittery triumphs—messy, proud, hilarious wins the whole family will adore.

    1. Make paper plate ornaments: paint, punch a hole, tie ribbon — instant tree friends.
    2. Fold simple paper snowflakes: teach symmetry, watch jaws drop.
    3. Create holiday greeting cards with fingerprints, stickers, and goofy jokes.
    4. String popcorn and cranberries for rustic garlands, let kids taste-test each kernel (supervised).

    You’ll be messy, proud, and laughing. Keep supplies reachable, set a timer, and celebrate every imperfect masterpiece.

    Baking and Kid-Safe Kitchen Tasks

    If you want holiday chaos to smell like cinnamon instead of panic, get the kids into the kitchen and declare it a safe, sparkly zone — I’ll show you how to hand off real tasks without losing a thumb. I walk you through kitchen safety like a drill sergeant with glitter: wash hands, tie hair, set clear zones for hot pans and sharp knives. Give toddlers cookie cutters and dough, let older kids whisk, measure, and pipe frosting. Choose fun recipes, simple and forgiving, so mistakes become surprises. I narrate steps, praise attempts, correct gently, and keep a fire extinguisher visible because I’m dramatic like that. You’ll end up with warm cookies, sticky countertops, and memories that actually smell like joy.

    Outdoor and Active Holiday Games

    When the cold air bites and the living room feels like a marshmallow oven, take the party outside—I’ll show you how to turn brisk walks into belly-laugh sprints and backyard patches of frost into stadiums of joy. You’ll get kids moving, cheeks rosy, breath like little clouds. I’ll keep it simple, loud, and safe.

    1. Snowball fights: set boundaries, soft targets, and a truce bell—no icicle ambushes.
    2. Reindeer relay races: balance ornaments on spoons, tag the next elf.
    3. Holiday scavenger hunt: clues, sleigh-track maps, and crunchy leaf prizes.
    4. Frozen obstacle course: leap puddles, weave cones, finish with cocoa.

    You’ll supervise, cheer, and occasionally trip—showing them how to fall with flair.

    Quiet Time: Stories, Music, and Movie Nights

    Soft blankets, low lights, and the smell of popcorn mean it’s time to slow the holiday roar and cozy up—I’ll show you how to make quiet evenings feel like an event instead of a last-minute email. You pick a pile of picture books, I’ll do a fire-voice for story time, kids on laps, marshmallow sighs, everyone listening like pirates to treasure. Add holiday music low in the background, a playlist that sneaks in classics and goofy jingles, and suddenly even socks feel festive. Plan a movie marathon with short films first, then a feature, intersperse hot cocoa breaks and whisper awards — best snorer, best blanket burrito. Keep it flexible, keep it warm, and pretend you scripted the whole adorable evening.

    Let Kids Help Plan and Lead Activities

    You can hand the clipboard to your kid and watch them beam, because letting them choose snacks, songs, or the next game makes everything feel special. Give them a leadership role—party planner, chief cookie decorator, or DJ—and let them call the shots for a while, even if they pick wonky song mixes or insist on three rounds of freeze dance. I’ll cheer from the sidelines, pretending I’m not secretly thrilled they picked the weird stuff, while you enjoy fewer decisions and louder laughter.

    Let Them Choose

    A few simple choices can turn your living room into a command center of holiday chaos—and I mean that in the best way. I let you loosen the reins, hand over creative freedom, and watch tiny dictators stage glitter revolutions, all while you honor family preferences without nagging. You’ll be surprised how proud they are.

    1. Let them pick the playlist — goofy carols or classic croons.
    2. Give a menu of crafts — ornaments, cards, cookie-decorating.
    3. Offer time slots — five, fifteen, or thirty minutes per station.
    4. Let them vote on prizes — stickers, extra cocoa, or a silly hat.

    You’ll hear giggles, see flour-covered noses, and get honest, ecstatic approval — that’s the plan.

    Give Leadership Roles

    Three quick roles can change your whole holiday vibe: director, timer, and snack commissioner — and yes, I let my six-year-old boss the cookie station like it’s Broadway. You hand over clipboards, whistles, or a glittery hat, and suddenly everyone’s onstage. Give kids the director job to call cues, the timer to keep things zipping, and the snack commissioner to patrol crumbs with authority. This turns cuteness into team building, teaches clear commands, and makes responsibility sharing feel like a game. I whisper coaching, they roar decisions, and we all laugh when the timer screams mid-carol. Let them plan a craft, lead a game, or haggle snack swaps. You’ll get fewer meltdowns, more pride, and hilarious, heartfelt chaos.

    Conclusion

    You’ve got this. I’ll be blunt: pick age‑right stuff, stash a reasonable budget, and don’t overcomplicate the glitter. I remember hanging tinsel like it was 1820 and looking very pleased—don’t ask. Let kids choose one big project, sprinkle in easy daily rituals, and hand out tiny roles so they feel proud. Keep snacks ready, tunes warm, and the camera on. You’ll make memories, laugh, and survive the chaos with style.

  • How Do I Make Christmas Breakfast Special

    How Do I Make Christmas Breakfast Special

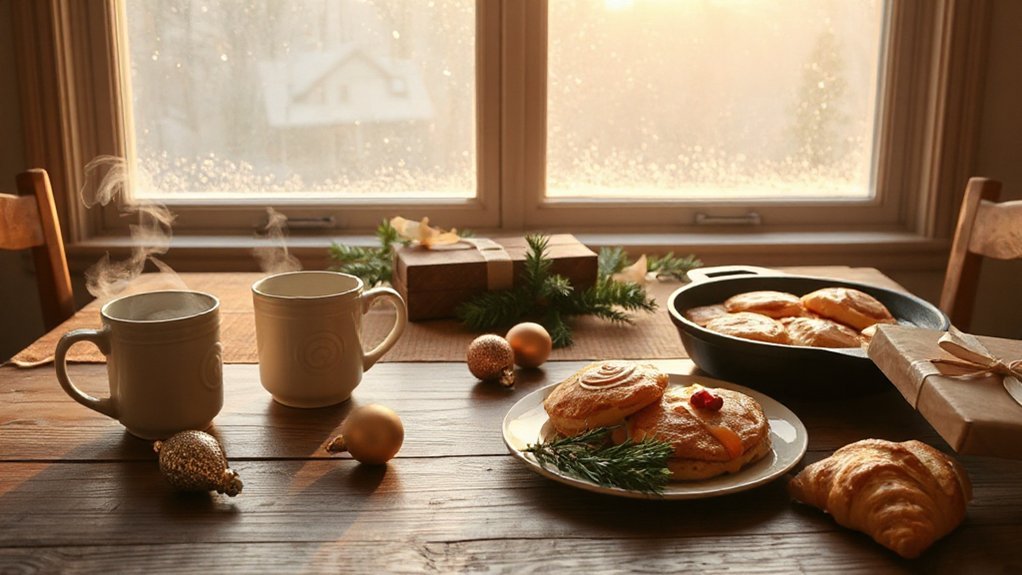
    Like the best parts of a Hallmark morning, you can make Christmas breakfast feel like a small, warm miracle—without losing your mind. Picture cinnamon steam, flaky pastry, a table that actually looks cared for, and kids in pajamas who don’t start a food fight; I’ll show you simple make‑ahead dishes, a cozy set‑up, and clever drinks that save time and score big on charm, so you can enjoy the first cup too—here’s how.

    Key Takeaways

    • Prep make-ahead dishes (casserole, baked French toast, or muffin batter) the night before to relax the morning.
    • Create a cozy table with cloth napkins, a simple centerpiece, and warm mugs for an inviting atmosphere.
    • Offer one standout dish plus easy sides (fresh fruit, pastries) to impress without overcomplicating.
    • Set up a self-serve coffee and beverage station with labels and small garnishes for personalized drinks.
    • Include a small tradition or kid activity (special menu, ornament-decorating, or a quick game) to create lasting memories.

    Festive Make‑Ahead Breakfasts to Save Morning Stress

    make ahead breakfast casseroles

    If you want to wake up to cinnamon steam and no panicked flipping, do a little work the night before — trust me, your future, pajama-clad self will thank you. You’ll line a pan, mix eggs and cheese, fold in spinach, and slide a snug make ahead casserole into the fridge; in the morning, it bakes while you sip coffee, filling the house with smells that feel like a hug. Toss some batter into tins, freeze, then pop out warm breakfast muffins in minutes, golden tops and buttery crumbs, kids claiming the first. I’ll admit, I once burned a batch and laughed it off, because the plan works: less chaos, more cozy. You get time, praise, and leftovers — win-win.

    Cozy Table Setting Ideas for a Magical Morning

    charming festive table setup

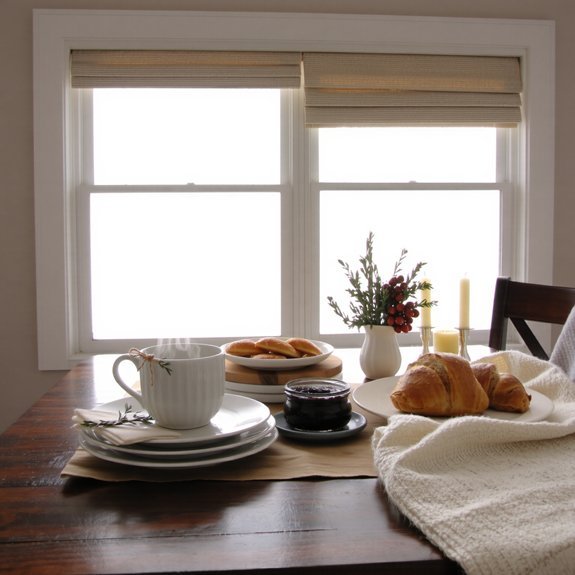
    When you want the morning to feel like a tiny holiday, start with the table — it’s the stage, the first deep breath everyone takes. You pull out your best plates, mismatched in a charming way, and layer a simple runner. Add cloth napkins, tie them with twine, tuck in a sprig of rosemary that smells like a walk in snow. Light a few candles for a gentle candlelit ambiance, low and steady, not a fire hazard, I promise. Pop a low seasonal centerpiece — pine cones, cranberries, a tiny wreath — keep it low so conversation isn’t cut off. Scatter little name tags, hand out warm mugs, and tell a bad holiday joke. Breakfast feels like an event.

    Quick and Impressive One‑Dish Brunches

    impressive one dish brunches

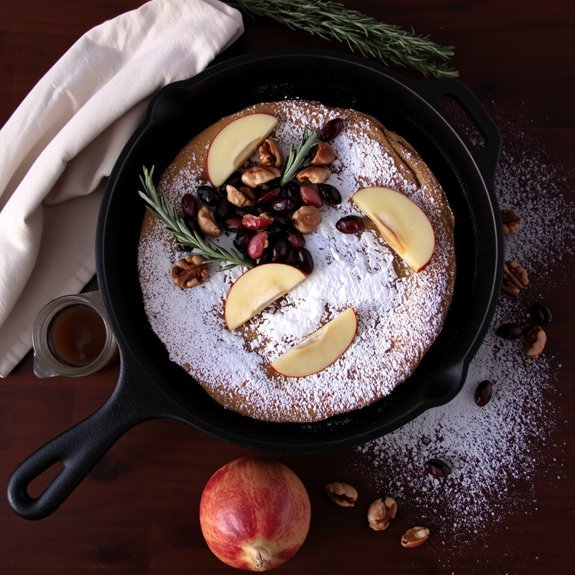
    You’ve set the table to look like a tiny holiday, now let’s make the food match the fanfare. You want quick, impressive one-dish brunches that feel luxe, not lazy. I’ll toss you easy ideas: a skillet frittata studded with roasted peppers and sage, a cinnamon-apple baked French toast, a savory strata bubbling with Gruyère. These feed a crowd, cut stress, and scream holiday brunch without the fuss. Focus on dish presentation — fresh herbs, a scatter of pomegranate arils, a drizzle of warm maple — small touches that make guests gasp. You plate from the pan, slice with confidence, hand around steaming plates, watch smiles. I promise, less effort here equals bigger cheer, and you’ll take the credit.

    Kid‑Friendly Morning Treats and Activities

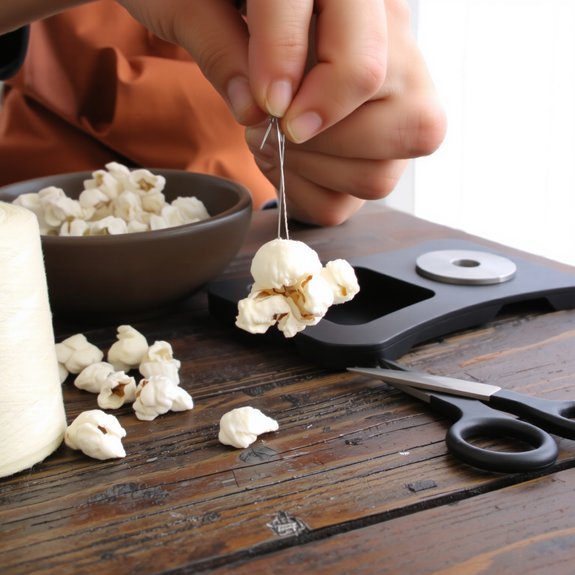
    Since kids run on sugar and spectacle, I plan for both—easy treats that look like magic but taste like home. You’ll set out mini waffles shaped like trees, drizzle warm cinnamon syrup, then sprinkle powdered sugar like fresh snow. You’ll let them top with berry “ornaments,” marshmallow stars, and a kiss of orange zest. While syrup cools, you’ll lead quick Christmas crafts, simple garland and reindeer headbands, scissors supervised, glitter contained (mostly). Toss in two holiday games—minute-to-win-it ornament toss and jingle-bell freeze dance—and watch the chaos become tradition. You’ll laugh, lose a mitten, score a crown. Keep plates small, colors bright, coffee close. You’ll make memories without burning the house down, which counts as a win.

    Savory Classics With a Holiday Twist

    Okay, time for the grown-up part of the table — savory classics with a holiday twist. You’ll start with crisp, golden hash brown nests, sprinkle rosemary and orange zest, nestle a soft-poached egg, and call it festive genius. I’ll show you how to turn a plain egg casserole into something that smells like winter and tastes like a hug: sharp cheddar, caramelized onions, sage, a splash of cream, bake until it puffs and browns. You plate with parsley, grind pepper like you mean it, and watch sleepy relatives wake up. Swap in smoked salmon or maple-glazed bacon for surprise cheer. Keep it simple early, impressive mid-morning, and leave room for coffee, conversation, and applause.

    Sweet Bakes That Fill the House With Holiday Aroma

    You’ll want to start with a cinnamon roll pull-apart, that sticky, gooey center making everyone orbit the pan like moths to a flame. Then toss an orange-glazed Bundt on the table, its citrus perfume cutting through the sugar haze and making you feel like a very competent holiday person for approximately five glorious minutes. Finish with spiced cranberry scones—crisp edges, tart bursts, and enough warm spice that you’ll forgive my obvious bias toward carbs.

    Cinnamon Roll Pull-Apart

    There’s nothing like waking the house with cinnamon steam and sticky fingers—trust me, I’ve ruined more shirts than I care to admit—so I make a pull-apart cinnamon roll when I want everyone up and smiling. You’ll cut soft dough into chunks, toss them in butter and brown sugar, then stack and bake until the crust blisters and the kitchen smells like holiday magic. Try cinnamon roll variations—brown sugar pecan, apple-cinnamon, or a cardamom twist—to keep things lively, and dab holiday icing options on hot peaks: cream cheese, maple glaze, or a citrus drizzle. Pull apart with your hands, hands sticky and warm, everyone laughing, tearing pieces, napkins useless; that’s breakfast victory.

    Orange-Glazed Bundt

    One bundt pan, a pile of oranges, and your oven set to “smell like Christmas” is basically all you need to turn an ordinary morning into a tiny celebration. You whisk batter, fold in orange zest, and think you’re just baking—until the house fills with citrus and butter, and you suddenly feel like a wizard. You tap the cake, it springs back, you grin, you’re smug for a minute. You flip it out, drizzle the warm holiday glaze, watch it run into the ridges like molten joy. Slice thick, steam curls, fork meets cake, everyone oohs. You take credit, blame the oven later. It’s simple, bright, and oddly sophisticated, perfect for cozy chaos and zero pretension.

    Spiced Cranberry Scones

    Three generous hands of flour, a pinch of cardamom, and a bowl of ruby cranberries are all it takes to make your kitchen smell like a Christmas postcard. You’ll cut cold butter into the flour, fingers quick, thinking of flaky layers. Fold in sugar, zest, and those berries, each pop of cranberry flavors promising tang against sweet. I tell you, don’t overwork the dough, or you’ll lose that tender crumb — been there, regretted it. Shape triangles, brush with cream, sprinkle raw sugar. Bake until golden, steam escaping like holiday gossip. Try scone variations with orange glaze or white chocolate, switch spices, make them yours. Serve warm, butter melting, everyone quiets down — success, at last.

    Beverage Bar: Hot Chocolate, Coffee, and Seasonal Drinks

    I’ll show you how to set up a cozy beverage bar that makes guests ooh and ahh, without turning your kitchen into a caffeine chaos zone. Start with a DIY hot chocolate station—marshmallows, peppermint sticks, and a pot of silky cocoa—then add coffee bar essentials like a grinder, good beans, milk frother, and clear labels so no one grabs decaf by mistake. Toss in a couple festive seasonal drinks, think spiced cider and cranberry spritz, and watch everyone circle back for seconds while you pretend you meant to be that impressive.

    DIY Hot Chocolate Station

    If you want your kitchen to smell like a hug, set up a DIY hot chocolate station and watch the crowd gather—trust me, marshmallows are a social glue. I tell you, start with a big pot of cocoa, dark and glossy, simmering gently. Line up hot chocolate toppings in jars—cinnamon sticks, crushed candy cane, cocoa nibs, whipped cream—and label them like a tiny bistro. Grab festive mugs, mismatched is charming, warm them with hot water first. Let guests build: a ladle, a swirl, a sprinkle, a taste test and a compliment (you’ll blush). Add spoons, napkins, little tongs. Play holiday music low, light a candle. Sit back, watch smiles grow, accept praise with mock modesty.

    Coffee Bar Essentials

    Hot chocolate was the social glue, but coffee is the practical handshake — strong, warm, and slightly smug when it wakes everyone up. You’ll set a coffee bar, clear and confident, with grinders, filters, and a kettle that sings. I nudge you toward thoughtful coffee bean selection, dark for punch, medium for comfort, decaf for the cautious aunt. Lay out syrups, cream, and spices, but don’t overcomplicate it. Label jars, stack spoons, and show people how to tamp like a pro — or at least pretend. Encourage mug personalization: sharpie names, tiny ornaments tied to handles, mismatched heirlooms that tell stories. Invite one-line orders, tease the picky relative, hand over a steaming cup, and watch sleepy faces turn grateful.

    Festive Seasonal Drinks

    Who doesn’t love a drink that smells like holiday nostalgia and slaps you awake at the same time? I set up a beverage bar that sings to every mood: hot chocolate with melted marshmallows, bold coffee, and bright seasonal drinks that wink at you. You’ll want options, and yes, you’ll brag about them.

    1. Peppermint hot chocolate — steam, cocoa, crushed candy cane rim, and a cheeky dollop of cream.
    2. Spiced coffee — cinnamon stick stirrer, nutmeg dust, and a whisper of orange peel.
    3. Holiday mocktails — cranberry fizz, rosemary sprig, tart and festive, zero-proof cheer.
    4. Festive smoothies — banana, pear, ginger, honey, chilled and silky, garnished with toasted oats.

    Make a pitcher, arrange cups, let guests mix, laugh, repeat.

    Time‑Saving Prep and Serving Tips

    Because mornings on Christmas already come with too many expectations, I’ll show you tricks that actually save time and keep everyone smiling. You can prep big, comforting dishes the night before: make ahead casseroles baked in disposable pans, cooled, wrapped, then popped in the oven while you sip coffee. Build a breakfast charcuterie board with cured ham, cheeses, fruit, nuts, and mini jams — it looks luxe, needs no last-minute fuss, and invites grazing while hugs and present-opening happen.

    Set a coffee station, label cups, and pre-fill pitchers with juice. Use warming trays, slow cookers, and toothpick-ready skewers. Tell guests to serve themselves, you’ll take the applause, and maybe just one dish to rinse.

    Dietary Accommodations Without Sacrificing Flavor

    If you want everyone at your table to leave humming instead of grimacing, plan for dietary needs like they’re VIP guests — because they are, even if Uncle Rob insists he’s “fine” (he’s not). You can keep flavor bold, textures varied, and nerves calm. I’ll show you simple swaps that taste like celebration, not compromise.

    1. Offer gluten free pancakes, made fluffy with a mix of rice and oat flours, topped with warm berry compote and a pat of vegan butter.
    2. Blend dairy free smoothies, rich with frozen banana, cocoa, and almond butter, for creamy sips that don’t scream “substitute.”
    3. Serve a savory frittata with dairy-free cheese options, herbs, and crisped edges.
    4. Label dishes clearly, with enthusiasm, not guilt.

    Small Traditions to Make the Morning Memorable

    Pick a special menu—something that smells like cinnamon and nostalgia—and tell everyone it’s “chef’s choice” so you can sneak in a secret favorite. Prep what you can the night before; pancakes batter in the fridge, cut fruit on a tray, coffee set to gurgle, and you’ll thank me when you’re half-asleep but still triumphant. Then tuck in little festive surprises—napkin ribbons, a silly note, a tiny ornament—so the morning feels like a gift without requiring you to perform holiday miracles.

    Set a Special Menu

    When I say “set a special menu,” I mean deliberately choose a handful of dishes that’ll make the morning feel important, not frantic; you’ll want smells that pull people out of bed, colors that photograph well, and textures that actually satisfy. I pick two signature dishes and a couple holiday favorites, then build around them so nothing fights for attention. You want a balance: sweet, savory, crunchy, silky. Keep portions reasonable; you’re feeding joy, not a buffet line.

    1. Cinnamon-butter French toast, golden, syrup-ready.
    2. Herbed egg casserole, fluffy, sliceable, crowd-pleasing.
    3. Roasted citrus salad, bright, palate-clean.
    4. Warm cardamom buns, sticky, aromatic.

    Tell everyone what’s coming, then deliver with a grin.

    Prep the Night Before

    Great menu—now let’s make it effortless. You’ll prep tonight, so morning feels like a gift. I line up jars of overnight oats, stir in cinnamon, orange zest, a splash of vanilla, then tuck them in the fridge; they look prettier than I deserve. Chop fruit, toast nuts, label bowls. Slide a preassembled holiday casserole into the fridge, cover it tight, and write baking time on a sticky note — trust me, you’ll thank me. Set coffee grounds, mugs, and syrup by the kettle, arrange plates, and hide the good spatula so it doesn’t walk off. Put a playlist on cue, dim a lamp, and breathe. In the morning, you’ll pop, bake, and smile — minimal chaos, maximum cozy.

    Little Festive Surprises

    If you want the morning to feel like a tiny holiday, tuck a few deliberate surprises into the routine—because nothing says “we remembered” like a bite of unexpected joy. I love slipping small, festive surprises into breakfast, you’ll grin when someone finds them. Think sensory pop, scent, crunch.

    1. Hide a cinnamon stick in mugs, it steams, smells like grandma’s kitchen.
    2. Wrap a mini pastry in paper, warm, buttery, labeled “open me” with a joke.
    3. Tuck a paper fortune in pancakes, crispy edges, syrup gleaming, silly prophecies.
    4. Place a tiny ornament on each plate, catch the light, chiming, then snackable chocolate.

    These holiday treats make moments. You’ll make memories, not just eat.

    Conclusion

    You’ll wake them with smells first — cinnamon, butter, hot coffee — and they’ll forgive you anything. Set the table, stash the casserole in the oven, cue the playlist, and breathe. Kids will demand waffles, teens will sneak cookies, you’ll pretend not to notice. Keep a warm drink handy, a silly tradition ready, and one perfect, tiny surprise. Do this, and the morning will feel like magic — but only if you don’t blink.

  • How Do I Host a Virtual Holiday Party

    How Do I Host a Virtual Holiday Party

    Most people don’t know that muted chaos sounds worse than live chaos on camera, so you’ll actually want a plan before you click invite. You’ll pick a platform, test cameras and microphones, and sketch a short agenda that keeps things moving—think cozy icebreaker, a silly game, then dessert-time show-and-tell—so folks don’t freeze in awkward silence. I’ll walk you through quick tech fixes and festive extras that make your party feel intentional, not desperate.

    Key Takeaways

    • Choose a platform (Zoom, Google Meet, Gather) based on breakout, simplicity, and guest tech comfort.
    • Set a clear agenda with theme, time limits, icebreakers, and a designated timekeeper.
    • Test camera, mic, internet, and have a backup device and link ready.
    • Plan interactive activities (trivia, scavenger hunt, breakouts, sing-along) to keep energy high.
    • Coordinate food/gifts ahead (menus, delivery, price cap) and schedule a live unboxing or toast.

    Choosing the Right Platform and Tech Setup

    choose platform test tech

    Alright—let’s get the boring but essential stuff out of the way. You’ll pick a platform after quick platform comparisons: Zoom’s reliable, great for breakout rooms; Google Meet is simple, no downloads; Gather adds playful spaces, but needs more setup. Check tech requirements before you commit, you don’t want a surprise buffering scream. Test your camera, mic, and internet speed—stand under warm light, listen for echoes, tap the mute button like a pro. I’ll say it: wired Ethernet beats flaky Wi‑Fi, every time. Have a backup device ready, and keep the link obvious, pasted in chat and calendar. I’ll poke fun at my own last-minute chaos, but you’ll be calm, click, and adored.

    Crafting a Festive Agenda and Guest List

    cozy themed party planning

    How do you make a party feel like a party when everyone’s in pajamas and pixels? I’m blunt: you plan like a pro, but keep it cozy. Pick creative themes that spark smiles, set a tone, and prune the guest list so conversation flows. You want guest engagement, not crickets.

    Plan like a pro, keep it cozy: pick a playful theme, trim the guest list, and spark real conversation.

    1. Start with a theme, announce it early, add a sensory prompt (smell, sound, snack).
    2. Limit length, stagger arrivals, assign a conversational icebreaker.
    3. Group guests by connection, mix coworkers with friends, avoid awkward exes.
    4. Name a timekeeper, outline segments, leave room for casual hangout.

    I narrate, I nudge, you execute. Small details — a playlist cue, a toast line — make pixels feel warm and real.

    Virtual Games, Activities, and Entertainment

    virtual party games fun

    Games are your party’s heartbeat, so pick beats that get people tapping—even if it’s just their mute buttons. You’ll kick off with virtual trivia, I’ll host, you’ll shout answers into your webcam like it’s a game show, and laughter will ricochet through headphones. Mix short rounds with lightning questions, keep score with emojis, reward weird facts. Slide into a holiday scavenger, send people racing through kitchens and closets, palms thudding on wood as they fetch ornaments or candy canes. Throw in breakouts for charades, use reactions for applause, cue a playlist that smells like gingerbread and pine. Keep rules crisp, timers loud, and don’t be precious — goofy wins. End with a sing-along, off-key and glorious.

    Coordinating Food, Drinks, and Gift Exchanges

    If you want your virtual party to feel like a real get-together instead of a sad slideshow of frozen smiles, you’ve got to plan the eats, the drinks, and the gift chaos like a kindly tyrant — I’ll show you how. You’ll coordinate food delivery, swap drink recipes, and set clear gift themes so everyone knows the vibe. Ask about dietary preferences up front, then match menus and surprise boxes.

    1. Send a curated menu link and local food delivery options.
    2. Share two easy drink recipes, one boozy, one mocktail.
    3. Pick a gift theme, price cap, and delivery deadline.
    4. Run a live unboxing order, call names, cheer, reroute mistaken packages.

    You’ll orchestrate warmth, clink virtual glasses, and laugh when the cat steals a present.

    Troubleshooting Common Technical Issues

    Because you’re not hosting in a living room, you’ll need a battle plan for when technology stage-whispers “nope” at the worst possible moment. I tell you what to do: test audio issues before guests arrive, tap mute buttons, and wiggle your headset like a veteran electrician. If video glitches, switch cameras, lower resolution, or freeze your face dramatically for comic effect. For connection drops, have a phone hotspot ready, move closer to the router, or declare a snack break while you reboot—people forgive interruptions. Practice screen sharing once, twice, out loud, so your slides don’t become a pixelated mystery. Keep instructions short, calm, and cheerful. You’ll handle it, you’ll laugh, and the party will keep going.

    Conclusion

    You’ve got this. I’ll say it plain: virtual parties work — 82% of remote workers say virtual gatherings boost team morale, so you’re not wasting anyone’s time. Set the scene: soft lights, a mug that smells like cinnamon, playlists cued. Run a tight agenda, toss in one goofy game, and send snacks ahead. If tech hiccups, laugh, reboot, keep the snacks coming. I’ll be here cheering, popcorn in hand.

  • How Do I String Popcorn Garland

    How Do I String Popcorn Garland

    You’ll want to start with fresh, crisp popcorn—none of that stale stuff—and a big-eyed needle threaded with strong thread or fishing line, because you’re not here for string breakage or sad, crumbling kernels. I’ll show you how to pierce each kernel near its center, slide them snug, add cranberries for color, and finish with neat knots so your garland hangs pretty and doesn’t fall apart mid-party. Stick around; the trick that saves hours is worth it.

    Key Takeaways

    • Choose fresh, fully popped, cooled popcorn and optionally dry it briefly in a low oven to reduce crumbling.
    • Use strong thread, fishing line, or thin twine and a long needle or skewer sized for the kernel holes.
    • Knot the thread end, pierce each kernel near the center, and slide kernels snugly while keeping the strand taut.
    • Space kernels evenly for desired density, and alternate with cranberries or ornaments for durability and visual interest.
    • Store garlands loosely in acid-free tissue in a cool, dry, rodent-free box and handle gently to prevent breakage.

    Materials You’ll Need

    popcorn garland crafting essentials

    Okay, here’s what you’ll need to get started: plain popcorn (the old-school kind you can salt and butter later), strong thread or fishing line that won’t snap when you’re yakking and hanging garlands, a long needle with a big eye or a popcorn skewer, scissors, and a bowl for catching stray kernels — plus a comfy chair and a mug of something warm because you’re going to be sitting awhile. I’ll tell you what I always grab. You’ll want to sort popcorn types by size and crunch, keep extra for snacking, and decide garland lengths before you start so you don’t end up retying like a klutz. Have a trash bowl, good lighting, and patience; your arms will thank you.

    Choosing and Popping Popcorn

    perfectly fluffy popcorn popping

    You’ll want big, fresh kernels that pop fluffy, not those sad little rocks that whisper instead of shout. I show you how to test a bag, then we’ll use a simple stovetop trick so the popcorn pops evenly, with few unpopped kernels and none of that scorched smell. Stick with me, you’ll hear the rhythm, smell the butter-sweet steam, and actually enjoy the prep as much as the garland.

    Kernel Selection Tips

    If you want perfect, crackly popcorn for your garland, start with the kernels — not the microwave bag you’re tempted to grab at midnight. Pick a pack by reading labels, feel free to be picky. I like to compare kernel varieties, listen for firm, dense seeds that promise big white clouds. You’ll notice aroma even before popping, earthy, slightly sweet. Think about flavor profiles: classic, buttery, or nutty hulls that add character. Buy a small bag to test, because waste is my least favorite word. Store kernels in a cool, dark jar, shake them occasionally like you mean it. When you pop, do it with confidence, don’t baby them. Keep some spare kernels — because yes, you’ll snack while you work.

    Even Popping Methods

    Because even popping starts with choices, I walk you through the bits that actually make a difference—kernel type, heat source, and that little dance you do with the pot. You pick large, fresh kernels for big, fluffy beads; stale ones sulk and half-pop. For stovetop, heat oil until it shivers, add kernels, shake like you mean it, listen for the rhythm—pop, pause, stop. If you prefer microwave popping, use a brown-paper bag or a safe bowl, watch for that furious burst then calm; don’t wander off. Air popping gives super-clean, lightweight popcorn that strings neatly, though it pops faster, so be ready. Test a handful, adjust temperature, practice the tilt-and-toss; you’ll learn the cadence, I promise.

    Preparing Popcorn to Prevent Crumbling

    fresh popcorn cool completely

    You’ll want only fresh, fully popped kernels—those sad half-pops will shatter your garland like soggy confetti. Let the popcorn cool completely on a sheet, fingers tested, steam gone, and if it still feels a bit soft, give it a quick, low toast or a few minutes in a warm oven to dry it out. Trust me, a little patience here saves you from picking crumbs off the tree and cursing the cat later.

    Use Fresh, Fully Popped Kernels

    When the popcorn’s still warm and crackling, you’re in the sweet spot — the kernels are fluffy, fragrant, and ready to be strung without shedding half their life story onto your table. You want fresh kernels, not one-season survivors from the back of the pantry. I raid the store for plump bags, inspect dates, and avoid that stale, dented look like it offended me personally. Use reliable popping techniques — stovetop with oil, an air popper, or a trusted microwave method — and listen: good pops sound like light rain, not timid coughs. Fully popped pieces hold together when you pierce them, they smell buttery and alive, and they make stringing fast, clean, and oddly satisfying. Trust me, it shows.

    Cool Completely Before Handling

    If you’re impatient like me, fighting the urge to start stringing right out of the pot, stop — let it cool. You’ll hear me grumble, but cooling matters: hot popcorn crushes, sheds crumbs, and turns your garland into a sad confetti heap. Spread kernels on a tray, fan or open-window the room, or gently stir them as they sit; these simple cooling methods cut steam fast and keep texture. Use handling precautions — don’t pile warm popcorn, don’t press down, and give your fingers a break; a few minutes makes a world of difference. I poke one kernel to test, like a chef with attitude. Then, when it’s truly cool, you string with confidence, not desperation.

    Lightly Toast or Dry Out

    One simple trick will save you hours of crumb-hunting later: toast or dry the popcorn first. I like to set a single layer on a baking sheet, give it a quick 5–8 minute tumble in a 250°F oven, and watch the steam vanish, that faint nutty scent sneaking up—golden, not burnt. You can also use a low, dry skillet, shaking constantly, it’s cozy and oddly satisfying. Those toasting methods firm up kernels, cut fluff, and stop pieces from shedding like polite dandruff. Or leave them overnight on a rack, airy and crisp; those drying techniques are hands-off and reliable. You’ll handle the garland with confidence, threads gliding through steady, dry popcorn, fewer breaks, less swearing. Trust me, your tree will thank you.

    Selecting Thread, Twine, and Needles

    Because you’ve got a handful of popcorn and a deadline before the butter gets cold, choosing the right thread and needle matters more than you’d think—I’ve learned that the hard way, with a tangled mess and a heroic trash can moment. You’ll want to know thread types, cotton versus nylon, and even fishing line for strength and invisibility, so pick based on look and durability. For twine, go simple: natural jute adds rustic charm, thin baker’s twine keeps it light. Needle sizes matter too, use a long, blunt tapestry needle for whole kernels, switch to a smaller darning needle for tiny holes or delicate pieces. Test a scrap, feel the pull, listen for the snap, and adjust.

    Step-by-Step Stringing Technique

    Alright, grab your bowl of popcorn and your chosen thread — you’ve already picked wisely, I trust — because we’re about to start threading like we mean it. First, knot the end of your thread, leave a tail, then pierce each kernel near the center, gentle but decisive, you don’t want shredded popcorn. I like to hold the strand taut, letting kernels slide snugly together; it feels satisfying, like stacking tiny white pillows. Space is up to you — tight for dense garlands, looser for a breezy look. When you hit a snag, don’t panic, breathe, rethread slowly. Alternate angles to avoid splits. Finish with a double knot, trim the tail, hang and admire your handiwork. These stringing techniques make festive decorations look effortless.

    Adding Cranberries and Other Accents

    Color pops help. I want you to tuck bright cranberry colors between popcorn knots, they zing against white, they smell faintly tart and look like tiny ornaments. Thread a cranberry, then a few popcorns, then a bead; rhythm matters, you’ll find a groove.

    • Use fresh cranberries for punch, or plastic for longevity.
    • Add small wooden beads for texture, or metallic bells for jingle.
    • Alternate colors and sizes, keep spacing playful.

    You’ll pierce each cranberry with the needle, feel a little give, maybe a squish—don’t panic, that’s normal. Lean into festive accents—sprigs of rosemary, tiny bows—place them sparingly, it’s art, not a thrift store. I cheer you on, you’ll make something charming, slightly imperfect, and utterly yours.

    Tips for Handling and Storage

    You’ve got your garland strung with popcorn, cranberries, beads—looks like holiday confetti and a tiny parade. Now, you’ll want storage tips so it survives until next year. First, handle it like a fragile parade float: lift by the thread, don’t yank. I tuck lengths into acid-free tissue, coil loosely, and tuck ends so berries don’t stab the popcorn. For handling techniques, use soft gloves or clean hands, whispering “be gentle” like a dramatic stagehand. Label boxes with contents and date, because memory fades faster than glue. Keep it cool, dry, rodent-free —basement humidity and curious mice are villains. When you unpack, let it breathe at room temperature before displaying. Trust me, these tiny moves save a lot of sad, crumbled garland.

    Display and Decorating Ideas

    Think of your popcorn-and-cranberry garland as wearable art for the house — lightweight, cheerful, and slightly mischievous. You’ll drape it, loop it, and prod guests into compliments. For holiday themes, mix ribbon, tiny ornaments, or sprigs of greenery to shift mood fast; you’ll turn a mantel into a stage. Use tension, not tape, so strands swing, not sag. For festive displays, try unexpected spots, they surprise: curtain rods, stair spindles, lampshades. I’ll confess, I once hung one from a chandelier — graceful chaos, worth it.

    Think of popcorn-and-cranberry garlands as playful, wearable house art — drape, loop, and surprise in unexpected spots.

    • Drape across bookshelves, tuck ends behind paperbacks for stealth.
    • Wrap banisters in spirals, step back, admire the curve.
    • Crown door frames, leave crumbs of color, invite smiles.

    Conclusion

    You’re the captain now, threading kernels like tiny boats on a skinny rope, and I’m your amused first mate watching you steer. You’ll taste the toasty salt in the air, feel the cool pop of popcorn under the needle, and laugh when a stubborn kernel rebels. Keep the line taut, keep your hands steady, and don’t take yourself too seriously. When the garland hangs, you’ll have made a small, edible constellation—proud, imperfect, yours.