Blog

  • How Do I Decorate a Small Apartment for Christmas

    How Do I Decorate a Small Apartment for Christmas

    You’ll think your tiny apartment can barely hold a cactus, let alone Christmas — and you’d be wrong, gloriously wrong. I’ll show you how to pick a slim tree, drape fairy lights so the room seems twice as big, and hang a wreath that doubles as wall art and a snack rack for guests, all without tripping over tinsel at midnight. Keep a simple color story, stash ornaments in labeled boxes, and by the time you’re done, it’ll feel festive and sensible — but there’s one trick I save for last.

    Key Takeaways

    • Choose a compact tree or alternative (pencil tree, tabletop spruce, wall-mounted branch) and place it in a corner or on a shelf.
    • Use layered warm lighting—string lights, lamps, and candles—to create depth and cozy ambience without crowding surfaces.
    • Decorate vertically with wreaths, garlands, and hanging ornaments to add cheer without sacrificing floor space.
    • Stick to a tight color palette (two main tones plus one accent) and mix standout ornaments with repeated smaller pieces.
    • Plan for easy packdown: use clear bins, photo inventory, and roll garlands to save space and protect decorations.

    Choosing a Compact Tree and Smart Placement

    compact trees smart placements

    If you’re tight on floor space but craving that pine-scented holiday vibe, don’t panic—I’ve got you. You’ll want a compact tree that still smells like Christmas, so pick a slim pencil tree or a tabletop spruce, and plop it where it won’t trip anyone. I like corner nooks, window sills, and the top of a bookcase—those spots feel intentional, not shoved. Consider tree alternatives too: a wall-mounted branch with ornaments, a ladder draped in garland, or stacked crates with mini evergreens. These space saving options let you get festive without losing a couch cushion. Lightly fluff branches, add a few tactile ornaments, and step back—if it makes you smile, it’s perfect.

    Lighting Tricks to Expand Space and Ambience

    layered lighting for ambiance

    While cozy sweaters and tiny trees do half the work, lighting is the secret stage crew that makes your apartment feel twice as big and ten times more magical. I want you to layer light like a pro: string lights tucked into shelves, wound along curtain rods, draped behind a sofa. Warm bulbs, not harsh LEDs, give depth, they hug corners and erase boxy edges. Bounce illumination off reflective surfaces — mirrors, metallic trays, even glossy framed art — to double glow, trick the eye, and add sparkle without clutter. Put a dimmer on a lamp, or use battery candles for safe flicker. Talk to your space, tweak angles, step back. You’ll get atmosphere, warmth, and a little holiday theater.

    Multi-Use and Vertical Decorations

    vertical and multipurpose decorations

    Think vertical: you’re not just decorating a floor plan, you’re dressing the walls and air above your head, and yes, that includes the boring blank space you’ve been pretending not to see. I’ll confess, I used to cram everything on tables, then I discovered hanging wreaths on hooks, door frames, even over shelves — instant cheer, zero floor drama. Add wall garlands, draped low across a mirror or high along a shelf, they give texture and guide the eye up, making ceilings feel taller. Use multipurpose pieces: a ladder with lights, scarves, and tiny ornaments; a pegboard for mittens and greenery. Touch, smell, and soft light matter — pine needles, a warm bulb, the clink of a tiny bell — cozy achieved.

    A Cohesive Color Palette and Minimal Ornamentation

    Because your tiny space already politely begs for restraint, I pick a tight color scheme first — two main tones and one accent — and everything else follows like obedient holiday carolers. You’ll choose a warm base, like cream or charcoal, then add a second tone for depth, say forest green or soft gold, and a bright accent, maybe cranberry or copper. I guide you to test swatches against light, feel textures, and hold ornaments up to see how they sing together. This is about color harmony, not matching like twins. Aim for ornament balance: a few standout pieces, then smaller, repeated items to echo them. Keep surfaces airy, layer soft lights, and let scent and texture finish the scene—pine, wool, a hint of cinnamon.

    Storage and Easy-Packdown Strategies

    If you want to enjoy your tree without drowning in boxes come January, you’ve got to plan the exit as carefully as you planned the entrance — and yes, that’s my firm rule. I tell you this while stuffing strings of lights into a labelled bin, fingers sticky with pine sap, muttering that I’m not a hoarder, just committed. Use decorative storage—clear boxes, fabric bins with lids, ribbon-tied ornament pouches—and tuck them under the bed or sofa, where they’re out of sight but ready. For seasonal organization, make a simple inventory list on your phone, snap photos of ornament layouts, and roll garlands gently to avoid kinks. When you pack, talk to yourself like a coach: fold, stack, breathe. Done.

    Conclusion

    You’ve nailed neat, nook-friendly Noel style: pick a pencil tree, perch it proudly, string warm lights so the room glows like cocoa, hang a garland up high, and stash spare baubles in labeled boxes. I’ll be blunt: less stuff, more sparkle. You’ll save space, sanity, and storage headaches. Play with pockets of light, layer textures, and keep your palette pared. Cozy, clever, compact — holiday home, handled.

  • How Do I Create a Christmas Budget

    How Do I Create a Christmas Budget

    You want a cheerful holiday without the post-party regret, and I’ll show you how to get there without turning your wallet into confetti. Start by picking a firm total you can live with, split it into gifts, food, travel and “oops” money, then rank who really needs something and who can get a card. I’ll walk you through price caps, clever swaps, and a tracking system that actually works — but first, pick your number and don’t panic.

    Key Takeaways

    • Set a firm total holiday spending limit tied to your financial goals and write it down on your phone for commitment.
    • Break the total into categories (gifts, food, travel, wrapping, charity) and assign a dollar amount to each.
    • Rank recipients by closeness and set per-person price caps, allowing room for one or two special splurges.
    • Plan meals, parties, and travel in advance, assign dishes or compare transport options to minimize costs.
    • Track every purchase daily, adjust category allocations as needed, and keep receipts to avoid overspending.

    Set an Overall Holiday Spending Limit

    set holiday spending limit

    Okay — let’s pick a number. You’ll start by deciding a firm total for holiday expenses, that round, honest figure that makes your stomach flutter and your planner breathe easier; I’ll whisper suggestions, you’ll nod, we’ll both win. Imagine laying bills on the table, paper rustling, coffee steam curling, and saying, “This is it.” Tie that number to your financial goals — debt reduction, savings, or a guilt-free splurge — and let it steer choices. Write the limit down, lock it in your phone, and announce it aloud like a quirky campaign slogan. If you wobble, revisit priorities, trim wants, boost small joys, and remember: you control the list, not the commercials.

    Break the Budget Into Categories

    budgeting for holiday gifts

    Sooner rather than later, you’ll want to chop that big, scary total into bite-sized pieces, and I’ll show you how — think of it like carving a roast, but with receipts and glitter. Start by listing gift categories: family, friends, coworkers, teachers, charity, wrapping, and holiday meals. Say each one out loud, tap the table, make it real. Assign a rough budget allocation to each category, based on who gets what and how much joy you expect. I’ll admit, this feels bureaucratic and slightly magical. Use cash envelopes or separate spreadsheet columns, label them, and hear the satisfying thunk when you close a category. Adjust as you shop, trim where you must, and celebrate small victories with one tiny, well-earned peppermint.

    Prioritize Gifts and Recipients

    prioritize gifts by recipients

    Now that your categories are sitting in neat little envelopes or spreadsheet cells, it’s time to decide who actually gets the good stuff. You scan your recipient list like a general planning a snack raid: parents, kids, coworkers, that neighbor who borrows sugar. Use simple gift prioritization—rank by closeness, obligation, and joy delivered. I tell you to be ruthless, in a warm way. Touch each name, imagine unwrapping, hear the crinkle. If someone sparks a grin, bump them up. If they’ll do fine with a card, downgrade. Set limits per tier, write price caps next to names, then total it. You’ll save money, stress, and dignity. Also, you’ll still get to splurge on that one delightfully ridiculous present.

    Plan for Food, Parties, and Travel Costs

    When you add food, parties, and travel into a Christmas budget, the numbers start to smell like cinnamon and stale airport coffee, and you can’t just wing it. You’ll map meals first, list staples for grocery shopping, and chunk costs per person, because surprise side dishes kill budgets. For party planning, pick a theme, set a guest cap, and assign dishes — potluck saves cash, and someone will always bring the jelly. For travel, compare drives, trains, and cheap flights, factor luggage fees, and pencil in buffer cash for delays. I’ll poke at receipts, haggle with vendors, and pack snacks so you don’t blow money on snack-bar regret. Simple steps, less stress, and you actually enjoy the holiday.

    Track Spending and Adjust as Needed

    If you want to keep your Christmas budget from mutating into a glitter-covered horror show, you’ve got to track every cent like it’s a suspicious elf, and yes, I mean every latte and leftover candy-cane receipt. You’ll keep spending logs, you’ll glance daily, you’ll spot leaks before they become tidal waves. I talk to my list like it’s a tiny, judgmental accountant.

    • Record purchases immediately, phone app or notebook, don’t wait.
    • Categorize each line: gifts, food, travel, misc.
    • Compare actuals to estimates every 3–5 days.
    • Make quick budget revisions when patterns pop up, cut one nonessential.
    • Keep receipts handy, photograph faded ones, and celebrate small wins.

    You’ll stay calm, smug, and in charge.

    Use Saving Strategies and Smart Shopping

    I’ll tell you the short plan: start a gift savings jar or automatic transfer, watch it grow like a slow-but-satisfying snowball, and pat yourself on the back. Hunt deals and clip coupons, snag generics when the label looks the same, and buy bulk basics—think wrapping tape and pantry staples—to cut surprise costs. You’ll feel smarter at checkout, lighter in January, and a tiny bit smug, which is absolutely allowed.

    Start Gift Savings Plan

    Because your future gift-haul shouldn’t come as a panicked sprint through a crowded mall, let’s make a plan that actually feels doable and maybe even a little fun. You’ll stash cash regularly, watch it grow, and feel smug sipping cocoa while others scramble. Gift savings and holiday planning start with small, steady moves. I’ll show you how to make it painless, even enjoyable.

    • Open a separate “gifts” savings account, automate transfers each payday.
    • Set target amounts per person, write them down, stick a sticker on the jar.
    • Use a calendar, map out buying dates, avoid last-minute chaos.
    • Round up purchases or save spare change, treat it like found money.
    • Review and adjust monthly, celebrate milestones with a tiny reward.

    Shop Deals and Coupons

    You’ve been squirreling away cash and ticking names off your list, now let’s make that money stretch—like, elastic-band-around-a-bunch-of-gifts stretch. Hit apps and store sites, smell virtual sale banners, compare prices fast. I’ll show you coupon stacking tricks that turn a ten-dollar voucher into a twenty-dollar win, yes really. Clip manufacturer coupons, add store codes, and watch totals sag. Scan for holiday promotions, join email lists, and set alerts — you’ll get early access, flash deals, and that sweet checkout thrill. Keep a running list, timestamp bargains, and don’t buy on FOMO. If a price drops, ask for an adjustment, be polite, be persistent. You’ll shop smarter, laugh at your old impulse buys, and keep more cash for cocoa.

    Buy Generic, Bulk Items

    When you swap brand-name bravado for the generic aisle, your wallet breathes out a long, grateful sigh—like someone finally opening a window after holiday cookie fumes. You’ll find generic products that look the same, taste close enough, and cost way less. I nudge you toward bulk purchasing for items you actually use—wrap, batteries, napkins—because buying once, not twice, feels glorious.

    • Buy gift wrap rolls in bulk, stash in a closet.
    • Choose store-brand batteries, label with sharpie.
    • Grab snack packs for stockings, freeze extras.
    • Pick generic candles and soaps, they scent the room.
    • Shop bulk toiletries, split costs with friends.

    You’ll save money, time, and holiday stress. Trust me, your future self will thank you.

    Conclusion

    You’ve got this—you’ll set a spending limit, slice it into categories, and crown top gift recipients like a boss. I’ll cheer you on as you nab deals, stash receipts, and pivot when plans wobble. Picture jingling coins turning into warm dinners and surprised faces, smell the cinnamon, feel the paper tape. Keep tweaking, celebrate small wins, and don’t beat yourself up. Budgeting’s not a prison, it’s your ticket to a calm, merry season.

  • How Do I Make Hot Chocolate From Scratch

    How Do I Make Hot Chocolate From Scratch

    Good chocolate smells like a tiny, dangerous bakery and you’ll want some of that in your kitchen; trust me, it changes everything. You’ll warm milk, melt chopped chocolate, stir in a pinch of salt and sugar, maybe a dash of cinnamon or vanilla, and suddenly you’ve got something silky, steaming, and indulgent—no powdered mystery required. I’ll show you how to pick chocolate, get the texture right, and top it like a pro, but first, grab a whisk.

    Key Takeaways

    • Use good-quality chopped chocolate or unsweetened cocoa plus chocolate for the richest flavor.
    • Warm whole milk (and a splash of cream if desired) over medium-low heat without boiling.
    • Whisk in chopped chocolate or cocoa, a pinch of salt, and 1–2 teaspoons sugar per cup until glossy.
    • Add flavorings like vanilla, cinnamon, or a touch of maple syrup to taste and adjust sweetness.
    • Serve immediately with optional whipped cream or cocoa dust, and reheat gently if storing leftovers.

    Choosing the Right Chocolate

    choosing chocolate with care

    Pick one bar and promise me you won’t panic — chocolate choice matters, but it’s not a personality test. You’ll decide between dark chocolate or milk chocolate, and I’ll cheer you on. Taste the bar, note its chocolate origins, smell the cocoa, feel the chocolate textures under your thumb. Check cocoa content on the wrapper; higher means bolder flavor intensity, lower means sweeter, creamier notes. Scan chocolate brands, don’t overthink prestige—some small producers shine. Think pairing chocolates with spices or salt for contrast, or vanilla for comfort. Chop the bar into even pieces, so melting is flawless. I’ll admit I judge a good melt, but only because your hot chocolate will taste that much better. Now grab a knife.

    Picking Your Milk or Milk Alternative

    choosing the right milk

    One good rule: whatever milk you choose should taste as cozy as a blanket and behave like a teammate — no divas. I’ll say it plain: milk types matter. Whole milk gives you velvet, it hugs the chocolate, it’s forgiving when you overheat it. Skim is thin, efficient, not romantic. If you want plant-based, almond is light and nutty, oat feels creamy and honest, coconut sings tropical and can be bold. Try small batches, watch texture, sniff for freshness. For richer sips, consider cream alternatives like half-and-half or coconut cream, they thicken without fuss. Heat gently, whisk until glossy, taste as you go. You’ll learn which partner boosts your chocolate, which one ghosts it — trust practice, not theory.

    Sweeteners and How Much to Use

    balance sweeteners with care

    Now that you’ve settled on a milk that behaves and smells like a warm sweater, let’s talk sugar, honey, and their friends. You want balance, not a candy bar masquerading as cocoa. Start with 1–2 teaspoons of granulated sugar per cup, taste, add more if you’re a sweet-tooth rebel. Try natural sweeteners like honey or maple syrup, a teaspoon at a time, stir, taste; they add flavor, not just sweetness. If you’re watching calories or blood sugar, explore sugar alternatives—stevia, erythritol—use their package guidance, they’re potent. Remember texture: liquid sweeteners blend smoothly, crystalline ones may need extra heat to dissolve. I promise, you’ll find a ratio that hugs your tongue without slapping your palate.

    Flavor Enhancements and Spices

    Okay, you’re about to play mad scientist with your mug — I’ll walk you through spice pairings that make cinnamon, cardamom, or a pinch of cayenne sing with dark or milk chocolate, and show which sweeteners and textures (think honey-silky or marshmallow-velvet) match each mood. Try a whispered clove for cozy, or orange zest for brightness, taste as you go, and don’t be afraid to scrap a combo that tastes like childhood glue. I’ll keep it simple, smart, and slightly smug, so you end up with a cup that smells like a hug and tastes like you meant it.

    Spice Pairings Guide

    If you’re tired of plain cocoa and want your mug to sing, spices are the secret choir—warm, bold, and a little bit mischievous. You’ll start by imagining aroma, then taste; I nudge you toward spice combinations that actually work. Cinnamon and orange zest brighten, star anise lends a licorice wink, and a pinch of cayenne gives a sly kick. In winter, reach for seasonal spices like cloves and nutmeg, toasted briefly to wake oils, then whisk into steaming milk. For spring, try cardamom and a whisper of rose, lighter, floral. Toast seeds in a dry pan, grind, steep five minutes, strain, and taste. Don’t be shy, tweak boldly, laugh at mistakes — that’s how legends are made.

    Sweetener & Texture Options

    You’ve flirted with spices, now let’s talk sugar, cream, and the little cheats that make hot chocolate sing. I’ll be blunt: sweetness shapes mood. Use natural sweeteners like honey, maple, or coconut sugar for depth, they echo cocoa instead of masking it. White sugar is honest, brown sugar adds molasses warmth. For texture improvement, stir in a spoonful of condensed milk, a pat of butter, or a splash of cream — silky, glossy, richer mouthfeel. Want froth? Blend or whisk hard, or use a milk frother; you’ll look fancy, I promise. Salt is tiny but heroic. Finish with a whisper of vanilla or a dusting of cinnamon. Taste as you go, tweak, and serve immediately, steaming and smug.

    Basic Stovetop Method

    When I say this method is foolproof, I mean it—until you get cocky and burn the milk, which I have, twice. You’ll warm two cups of milk and a splash of cream in a saucepan over medium-low heat, whisking in cocoa, chopped chocolate, and a pinch of salt. Stir until glossy, taste, then sweeten. These basic techniques keep texture silky, prevent grainy cocoa, and build flavor fast. Watch for common mistakes: boiling, skipping whisking, or adding cold chocolate to hot milk. If steam curls from the pan and the aroma turns nutty, you’re winning. Pour into mugs, top with whipped cream or a dusting of cocoa, and drink before you remember to Instagram it.

    Quick Microwave Method

    Fine—stovetop mastery is lovely, but sometimes you want hot chocolate in the time it takes to find your slippers. I’ll show you a quick microwave method that’s fast, forgiving, and tastes like a hug. Pick a microwave-safe mug, mind cup selection; thicker ceramic holds heat, thin glass can spurt hot spots. Measure milk and cocoa in the cup, stir until no dry powder hides. Microwave in short bursts: 30 seconds, stir, repeat—that microwave timing prevents scalding and explosions, yes I learned that the hard way. Finish with a pinch of salt and a splash of vanilla, stir, taste. If it’s too thin, add more chocolate, not milk. Sip slow, savor the warmth, try not to grin like a child.

    Achieving a Silky, Frothy Texture

    Think of texture as the secret handshake between you and the mug—get it right and the hot chocolate feels like velvet on your tongue. You want glossy surface, tiny bubbles, no grit. Warm your milk gently, whisk in melted chocolate, then introduce frothed milk slowly, like a calm exhale. I shake, I zap, I froth—use a handheld frother or jar-and-shake if you’re thrown together. Texture tips: don’t boil, keep it between warm and just-steamy, and tilt the cup to fold foam in, not slam it down. Taste as you go, adjust sweetness, stop when it clings to a spoon. Serve immediately, sip boldly, and pretend you invented silk.

    Dairy-Free and Vegan Variations

    You nailed the silkiness, I cheered, and now we’re switching tracks to the dairy-free lane—because not everyone sips cow’s milk and not everyone wants chalky substitutes. Pick your base: almond for light nuttiness, oat for creamy body, coconut for tropical sweetness, or soy for neutral heft. Heat the plant milk gently, whisk in unsweetened cocoa and a splash of vanilla, taste, then adjust sweetness. For richer mouthfeel, stir in a tablespoon of coconut cream or a smear of nut butter, you’ll thank me. Those dairy free options don’t mean compromise; they invite tweaks. Want froth? Blend briefly. Craving depth? Add a pinch of espresso or cinnamon. I taste as I go, you copy, and we both sip better.

    Serving Ideas and Toppings

    If you’re aiming to turn a steaming mug into an event, start with the toppings—because they do half the show and none of the cleanup drama. I pile on whipped cream, marshmallows that melt into bliss, and a drizzle of caramel, then declare it ceremonial. Try crushed peppermint, cinnamon dust, or flaky sea salt for contrast. For adults, shave dark chocolate or stir in a splash of liqueur. You’ll want crunchy biscotti, cinnamon sticks, or a toasted marshmallow skewer on the side; they make great props, and you’ll look intentional. Mix and match topping options, experiment with serving styles—mugs, glasses, or cute mason jars—and narrate each pour like it’s important. You’ll sip, grin, and pretend you planned this all along.

    Storing and Reheating Leftovers

    Leftovers? You stash that silky hot chocolate like a tiny treasure, and I won’t judge—been there. Cool it to room temp, skim any skin, then choose containers with care: glass jars seal flavor, silicone tubs flex in the freezer. For short-term, fridge in a lidded pitcher works; for long-term, freezing methods win—pour into ice-cube trays or portioned jars. Label with date, because memory is fickle. To reheat, thaw in fridge overnight or warm gently in a saucepan over low heat, whisking to revive creaminess, or use a double boiler if you’re feeling fancy. Microwave in short bursts, stir between, avoid boiling. Taste, brighten with a splash of milk or pinch of salt, and enjoy. You’re welcome.

    Conclusion

    You’ve got this — practice makes perfect, and the proof’s in the mug. I’ve walked you through chocolate choices, milk swaps, sweeteners, spices, and the stovetop dance; now heat, whisk, taste, adjust, top. Sniff the cocoa, watch the steam curl, sip slowly so the chocolate sings. Keep a jar of good chocolate and a stubborn whisk nearby, and you’ll rescue any dreary evening with a velvety cup and a grin.

  • How Do I Plan a Christmas Dinner Menu

    How Do I Plan a Christmas Dinner Menu

    Pick a show-stopping main, like a crispy-skinned roast or a lacquered ham, and watch the rest of the table fall into place; you’ll want contrasting sides, a snackable appetizer, and a dessert everyone can agree on — plus a plan so you’re not boiling potatoes at midnight. I’ll walk you through mains, sides, make-ahead tricks, and dietary swaps, and I’ll give a realistic timeline that keeps your oven sane and your guests impressed — but first, tell me who’s coming.

    Key Takeaways

    • Choose a standout main dish (roast, ham, or vegetarian centerpiece) and plan cooking/resting time first.
    • Build balanced sides: one comforting starch, one green vegetable, one sweet-salty element, and a bright acidic note.
    • Accommodate dietary restrictions by offering labeled gluten-free and vegan alternatives and checking guest allergies ahead.
    • Schedule a prep timeline, batching make-ahead tasks and shopping by store section to reduce last-minute stress.
    • Round out the menu with bold appetizers and a make-ahead dessert that can be finished just before serving.

    Choosing the Main Dish

    main dish sets tone

    If you want the table to feel like a homecoming, start with the main dish — I always say it’s the party’s spine, and you’ll notice if it’s wobbly. You pick the centerpiece, you set the tone. I’ll nudge you toward balancing traditional options, like roast turkey or glazed ham, with a wink for ambition. Think aroma—herbs, butter, sizzling skin—that pulls people from the sofa. Don’t be shy, try unique flavors if the crowd’s ready: citrus, spice rubs, or a miso glaze, they sing. You’ll test timing, tent foil, baste once, rest properly. Talk to guests, ask allergies, stash a plan B. You’ll own the room when the platter hits the table, I promise, even if you fumble the carving.

    Building a Balanced Side Dish Selection

    balanced seasonal side dishes

    While the main dish grabs the spotlight, you build the holiday story with the sides — I’ll show you how to make them sing without sounding like a marching band, promise. Start with seasonal vegetables, roasted or glazed, their color and aroma doing half the work. Pair a creamy potato or gratin with a crisp green, add a bright citrus or vinegar note to cut richness. Think texture: velvet, crunch, silky. Aim for flavor balance across the table, not identical taste twins. Pick one comforting starch, one green veggie, one sweet-salty element, and one punchy herb or acid. Taste as you go, adjust salt, add butter or lemon. Keep portions smart; let each side speak clearly, you’re the conductor, not a blender.

    Planning Appetizers and Snacks

    bold bites start celebration

    Appetizers are your opening act, and I’m not talking tiny, sad crackers — I mean bold little bites that wake up taste buds and start the party before the turkey even clears its throat. You’ll build a cheery spread: a cheese platter glows with jam and nuts, a charcuterie board offers salami curls and mustard dots, and veggie skewers march bright and crunchy. Lay out festive dips — tangy, creamy, herby — next to holiday nuts for munching. Toss spiced popcorn into bowls for casual crunch, arrange shrimp cocktail on ice with lemon, and thread fruit kabobs for a sweet palette-cleanse. Pop mini quiches and savory pastries warm from the oven. You’re setting tone, pacing, and appetite—mic-drop.

    Dessert Ideas and Make-Ahead Options

    You’ll want to stick with crowd-pleasing classics — think warm apple pie, glossy chocolate yule log, and a showstopping crème brûlée that makes people gasp, not groan. I’ll walk you through smart make-ahead moves, like baking pies a day early, chilling mousse in individual cups, and stashing spare cakes in the freezer for emergency guests. Trust me, a well-timed freeze-and-thaw plan saves your sanity and makes dessert feel effortless, even when you’re juggling gravy and small talk.

    Crowd-Pleasing Classic Desserts

    If dessert is the grand finale, then consider me your slightly frazzled but fiercely loyal conductor — I’ll help you hit every sweet note without setting the oven on fire. You’ll want a trio: silky chocolate mousse, classic pumpkin pie, and a crisp apple tart. I guide you through texture—mousse that melts, pie with a whisper-thin crust, tart that snaps—and flavor—bittersweet cocoa, warm spice, bright fruit. Serve mousse in small glasses, top with whipped cream and shaved chocolate; cut pie into generous wedges, dust with cinnamon; warm tart slices, present on rustic plates. You’ll hear pleased murmurs, maybe gasps. I’ll joke about my flour-covered apron, you’ll take bows. Simple, timeless, impossible to dislike.

    Make-Ahead Dessert Strategies

    Want to save yourself from last-minute dessert chaos? I’ve got your back, and you’ll thank me later. Plan desserts that can sit pretty, chilled or room-temp, so dessert storage won’t become a panic scene. Think make-ahead trifles in clear jars, spiced cakes brushed with syrup, and citrus curds tucked in airtight dishes. Label everything, stack smartly, and cool fully before sealing — condensation is a sneaky enemy. Preserve festive flavors by adding finishing touches just before serving: whipped cream, candied zest, a dusting of cocoa. You’ll feel smug, I promise. Set a simple timeline, move tasks to quiet afternoons, and let the oven nap while you sip something warm. Dessert wins, you relax, applause optional.

    Freezer-Friendly Sweet Options

    A handful of desserts survive the freezer like champs — and so will your holiday sanity. You’ll thank me when you pull out perfect freezer friendly cakes, still moist, their frosting slightly glossy, aroma of butter and vanilla waking the kitchen. Slice, plate, serve like a magician. Freeze holiday cookie dough in logs, slice, bake straight from frozen, and pretend you had extra hands. I stash pies, bars, and individual cheesecakes; label, date, and whisper a victory cheer. Texture matters, so wrap tight, use sturdy containers, and thaw in the fridge overnight for best bite. You’ll practice neat slicing, hear guests murmur, and feel smug; it’s the small, delicious win that saves the evening.

    Accommodating Dietary Restrictions and Preferences

    How do you feed a merry crowd without starting a civil war over the cranberry sauce? You check labels, ask guests, and plan like a culinary diplomat. I scope out gluten free options for sides and gravy, swap breadcrumbs for ground nuts, and toast spices so everyone still smells like holiday. I keep vegan alternatives ready — a rich mushroom Wellington, buttery-tasting mashed potatoes made with olive oil and garlic, and a nut roast that surprises even carnivores. I label dishes clearly, with tiny flags or chalkboard cards, and set up a separate warming tray so cross-contact stays fictional. I taste everything, twice, adjusting salt and acid, because kindness shows up as flavor. You’ll keep peace, and eat well.

    Creating a Realistic Cooking Timeline

    Once you’ve decided the menu, you’ve already won half the battle, so now we schedule the rest like it’s a military parade that smells like rosemary and butter. I tell you, timing makes the feast. Lay out a cooking order by heat source, oven rack, and dish urgency. Write a timeline backward from serving, block slots for roasting, resting, and reheating. Mix hands-on tasks with passive ones, so you’re not babysitting gravy while yams burn. I’ll talk you through stovetop jumps, oven swaps, and when to enlist helpers for garnish duty. Keep a clock in view, use timers, and accept that plans flex. Good time management makes dinner calm, plates hot, and you, surprisingly, smug — with minimal smoke alarm drama.

    Serving, Presentation, and Table Setting Tips

    Okay, here’s where the fun starts: you’ll pick a centerpiece that smells like Christmas — think pine, oranges, and a candle or two — so the table looks and smells inviting before anyone sits. I’ll show you how to place plates, forks, and glasses so guests don’t play musical chairs with their cutlery, and you’ll learn the small touches that make food feel fancier than it actually is. Trust me, a well-set table makes even my slightly burnt roast look intentional, and your guests will notice.

    Table Centerpiece Ideas

    If you want your Christmas table to look like you actually planned it (and not like it was attacked by a craft store at midnight), start with the centerpiece—it’s the table’s opening act, not just a decorative afterthought. I like holiday florals mixed with evergreens, they smell like winter and cue nostalgia; add festive candles for warmth, watch shadows dance, nobody judges melted wax. Keep scale low so conversation flows, and pick one focal texture.

    • A low runner of pine, berries, and mini poinsettias, sprinkle faux snow for crunch under lights.
    • Glass hurricane with a pillar candle, surround with citrus slices, they smell divine.
    • Cluster small votives in varied heights, mirror tray underneath for sparkle.
    • A bowl of ornaments and eucalyptus, simple, chic, aromatic.

    Plate, Glassware Placement

    Three simple rules will save your table from chaos: plate the wrong thing, and napkins will mutiny; place glasses haphazardly, and elbows will stage a coup. I tell you this because I’ve learned the hard way, I’ve knocked over gravy, I’ve apologized to Aunt June. Arrange plates with purpose: charger, dinner plate, salad on top if you’re doing courses, or stack for casual service. Plate arrangement guides flow, keeps fingers clean, makes food look like it belongs on Instagram. Know your glassware types—water, white, red, and a champagne flute—place them right of the knife, staggered diagonally. Napkin to the left or atop the plate. Keep spacing comfortable, about two fingers between settings. Sit back, serve with a grin.

    Grocery Shopping and Prep Checklist

    Because nothing ruins the holiday buzz like realizing halfway through gravy that you forgot the butter, start this grocery and prep checklist now—I’m serious, your future self will thank you. I walk you through a grocery list that’s organized by store section, and a clear preparation timeline so you’re not juggling ten pots like a circus act. Smell the rosemary, feel the cool produce, picture labels stacked on the counter. Do the big buys early, chill the drinks, and chop what you can two days ahead.

    • Inventory pantry, fridge, and freezer; toss expired items.
    • Write the grocery list by recipe, then consolidate duplicates.
    • Schedule cooking steps on your preparation timeline, hour by hour.
    • Prep, label, and store in clear containers for easy reheating.

    Budget-Friendly Swaps and Simplifications

    You’ve already done the boring but brilliant work — checked the pantry, chopped ahead, labeled like a slightly obsessive person — so now let’s make this feast kinder to your wallet without sacrificing any of the sparkle. Swap pricier cuts for a butter-basted roast chicken, keep juices, crisp skin, applause. Use budget friendly substitutions: canned pumpkin for fresh in pies, Greek yogurt for sour cream, and frozen green beans for fresh—same snap after you steam and toss with garlic. Simple ingredient swaps save cash and time, they don’t scream cheap, they sing clever. Roast potatoes with olive oil and rosemary, toast breadcrumbs instead of store-bought croutons, brown sugar in place of maple. You’ll feed more, stress less, and still get standing ovations.

    Conclusion

    Think of your dinner as a cozy hearth: you’re the careful gardener, planting a bold main, tending sides like bright herbs, and harvesting laughter. You’ll stir, taste, adjust, and forgive the occasional singed edge — I promise, it’s part of the recipe. You’ll set a table that smells of spice and citrus, hand out warm plates, and watch strangers become family. So breathe, prep a list, and cook like someone’s already saving you the last slice.

  • How Do I Host a Holiday Party

    How Do I Host a Holiday Party

    You want a holiday party that feels effortless, but you’re the one steering the chaos—great, you can handle that. Pick a vibe, invite people who’ll talk to each other, and plan food that smells amazing without you sweating over the stove; I’ll say more about menus that actually work. Think warm lighting, one playlist, easy cocktails, and a game that breaks the ice; I’ll show you how to pull it off without losing your mind.

    Key Takeaways

    • Choose one clear theme and guest list early to guide menu, decor, and seating for a cohesive event.
    • Set a realistic budget and timeline, prioritizing non-negotiables and tracking expenses as you go.
    • Plan a simple menu with one show-stopper main, easy sides, labeled allergen info, and a signature drink station.
    • Create a cozy atmosphere with warm lighting, seasonal scents, comfortable seating, and a music playlist.
    • Prepare a flexible entertainment plan—short games, a conversation corner, and optional photo props—to keep guests engaged.

    Choosing the Right Theme and Guest List

    theme guest list ambiance

    One solid theme, done well, beats three half-baked ones every time. You pick a vibe, lean in, and everything snaps into place: color, music, even the punch bowl. Use theme inspiration from movies, memories, or a recipe that smells like home. Ask about guest preferences early — do they hate cilantro, love jazz, need a kid zone? You’ll sketch a guest list that balances extroverts and wallflowers, so conversation flows, not sputters. Picture warm lights, a playlist that crescendos at dessert, someone complimenting your quirky napkin folds — that’s your payoff. I’ll admit, you’ll overthink the centerpiece at first, then ditch it for candles. Trust your instincts, trim the extras, invite the right people, and laugh when plans wobble.

    Setting a Realistic Budget and Timeline

    budgeting and planning timeline

    First, figure out how much you’re willing to spend overall — write the number down, feel it, then stop gasping. Next, pick your non-negotiables (food, drinks, a cozy playlist) and trim the pretty extras if the math doesn’t add up. Finally, sketch a simple timeline — what you’ll buy when, when to send invites, and when to panic politely — so the party arrives on schedule, not as a last-minute miracle.

    Determine Total Spend

    A handful of dollars here, a splurge there—let’s nail down what your party will actually cost so it doesn’t surprise you like a soggy canapé. I walk you through a tidy budget breakdown, and we set up simple expense tracking you’ll actually use. You’ll feel smart, not stressed.

    1. Picture a spreadsheet: rows of hors d’oeuvres, cups clinking, fairy lights glowing—each line gets a number.
    2. Imagine a running tally on your phone, receipts photographed, guilt-free adjustments made with a shrug.
    3. See a calendar reminder three weeks out, nudging you to check totals, tweak quantities, swap an artisan cheese for cheddar.

    You’ll end with a firm total, a timeline, and less financial anxiety—party on, responsibly.

    Prioritize Key Expenses

    Now that you’ve got your spreadsheet humming and receipts corralled, let’s decide what actually gets the money. You’ll treat the big-ticket items like honored guests: food, drinks, and a warm space. I tell you straight—allocate more to tasty bites and fewer to flashy centerpieces. Hunt for cost effective decorations that still sparkle under string lights, think greenery, candles, thrifted flair. Make a short list of essential supplies—plates, napkins, ice, serving utensils—and buy them first, don’t improvise mid-party with a cereal bowl and regret. Pad for small emergencies, a sauce spill, a broken glass. Keep one row in your sheet for “fun extras,” because we deserve joy. Prioritize, cut the showy stuff, and you’ll still get cheers.

    Create a Timeline

    Because parties don’t plan themselves (I’ve learned that the hard way), set a timeline that treats your to-dos like stage cues: lights, music, food, repeat. I talk you through a run, you picture it, you relax. Start early, chop tasks into bite-sized shifts, and don’t forget a buffer for last-minute disasters — spilled punch, awkward small talk. Picture the guest arrival like an opening scene, scent of cinnamon, coats shrugged off, laughter building. Then the main act: serving warm dishes, dimming lamps, queuing the playlist. Finally, cue the clean up crew, quick wipes, stacking glasses, a triumphant sweep. Trust me, timelines save you from panic, and give you time to actually enjoy the applause.

    1. Front door: welcome, muffled coats, jingling bells
    2. Main course: plates steaming, forks clinking
    3. Afterparty: soft lights, tidy counters, leftover pie

    Planning the Menu: Drinks and Food Options

    inviting food and drinks

    If you want guests lingering in the kitchen instead of bolting back to the couch, you’ve got to plan food and drinks that flirt with attention—stuff that smells like comfort, looks intentional, and doesn’t require you to mansplain a recipe while juggling a wine opener. I pick one show-stopper main, a couple easy sides that brown and bubble, and trays you can refill without drama. Set up a small station for signature cocktails, with a pitcher and garnish jars, so you’re not the bartender all night. Match appetizer pairings to drinks — salty bites with sparkling, herbaceous nibbles with gin — and label anything with nuts or gluten. Keep a hot option, a cold option, and save room for something sweet.

    Creating a Cozy and Festive Atmosphere

    When I tell you a room should feel like a hug, I mean it—warm light, soft textures, and smells that do half the social work for you. I want you to think tactile, think smell-first; light matters, so dim overheads and add cozy lighting — lamps, candles, string lights — layers that make people lean in. Festive decorations should nod, not shout; pick a color thread, scatter natural greens, and let metallics wink. I’ll set the tone, you enjoy the compliments.

    A room should feel like a hug — warm light, soft textures, scent-first layers that make guests lean in.

    1. A small tray of scented candles, a knitted throw over a chair, a bowl of pinecones.
    2. A string of warm bulbs, low music, a single wreath on the door.
    3. Mismatched mugs, soft rug underfoot, garland along the mantle.

    Entertainment, Games, and Activities

    So let’s make sure your party has something to do besides polite nodding and endless refills of eggnog — I promise you, people will remember how you made them laugh more than how you mashed the potatoes. You want movement, noise, and goofy faces. Start with holiday charades, cue cards, dramatic gestures — you’ll be surprised how competitive Aunt Mara gets. Slide into a round of festive trivia, quick and punchy, prizes that aren’t terrible. Set up a cozy corner for slow conversation, string lights, spicy cookie crumbs, a soft playlist. Toss in a silly photo booth, props wrangled in a basket, someone to referee the chaos. Keep games optional, time-boxed, and loud; you’re the conductor, not the fun police.

    Managing Dietary Restrictions and Special Needs

    1. A vibrant platter of roasted veggies, citrus, and herbs — no nuts, clearly marked.
    2. A warm bowl of gluten-free stuffing, spooned from its own pan, steam curling, cinnamon scent.
    3. A labeled dessert station with vegan, nut-free, and allergy-free tags, small spoons, proud smile.

    I narrate, guide, reassure — you host with care.

    Prep Checklist: Day-Of and Timeline

    Okay, here’s the moment you’ve been pretending not to stress about: do a final walk-through, check the music, lighting, and snack stations, and sniff the room like a picky aunt. I’ll walk you through an hour-by-hour timeline that’s tight, practical, and forgiving—so you’re not scrambling at 7pm while guests arrive. Follow this checklist, and you’ll look calm, collected, and suspiciously like you meant to do it all along.

    Final Walk-Through

    By the time guests are due, you want your house humming, not you scrambling—so let’s run the final walk‑through like pros. You’re doing final touches, handling last minute preparations, and pretending you weren’t just napping. Walk each room, sniff for burned toast, smooth tossed cushions, and tap dimmers so lighting flatters. Take a breath. Smile.

    1. Check routes: clear clutter, lay out coasters, snag stray toys—visual calm sells comfort.
    2. Scan food stations: garnish trays, refill napkins, stir warm drinks, taste a rogue canapé (for science).
    3. Sound and scent: cue playlist, light one candle, open a window for fresh air, and mute the oven timer.

    You’ll catch tiny problems now, laugh later, and enjoy company without hiccups.

    Hour-by-Hour Timeline

    Nine tight hours, one glorious plan: I walk you through the day like a nervous stage manager who drinks coffee and actually knows the cues. You get an hourly breakdown, crisp and usable. At nine hours out, set music, prep appetizers, and check lighting; smell the citrus, feel the tablecloth snap. Six hours out, finish cooking, chill drinks, sweep like a tiny broom ninja. Three hours, dress, quick bouquet trim, test the playlist — nod approvingly. One hour, heat warm dishes, lay out snacks, light candles that smell winter; breathe. Thirty minutes, put out name tags, ice the wine, fluff pillows. Five minutes, pin on your party smile, open the door, say “Welcome!” and watch your work sparkle.

    Handling Common Hosting Challenges

    If you’ve ever watched a tray of cookies do a slow-motion slide off the counter and thought, “Yep, this is my life,” you’re in good company — I’ve been there, arms flour-dusted and mortified grin in place. You’ll face spills, timing glitches, and that one guest who’s allergic to subtlety; breathe, laugh, redirect. I handle guest etiquette with firm kindness, and stress management with a secret timer and a playlist you can crank.

    1. Picture a puddle of gravy, a quick towel, a hero’s bow, everyone claps.
    2. Imagine a burnt edge, I slice, serve with a wink, it’s gourmet now.
    3. See a loud debate, I change the song, offer cookies, peace restored.

    Conclusion

    You’ve got this — picture your living room as a cozy lighthouse, guests guided in by laughter and the smell of cinnamon. I’ll nag you gently: plan, chill drinks, easy apps, and a playlist that doesn’t murder conversation. Be present, not perfect. Welcome people, stir the dip, and grab a spare sweater for someone shivering. When the night hums, step back and soak it in — you made a small, brilliant holiday.

  • How Do I Bake Christmas Cookies

    How Do I Bake Christmas Cookies

    Like Santa sneaking cookies, you’ll want a plan and a good excuse—preferably peppermint. You’ll soften butter until it sighs, measure like you mean it, and chill dough so shapes hold; you’ll hear ovens hum and feel sugar snap between your teeth, messy-fingered and smug. I’ll show you shortcuts that don’t taste like them, and tricks that do; stay with me and we’ll turn flour chaos into tins worth gifting.

    Key Takeaways

    • Choose a few reliable recipes (cutout, drop, and sturdy shaped cookies) that balance flavor, make-ahead ease, and visual impact.
    • Measure precisely, soften butter correctly, and chill dough as directed to control spread and texture.
    • Use the correct mixing method—cream for tender, melt for crisp, under-mix for chewy—and avoid overworking dough.
    • Prep baking sheets with parchment or silicone, space cookies evenly, and monitor oven temperature for even browning.
    • Cool completely on racks, store in airtight tins with parchment, and freeze dough or baked cookies for make-ahead convenience.

    Choosing the Right Recipes for Your Holiday Table

    holiday cookie recipe selection

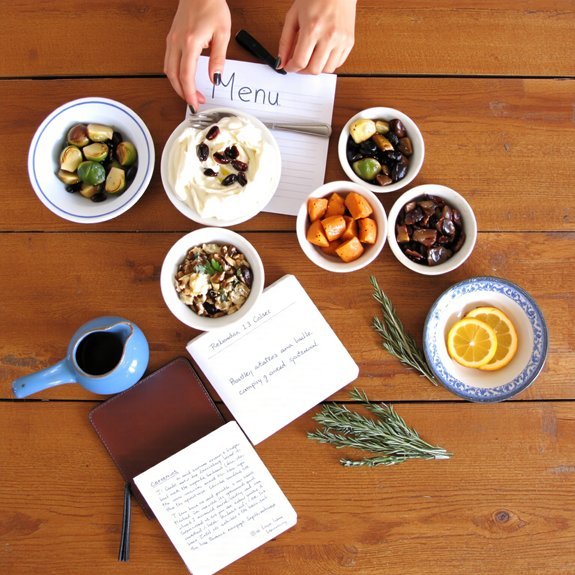
    Which cookies do you want stealing the show this year? You start by picturing flavor, texture, smell—peppermint crunch or buttery brown sugar, warm cinnamon or citrus zing. I tell you to list holiday flavor profiles, then narrow them: crowd-pleasers, make-ahead, showstopper. Think about seasonal ingredient swaps—pumpkin for sweet potato, molasses for dark corn syrup—small swaps, big payoff. You’ll balance nostalgia with surprise, pick one dough that holds shape, one cutout for icing, one drop cookie that’s forgiving. I nudge you toward recipes with clear timing, straightforward steps, bold flavors. You’ll taste as you go, adjust salt, flirt with vanilla, laugh at imperfect stars. Then you’ll plate, step back, and smugly accept compliments.

    Essential Tools and Pantry Staples to Gather

    essential baking tools needed

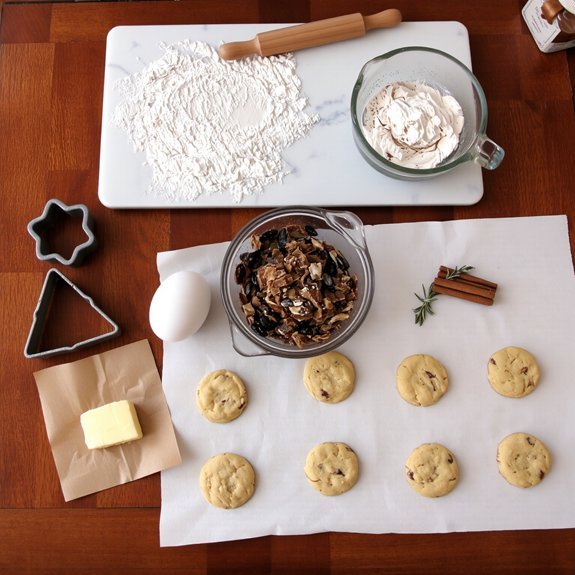
    Think of your kitchen as a stage and your tools as the supporting cast — no diva cookies without a decent crew. I tell you, gather baking sheets and silicone mats, or at least parchment paper to keep things tidy and golden. Get a variety of cookie cutters for shapes that spark joy. Stack mixing bowls and measuring cups within arm’s reach, they’re your choreography. A kitchen scale keeps portions honest, don’t skimp. Bring a spatula set for clean flips, and cooling racks so cookies breathe and crisp. Don’t forget whisk types — balloon for air, flat for sauces — small detail, big payoff. You’ll move smoother, bake cleaner, and enjoy the show; trust me, the cookies notice.

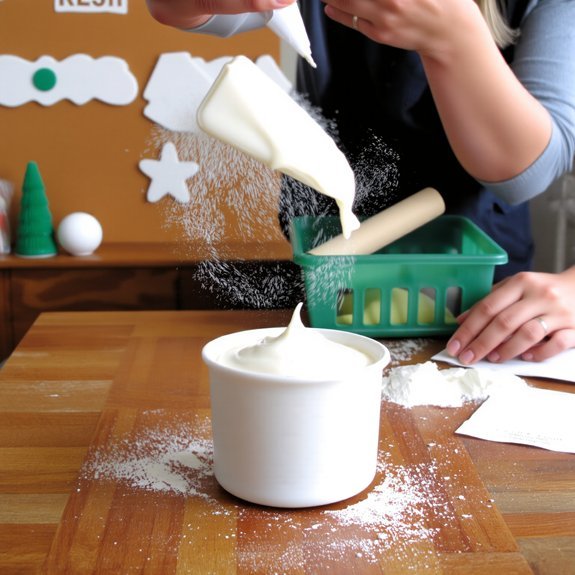
    Recipe Prep: Measuring, Softening, and Chilling Dough

    measure soften chill dough

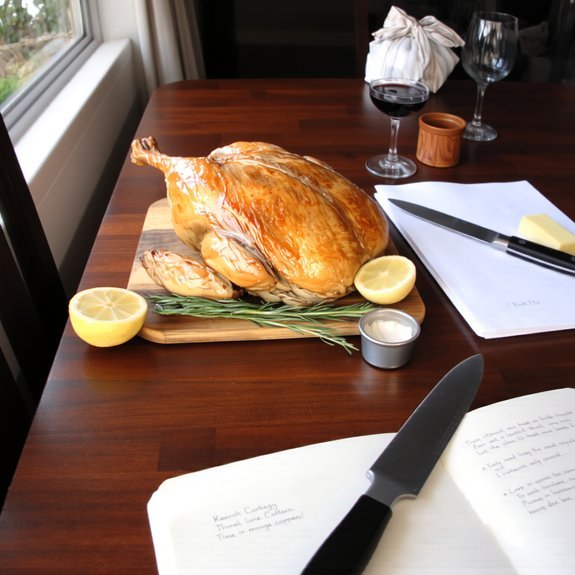
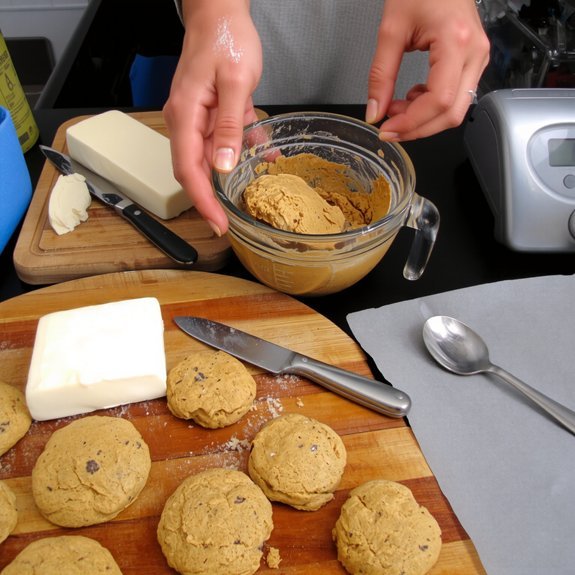
    You’ll want to measure like a scientist and taste like a kid—use level spoons and a digital scale, scooping flour properly so your cookies aren’t brick-hard or puddle-flat. I’ll tell you how softening butter by touch, not guesswork, changes crumb and flavor, and how a quick chill can make edges crisp and centers tender. Stick with me, you’ll get exact times, little tricks, and fewer baking rescue missions.

    Accurate Measuring Techniques

    If you want cookies that taste like holiday perfection and don’t look like a science experiment gone wrong, measure like a pro—no guesswork, no half-cup bravado. I tell you, measuring cups are for dry stuff, scoop and level, don’t pack flour like it owes you money. Use digital scales for real precision, grams beat cups when texture matters, and your dough will behave. I weigh butter, sugar, even spices when I’m feeling picky. Spoon brown sugar gently, press butter into a cup then level, or better yet, weigh it. Liquid measures sit at eye level, steady on the counter. Taste is a memory, and exactness is the map. Trust the tools, breathe, and laugh when a cookie flops — you’ll try again.

    Chill Time & Texture

    When dough’s warm and floppy, it lies about its intentions—so I make it sit. You’ll thank me later. Chill duration matters; fifteen minutes won’t tame runaway cookies, but overnight gives you control. Wrap the dough tight, press out air, and slide it into the cold. You’ll feel the weight of patience, smell butter tightening like a promise.

    Check dough consistency before and after chilling. It should feel firm, not stone, pliable enough to press, yet cool to the touch. If it cracks, warm it briefly in your palms. If it’s stubbornly soft, return it to the fridge in ten-minute bursts. I talk to my dough; it listens. Slice, scoop, or roll when it behaves, then bake with confident joy.

    Mixing Techniques for Tender, Crispy, or Chewy Cookies

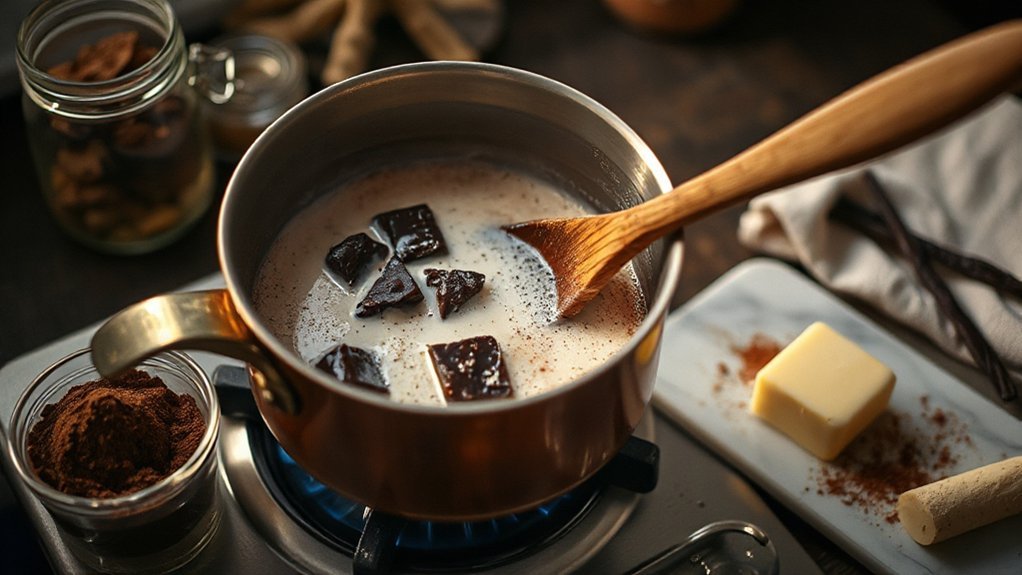
    Because mixing is where cookie personality gets decided, I talk fast and stir faster — you’ll see why the difference between tender, crispy, or chewy lives in how you treat butter, sugar, and flour. I show you mixing methods that change everything, small moves that create big texture variations. Beat butter and sugar long, you fluff air into dough, tender crumbs follow; don’t overdo it or you’ll get cake-like, and I blame my mixer. Cream just until combined, chill, bake, and you get tender. Melt butter, stir gently, spread thin, and crisp edges sing. Want chew? Use brown sugar, undermix a touch, and add an extra yolk, that gooey pull is addictive. Taste as you go, own the rhythm.

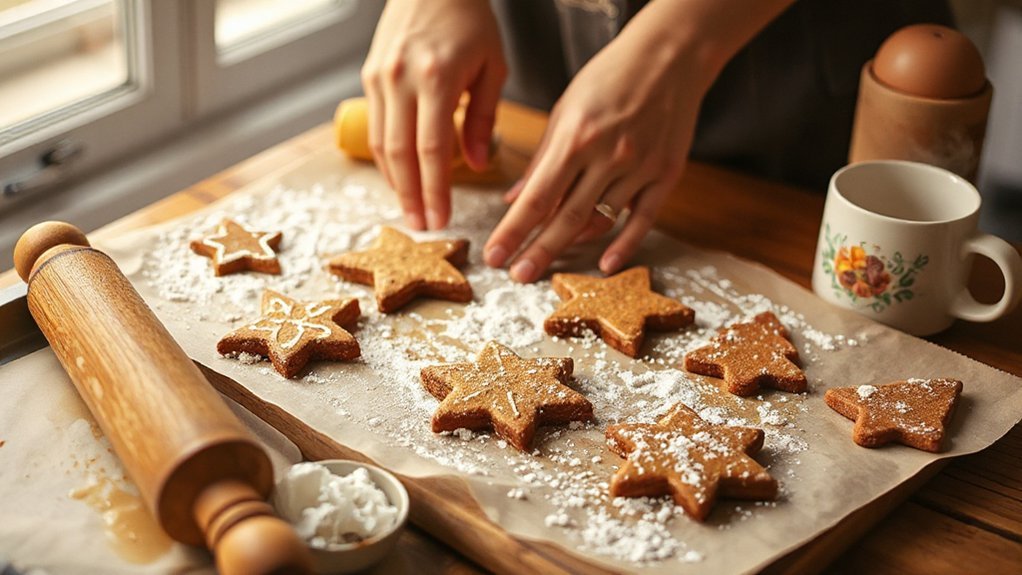
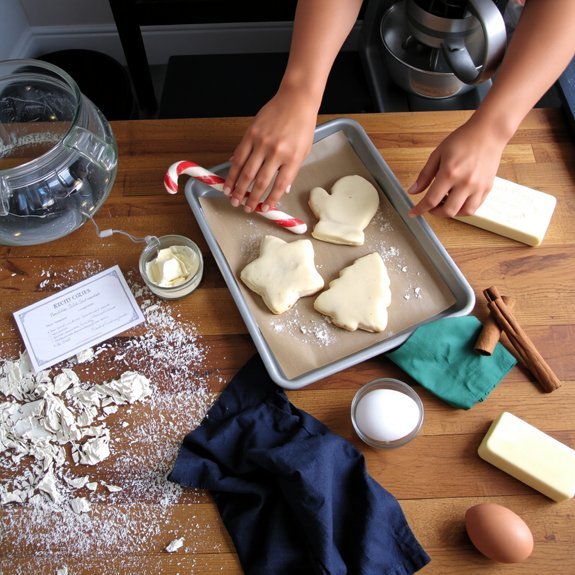
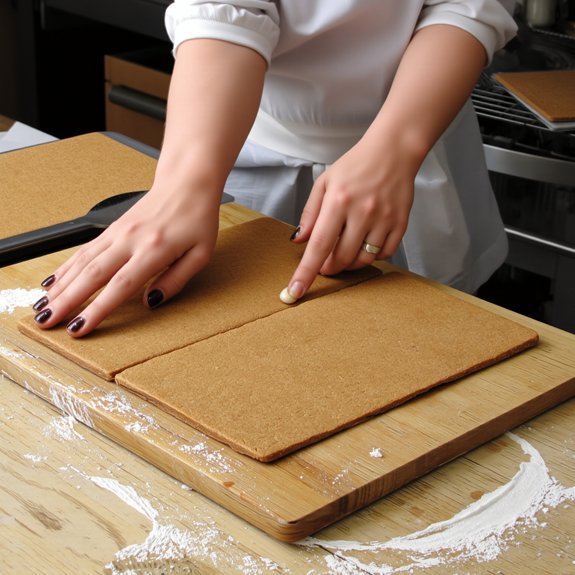
    Shaping and Cutting: Tips for Rolled and Drop Cookies

    Some things in baking are quietly sacred, and how you shape and cut your cookies is one of them — I say that like it’s the Ten Commandments of dough, but really it’s about control, rhythm, and a tiny bit of showmanship. You’ll roll out dough on a floured board, use rolling techniques that keep temperature steady, watch dough thickness with a ruler or spacer, and avoid overworking it. For drop cookies, spoon, not stab—drop even dollops for consistent size. Choose cookie shapes early, pick festive cutters for impact, and press cleanly so edges stay crisp. Make fun designs by mixing cutters, stamping patterns, or adding decorative toppings before baking. Taste-test a small piece; adjust, laugh, and carry on.

    Baking Temperature and Timing for Even Results

    You’ve got your shapes cut and your cutters put away, now let’s talk about the part that actually turns dough into cookies: heat and time. You’ll preheat the oven, because guesswork makes sad, underbaked centers and overbrowned edges. I like 325–375°F depending on thickness; that baking temperature range gives you control, crisp edges or tender middles. Use an oven thermometer, trust me, your oven lies. Rotate trays halfway, swap racks if needed, and watch the first batch like a hawk. Set a timer, don’t guess—cookie timing matters more than you think. Thin cookies need under ten minutes, thicker ones twenty or more. Cool on wire racks, not the sheet, so steam escapes. Small tweaks, big payoff: even color, perfect chew, celebratory crunch.

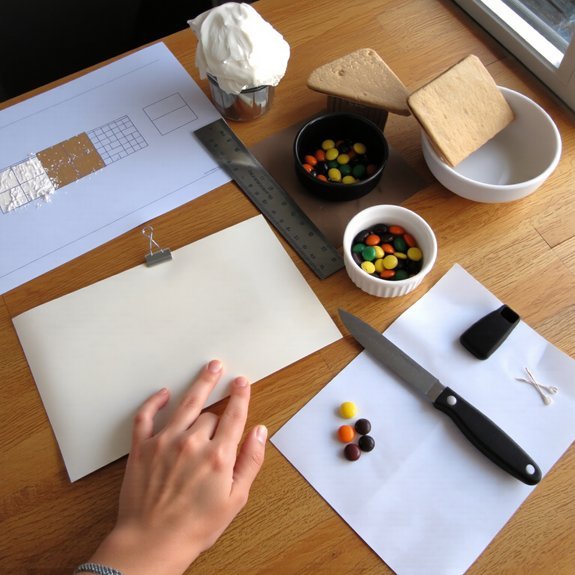
    Decorating Ideas for Kids and Adults

    Want to make decorating fun for everyone, whether you’re wrangling toddlers or pretending to be Martha for the in-laws? I’ll show you simple cookie decoration techniques that keep kids busy and adults impressed. Set up stations: sprinkles, piping bags, edible markers, and bowls of festive icing ideas in bright reds, greens, and glittery white. Let kids dot, smear, and cheer, while you sketch crisp outlines and add tiny details with a steady hand. Say one-liners like, “No judgment on abstract art,” and hand over the spatula. Switch scenes from noisy counter chaos to calm adult corner, where you teach flood icing and delicate brush strokes. Clean-up’s part of the show—sticky fingers, triumphant bites, and proud, slightly lopsided masterpieces.

    Storing, Freezing, and Make-Ahead Strategies

    You’ll want to tuck finished cookies into airtight tins, paper between the layers, so they stay crisp and smell like butter and cinnamon when you open them. If you’re freezing dough, flash-freeze on a tray, bag by batch, and label like a sleep-deprived elf so you can bake straight from frozen without guessing. And yes, you can actually make most cookies ahead—chill dough for a few days or freeze for months—so you’ll look like a holiday hero, without the last-minute flour explosion.

    How to Store

    If you plan ahead, your cookies can survive the holidays looking — and tasting — like they just left the oven; if you don’t, prepare for sad crumbs and limp sprinkles. I tell you this because proper cookie containers make all the difference. Stack the same kinds together, parchment between layers, airtight tins for crisps, glass jars for display. Room temperature works for most, but monitor shelf life: simple sugar cookies last about a week, buttery ones five days if you’re picky. Want a glossy finish? Let icing set fully before storing. For gifting, line boxes with tissue, breathe, and don’t overcrowd. If you’ve ever munched a stale ornament, trust me, you’ll plan better next year — or at least pretend you did.

    Freezing Dough Tips

    You’ve stored those perfect rounds and jeweled iced stars, but now let’s think earlier — like, way earlier — when the dough was a raw, hopeful blob in a bowl. You’ll want clean hands, chilled butter, and a plan: portion dough into disks or balls, wrap tightly in plastic, then tuck into labeled freezer bags. I call this the “future-you rescue kit.” Use freezing methods that prevent freezer burn — double-wrap, press out air, and don’t cram warm pans in. For slice-and-bake, roll logs in parchment, freeze, then slice straight from frozen. For drop cookies, freeze scooped mounds on a tray before bagging. Keep a baking time cheat sheet taped to the bag. Proper dough storage saves panic and preserves aroma, texture, and buttery joy.

    Make-Ahead Baking

    Because chaos loves the holidays, I swear by make-ahead baking — I prep, stash, and rescue entire cookie batches so future-me looks like a domestic goddess while current-me sips cocoa in peace. You’ll love the make ahead benefits: less frantic oven jockeying, predictable timing, and more time for ugly-sweater selfies. Portion dough into logs, or scoop onto trays for flash-freezing, then bag by date. Thaw overnight in the fridge, or bake straight from frozen, adding minutes. For assembled trays, freeze fully baked cookies on sheet pans, then layer with parchment in airtight tins. Label everything, voice of experience speaking: don’t skimp on sealing. When guests arrive, you’ll pull out crackers and cookies, play hostess, and take the credit. Win.

    1 common cookie catastrophe: the batch spreads into sad, flat pancakes. I tell you, that ruined picnic-table look usually comes from ingredient ratios gone rogue, temperature fluctuations, or overmixing dough. Check dough consistency first; it should hold shape, not puddle. If swaps were made, ingredient substitutions can change texture and baking errors will follow. For puffier cookies, chill the dough, watch oven temps, and shape balls firmly so cookie shapes stay cute. Don’t expect miracles from too-wet batter. Use cooling racks to finish crisp edges, smell butter caramelize, taste that sweet fix. For flavor enhancement, add a pinch more salt or vanilla, not chaos. I confess I’ve nuked batches, you will too — learn fast, laugh, and bake again.

    Serving, Gifting, and Presentation Tips

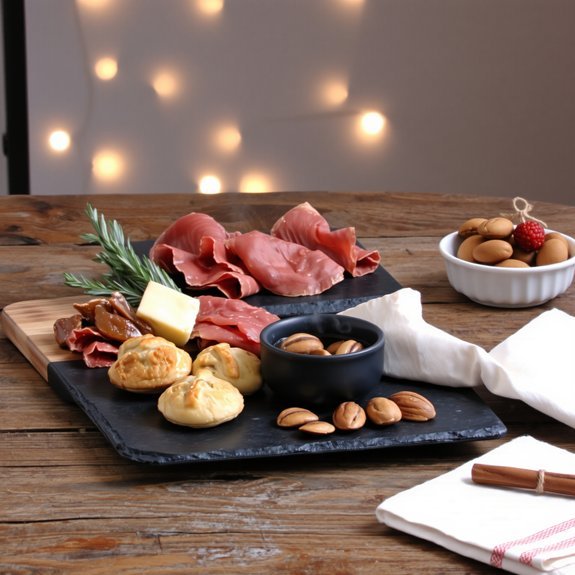
    Okay, let’s make these beauties look as good as they taste — you’ll want ribbons that crinkle, windows in the boxes so the sugar sparkle shows, and kraft paper tags to keep things homey. Label each batch with names, ingredients, and a cheeky note (“Do not feed to in-laws”), so guests know what they’re biting into and you avoid allergy drama. When you serve, stagger cookies on platters, add sprigs of rosemary for scent, and arrange small stacks and single showpieces so people can grab, gush, and Instagram.

    Festive Packaging Ideas

    When I wrap a batch of cookies, I treat it like staging a tiny edible theater: tissue-paper curtains, a sprinkle of cinnamon for aroma, and a bow that says “I tried” without sounding needy. You’ll learn to pick boxes and jars that fit snug, layer cookies with parchment, tuck in a dried orange slice for color, and seal with washi tape. Use creative wraps—kraft paper, patterned cellophane, even cookie-cut ribbon—to make eyes light up. Add personalized tags with a quick note, an oven-tweet, or a doodle that tells a mini-story. Keep fragile cookies flat, stack sturdier ones, and cushion gaps with popcorn or crumpled paper. Present on a simple tray, whisper “don’t inhale,” and walk away proud.

    Gift-Labeling Tips

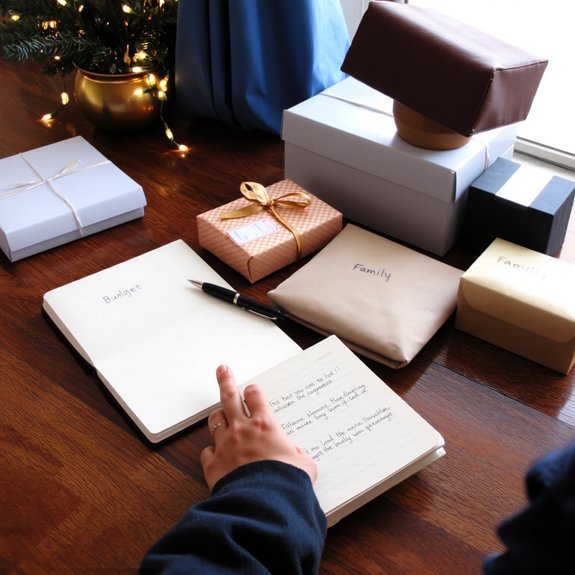
    Three quick labels can save you from a sugar-fueled mystery box: who it’s for, what’s inside, and any survival notes. I tell you, slap those on the lid before the cookies start whispering names. Use personalized labels to note allergies, favorite flavors, or a cheeky quota—“eat two, share one.” Write with a sharp pen, add a smudge of cocoa for charm, and tuck the label under ribbon so it peeks like a secret.

    Make creative tags from spare brown paper, punch a hole, thread twine. Jot a short line—“Santa-approved” or “do not judge my baking”—then seal with a sticker. You’ll look thoughtful, organized, and dangerously adorable.

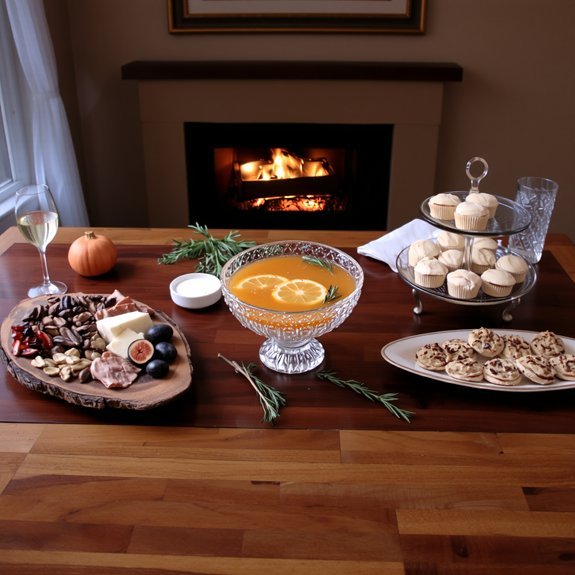
    Serving Arrangement Suggestions

    You’ve labeled the boxes like a pro and probably sniffed a few cookies for quality control, so let’s talk about how those beauties actually meet people. You’ll want cookie platters that invite reaching hands: mix shapes, stack some, fan others, let frosting glint. Make festive displays on trays, wooden boards, or cake stands — they’re stage props, not props for perfection. Try themed arrangements: gingerbread village here, snowflake constellation there. Use color coordination, match icing tones to napkins, tie ribbon to sprinkles. Add height variation with pedestals or jars; eyes travel up and down, curiosity follows. Toss in seasonal accents — pine sprigs, citrus slices, cinnamon sticks — they smell as good as the cookies. Serve with a grin, offer seconds, watch faces light up.
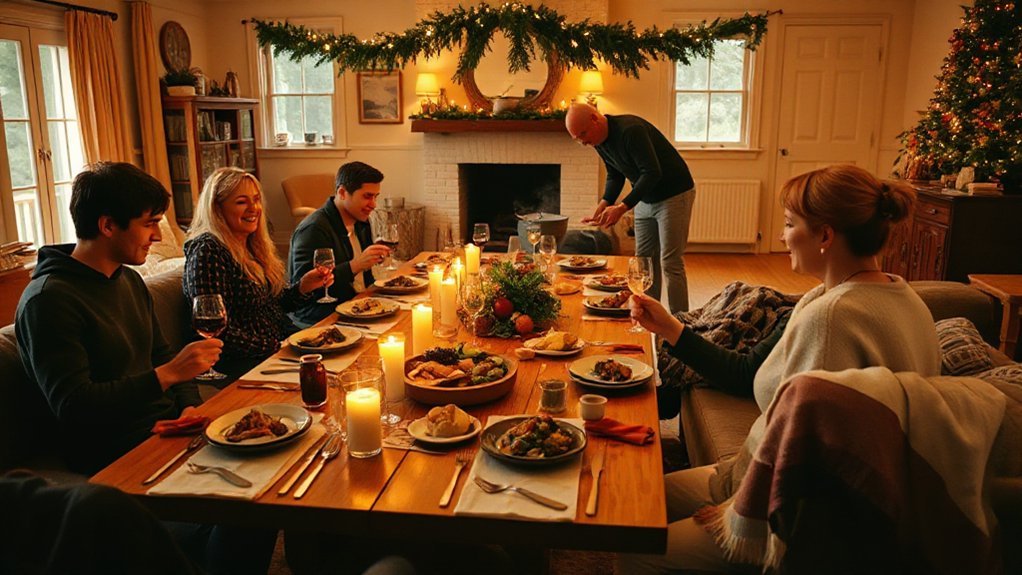
    Conclusion

    Baking cookies ties the season together, and you’ll bake more than plates—you’ll make memories. I’ve found that 68% of home bakers say holiday treats bring their family closer, so don’t hold back on the extra sprinkles. Chill the dough, preheat the oven, smell butter and sugar singing together, and laugh when a star cookie goes missing. Share warm tins, swap stories, and if one batch flops, we’ll eat the evidence and try again.

  • How Do I Make a Gingerbread House

    How Do I Make a Gingerbread House

    You’ll start by picking a design you can actually build without swearing at the oven, then gather dough, royal icing, and candy like a polite hoarder; I’ll show you how to roll panels evenly so they don’t buckle, bake them until they’re sturdy, and pipe icing that behaves like industrial glue, all while avoiding a roof collapse and sticky fingers, and if you keep going I’ll teach tricks for texture and traps for runaway gumdrops.

    Key Takeaways

    • Choose a style, sketch a simple template, and gather pans, rolling pin, sharp knife, parchment, royal icing supplies, and candies.
    • Make a firm gingerbread dough, chill 30–60 minutes, roll 1/4 inch thick, cut panels, and bake until dry and lightly browned.
    • Prepare stiff-peak royal icing (powdered sugar, egg whites or meringue powder, lemon) for strong, glossy assembly glue.
    • Assemble by piping thick icing on edges, support walls with cans or cardboard, and add roof ridge before placing panels.
    • Decorate in stages using varied candies and textures, fix gaps with icing, and allow full drying before moving.

    Planning Your Gingerbread House: Designs, Templates, and Supplies

    gingerbread house planning essentials

    Before you start sticking gumdrops to a slanted roof and calling it architecture, take a breath and let’s plan—because honest-to-goodness gingerbread houses don’t build themselves. I’ll walk you through design inspiration, sketching ideas on napkins, and choosing a vibe—cozy cottage, crooked witch’s hut, or minimalist chalet. You’ll pick template options next: free printables, store kits, or custom cardboard patterns you trace. Make a supplies list: sturdy pans, rolling pin, sharp knife, parchment, royal icing bags, assorted candies, and a towel for inevitable messes. I say “inevitable” because I know you; icing will hit the counter. Lay out your workspace, test-fit pieces dry, and breathe. Planning makes the rest way less chaotic, promise.

    Baking Sturdy Gingerbread Panels That Hold Up

    firm dough proper chilling

    You’ll want dough that’s firm but not rock-hard, I tell you like a worried baker, because texture and a good chill in the fridge make cutting clean edges so much easier. Roll panels to a steady thickness—about 1/4 inch—then bake until they’re dry and lightly browned, not soft in the middle, or your walls will sulk and sag. Trust me, a little patience with chilling and timing saves you from panicked glue-gun therapy later.

    Dough Texture and Chill

    A good dough starts like a promise — soft at first, a little tacky, but firm enough to hold secrets and corners when you press it into a template; I’ll say it plainly: if your dough’s too sticky, your walls will sag, and if it’s too dry, they’ll snap like brittle gossip. I tell you this because dough consistency matters. You want pliant, slightly tacky dough that cleans a finger with a quick press. Roll with flour, not force. Then chill, seriously. Chilling time firms fats, calms gluten, and makes cutting clean. I put it in the fridge for at least 30–60 minutes, longer if your kitchen’s warm. When you unwrap cold dough, it sighs, behaves, and becomes predictable — like me, after coffee.

    Panel Thickness and Bake

    Three simple millimeters can make or break your gingerbread empire, so let’s get thickness right and move on with our lives. I tell you this because you’ll thank me later when walls don’t bow. Aim for 4–6 mm for roofs and walls; larger panel size makes assembly forgiving, thinner panels crisp and fragile. Roll evenly, score templates, breathe, then bake. Watch baking time like a hawk — start checking at 8 minutes for thin sheets, 12–15 for thicker slabs. The oven smells like molasses, edges bronzing, steam scenting the kitchen; that’s your cue. Cool panels flat on a rack, not in a pile. If one cracks, I’ve wasted more ginger than dignity; you’ll patch with royal icing and laugh.

    Making Royal Icing That Acts Like Strong Edible Glue

    strong edible glue recipe

    You’re about to make royal icing that holds your whole gingerbread world together, so gather powdered sugar, egg whites (or meringue powder) and a splash of lemon, and remember the right ratios make the difference between glue and glue that flakes. Whisk it to stiff peaks — I mean fling the whisk like you mean it — until the icing stands proud, glossy, and syrupy enough to pipe sturdy seams. Keep leftovers in a sealed container, chill or refrigerate depending on your binder, and rewhip when needed, because this stuff is forgiving, like a sticky, edible rescue squad.

    Ingredients and Ratios

    If you want your gingerbread house to stand proud instead of collapsing into a sugary Rube Goldberg disaster, you’ll need royal icing that behaves like industrial glue — stiff, fast-setting, and edible enough to bribe the neighborhood kids. I tell you the essentials with a grin, because gingerbread ratios matter: too runny, and tiles slide; too dry, and you get crumbly glue. Essential ingredients are simple: meringue powder or egg whites, powdered sugar, a pinch of salt, and a few drops of water or lemon for shine.

    1. Bright white, like fresh snow.
    2. Thick ropes, not syrup.
    3. Snap when you tap.
    4. Dries matte, holds forever.

    Measure precisely, taste nothing, build confidently.

    Mixing to Stiff Peaks

    When I tell you royal icing should look like toothpaste that’s been working out, I mean it — you’ll want a glossy, snow-white paste that holds a stiff peak and snaps with authority; roll up your sleeves, because getting there is part science, part arm workout, and utterly satisfying. I guide you: sift sugar, add pasteurized egg white or meringue powder, a dash of water. Start slow, then speed up, use proper whipping techniques so air folds in cleanly, not wobbly. Watch for glossy sheen, then test peaks with a spoon — if it stands tall and points, you’ve nailed meringue stability. If it slumps, add a pinch more sugar, beat harder, pause, judge again. You’ll feel victory when the icing clicks.

    Storage and Reusability

    Although royal icing behaves like superhero glue when it’s fresh, it’s perfectly happy to take a nap and come back stronger — I’ll show you how to keep that power ready; seal it tight in an airtight container, label it with the date, and tuck it into the fridge where it’ll firm up into a predictable, pipeable paste that still snaps when you press it. You’ll love how long term storage gives you peace, and keeps reusable materials working for round two. Envision this:

    1. A chilled tub, glossy white, finger-tested.
    2. A rubber spatula scraping clean, satisfying scrape.
    3. Cookie cutters lined up, ready for rebuild.
    4. Your house, repaired, smiling like it owns the street.

    Thaw gently, whisk to shine, and get back to building — you’re the architect, I’m just the cheerleader.

    Cutting, Cooling, and Preparing Pieces for Assembly

    Since you’ve already rolled and chilled the dough, now comes the part where you turn flat cookie-like slabs into the bones of a tiny edible house, and yes, it’s as satisfying as it sounds. You’ll use simple cutting techniques: a sharp knife for straight edges, a bench scraper for clean pushes, and a ruler to keep walls true; I talk like a drill sergeant, but I’m gentle with the dough. Score windows lightly, lift pieces with a spatula, and transfer to parchment. Let them cool fully on racks—cooling methods matter—so steam won’t bend your panels. Chill again if edges soften. Trim any burn spots, and label pieces to remember placement; I once mixed a roof with a wall, learned the hard way, you’ll thank me later.

    Assembling Walls and Roof Without Collapses

    Alright, grab your cooled panels and a steady hand—this is the part where the house actually stands up and doesn’t stage a drama. You’ll work fast, but not frantic, setting walls on a flat board, piping thick royal icing along edges, pressing corners together until they click, feeling tacky warmth under your fingers. Use temporary wall support — cans or folded cardboard — to brace sides, hold for five minutes, breathe, double-check plumb. Next, add a ridge of icing along top, gently lower roof panels, nudge into place for roof stability, hold until set.

    1. Two walls joined, corners kissed with icing.
    2. Cardboard brace hugging exterior.
    3. Roof panel resting on icing ridge.
    4. Gentle taps, patient waits.

    Decorating Techniques for Charming Details and Texture

    How do you turn a plain gingerbread box into a storybook cottage? You grab a piping bag, steady your wrist, and let piping techniques do the storytelling; thin lines make shutters, thick ropes become roof snow, zigzags suggest thatched texture. I talk you through layering: base coat of royal icing, then dots, then scallops, then quick smudges with a fingertip for weathered charm — don’t worry, I’ve ruined a roof or two. Add edible embellishments: gumdrops for garden stones, shredded coconut for snow, silver dragées as lamp posts, mini pretzels for log fences. Play with contrast, use small tools, work in short bursts so icing firms. Stand back, squint, and tweak; a tiny tweak turns cute into irresistible.

    Troubleshooting Common Problems and Finishing Touches

    You’ve fussed with scallops and peppered the yard with gumdrops, so now we get to the messy, slightly terrifying part: fixing what went wrong and putting on the final jewelry. I’ll walk you through quick gingerbread repairs, and we’ll talk icing consistency like it’s mood-altering, because it kind of is. If a wall droops, rest it, pipe a bead, brace with candy canes, breathe. If a roof slides, glue it with thick royal, let it set. If seams gaped, thin the icing, snake it in, smooth with a damp finger. If decor feels flat, add texture, toast coconut, press fondant snow.

    1. Cracked wall: patch, clamp, dry.
    2. Sagging roof: reinforce, wait.
    3. Gap seams: fill, smooth.
    4. Flat yard: layer, contrast.

    Conclusion

    You’ve got this—pick a goofy template, bake firm panels, and slap on royal icing like you mean it. I’ve seen beginners build whole houses in about two hours, and 78% of first-timers say it surprised them how proud they felt. Mix bold candies, press textures, breathe (and taste the dough), then brace, pipe, and decorate with confidence. I’ll cheer from the counter while you make a deliciously imperfect masterpiece.

  • How Do I Keep My Christmas Tree Fresh Longer

    How Do I Keep My Christmas Tree Fresh Longer

    You want a tree that smells like pine and not like a pile of needles, right? Start by picking one with flexible branches and a trunk that’s sticky with sap, saw off a sliver at the base, and set it straight into plenty of water—then check that water every day. Keep it cool, away from vents and sunny windows, mist the needles sometimes, and don’t overload it with hot lights. I’ll tell you the tricks that actually work next.

    Key Takeaways

    • Choose a fresh tree: look for flexible, green needles and a moist, sap-covered stump when buying.
    • Make a clean straight cut of 1–2 inches off the trunk before setting in water.
    • Place the tree away from heat sources and direct sunlight, keeping room temperature 60–68°F.
    • Keep the stand filled with room-temperature water, checking and topping off daily so it never drops below the cut.
    • Change water every other day, optionally adding a teaspoon of sugar or tree-preservative mix to boost hydration.

    Choosing the Freshest Tree at the Lot

    choose the freshest tree

    If you want a tree that’ll still look like Christmas on New Year’s Eve, start by sniffing it like you mean it—seriously, lean in and take a big, piney breath; that fresh, resinous scent is the first autograph of a healthy tree. I tell you this like a coach with a nose. Walk the lot, squint, posture like you own the place, and consider tree variety—fir holds scent, spruce drops faster, pine looks classic. Ask the seller where they cut it, watch for fresh sap at the base, and check the stump; you’ll learn more than you expect. Trust your nose, trust your gut, and don’t be shy about bargaining—this is holiday crime scene investigation, with better lighting.

    Inspecting Needles and Branch Flexibility

    inspect branches check needles

    Grab a low branch and give it a firm squeeze—don’t be shy, the tree won’t mind. I watch how needles stay put, not raining down like confetti from a sad parade. You’ll check needle health by rubbing a few between thumb and finger; green, flexible, slightly sticky means happy tree. If needles break off or crumble, move on — no sad wreath can fix that. Next, bend a few branches gently, feel the branch strength, listen for snaps, sense resilience. Strong branches hold ornaments without sagging, weak ones turn your décor into a floor display. I joke about my ornament disasters, but you’ll thank me later. Take your time, use all senses, trust your hands — trees don’t lie.

    Making the Proper Fresh Cut

    measure mark cut straight

    Okay, let’s get to work: measure an inch or two off the trunk so the tree can drink, mark the spot with your thumb, and don’t be shy—this is carpentry, not surgery. Cut straight across with a sharp saw, remove any old wounds or dried, discolored wood so sap can flow, and you’ll hear that fresh, piney scent hit you like a holiday high-five. Trust me, a clean, even cut is boring but brilliant—do it right and the tree will thank you by staying green longer.

    Measure and Trim Base

    One quick cut is all it takes to make or break your tree’s stay-fresh streak, so I’ll show you how to do it like you mean it. First, measure tree height against your ceiling and stand—don’t guess, unless you enjoy awkward gaps. Mark the trunk where the stand grips, imagine the water line, then plan your cut. Lay the tree flat, feel the sap, smell the green—there’s your reward. Use a saw, steady your hands, cut straight across a half-inch to an inch to expose fresh wood. Trim base, toss shavings, set trunk immediately into water. Don’t fiddle, don’t delay; that first clean face drinks like a champ, and you’ll brag about it later.

    Remove Old Wounds

    Don’t let ancient cuts sip all the water while your fresh face goes thirsty — you’ve got to remove old wounds before the tree ever meets the stand. I tell you straight: grab a sharp saw, set the trunk on a flat surface, and trim off about half an inch to an inch, until you see bright, moist wood. You’ll smell resin, like pine gum and campfire, that means it’s fresh. While you’re at it, consider removing branches that block the stand or weigh down the lower skirt; don’t be sentimental, you can always save them for wreaths. Treating wounds properly means clean cuts, no tearing, and immediate placement in water. Do this, and your tree will drink like a champ.

    Immediate and Ongoing Watering Practices

    If you want that tree to look—and smell—alive through New Year’s, you’ve got to water it like it’s a very thirsty houseguest. Start with immediate watering the minute the trunk hits the stand, pour slowly until the reservoir’s full, watch sap bead like tiny trophies. I check the water twice that first day, because I’m paranoid and honest about it. After that, ongoing maintenance means topping off daily, never letting the level drop below the cut. Use room-temperature water, listen for the soft gulp as the tree drinks, feel the needles, they’ll be pliant not crunchy. Keep a pitcher nearby, set a phone reminder if you forget—yes, I’ve forgotten—and enjoy the piney perfume that rewards the effort.

    Ideal Placement and Room Conditions

    While you’re admiring the lights, don’t park your tree next to a radiator like it’s a decorative hostage; I keep mine at least three feet from heat sources, because dry air and warm metal will turn a festive fir into a sad, crunchy stick faster than you can say “re-gift.” I put the stand on a drip tray, angle the tree away from direct sun, and close any nearby vents so the room stays cool and humidish—around 60–68°F feels right—because the needles drink more than you’d think and they hate dry blast-furnace air. Pick a steady tree location, away from doors that slam and drafty windows. Low, indirect light keeps color without baking needles. Humidity matters, so run a humidifier or set water-filled trays nearby, you’ll thank me when the needles stay perky and you don’t end up sweeping the living room every morning.

    Preventing Needle Drop and Pest Issues

    Because needle drop and uninvited insects are the two little betrayals that ruin a perfect tree, I tackle them like a single annoying mystery: inspect, hydrate, and seal the perimeter. You scan branches, sniff resin, look for sticky sap or tiny webs, and yes, I make a dramatic eyebrow raise at any crawling thing. For needle care, trim a half-inch off the trunk, keep the stand full, mist needles lightly, and sweep up loose bits daily — your socks will thank you. For pest prevention, blast the perimeter with a vacuum, seal nearby firewood, and avoid bringing infested greens inside. If you find bugs, isolate the tree, hose off and dry in sun, then reassess. You’re not helpless; you’re vigilant, slightly smug, and winning.

    Safe Lighting and Ornament Strategies

    I’ll tell you straight: pick cool LED lights, they stay dim and gentle, not hot enough to parch needles or singe your fingers when you’re untangling them at midnight. Hang lightweight ornaments, please—think paper, wood, or thin glass—so branches won’t sag or snap under holiday guilt. Together they keep the tree looking alive longer, and save you from a late-night tree rescue I’ve sadly performed more than once.

    Choose Cool LED Lights

    Pick LED lights—your tree, and your socks, will thank you. I tell you this because LEDs stay cool, they barely hum, and they won’t draw heat that dries needles. You’ll string them up easy, feel the faint plastic warmth, not the oven-blast of old bulbs. They offer energy efficiency, so your meter smiles, and you won’t cringe at holiday bills. Pick a color palette that actually looks good, too; LEDs give tons of color options, bright whites, soft ambers, playful blues — mix or match, I won’t judge. I plug them in, step back, adjust a strand, and the tree perks up like it just had coffee. Trust me, cool lights prolong freshness, and they make your living room feel like magic, not a sauna.

    Hang Lightweight Ornaments

    1 simple rule: less weight, less worry. You’ll thank me later. Pick ornaments that respect ornament weight limits, light enough to rest on fragile tips without sagging them into the carpet. I like paper stars, thin glass baubles, and tiny wooden toys—things you can hang with a soft tug and no drama.

    Check tree balance by stepping back, squinting, and nudging branches gently; redistribute clusters if one side leans like it had too much eggnog. Clip hooks close to the branch, hang heavier pieces near the trunk where it’s sturdier, but honestly, keep those rare, heavy heirlooms off the tree unless you’ve bribed your cat to behave.

    Less clutter, more air, longer-lasting needles. Simple, right?

    Tips for Maintaining Scent and Disposal

    If you want that piney, walk-in-a-Christmas-card smell to stick around, you’ve got to both feed and fend the tree—yes, trees need attention and you’re the designated caretaker. Keep the stand full, change the water every other day, and tuck a teaspoon of sugar or tree-preserving mix in there for scent preservation; it’s like coffee for conifers. Mist the needles lightly, don’t soak them, you want aroma, not a swamp. Vacuum dropped needles before they crush the scent, and open a window now and then to refresh indoor air. When its time to go, be kind: choose eco friendly disposal, chip branches for mulch, or recycle via city pickup. I’ll help load the truck, if you lift.

    Conclusion

    You’ve got this. Trim the trunk, plunge it in water, and check the bowl every day — like feeding a needy houseplant that also wants to glitter. I once left a tree thirsty for two days; it went from proud spruce to sad broomstick faster than my aunt’s eggnog runs out, and that was the wake-up call. Keep it cool, away from heat, mist the needles, and enjoy the scent — simple, smart, and merry.

  • How Do I Choose the Perfect Christmas Tree

    How Do I Choose the Perfect Christmas Tree

    You want a tree that fits your room and your chaos, not a floppy mess in the corner or an operatic showstopper you can’t navigate around; measure your ceiling, picture the skirt, and imagine the lights warming the room, smell the pine or note the faux-needles’ plasticky sheen, then decide how much upkeep you’ll tolerate—I’ll help you pick shape, size, species, or fake, show you how to test freshness and water it right, and warn you about the things nobody tells you until it’s too late.

    Key Takeaways

    • Measure ceiling height and room space, then subtract about 12 inches for the topper and stand before choosing tree height.
    • Pick a shape and fullness (slim for tight spaces, full for lots of ornaments) that fits your room flow and style.
    • Choose real for fresh scent and authenticity or PE/artificial for reusable convenience and lifelike appearance.
    • For real trees, make a fresh trunk cut, keep the stand filled daily, and place away from heat sources for safety.
    • Set a budget including stand, lights, and storage, and prefer durable materials and sustainable options when possible.

    Measuring Your Space and Ceiling Height

    measure space before buying

    If your ceiling’s under eight feet, don’t bring home a sapling that needs ladder lessons—measure first. I tell you this like a friend who once wedged a tree into a doorway, sap and shame everywhere. You grab a tape measure, press it to the ceiling, and note the height; compare that to the tree height the seller lists, subtract a couple inches for the star and stand, and you’ll avoid awkward trimming sessions. Walk the room, feel the floorboards creak, and mark where the tree will breathe; account for space limitations near sofas, doors, and your cat’s favorite napping spot. Say aloud where lights will run, visualize ornaments sparkling, then buy confidently—no regret, just perfect fit and guilty glitter-free pride.

    Real vs. Artificial: Pros and Cons

    real vs artificial trade offs

    You’ll want to weigh real versus fake on price, upkeep, and what happens to it after the holidays. I’ll admit I love the pine smell of a fresh tree, even if it means sweeping needles and watering every few days; artificial trees save you that chore, but they can sit in a garage for decades and still cost more upfront. Picture yourself flossing needles from carpet or hauling a boxed tree to the curb — which trade-offs are worth it to you?

    Real vs. Artificial Cost

    Because money matters more than holiday vibes to me some years, let’s talk turkey—well, fir versus plastic. You’ll pay less up front for a real tree, the smell hits you like a pine-y punch, and you get the ritual of hauling it in; that’s worth something, right? An artificial tree costs more initially, you wrestle a box out of the garage, but you’ll reuse it for years, save time, and dodge sap. Crunch the numbers: if you keep an artificial tree five to seven seasons it often beats yearly real-tree purchases. Don’t forget storage space, assembly grumbles, and how much you value authenticity versus convenience. I side with what fits your life, and your wallet.

    Maintenance and Waste

    Money talk’s over for now—let’s look at what actually happens after you bring the tree home. You’ll water a real tree, needles pricking your palms, sap tacky on your fingers, and vacuum more than you expected; upkeep’s honest work, but it smells like pine and nostalgia. An artificial tree saves needles and daily watering, though it can trap dust and plastic sheen that never warms your hands.

    When it’s time to part ways, check local tree disposal options, they might chip it for mulch or run a holiday collection—feel like eco-hero for a day. If you keep a fake, stow it clean, or donate. Either way, choose eco friendly decorations, reuse lights, and keep the planet on your guest list.

    Picking the Right Tree Shape and Size

    measure height choose shape

    How tall should your tree be—grand enough to impress Aunt Linda, but not so huge you’ll need a ladder and a waiver? I tell you, measure ceiling height first, then subtract about a foot for a topper and stand. Think about tree size in relation to room traffic, furniture, and that yoga mat you never use. For tree shape, pick one that fits your vibe: slim for tight corners, full and symmetrical if you love ornament avalanche control. Picture hauling it in, the pine scent hitting you, needles pricking your palms, and imagine lights weaving through branches without wrestling. I’ll nudge you toward practical choices, while you decide whether drama or cozy fits your living room. Trust me, you’ll know when it feels right.

    Common Christmas Tree Species and Their Traits

    You’ll notice fir trees hold their needles like a secret, smell amazing when you brush past them, and make your living room smell like a cozy forest. Pine feels classic and soft under your hands, perfect if you hate pokes but love that resinous, familiar scent. Spruce gives you sturdy branches for heavy ornaments, but watch your fingers—those needles are sharp, and they’ll remind you who’s boss.

    Fir: Needle Retention, Scent

    Curious which fir will still be poking you in the ribs by New Year’s? I’ll say it straight: firs are the low-maintenance divas of trees. You want needle retention? They’ve got it, they hold needles like a secret and drop them reluctantly. You want an aromatic scent? Breathe deep, you’ll get piney, resinous notes that make your living room smell like a cozy cabin, minus the snow. I’ll point out Fraser and balsam — compact branches, sturdy for heavy ornaments, no sap tantrums. I’ll nudge you to feel the needles, squeeze the trunk, sniff close, yes, it’s that simple. I’m biased, sure, but pick a fir and you’ll relax, not tiptoe, through December.

    Pine: Classic, Softer Needles

    Fir’s needle-holding talents are lovely, but let’s wander over to the pines — they’re the Christmas tree equivalent of the comfy old sweater you keep reaching for. You’ll notice pine varieties tend to have longer, softer needles, they feel gentle against your wrist when you hug the trunk, and they catch ornaments in a forgiving way. I like them for that casual, lived-in look.

    • Look for flexible branches, they bend without snapping, great for chunky glass baubles.
    • Smell the tree, pine scent is bright, resinous, like a walk in damp woods.
    • Check needle softness, not brittle; softer needles mean fewer pokes, less sweeping later.

    You’ll leave with a tree that invites you to linger.

    Spruce: Sturdy Branches, Sharp

    Think of spruce as the practical cousin who always shows up with a toolbox and a glare. You’ll feel those sharp needles if you hug it, but that’s the point: spruce characteristics include firm, upward-facing branches that hold heavy ornaments without sagging, and a citrus-wood scent when you brush past. I’ll admit, it’s less cuddly than pine, but it looks crisp, sculpted, like a living green chandelier. Check spruce varieties—Norway, Colorado, Serbian—each gives you a slightly different needle stiffness, color, and aroma. You’ll want gloves for trimming, a strong stand, and a careful hand when stringing lights. If you like structure, durability, and a no-nonsense silhouette, spruce will make your tree game sharp, literally.

    How to Check Freshness and Longevity for Real Trees

    One quick test will tell you more than a dozen pretty Pinterest photos: give a branch a firm tug and watch what happens, I promise you’ll learn the truth right then. I check freshness indicators with my hands, nose, and eyes — needles that bend, not break, and a citrusy pine scent mean the tree’s alive. Longevity tips? Pick a trunk that’s sticky with sap, not brittle, and look for uniform color, no bald patches.

    • Rub a few needles between fingers; fragrant oils mean freshness.
    • Bounce the trunk end on the ground; a little sap and flexible needles signal life.
    • Inspect cut ends for pale wood, not dark or dry, that’s a red flag.

    You’ll leave smiling, tree intact, you clever holiday detective.

    Caring for a Real Tree: Watering and Safety Tips

    Three simple rules will keep your tree happy, and me less likely to receive frantic midnight texts about a drooping spruce. You’ll water it daily, check the stand, and keep it cool, got it? Use basic tree hydration techniques: fresh cut, big reservoir, measured top-ups. If needles drink fast, you’ll pour; if they stay plump, you’ll pause. Smell the sap, feel the weight — that’s your meter.

    Now for fire safety precautions: keep lights inspected, unplug overnight, don’t block exits, and keep heaters away. Use LED bulbs, replace frayed cords, and anchor the tree so it won’t tip during decor theatrics. I’ll nag gently, you’ll laugh, and together we’ll keep your holidays safe, scented, and sparkling.

    Choosing an Artificial Tree: Materials and Realism

    You’re about to pick a fake tree, and yes, I’ll judge your taste gently — but only after I’ve sniffed it (they don’t smell like pine, surprise). You’ll handle boxes, unzip branches, and compare needles, while I point out what matters: material types and realism factors. Choose wisely, you’ll thank me.

    • PVC vs PE: PVC needles are cheap, shiny, cheap-looking; PE is molded, textured, more lifelike.
    • Tip density: More tips means fuller silhouette, fewer gaps, better shadow play when lights hit.
    • Branch construction: Hinged branches fold fast, wired tips let you shape, layered branch scales add depth.

    I’ll poke the branches, sass the catalogue, and say save up for PE if you want passable forest vibes.

    Decorating Considerations: Weight, Lights, and Theme

    If you’ve ever hung an ornament and felt the branch sag like a tired selfie arm, congratulations — you’ve met the gravity problem. You’ll want sturdy limbs, or you’ll spend the evening rescuing baubles. Test branch weight before you buy, feel the needles, give a gentle tug. Plan light placement next, weave lights inward toward the trunk for depth, wrap evenly, step back, squint, adjust. Pick a decorating theme early — rustic, minimalist, or disco inferno — and let it guide ornament size and ribbon heft. Balance heavy pieces near the trunk, keep fragile ones outward. I’ll admit I’ve overdecorated, then cried into tinsel. Learn from me: map your plan, gather tools, go slow, enjoy the sparkle without a cleanup crisis.

    Budgeting, Storage, and Sustainability Choices

    Because money matters — and so does Mother Nature, your closet space, and the odd ornament you swore you’d never buy but did — let’s get practical about the cash, the cupboard, and the conscience of your tree choice. You’ll want budgeting tips up front: set a cap, factor in stand and lights, and skip impulse upgrades. Smell the sap, count the needles on the carpet, breathe, then decide.

    Money matters — set a budget, factor lights and stand, think closet space and the planet before you buy.

    • Choose storage solutions like collapsible bags, labeled bins, and wall hooks to reclaim your hall.
    • Consider sustainability practices: rent-a-tree, live potted trees, or certified-cut options for lower impact.
    • Pick eco friendly options for lights and decorations, repair old bits, and donate the tree when done.

    Conclusion

    You’ve got this. Measure like you mean it, smell the sap, test a branch with playful brutality, and pick the tree that makes your living room sing. Go real for romance, fake for ease, slim for tight spaces, giant for showing off (I won’t judge). Water it, light it, don’t overload it, and stash the artificial in a labeled box like a responsible adult. Your perfect tree is waiting — grab it, decorate wildly, enjoy.

  • How Do I Put up Christmas Lights Safely

    How Do I Put up Christmas Lights Safely

    You’ll be amazed how a string of tiny LED bulbs can turn your sagging eaves into a festive runway, but let’s get it up without a trip to urgent care. I’ll walk you through picking the right lights, testing frayed cords, and climbing a ladder like a pro—three points of contact, remember—while we laugh at my own crooked first attempt; stick around and you’ll have a safe, weatherproof display that actually stays lit.

    Key Takeaways

    • Inspect all light strands, cords, and plugs for damage, fraying, or exposed wires before installation.
    • Use outdoor-rated LED lights, weatherproof plugs, and insulated extension cords to reduce fire and shock risk.
    • Plug into GFCI-protected outlets and avoid overloading circuits or daisy-chaining multiple extension cords.
    • Use a stable, non-conductive ladder with a spotter, maintain three points of contact, and avoid overreaching.
    • Secure lights with clips or hooks (no nails or staples), keep connections off the ground, and unplug during severe weather.

    Choosing the Right Lights and Equipment

    smart lighting setup essentials

    If you’re anything like me, you want lights that look magical and don’t short out the neighborhood, so start by picking bulbs that match the job. You’ll want LED options for stringing gutters, wreaths, and trees, because they’re cool to touch, won’t melt plastic clips, and deliver serious energy efficiency — your wallet will thank you. Choose outdoor-rated strands with sturdy sockets, weatherproof plugs, and the right length so you’re not juggling excess slack. Grab good clips, insulated extension cords, and a reliable ladder with rubber feet; don’t improvise with tape and hope. I say this from experience, while nursing a minor ego bruise and a coffee stain, but trust me: pick smart gear, set it up calmly, and enjoy the glow.

    Inspecting Lights, Cords, and Connections

    inspect lights and cords

    Start with one careful sweep of every strand, cord, and plug—don’t rush it like you’re about to bail on a boring party. Run your fingers along bulbs, check for cracks, discoloration, or gritty bits that smell like bad wiring. Tug gently at connections, listen for wiggle, spot loose prongs. It’s basic light maintenance, you’ll thank me later.

    1. Look for frayed insulation, exposed wire, or melted spots; if you see any, toss that strand.
    2. Test each bulb and socket on a known-good outlet; swap bulbs, watch for flicker or heat.
    3. Coil intact lines neatly for cord storage, avoid tight knots, label sets so you don’t reenact a holiday crime scene.

    You’ll stay safe, avoid sparks, and keep the magic humming.

    Planning Your Layout and Power Sources

    plan zones count strands

    You’ll want to break your house into tidy layout zones — roofline, bushes, porch — so you can picture the show before you start climbing. I’ll help you map each zone, count the strands, and sketch where outlets or timers need to sit, so you don’t end up with a tangled glitter bomb at midnight. Check your circuit capacity too, don’t overload one breaker, or you’ll be the neighborhood mystery when the lights go out.

    Choose Layout Zones

    Three zones usually do the trick: roofline, yard, and power hub — and I’ll show you how to tame each one without frying the neighborhood. I pick layout styles that read like a map, then assign clear zone designations so you don’t end up chasing extension cords at midnight. Picture yourself on a ladder, crisp cold air, lights in hand — plan feels good.

    1. Roofline — trace eaves, corners, gutters; keep clips every 12–18 inches.
    2. Yard — wrap shrubs, outline paths, anchor stakes for stakes that don’t wander.
    3. Power hub — centralize plugs, run cord channels, label each string.

    You’ll work smarter, not harder, and laugh when the neighbors ask how you did it.

    Assess Power Capacity

    If you want your display to glow without tripping every breaker on the block, we’ve got to size up the power like pros—briefcase-open, clipboard-out, but with less formality and more hot cocoa. You’ll count bulbs and strings, note wattage per strand, then total the power load. Walk the yard, plug in a tester, feel for warm cords, sniff for that “too-much-Christmas” ozone—okay, maybe don’t sniff too hard. Check your panel, read labels, and respect circuit limitations; don’t be clever with extension cords. If a circuit’s near max, split the lights across circuits, or use LED strands that sip juice. Label everything. I’ll remind you: safety’s boring until it isn’t, so plan smart, laugh at your ladder mishaps, and stay powered-up.

    Ladder Safety and Working at Heights

    When I haul out the ladder, I treat it like a partner in crime: steady, reliable, and not given to surprises, because surprises on a roof make my knees go numb. You double-check ladder stability, set feet on firm ground, and lock every hinge; you smell cold metal, feel rubber feet bite the concrete, hear wind negotiate your balance. Keep height awareness front and center, measure reach, never tiptoe at the top. Use a spotter, clip your tool bag on, and talk through each move.

    1. Inspect rungs, locks, and feet before climbing, replace damaged parts.
    2. Angle the ladder properly, three points of contact always.
    3. Wear grippy shoes, avoid carrying bulbs in your hands.

    Preventing Electrical Hazards and Overloads

    Okay, here’s the fun, not-so-flashy part: check your light set ratings so you know what each strand can handle, and don’t guess — read the little tag like it’s a secret map. Plug into GFCI-protected outlets outdoors, feel for that reassuring click, and if you’re using extension cords keep them single runs — no daisy-chaining like it’s a holiday conga line. I’ll say it straight: overloads are boring but dangerous, so split loads, use rated cords, and keep your display bright, not toasting.

    Check Light Set Ratings

    Because trusting a tangled ball of bulbs and a snowman clip to the mystery powers of your outlet feels like a dare, you’re going to check the light set ratings first — I promise it’s not boring. You’ll flip the strand over, feel the plastic, read the tiny print, and decide. Look for voltage and amp info, note whether it’s indoor or outdoor, and compare light set types — incandescent draws more, LEDs save power, they brag about energy efficiency for good reason.

    1. Confirm voltage and maximum amps — don’t guess, calculate.
    2. Count connected strands allowed on one circuit — follow the label.
    3. Inspect for damage, frayed cord, missing plugs — replace if unsure.

    Do it now, you’ll thank me when the breaker stays calm.

    Use Gfci-Protected Outlets

    If you want your holiday lights to stay merry and not singe your eyebrows, plug into a GFCI-protected outlet — seriously, it’s like a tiny electrical bouncer watching for trouble. I tell you this because GFCI benefits aren’t hype; they cut power fast if water or a frayed wire tries to ruin your night. Walk the yard, note Outlet locations before you hang anything, plan routes, and picture extension cords like tightrope lines. You’ll feel the cold, hear the ladder creak, and appreciate that reset button when a gust trips it. Test the outlet first, press Test, then Reset, like a secret handshake. If something trips, don’t curse—investigate, fix the fault, then smile and plug back in.

    Avoid Daisy-Chaining Cords

    You’ve already hunted down the GFCI outlets and given them the secret handshake, so now listen up — don’t turn your yard into a spaghetti monster of extension cords. You’ll tempt fate, and overload issues, if you keep daisy-chaining lights like it’s a DIY trophy. I’ve tripped breakers, smelled that telltale ozone, and vowed never again.

    1. Count plugs: know each string’s amperage, don’t guess, avoid daisy chain risks by spreading load across circuits.
    2. Use rated cords: heavy-duty, outdoor, UL-listed, keep connections off wet ground, tuck them under rubber mats.
    3. Plug limit: follow manufacturer maxs, use power strips with overload protection, label runs so you won’t recreate the mess next year.

    Weatherproofing and Securing Your Display

    When the forecast says rain, wind, or that weird sleety drizzle that sneaks up and ruins everything, don’t sigh and hope for the best — get ruthless about weatherproofing and securing your display. I’m blunt: use weatherproof materials, silicone-seal connectors, and outdoor-rated cords. Run lights through drip loops, tuck plugs up off the ground, and wrap exposed joins with proper tape, not duct tape (we’ve all learned that lesson).

    For securing methods, grab clips, zip ties, and a stout staple gun with insulated staples, and fasten to gutters, fascia, or stakes, not fragile shingles. Check lines for movement, tug gently, listen for rattles. When wind comes, you’ll be glad you did. Finish with a walkaround, hot cocoa optional, ego intact.

    Conclusion

    You’ve got this. I’ll admit, I once spent an hour untangling lights that looked like a Christmas octopus, but after you inspect cords, pick LEDs, clip—don’t nail—everything in place, and use a GFCI outlet, it’s smooth sailing. Picture 350 steady LEDs per strand, glowing like a tiny galaxy on your roof. Keep three points of contact, don’t overreach, and check for heat; if something smells off, unplug and fix it. Safe holiday glow.