Tag: cooking tips

  • How Do I Cook Prime Rib

    How Do I Cook Prime Rib

    The first time I nailed a prime rib, it behaved like a diva—lots of fuss, then a standing ovation when it sliced cleanly—so you can expect drama and reward. You’ll pick a well-marbled cut, season it boldly, roast it steady, and watch the thermometer like a hawk, and yes, you’ll smell butter and garlic before anyone sits down. I’ll walk you through timing, temp, and the resting trick that makes it sing, but first—stop fretting.

    Key Takeaways

    • Choose a well-marbled, bone-in rib roast (USDA Prime or Choice) sized 10–12 oz cooked per person.
    • Trim excess silverskin, leave ~1/4″ fat cap, and tie the roast for even cooking and neat presentation.
    • Season generously with coarse salt, freshly ground pepper, and an herb-garlic rub; let rest after seasoning.
    • Roast low and slow (about 15–20 minutes per pound) or reverse-sear, using an instant-read thermometer to target desired doneness.
    • Rest the roast 20–30 minutes tented in foil, then slice against the grain and serve with jus or horseradish.

    Choosing the Right Cut and Grade

    choose quality meat wisely

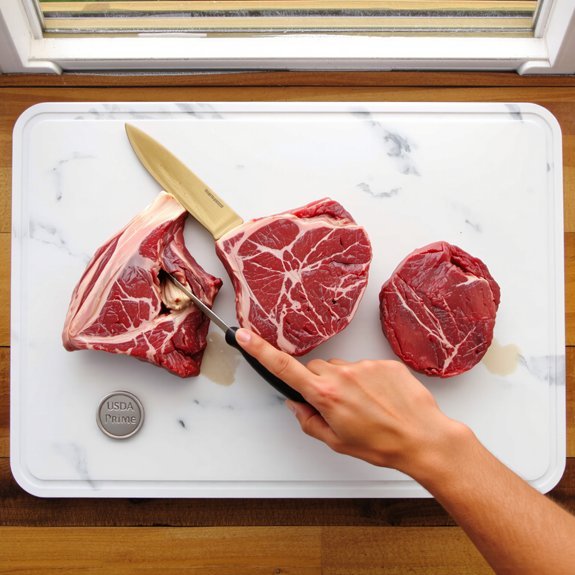
    Okay, let’s get picky. You’ll start by eyeballing the rib section, feeling the marbling under your fingers, because cut selection matters—don’t pick a sad-looking slab. I’ll tell you straight: better marbling equals juicier bites, richer aroma when it hits the pan, and that glorious crust you’ll brag about. Know the grade differences, USDA Prime pushes flavor, Choice is solid and wallet-friendly, Select you’ll politely decline at dinner. You’ll imagine the sizzle, the butter pooling, the rosemary scent—sales pitch? Nope, sensory homework. Trim minimal fat, leave the cap for flavor, tie if it flops. You’ll shop with purpose, not panic, ask the butcher one confident question, and walk out like you own Sunday dinner.

    Understanding Bone-In Vs Boneless Roasts

    bone in flavor vs boneless convenience

    One clear choice you’ll face is whether to keep the bones — and yes, those ribs change everything. I’ll tell you straight: bone in benefits aren’t just bragging rights. The bones add flavor, they steady the roast on the rack, and they make a prettier, more dramatic carve. You’ll hear richer aromas as it roasts, see juicier slices, and feel proud handing it to guests. But I get it, I’ve slipped on a carving knife too. Boneless convenience wins when you want faster prep, easier carving, and neater portions. You’ll trim and tie, slide it onto the pan, and relax. So pick what fits your ego and your kitchen skills—either way, you’re about to eat very well.

    Calculating Portion Sizes and Cooking Time

    calculating prime rib portions

    Think of servings like a shopping list for happiness: plan on about 10–12 ounces of cooked prime rib per person if you want generous portions, 6–8 ounces if you’re pairing it with hearty sides and frugal guests. You’ll do quick portion calculations, then factor cooking times by weight and desired doneness. I’ll walk you through it like a friendly drill sergeant.

    1. Weigh the roast, subtract ~20% for bone and shrinkage.
    2. Divide edible ounces by desired portion size.
    3. Estimate oven time: about 15–20 minutes per pound for medium-rare after sear/low-heat phases.
    4. Use a probe thermometer, rest 20–30 minutes, slice against the grain, serve steaming.

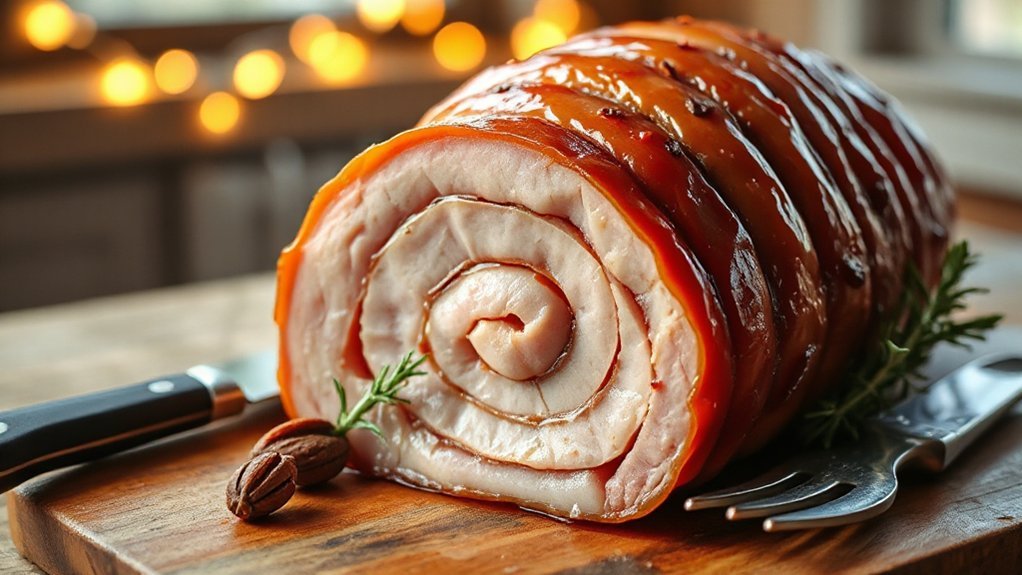
    Trimming and Tying the Roast

    Grab a sharp knife and a length of butcher’s twine—this is where the magic (and the mild swearing) starts. You trim silverskin and excess fat, feel the meat under your fingertips, hear the scrape of the blade, and breathe a tiny sigh of victory. Use simple trimming techniques: pare fat to about 1/4 inch, remove funky bits, leave the cap if you want juiciness. Then tie. I loop twine every inch or so, snug but not strangling, tuck loose ends, and make a neat butcher’s knot. Tying methods matter: single loop for stability, figure-eight for shape, trussing for even roast. It’s hands-on, a little theatrical, and yes, oddly satisfying—your roast now looks like you mean business.

    Seasoning and Marinades for Maximum Flavor

    You’re about to build flavor like a pro, starting with a simple salt-and-pepper crust that snaps and stains the air with toasty, savory perfume as it sears. Then we’ll smear on an herb-garlic rub—bright parsley, thyme, minced garlic, a splash of olive oil—that melts into the meat and gives each slice a fragrant, garlicky hug. Trust me, it’s bold, easy, and a little showy, but that’s the point: big taste, no drama.

    Salt-And-Pepper Crust

    Salt-and-pepper crust is the short, brilliant trick that turns a good roast into something people whisper about—trust me, I learned this the hard way with a sad, rubbery rib that tasted like regret. You’ll start by thinking about salt selection and why coarse salt sticks and seasons differently than fine; grab kosher or flaky sea salt, it gives texture and bite. Then press freshly ground black pepper into the meat, really massage it, watch the crust formation happen as proteins meet heat. Follow this quick checklist:

    1. Pat meat dry, room temperature.
    2. Generously salt, let sit 45–60 minutes.
    3. Press pepper into surface, don’t be shy.
    4. Roast hot, finish at lower temp, rest well.

    Herb-Garlic Rub

    One good rub can make a prime rib sing, and I’m talking herbs and garlic that hit like a chorus line—bright, savory, and impossible to ignore. I want you to pick herb selection like it’s a playlist: rosemary for punch, thyme for depth, parsley to freshen the aftertaste. Smash garlic, choose from garlic varieties —soft-roasted for sweetness, raw for bite—then mix with coarse salt, cracked pepper, olive oil, maybe a squeeze of lemon. Rub every crevice, press hard, don’t be shy, you’re massaging flavor in. Let it rest, fridge overnight if you can. When you roast, aromas will rise, the crust will sing, and you’ll wink because yes, you did all that.

    High-Heat Searing Techniques

    You’ll want to pat the roast bone-dry, no dampness left to steam your crust away, because a dry surface gives you that snap. I preheat the pan or oven spot until it’s screaming hot, you should see heat shimmer and a faint scent of oil just before it smokes. Then we hit every side, flip with confidence, and listen for that loud, caramelized sizzle that says you nailed the sear.

    Dry the Surface

    Think of the crust as the coat of armor for your prime rib — the part that snaps, sizzles, and makes people stop mid-bite. You’ll want to remove surface moisture before searing, I promise it pays off. Pat the roast dry with paper towels, press firmly, keep at it until no damp spots remain. Use drying techniques like air-dry in the fridge for a few hours, towel patting, gentle blotting with a clean cloth, or a quick saline brine that you dry off completely.

    1. Pat thoroughly.
    2. Air-dry uncovered.
    3. Don’t crowd the pan.
    4. Salt early, then dry.

    This creates a brown, crackly crust, not a sad, steamed mess. You’ll thank me when everyone goes silent.

    Preheat Extremely Hot

    You’ve dried that roast until the skin snaps under your fingers, so now we crank the heat and make the crust happen. I tell you, you don’t mess around here: preheat oven to an ideal temperature that’ll torch the exterior without overcooking the middle later. I set mine high, wait until the gauge sings, and watch the light go steady — that’s your cue. Use a sturdy rack, a roomy pan, and gloves like a grown-up, because this is hot, glorious work. The room smells like promise, you hear the metal sigh as it warms, and your confidence rises. Quick, decisive action wins—get that oven screaming, then we’ll move fast, no hesitations.

    Sear All Sides

    Grab that roast like you mean it, then slap it onto a screaming-hot surface and let the magic begin. You’ll hear that sizzling technique sing, and you’ll smile — I do. You’re building flavor fast, sealing juices, creating a brown crust that snaps when you slice.

    1. Heat pan or grill until it smokes lightly, oil it, don’t crowd the meat.
    2. Press each face to the heat, count to 45–60 seconds, flip with confidence.
    3. Use tongs, not forks, keep your hands back, watch for flare-ups.
    4. Finish edges upright, hit fat cap last, rest the roast before carving.

    I’ll give you searing tips: watch color, trust smell, don’t overcook, and own the process.

    Low-and-Slow Roasting Method

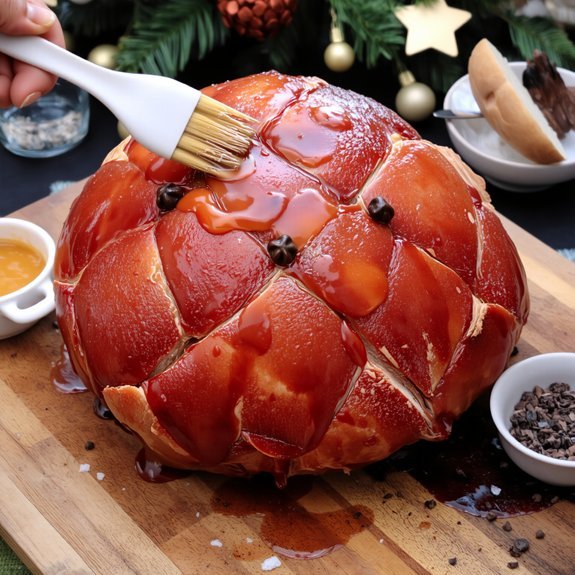
    If you want a prime rib that’s tender all the way through and cooks to a perfect rosy edge, low-and-slow roasting is your secret weapon, and yes, it’s worth the patience—trust me. You’ll set a low temperature, slide the rib in, and let time do the heavy lifting. The gentle heat breaks down collagen, keeps juices where they belong, and rewards you with a butter-soft bite. I pat the roast dry, season boldly, then pop it fat-side up so flavors baste as it goes. Expect long, quiet hours, fragrant steam, the kitchen smelling like success. You’ll resist peeking, I know, but that restraint equals better moisture retention and a uniformly pink center. Slice slowly, savor loudly.

    Using a Thermometer for Perfect Doneness

    One tool will save your roast more reliably than prayer or Pinterest tips: a good instant-read thermometer, and I’ll tell you how to wield it like a pro. You’ll poke the thickest part, avoid bone, and watch for temperature accuracy — that tiny difference decides everything. I’m blunt: don’t guess.

    A good instant‑read thermometer will save your roast — probe the thickest part, avoid bone, and stop guessing.

    1. Calibrate first, ice-water or boiling check, so readings don’t lie.
    2. Probe depth matters, mark the spot, steady hand, quick read.
    3. Know doneness levels, aim for targets, and trust the numbers over feel.
    4. Sweep multiple spots, record temps, adjust oven time as needed.

    You’ll hear a sizzle, smell roasted fat, and relax when numbers match intent, because precision beats luck every time.

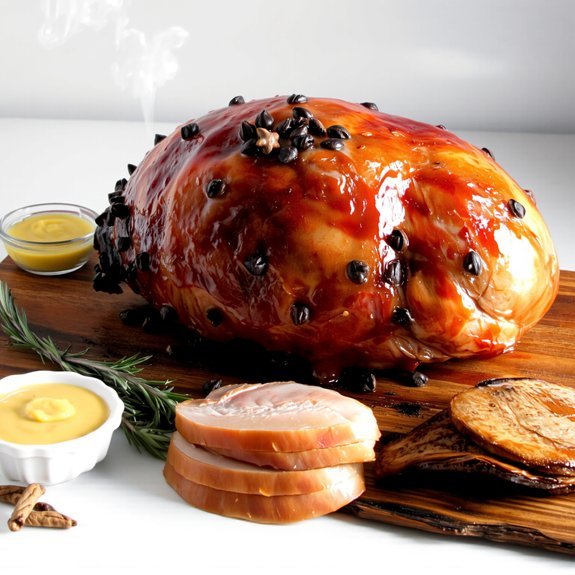
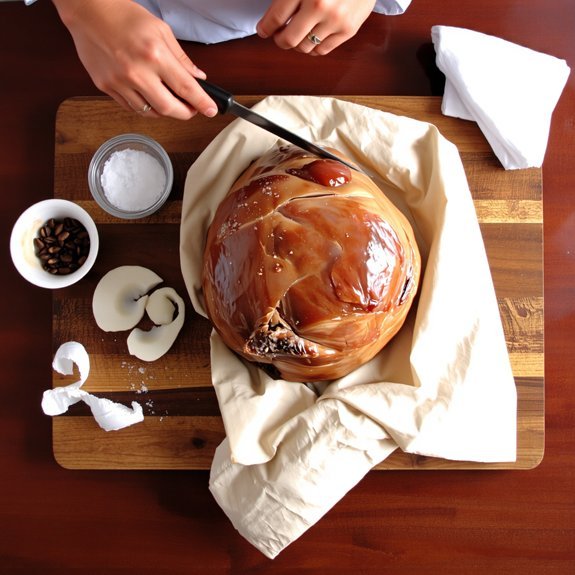
    Resting and Carving Like a Pro

    You’ve got the thermometer out, the roast hit your target temp, and yes, you can finally stop hovering like a nervous hawk — now comes the part that makes or breaks dinner: resting and carving. Sit the prime rib on a carving board, tent loosely with foil, and let those juices redistribute — that’s basic resting techniques, and yes, patience is a flavor. I pace, I sip, I stare at the couch like it’s doing work. After 20–30 minutes, reveal the glorious crust. Use a sharp slicing knife, steady your hand, cut against the grain, and aim for even slices. My carving methods are simple: thin for tenderness, thicker for show, keep a pan ready for jus. Don’t rush, savor the reveal.

    Serving Suggestions and Leftover Ideas

    Lots of ways to plate prime rib so it looks like you meant to be fancy. You slice across the grain, watch the juices bead, and drape meat over roasted veggies like it’s a tuxedo. Serve it with horseradish cream, au jus, or a chunky chimichurri, and don’t be shy about browned butter asparagus — it sings.

    1. Thin slices, warm plate, bright chimichurri — instant elegance.
    2. Thick cuts, jus on the side, roasted potatoes — stick-to-your-ribs comfort.
    3. Leftover sandwiches: shred cold meat, add mustard, pickles, toasted ciabatta.
    4. Prime rib salads: mixed greens, shaved beef, blue cheese, vinaigrette.

    You’ll have dinner applause, and tomorrow’s lunch will taste like a happy accident.

    Conclusion

    You’ve got this—season well, roast steady, and watch the thermometer like a hawk. I once under-salted, learned quickly, then nailed a perfect 130°F medium-rare that made my neighbor applaud mid-bite (yes, really). Rest it, slice against the grain, smell that buttery crust, taste that juicy pink center. Serve with horseradish or pretend you planned the sides. Leftovers? Sandwiches that’ll make you forgive past mistakes. Cook, enjoy, repeat.

  • How Do I Cook Ham for the Holidays

    How Do I Cook Ham for the Holidays

    Most people don’t know that a pre-cooked spiral ham only needs gentle heating, not an hour of oven punishment. You’ll learn how to trim, glaze, and time it so the crust sings and the meat stays juicy, and yes, I’ll show you a failproof glaze that even your picky aunt will admire. Stick with me — I’ll stop the drying-out disaster before it starts, and we’ll still have room for pie.

    Key Takeaways

    • Choose the right ham (smoked, spiral, bone-in, or boneless) based on flavor, presentation, and how much hands-on carving you want.
    • Trim excess rind and fat, leaving a thin fat cap so the glaze penetrates without creating greasy slices.
    • Reheat or cook to safe temperatures: 145°F for raw ham, 140°F for fully cooked/reheated, using a meat thermometer.
    • Glaze with a sugar-acid base (brown sugar, maple, mustard, or fruit) and brush every 10–15 minutes, finishing under broil for caramelization.
    • Roast at 325–350°F, plan 15–20 minutes per pound for pre-cooked bone-in, then rest 15–20 minutes before slicing.

    Choosing the Right Type of Ham

    choose ham that resonates

    Why pick one ham over another—doesn’t that feel oddly like choosing a holiday soulmate? You’ll sniff first, trust me, because aroma tells you stories: a smoked ham hits you with woodsy, savory warmth, while a spiral ham promises convenience and those postcard-perfect slices. You’ll imagine the table, plates clinking, jaws mid-chew, and decide whether you want rustic depth or effortless glam. I’ll nudge you toward smoked ham if you crave smoky drama, char notes, and a chewy, satisfying bite; pick spiral ham when you want neat rounds, glaze that clings like candy, and zero knife theatrics. Either way, picture slicing, tasting, a little dance in the kitchen—you’ll know when you’ve found the one.

    Preparing and Trimming the Ham

    trim ham for optimal flavor

    You picked a ham, now let’s get it ready — I’ll help you spot the right cut and trim it like a pro, no stress. Lay it on a sturdy board, feel for the fat cap and follow the bone with a sharp knife, peeling away any thick, waxy blubber until you’ve left a thin, even layer that’ll baste and crisp. Trust me, a little careful trimming smells better, carves prettier, and makes the glaze actually stick, so roll up your sleeves and let’s make this ham sing.

    Choosing the Right Ham

    How do you pick a ham that makes everyone forget about the messy year and fight over seconds? You weigh ham varieties, you sniff for sweet or smoky flavor profiles, and you picture that glorious brown crust. I say go bone-in for depth, if you don’t mind a little carving theater. Boneless is neat, fast, kid-approved. Spiral-cut saves your wrist, but check glaze absorption—some hams drink it up, others shrug. Smoked versus honey-cured? Smoked hits you like a cozy fireplace, honey-cured sings of sticky, golden sweetness. Feel the heft, examine the label, imagine the aroma pulling guests from the couch. I promise, pick one with confidence, and you’ll be the reason someone whispers, “Can I have more?”

    Trimming Excess Fat

    When the ham comes out of its wrapper, take a breath and look it over like you’re about to tame a small, fatty beast—I do, every time, because trimming is half ceremony, half surgery. You’ll see thick rind and blobs of fat. I tell you to start with a sharp knife, slice away pockets of fat, leaving a thin cap for flavor. Feel the texture, smell the pork, don’t be squeamish. Use gentle strokes, pull the fat with your free hand, keep the blade angled, that’s key. These trimming techniques speed cooking, prevent greasy glaze, and help even seasoning. Fat removal isn’t about purging flavor, it’s about balance. You’ll end up with a neater, juicier roast, and a proud grin.

    Glaze Ideas and Application Techniques

    glazed ham application techniques

    Even if you’re planning a simple spiral-sliced ham, don’t skip the glaze — it’s the part that turns “nice” into “knock-their-socks-off.” I’ll walk you through flavor ideas that actually sing (brown sugar and mustard? yes. maple and bourbon? absolutely.), and show how to paint, baste, and finish so every slice has a glossy, caramelized crust that cracks with a satisfying snap. Start with a base: brown sugar, a splash of maple syrup, and a spoonful of spicy mustard for snap; add cloves, citrus zest, or bourbon if you’re brave. Brush on, let it set, baste again every 10–15 minutes, and finish with a hot broil for five minutes to blister. Slice, smell, smile, serve.

    Oven Roasting and Baking Times

    Okay, here’s the game plan: set your oven temperature right, I mean precise heat so the fat crisps and the meat stays juicy, and I’ll walk you through the sweet spot for both spiral-cut and whole hams. You’ll learn the minutes-per-pound math that stops guesswork, plus when to baste, when to tent with foil, and how long to let the ham rest so juices settle (trust me, patience equals glory). Then we’ll slap on the glaze at the perfect moment, hear the oven sing, and carve into a glossy, fragrant centerpiece everyone’s been eyeing.

    Oven Temperature Guidelines

    Heat is your friend, not a tyrant—treat the oven like a temperamental but reliable sous-chef and you’ll nail the roast. I tell you plainly: set the oven temperature to control flavor, not just kill germs. Different cooking methods need different temps; low and slow brings tender, high heat crisps the exterior. You’ll smell caramel and hear a gentle sizzle when it’s working.

    1. 325°F for gentle roasting, steady and forgiving.
    2. 350°F for a balance of browning and juiciness.
    3. 375–400°F to finish, crisp the glaze, watch closely.
    4. Use an oven thermometer, don’t trust the dial.

    I check color, tent with foil, baste once — you’ll get applause, and maybe a smug grin.

    Cooking Time per Pound

    One reliable rule I swear by: plan for roughly 15–20 minutes per pound for a fully cooked, bone-in ham at 325°F, and about 10–12 minutes per pound if you’re starting with raw ham—numbers that keep you out of the danger zone and in the delicious one. You’ll use simple cooking methods, oven roasting mostly, and do time calculations that make sense. I’m blunt: weigh the ham, do the math, set the timer. You’ll hear the oven hum, smell the sugars caramelize, and peek once or twice like it’s a sitcom. If you’re nervous, use a meat thermometer—145°F for raw, 140°F for reheated, and you’re gold. No drama, just juicy results.

    Resting and Glazing Tips

    You’ve done the math, set the timer, and the oven’s been humming like a tiny orchestra—now don’t wreck it by skipping the rest. Let the ham sit, tented loosely with foil, for 15–20 minutes; juices redistribute, you’ll slice cleaner, and it won’t spatter molten bliss everywhere. Try simple resting techniques: elevate on a rack, keep it warm, and resist the fork.

    1. Brush glaze cold, then reheat briefly for shine.
    2. Baste every 10 minutes for a sticky crust.
    3. Sear under broiler 2–3 minutes for caramel.
    4. Let internal temp settle 5–10°F before slicing.

    Pick glazing options you love—brown sugar, mustard, or maple—mix sweet, tang, and heat, then watch guests swoon.

    Reheating Pre-Cooked Hams Safely

    If you’re staring at a glossy, pre-cooked ham on your counter and wondering how not to ruin it, relax — I’ve got your back. You want safe reheating, and you want it tasty, not rubbery. Preheat the oven to 275–300°F, that’s your sweet spot for even warmth. Pop the ham, fat-side up, in a shallow pan, add a splash of water or stock, cover tightly with foil, and let low, slow heat work its magic. Aim for internal temperature guidelines: 140°F for fully cooked hams, check with a probe in the thickest part. Rest five to ten minutes before slicing. You’ll get juicy slices, no surgical gloves required. Slice, serve, and enjoy the applause.

    Common Mistakes to Avoid and Serving Tips

    Alright, now that your pre-cooked ham’s safely warmed and resting like a diva, let’s talk about the stuff that actually ruins dinner — and how to avoid it. You’ll trip up if you over-glaze, slice too early, or serve it stone-cold. Keep juices, keep patience. For common serving errors, remember: cut against the grain, let carryover finish the job, and save the drippings for sauce.

    1. Over-glazing burns surface, tastes bitter.
    2. Cutting hot makes a juicy mess.
    3. Ignoring internal temp risks safety.
    4. Bland plating kills holiday presentation.

    Plate with colorful sides, spoon glossy glaze over cuts, whisper “look alive” to guests, and enjoy the applause when everyone digs in.

    Conclusion

    You’ve got this. One in four Americans serves ham at holiday meals, so your oven heroics matter. Trim a little fat, slap on that glaze, baste like you mean it, and let the steam perfume your kitchen—brown sugar caramel, tangy mustard, sticky citrus. Rest it, slice it, watch jaws drop. I’ll take credit, you take the applause, and don’t forget: save the bone for soup, it’s dinner encore magic.

  • How Do I Make the Perfect Gravy

    How Do I Make the Perfect Gravy

    You want gravy that smells like dinner’s winning, so we’ll do it right: sweat onions, brown the roast until the pan is naughty with fond, whisk in flour, then add stock a little at a time while you stir like you mean it; taste, tweak with salt, pepper, a splash of acid or sherry, finish with cold butter for shine—simple, exact, and stubbornly delicious—stick around and I’ll show you the tiny tricks that turn good gravy into the stuff people fight over.

    Key Takeaways

    • Build flavor by sweating a mirepoix (2 parts onion, 1 carrot, 1 celery) and browning meat to create fond.
    • Deglaze the pan with stock or wine, scraping browned bits to incorporate deep savory flavor.
    • Thicken gradually with a roux or cold slurry, whisking constantly to avoid lumps and achieve silky texture.
    • Adjust seasoning and balance with acid (lemon, vinegar, or wine) and a final pat of cold butter for sheen.
    • Rescue issues by straining lumps, simmering to concentrate, or diluting salty gravy with unsalted stock.

    Essential Ingredients and Equipment

    essential gravy ingredients and tools

    Alright, let’s get real: good gravy starts with the right stuff. You’re going to want stock, fat, flour, salt, and pepper, nothing mystical. Smoked drippings, chicken bones, or mushroom stock give different gravy types, so pick your mood. Grab essential tools: a whisk that won’t clump, a wooden spoon for scraping, a fine sieve for shine, and a heavy pan that heats evenly. I’ll admit, I once burned flour—I winced, you’ll laugh—so keep a scraper handy. Taste as you go, adjust with acid or butter, watch texture closely, it tells you the story. Prep your mise en place, keep warmth nearby, and don’t forget a mug for spoon-licking. You’re ready.

    Building a Flavorful Base

    sweating mirepoix browning roast

    You start by sweating a mirepoix—onions, carrots, celery—until they smell sweet and a little like caramel, and yes, that smell alone makes you feel proud. Then, brown your roast in the same pan so the fond sings, those dark bits sticking like tiny flavor trophies you’ll scrape up with stock. Stick with me, we’ll turn that caramelized, browned mess into gravy that talks back.

    Aromatic Mirepoix Roast

    Three things happen the second you toss a rough-chopped onion, carrot, and celery into a hot pan: they sizzle, they brown, and they start telling you the story your gravy will later brag about. You’ll pay attention to mirepoix ratios — the classic two parts onion, one part carrot, one part celery — because balance matters, and because I like to argue with tradition while mostly obeying it. Roast those aromatics until edges caramelize, stir, breathe in the sweet, savory perfume. You’ll get the aromatic benefits immediately: depth, sweetness, a savory backbone that hugs your gravy. Don’t let them burn, just coax color and flavor, scrape browned bits gently, taste constantly, and laugh when it smells so good you almost skip the gravy.

    Fond Development Techniques

    Now that your mirepoix has sung and browned, it’s time to let the pan tell the rest of the story—really listen to that caramelized whisper stuck to the bottom. I teach you to coax those flavors, you watch the magic. First, know your fond types: brown beefy bits, pale fond from poultry, and sticky veg caramel—all useful, all different. Use fond techniques like deglazing with wine or stock, scraping with a wooden spoon, and simmering to dissolve treasures. Smell it—nutty, toasty, a little sweet. Don’t burn it, you’ll sulk over bitterness. I’ll jab a lemon or add butter for roundness, you’ll nod. It’s theatrical, intimate, a tiny kitchen confession that turns drippings into delicious gravy.

    Achieving the Perfect Consistency

    silky pourable gravy perfection

    If the gravy’s too thin, it’s sad and slippery; if it’s too thick, it’s a gloopy crime scene — let’s aim for silky, pourable perfection. You’ll watch texture like a hawk, taste as you go, and use simple consistency techniques: simmer to reduce, whisk to smooth, and add measured thickening agents. Start hot, then lower heat; a steady simmer mellows starch and concentrates flavor. Make a slurry with cold liquid before you stir it in, or temper a roux into warm stock, no lumps allowed. I nudge with butter at the end for sheen and silk. If you need to loosen, add warm stock spoonwise; to enrich, simmer a touch longer. You’ll learn the feel: coats the spoon, drips slow, looks irresistible.

    Fixing Common Gravy Problems

    You nailed the texture lesson, and now we cope with the mess-ups that sneak up on you—because gravy is a diva, and you’ll need a few tricks when she throws a tantrum. I’ve seen the lumps, the thin puddles, the sad gray sheen. Common mistakes? Not whisking, adding cold liquid to hot roux, or cooking off the flavor. Troubleshooting tips start with rescue moves: blitz lumps with a blender or strain through a fine sieve, simmer slowly to thicken, or whisk in a beurre manié spoonful by spoonful. If it’s too salty, dilute with unsalted stock, if too thin, reduce or whisk in starch slurry. Taste constantly, adjust heat, and own the fix—gravy forgives, eventually, when you do the work.

    Flavor Variations and Add-Ins

    Welcome to the flavor toolbox—I’m about to make your gravy interesting, not intimidating. You’ll want to taste first, then tweak. Add herb infusions like thyme sprigs, rosemary needles, or a bay leaf tied to a spoon; simmer briefly, then fish them out. Try splashy add-ins—sherry, soy, or a mustard whisk—to lift sadness from bland gravy. For heat or depth, grind fresh pepper or fold in spice blends like smoked paprika and cumin, sparingly at first. Want richness? Stir in brown butter or a pat of cold butter off-heat, whisking until glossy. For brightness, squeeze lemon or drop minced shallot sautéed until sweet. I promise, with small experiments, your gravy will sing, not mutter.

    Serving and Storage Tips

    Plating’s where your gravy gets to brag a little, so don’t let it slouch in a sad spoon — ladle it hot, steady, and with a confident wrist so it pools just right around the meat and veggies; I like to warm the gravy gently on low while the plates rest, give it one last whisk to gloss it up, then drizzle in an S or a heart if I’m feeling dramatic. Keep an eye on serving temperature, aim for warm, not scalding, so flavors sing and mouths don’t protest. If you’re saving leftovers, cool gravy quickly, skim any fat, then portion into airtight storage containers, label and chill. Reheat gently, whisk to revive the sheen, taste, adjust salt, then serve like you meant it.

    Conclusion

    You’ve learned the recipe, now think of gravy as a loyal dog: you train it with patience, feed it good stock, and it repays you with warm, glossy devotion. I’ll say it plain—don’t rush the browning, taste like you mean it, finish with cold butter for that shine. You’ll end up with something comforting, saucy, and seriously gratifying. Keep practicing; the perfect gravy’s a friendship, not a miracle.