Tag: cozy drinks

  • How Do I Make Mulled Wine

    How Do I Make Mulled Wine

    Ever notice how one simmering pot can make a room feel like a holiday movie set? You’ll grab a fruity red, toss in cinnamon, star anise and cloves, peel an orange with purpose, and let the kitchen fill with sticky, warm spice — it’s simple theater, really, and you’ll look like you know what you’re doing. I’ll show you how to simmer gently, sweeten smartly, and serve it so everyone pretends you planned this.

    Key Takeaways

    • Choose a fruity, mid-range red (or dry white) and discard any wine that smells off.
    • Combine wine, citrus peel, whole spices (cinnamon, cloves, star anise), and a sweetener in a heavy pot.
    • Warm gently to 65–75°C without boiling, simmering slowly to extract flavors and tasting as you go.
    • Sweeten last with honey, maple, liqueur, or brown sugar to balance acidity and spice.
    • Strain, serve garnished with citrus, berries, and a cinnamon stick, and store refrigerated up to 3 days.

    Choosing the Right Wine

    choosing cozy wine wisely

    If you want the mulled wine to taste like a cozy hug instead of a boiled mystery, start with the right bottle. You’ll pick a red wine for depth, something fruity, not tannic, because you don’t want grit stealing the show. I’d avoid super-expensive labels — this isn’t a sommelier’s parade, it’s winter comfort. If you prefer a lighter approach, try a dry white wine, it mulls surprisingly well with citrus and a touch of honey, bright and cheeky. Smell the bottle, pour a sip, and trust your nose; if it smells off, don’t force it. I keep a reliable mid-range red and a crisp white on hand, so when cold hits, I’m ready, no panic, just pour and heat.

    Essential Spices for Mulling

    mulling spices require balance

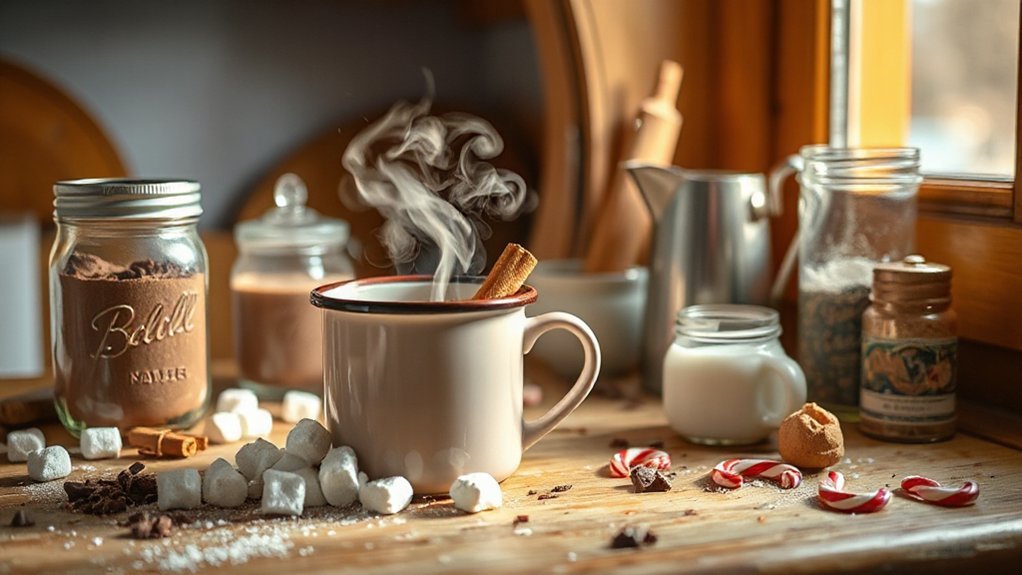
    You’ll want whole spices—sticks of cinnamon, star anise, and clove studs—so you can smell them hit the pot before you even turn on the heat. Decide between fresh and dried: fresh citrus peels and whole nutmeg give bright, zesty punch, dried bay or ginger add steady backbone, and I’ll warn you, too many cloves will boss the room. Start with modest quantities—one cinnamon stick, three cloves, a half-apple slice worth of nutmeg—and taste as you heat, because mulling is negotiation, not warfare.

    Whole Spices Selection

    Although I won’t promise your kitchen won’t smell like a holiday movie in ten minutes, choosing the right whole spices is where the magic starts, and I’ll walk you through it like a mildly obsessed friend whispering secret recipes. You’ll grab cinnamon sticks for warm backbone, star anise for that licorice twang, whole cloves for sharp perfume, and a couple of nutmeg seeds to grate over the top. Toss them in a saucepan, bruise the cinnamon, press the cloves into citrus, give star anise a little nod, and hold the nutmeg like a tiny fortune. You’ll simmer gently, taste, and tweak. Don’t go overboard; mulled wine is a suggestive art, not a punch to the face.

    Fresh vs. Dried

    Wondering whether to reach for the jar of whole cloves or the sad little packet of ground spice? I’ll be blunt: fresh herbs sing, dried ones whisper. You’ll notice fresh herb benefits immediately — bright citrus thyme, glossy bay leaves, crushed star anise that snaps. They lift aroma, they look pretty in the pot, they make you feel fancy and competent. But dried herb convenience is real; you’ll grab, toss, and never worry about wilting. I mix approaches, because life’s messy and so is my spice drawer.

    1. Use fresh for aroma and visual drama, when you’ve got time and flair.
    2. Use dried for pantry ease, quick weekday mulls.
    3. Combine both to balance pop and steadiness.
    4. Bouquet garni hides whole bits, neat and classy.

    Spice Quantities Guide

    One neat rule I follow: start with small, then build — you can always add, you can’t take away. I tell you this because spices are sneaky, and you’ll thank me when your kitchen doesn’t smell like a cinnamon factory. Use 2-3 star anise, 3-4 cloves, 1-2 cinnamon sticks per bottle of wine. Add a thumb-sized slice of fresh ginger for bite, a strip of orange peel for brightness. If you like it sweet, a tablespoon of sugar, honey, or maple balances tannins. Taste as it warms, tweak gently. Try classic spice combinations—cinnamon-clove-orange—or bolder mixes with cardamom and star anise. You’ll learn which flavor profiles sing for you, and you’ll mess up once, laugh, then nail it.

    Sweeteners and Flavor Enhancers

    taste depth not sweetness

    Sweetness is your friend here, and I’m not talking about polite sugar—think molasses-thick honey, bright maple, or a splash of liqueur that makes you grin. I like to test honey alternatives and different sugar types, so you won’t get bored. You’ll taste depth, not just sweetness. Add gradually, stir, and sip warm, not scalding.

    1. Use honey or maple for viscosity and warmth, they coat the tongue, comfort like a blanket.
    2. Try brown sugar or demerara for toffee notes, they give body, they don’t hide.
    3. Add a spoon of jam or liqueur for complexity, it’s cheating that works.
    4. Don’t overdo it, you can always add more, but you can’t take it back.

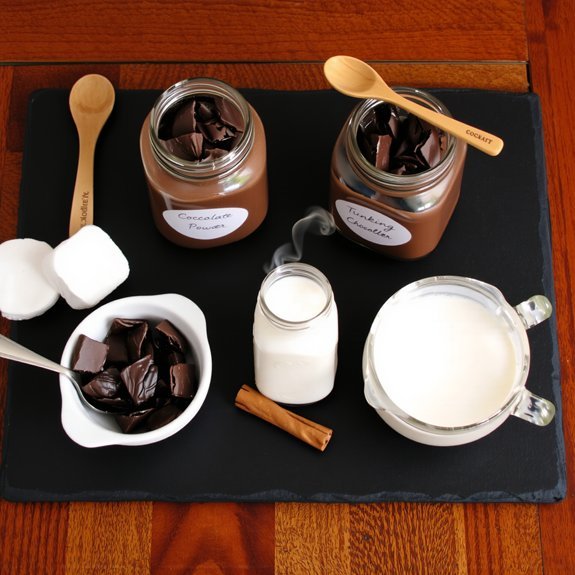
    Fruit Additions and Garnishes

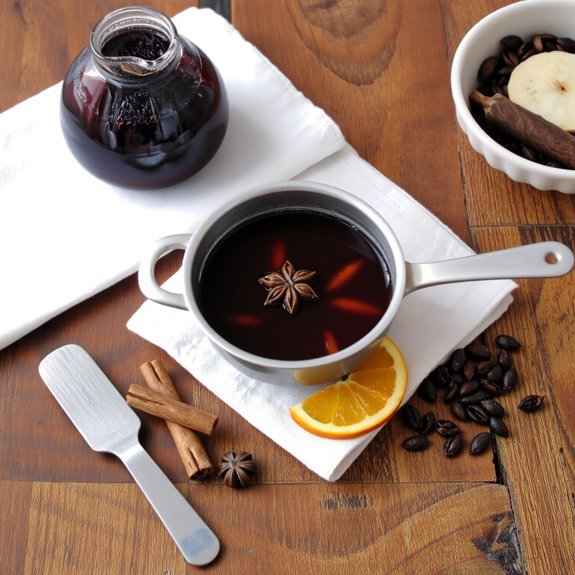
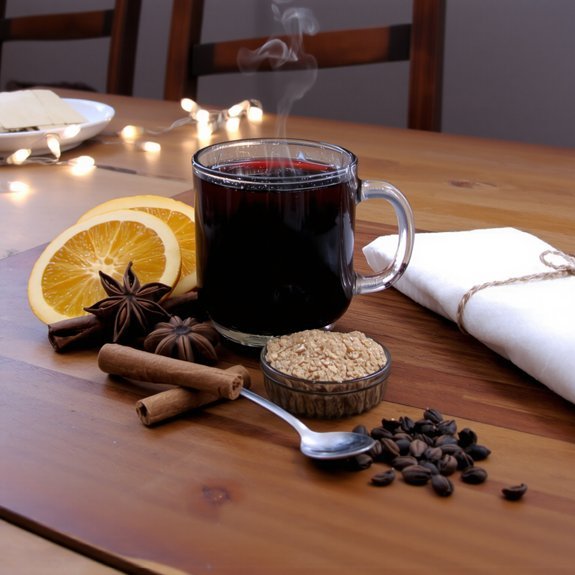
    Looking for a little brightness to cut through all that cozy spice? You’ll toss in citrus fruits—orange twists, lemon slices—to wake the aroma, I promise it snaps awake. Add berry blends, frozen or fresh, for a playful color and a tart pop, stir gently so they don’t turn to mush. Dried fruits like apricots or figs give body, they soak up spice and sweeten slowly, which I love. For contrast, tuck in a sprig of rosemary or thyme for herbal notes, it smells like a garden crashed your kitchen party. Aim for flavor balance: don’t overdo any one thing. Garnish with a citrus wheel, a few berries, a cinnamon stick, and you’re handing people winter in a mug.

    Step-by-Step Mulled Wine Method

    Start by grabbing a heavy-bottomed pot and a good mug—you’ll want something that holds heat and feels honest in your hands, not some dainty teacup pretending to be festive. I walk you through a clear, cozy method that honors mulled wine history and modern festive traditions, no pomp, just smell and warmth.

    1. Combine wine, sugar, citrus, and spices in the pot, stir gently, listen to the tiny hiss as flavors meet.
    2. Add a cinnamon stick and star anise, press scents into the liquid, imagine old markets and holiday lanes.
    3. Simmer slowly, taste and tweak sweetness, wink at ritual, don’t rush the letting-be.
    4. Strain, pour into your mug, garnish, sip, sigh—mission accomplished.

    Temperature and Timing Tips

    If you let the wine flirt with heat too aggressively, it sulks and turns bitter, so I keep things gentle and precise. You’ll want to aim for a low simmer, around 70–80°C (160–175°F), and resist the urge to boil; temperature control saves aroma, keeps spice oils lively, and avoids that burned-edge taste. I stir, I sniff, I taste — every ten minutes at first, then every five when you’re nearing perfect. Use a kitchen thermometer, set a timer, and don’t walk off. For larger batches, add a bit more time, for single mugs, subtract a few minutes; those are basic timing techniques that actually help. When it smells like holiday magic, you’re done — pull it off heat and serve.

    Nonalcoholic and Low-Alcohol Alternatives

    Want the mulled-wine vibe without the buzz? I’ve got you. You’ll still get steam, cinnamon perfume, and that cozy, sock-sliding warmth, minus the wobble. Try nonalcoholic wines as a base, they mimic body and fruit, you’ll stir in orange and clove and taste comfort. Or, if you want a whisper of kick, add low alcohol spirits, a splash, not a dive.

    1. Heat nonalcoholic wines gently, don’t boil, you’ll lose aroma.
    2. Infuse with citrus, cinnamon, star anise, simmer low, smell the room sigh.
    3. Use low alcohol spirits sparingly, for complexity, not intoxication.
    4. Finish with honey or maple, taste, adjust, and serve warm, smug and proud.

    Scaling the Recipe for a Crowd

    You’re throwing a party, I’m pouring for a crowd, and we’ve got to pick the right volume so no one’s left waving an empty cup. Keep your spice and infusion ratios steady as you scale—more wine isn’t license to drown the cinnamon, so taste as you go and smell for that warm, orange-clove hit. Think about heating and serving logistics too: big pot or urn, gentle low heat, ladle-ready cups, and a clever friend to man the station so you can sip one warm yourself.

    Choosing the Right Volume

    One simmering pot serves six people, but that’s just the polite dinner-party answer; I plan for two cups per guest, because everyone naps on leftovers and I don’t trust manners. You’ll think in liters or quarts, and you’ll think about volume considerations and party sizes before you buy the wine. Measure cups, count guests, add a little extra for seconds and sneaky refills.

    1. Estimate demand: sober guests take one, thirsty guests take two.
    2. Buffer rule: add 10–15% extra for spill and seconds.
    3. Vessel choice: use a stockpot for 12+, a saucepan for small groups.
    4. Reheat plan: warm smaller batches on the stove, keep a thermos hot.

    I narrate like a friend, practical, slightly cheeky, hands-on, precise.

    Spicing and Infusion Ratios

    If you’re scaling mulled wine for a crowd, think of spices like a band—each instrument needs its time and volume, or the whole thing sounds wrong. You’ll want clear spice balance: cinnamon leads, star anise and cloves solo sparingly, orange peel fills the harmony. I recommend per liter: 1 cinnamon stick, 2 cloves, half a star anise, a strip of peel. For 10 liters, multiply, but don’t go linear—reduce cloves a touch, they bite. Use infusion techniques: tied sachets for easy removal, cold maceration overnight for gentle melding, or brief simmering for punch. Taste as you go, trust your nose, adjust sugar last. You’ll serve warm smiles, not a spice crime scene.

    Heating and Serving Logistics

    When you’re serving mulled wine to a crowd, plan like you’re running a tiny, festive railway—trains (and people) need smooth arrivals, clear platforms, and a boss who looks like they know the timetable. I pick a primary heating method, then a backup kettle, because crowds are cheerful, impatient, and will test your patience. Keep a thermometer nearby, watch serving temperatures, aim for 65–75°C, never boiling, so spice oils sing not scorch. Ladle with rhythm, announce pours, make each cup feel curated.

    1. Use a slow cooker for steady heat, and a saucepan for quick top-ups.
    2. Batch in large pots, label vats, rotate to keep flavor even.
    3. Station one server, one cashier, one trash wrangler.
    4. Prep mugs, garnishes, napkins — speedy theater.

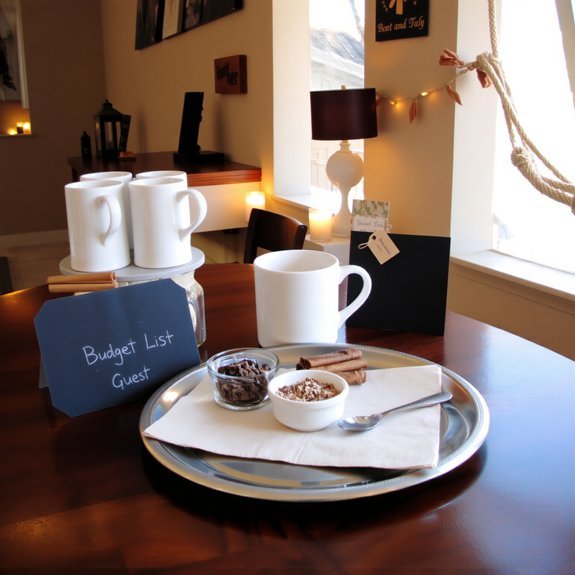
    Serving Suggestions and Pairings

    Since mulled wine’s already doing the heavy lifting with heat and spice, I like to keep the rest of the scene simple and a little theatrical, like I’m hosting a cozy mystery where everyone’s guilty of drinking too much warmth. For holiday gatherings, set out mugs, cinnamon sticks, and citrus slices, let guests garnish their own, it’s interactive and avoids your pretending to be a bartender. For cozy evenings, dim lights, light a clove-studded orange, and hand someone a blanket — instant atmosphere, minimal effort. Pair with salty cheeses, roasted nuts, dark chocolate, or spiced shortbread, they’ll cut the sweetness, boost the spice, and make you look thoughtful. If someone asks for a sober option, offer warm spiced apple cider, and wink like it’s your best improvisation.

    Storing and Reheating Mulled Wine

    Because mulled wine tastes best warm and a touch naughty, you’ll want to store and reheat it like you’re protecting a cozy secret, not hoarding leftover soup. I cool it quickly, stirring occasionally, using simple cooling techniques: ice bath, shallow pan, gentle fan. Then I decant into clean storage containers, glass jars work best, lids tight, spices tucked in.

    1. Cool fast, but don’t shock the flavor—let aromas settle.
    2. Use glass storage containers, label date, keep in fridge up to 3 days.
    3. Reheat low and slow on stovetop, don’t boil, taste and tweak sugar or spice.
    4. For parties, warm in slow cooker, keep lid on, stir before serving.

    You’ll sip, grin, and pretend it was effortless.

    Conclusion

    You’ve nailed it — warm, spiced, and impossibly cozy. Keep the heat low, taste as you go, and don’t drown good wine in sugar. Fun fact: mulled wine sales jump about 30% each winter in many countries, so you’re joining a global cozy club. Make a pitcher, strain it, garnish with orange and cinnamon, then watch faces light up. I’ll take credit for the smell; you take the applause.

  • How Do I Create a Hot Cocoa Bar at Home

    How Do I Create a Hot Cocoa Bar at Home

    Like a warm hug that’s socially acceptable, you’ll want a small counter or table, mugs at the ready, and a plan so things don’t devolve into a sticky marshmallow war. I’ll walk you through cocoa bases, milk swaps, must-have tools, and clever mix-ins that actually taste grown-up, plus quick tricks to keep everything hot and tidy—so grab a mug and don’t worry, I’ll warn you about the hot chocolate bombs before someone’s eyebrows get involved.

    Key Takeaways

    • Pick a location, set a theme, and arrange flow with trays, signage, and a nearby trash bin for easy guest movement.
    • Offer at least two cocoa bases (powdered mix and drinking chocolate) plus a DIY option for customization.
    • Provide a variety of warmed milks and clearly label dairy-free choices like oat, almond, and coconut.
    • Set out essential tools: ladles, whisk, small frother, mugs, and insulated dispensers or warmers to retain heat.
    • Create a toppings station with marshmallows, whipped cream, flavored syrups, spices, and adult add-ins, with clear kid/adult signage.

    Planning Your Hot Cocoa Bar: Space, Guests, and Budget

    hot cocoa bar planning essentials

    If you’ve got a corner of the kitchen, a cleared buffet, or even the top of a rolling cart, you can make a hot cocoa bar that looks intentional instead of like you lost a marshmallow fight, and I’ll show you how. You’ll size the space first, imagining mugs lined like happy sentries, then jot guest preferences—dairy, vegan, spicy, plain—so nobody glares at you over sour milk. Set a simple budget, split into essentials and fun extras, and stick to it; I learned the hard way, my wallet still has cocoa stains. Pick bar themes that match your mood—rustic, glam, retro—then plan props, lighting, and flow. Think reachability, spills, and a trash bin within arm’s reach.

    Choosing the Perfect Cocoa Base: Mixes, Drinking Chocolate, and Hot Chocolate Bombs

    choose your cocoa wisely

    You’ve planned the space, bribed guests with promises of mini marshmallows, and penciled a budget that didn’t make your wallet cry—now it’s time to pick what’s actually going in the mug. You’ll choose between pantry-friendly cocoa mixes, silky drinking chocolate, and dramatic hot chocolate bombs. Think about cocoa types and flavor profiles, they’ll steer choices more than trends.

    • Classic powdered mixes: quick, nostalgic, kid-approved, mixes smooth with hot water.
    • Drinking chocolate: thick, glossy, chew-worthy sip, melts like velvet, feels fancy.
    • Hot chocolate bombs: theatrical, messy bliss, surprise fillings pop into warm milk.
    • DIY blend: tweak sugar, cocoa, salt, cinnamon, tailor taste to brag about later.

    You’ll taste-test, adjust, and smile when the first “ooh” escapes.

    Milk and Dairy-Free Options to Serve

    milk and dairy free options

    You’ll want a lineup of milks that makes everyone at your cocoa bar grin: whole and 2% for creaminess, skim if someone’s pretending to be virtuous, and heavy cream for the dramatic stir. Add a few plant-based contenders — almond, oat, and coconut shine, soy holds steady, and cashew feels fancy — and warm them gently so they steam and smell like a cozy bakery. Top it off with dairy-free whipped cream, marshmallows, and a sprinkle station of cocoa, cinnamon, and chopped nuts, and I promise the choices will spark happy chaos.

    Cow’s Milk Choices

    Milk matters. You’ll pick the milk that makes your cocoa sing, whether you’re chasing creaminess or a lighter sip. I recommend tasting a few — I do, shamelessly, like it’s my job. Offer clear choices so guests don’t guess.

    • Whole milk: velvety, rich, perfect for thick, cozy cocoa.
    • 2% or low-fat: milder texture, still warm and satisfying.
    • Flavored milks: vanilla or chocolate add a playful boost, try small carafes.
    • Organic options: for cleaner taste, fewer additives, and peace of mind.

    Warm each gently, don’t boil. Froth for a café vibe, or whisk briskly for quick foam. Label each carafe, add spoons, and you’ll look like you planned it all along — even if you didn’t.

    Plant-Based Alternatives

    Variety is the secret weapon here — I’ll admit I get a little giddy lining up cartons like they’re contestants. You’ll want nut milks first: almond for a light, slightly sweet lift, cashew for creamy richness, oat for cozy thickness, and coconut when you crave a tropical wink. Offer plain and sweetened versions, chill some, warm others. Don’t forget soy, reliable and neutral, and refrigerated plant creamers for extra silk. For adventurous sippers, set out cocoa substitutes — carob blends or matcha for a different vibe; label them, so nobody glares at the wrong mug. I’ll stand by the station, tasting and exaggerating descriptions, nudging guests to mix, sip, and declare a winner.

    Dairy-Free Toppings

    Three good scoops of toppings will make your dairy-free cocoa feel decadent, not like a consolation prize. I want you to pile on textures and bold flavors, so each sip sings. Use dairy free chocolate shavings for melt-in-your-mouth richness, sprinkle toasted coconut for crunch, and add a dollop of vegan whipped that crowns the cup like a tiny cloud. Don’t forget something salty.

    • Dairy free chocolate curls for instant luxury.
    • Vegan whipped cream, pipe it or spoon it, I won’t judge.
    • Toasted nuts or coconut flakes for contrast.
    • A pinch of flaky sea salt to wake the cocoa.

    You’ll mix, taste, adjust, and probably lick the spoon. That’s the point.

    Essential Tools and Equipment You’ll Need

    Okay, here’s the toolbox you didn’t know you needed, and yes, you’ll actually use everything on the shelf. I’m talking essential tools and a compact equipment list that turns chaos into cozy. Grab a large pot or electric kettle for fast heating, a whisk for silky froth, and a ladle to portion like a pro. Keep mugs of varying sizes, heatproof glass jars for mix storage, and spoons—lots of spoons. I like a small milk frother for that café finish, and a tray to corral everything, because I’m tidy-ish. Don’t forget napkins, a small cutting board and knife for garnish prep, and a thermometer if you’re picky about temp. You’ll be ready, confident, and annoyingly well-equipped.

    Mix-Ins and Flavorings to Elevate Every Cup

    When you want to trick your guests into thinking you’re a chocolate wizard, start with smart mix-ins and bold flavorings that do the heavy lifting—think a spoonful of instant espresso stirred into steaming milk, a pinch of smoked sea salt, or a swirl of caramel sauce that glazes the mug and makes everyone pause. You’ll build flavor combinations that surprise, balance sweetness, and deepen cocoa notes. I like to offer concentrated syrups, extracts, and spice blends so people customize confidently.

    Trick your guests into thinking you’re a chocolate wizard with bold mix-ins—espresso, smoked salt, caramel, and concentrated syrups.

    • Orange zest plus a dash of cinnamon for bright, cozy warmth
    • Almond extract with toasted cocoa for a nutty hug
    • A tiny shot of liqueur, if adults are present
    • Seasonal spices sachets for holiday flair and nostalgia

    Toppings, Garnishes, and Edible Decorations

    You’ve got the flavors sorted, now let’s finish the show-stopping part—the stuff people Instagram and then actually eat. I line up bowls of whipped cream, marshmallow fluff, and chocolate shavings, so guests build towers that wobble gloriously. I smash candy canes for stirring, offer a sprinkles station for the brave, and drizzle flavored syrups and caramel drizzle like a pro who once burned toast. Crushed cookies add crunch, edible glitter makes cups sparkle, and a pinch of nutmeg dust wakes the nose. Say things like, “Try mint with dark chocolate,” while you demo a swirl. Keep spoons, napkins, and safe toothpicks handy. It’s silly, sticky, perfect — and everyone leaves happier, with chocolate on their cheeks.

    Warmers, Dispensers, and Keeping Drinks Hot

    You’ll want a few electric drink warmers humming on the table, their soft glow promising hot chocolate that actually stays hot—no sad, lukewarm mugs here. I like to tuck insulated beverage dispensers at the back, lids clinking, steam peeking when guests pour, so everyone can help themselves without a tea kettle relay. Keep a tray of extras—stoppers, preheated mugs, and a tiny whisk—so you can patch leaks in warmth fast, and look like a cozy, caffeinated superhero.

    Electric Drink Warmers

    A few clever gadgets will save your hot cocoa party from becoming a lukewarm regret, and electric drink warmers are the MVPs. I plug one in, hear the soft hum, and know everyone gets cocoa that’s cozy, not tepid. You’ll appreciate precise temperature control, quick reheats, and less babysitting. Remember, electric warmers pair well with good drink safety: keep cords tucked, lids secure, and a thermometer handy if kids are around.

    • Choose a model with adjustable heat, so marshmallows don’t melt into oblivion.
    • Look for spill-proof designs, because guests are delightfully clumsy.
    • Favor easy-clean surfaces, you’ll thank me later.
    • Use a dedicated station, label it, and keep the chaos contained.

    Insulated Beverage Dispensers

    Think of insulated beverage dispensers as the hulking, reliable friend who shows up with blankets and flasks—steady, warm, and annoyingly helpful. I set one on the table, its matte steel skin humming faintly with promise, and tell you to ladle slow, feel the steam. You’ll like how insulated containers keep cocoa at serving temp without babysitting, and how thermal jugs pour smooth, no-drip river into mugs. I wink, remind you that labels save chaos—“extra marshmallows” vs “peppermint”—and hand you a ladle like it’s a magic wand. They look impressive, they’re practical, and they free you to mingle, refill cookies, or fumble with fairy lights. Trust me, they’re the backstage crew that makes your party shine.

    Techniques for Heat Retention

    When the party’s buzzing and the lights are doing their twinkle trick, I want your cocoa to stay just-steamy enough to make people sigh, not sulk. I walk you through simple heat retention techniques so your drinks feel cozy, every cup. Use warmers and insulated dispensers, tuck in thermal insulation materials, and don’t skimp on lids.

    • Set electric warmers on low, stir often, taste-test for comfort.
    • Choose an insulated beverage dispenser, preheat with hot water first.
    • Wrap carafes in blankets or neoprene sleeves, secure with clips.
    • Keep lids closed, use small ladles to limit air exchange.

    You’ll save flavor, avoid scalds, and look like the host who actually planned ahead — miracle achieved.

    Kid-Friendly and Adult Variations

    Since everyone deserves a warm treat, I like to split my hot cocoa bar into kid-friendly and grown-up zones so chaos stays cute instead of catastrophic. You’ll set out kid friendly recipes on one side: classic marshmallow-studded cocoa, cinnamon-hot chocolate, and a DIY sprinkle station kids can’t resist. Label cups low-sugar, offer milk options, and keep spoons and napkins handy — sticky fingers guaranteed, you’ll laugh about it later. On the adult side, tempt with adult indulgences: spiked Mexican cocoa, salted caramel, espresso shots, and bittersweet chocolate shavings. Provide small pourers, shot glasses, and napkins for grown-up spills. Shift between zones with a small sign, keep flavors bold, textures contrasty, and invite everyone to customize their cozy cup.

    Styling, Signage, and Lighting for a Festive Display

    Because lighting and little details make a table feel intentional, I treat my hot cocoa bar like a tiny stage — and yes, I am the slightly overprepared director. You’ll style with intent: pick one festive themes palette, layer textures, and keep paths clear so guests can perform their own marshmallow choreography. I add fairy lights low and warm, a small lamp for pouring, and candles (LED if kids are near).

    • Use mismatched mugs for character, group by color or pattern.
    • Hang creative signage with chalkboard tags, witty prompts, and arrows.
    • Place trays for toppings, spoons, and napkins to avoid spills.
    • Add a centerpiece, evergreen sprig, or candy-cane prop for scent and focus.

    You’ll see, it feels cozy, organized, and a little theatrical.

    Cleanup, Storage, and How to Repurpose Leftovers

    You’ll want to wipe down spills right away, grab a damp cloth and a little elbow grease so hardened marshmallow goo doesn’t become a sticky crime scene later. I always stash extra supplies—zip bags for cocoa, airtight jars for toppings, and labeled bins—so putting things away feels like a tiny win. And if you’ve got leftover hot chocolate, chill it into morning coffee creamer or freeze it in ice cube trays for future mugs, because waste is uncool and delicious repurposing is not optional.

    Quick Cleanup Tips

    One quick trick I swear by: tackle the mess while the mugs are still warm, not when you’ve devolved into a sticky, snack-smeared zombie. I rinse mugs immediately, do quick wipe downs of spills, and stash garnishes fast so crumbs don’t migrate like tiny invaders. You’ll thank me.

    • Scrape chocolate with a spatula, then wipe with a damp cloth.
    • Soak spoons and frothers in warm, soapy water while you chat.
    • Funnel leftover cocoa into airtight jars for easy storage, label them.
    • Turn stale marshmallows into melted-toast toppings or s’mores bits.

    Move fast, but don’t panic. Warm mugs mean softer mess, less elbow grease. You’ll save time, get a cleaner counter, and have tasty leftovers ready for round two.

    Storing Supplies Properly

    If you want your hot cocoa setup to survive more than one indulgent evening, start by treating storage like a tiny pantry boot camp — I mean it, labels, seals, and a little discipline will save you grief later. I toss used marshmallow bags into resealable storage containers, press out air, and label with sharpie — yes, even the cinnamon sticks. For supply organization, group cocoa powders, syrups, and toppings on one shelf, mugs on another, spoons in a jar. Wipe jars warm, dry, then pop on airtight lids so scents don’t cross — your peppermint shouldn’t flirt with vanilla. Leftovers? Freeze extra hot chocolate in ice cube trays for frothy iced cocoa later. You’ll thank me when mornings are effortless.

    Conclusion

    You’ve got this. Like a cozy fireside scene from a favorite movie, your hot cocoa bar will draw people in—steam rising, chocolate scent thick in the air, mugs clinking. I’ll cheer you on from the sidelines as you scooping, stirring, and tasting (yes, you’ll taste-test). Keep it simple, playful, and stocked. Guests will linger, laugh, and ask for seconds. That’s the magic—warmth, flavor, and a little homemade charm.

  • How Do I Stay Hydrated in Winter

    How Do I Stay Hydrated in Winter

    Let’s call it “seasonal air-conditioning” instead of admitting your apartment sucks the moisture out of you; you’ll feel dry, sluggish, maybe a bit grumpy, and it’s fixable. I’ll walk you through hot, cozy drinks that actually hydrate, sneaky bedside tricks, and quick outdoor hacks — plus the simple reminders that keep you sipping between meetings, errands, and Netflix marathons — so you stop mistaking thirst for fatigue and start feeling…less like a raisin.

    Key Takeaways

    • Drink regularly throughout the day, not just when thirsty, aiming for small sips every 20–30 minutes.
    • Swap one hot beverage for plain or lightly flavored water between teas to boost total fluid intake.
    • Keep a visible water bottle or glass by your desk and bedside to make sipping habitual.
    • Use an insulated bottle or thermos with warm drinks and electrolyte tabs during outdoor activities.
    • Raise indoor humidity with a humidifier or bowls of water to reduce moisture loss from skin and breath.

    Why Winter Dehydration Happens

    winter moisture loss explained

    Even though you can’t see it, winter sneaks up on your hydration like a polite thief—cool air sucks moisture from your skin and the heater robs your room of humidity, so you end up thirsty without noticing. You step outside, cheeks sting, breath fogs, and you assume cold equals less sweating — cute, but wrong. Cold air holds less water, indoor heating amplifies winter dryness, and you lose fluids through faster breathing and dry skin. I’ll admit I’ve blamed the weather more than my water bottle; been there. So you sip less because hot tea feels like hydration theater, not actual water work. Notice the micro-drains: warm rooms, wool sweaters, brisk walks — they all nibble at your fluid levels.

    Common Signs You’re Not Getting Enough Fluids

    stay hydrated recognize symptoms

    If you’re shrugging off that nagging thirst, don’t—your body’s dropping hints like a passive-aggressive roommate. You’ll notice thirst signals first: dry mouth, sticky lips, that gravelly throat when you wake up. Your urine darkens, like tea you didn’t mean to brew. Headache creeps in, focus blurs, you feel foggy, slow. Muscles twitch, joints ache, and your skin loses that plump, springy feel; pinch it, it takes too long to bounce back. You’ll get chilly faster, even with a sweater, because circulation dips. Mood sours, energy dips, you snap at small things — sorry about that. These are classic dehydration symptoms. Listen, act: sip, snack on water-rich foods, and don’t wait until you’re desperate.

    Warm and Hydrating Beverage Choices

    warm hydrating drink options

    Okay, so you’ve noticed the telltale signs of running low on fluids — foggy brain, cranky mood, urine the color of weak tea — and you don’t want to feel like a hibernating raisin. I suggest you reach for warm, hydrating drinks that actually taste like a hug. Sip herbal teas, bright mint, citrus, or rooibos, steam rising, warmth spreading to your fingers. Try spiced cocoa made with milk or a milk alternative, cinnamon and a pinch of chili, not an apology for sugar — it hydrates and satisfies. Alternate hot cups with room-temperature water between sips, and keep a thermos nearby when you’re out. These swaps keep you cozy, alert, and way less prune-like.

    Home and Routine Habits to Boost Hydration

    While you’re chasing cozy drinks, don’t forget your home habits — they do half the work, honestly, and they’re way less dramatic than me waving a thermos, though equally effective. I speak from trial and error: leave a glass by your bedside, set hydration reminders on your phone, and your future self will thank you. Keep a pretty pitcher within arm’s reach, the cool clink of ice feels celebratory. Layer blankets, sit by sunny windows, sip between tasks, that’s the rhythm of cozy routines. I’ll admit, I forget, then I trick myself with flavored ice cubes. Make water visible, add citrus or herbs, and pair sips with small rituals like journaling or a podcast. It’s simple, subtle, and stubbornly effective.

    Practical Tips for Staying Hydrated Outdoors

    You’ve got your cozy indoor systems down — now let’s take that same lazy, effective hydration energy outside, where wind stings your face and pockets betray you. Pack an insulated bottle, fill it with warm water or herbal tea, and tuck it into an inner pocket so it won’t freeze. Before you head out, set hydration reminders on your phone, or tie a bright band to your glove as a visual nudge. During outdoor activities, sip regularly, don’t guzzle; cold air steals moisture, so you’ll need steady doses. If you’re hiking, stash electrolyte tabs in a zip bag. If you ski, carry a small thermos and I’ll admit, I judge your hot-chocolate-only plan. Plan, prep, sip, repeat — you’ve got this.

    Conclusion

    You’ve got this, honestly — be the water ninja of winter. Sip warm tea like it’s a tiny blanket, stash a bottle within arm’s reach, and set those annoying reminders so you don’t forget. Feel the steam, taste the spice, notice your lips stop peeling. Outdoors? Wrap your hands around an insulated cup, pop an electrolyte tab, and keep moving. Do these things, and you’ll outrun dry air like it’s a mildly rude ghost.