Tag: gift wrapping

  • How Do I Wrap Oddly Shaped Presents

    How Do I Wrap Oddly Shaped Presents

    You’ve got a weird-shaped gift and you’re staring it down like it owes you money, aren’t you? I’ll walk you through stabilizing it with cardboard, choosing whether to box or fabric-wrap, and hiding lumps with clever folds and ribbons — you’ll feel the paper give under your fingertips, hear the tape tack, see the silhouette smooth out. Stick with me and you’ll turn that awkward lump into something cheeky and polished, but first—let’s pick the base.

    Key Takeaways

    • Stabilize the gift on a trimmed cardboard base and tape it down to create a flat, secure wrapping surface.
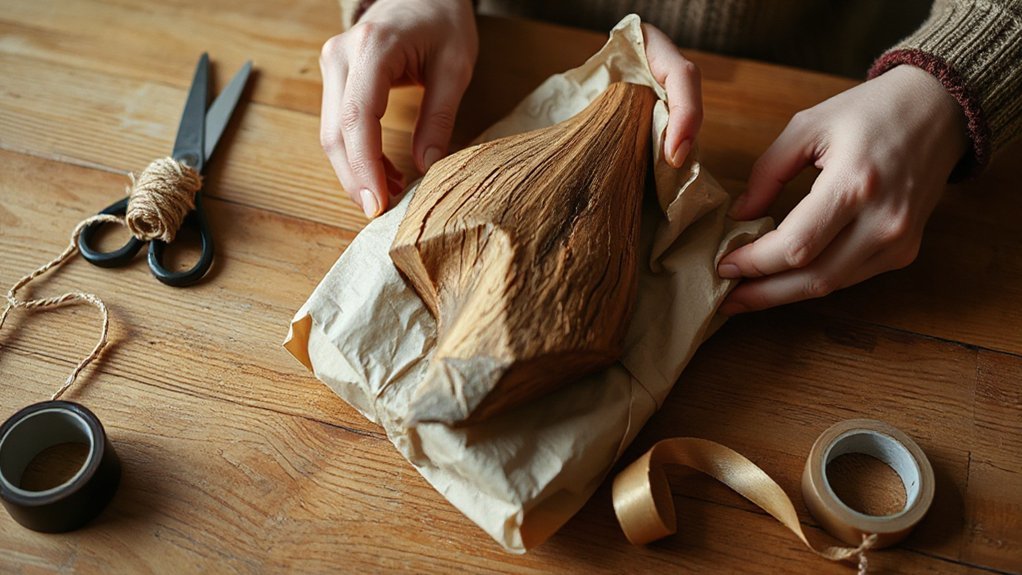
    • Choose a wrapping method: box lumpy items, use fabric or bags for soft shapes, or sculpt paper for organic forms.
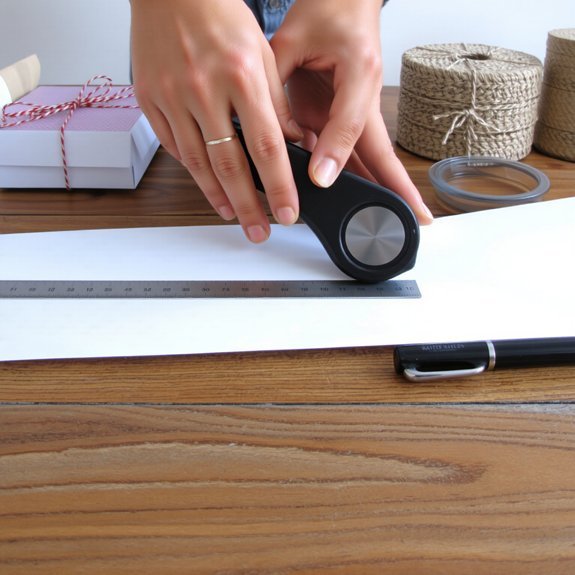
    • Test with scrap paper to mark seams and plan folds, then cut one sheet to minimize overlaps and bunching.
    • Conceal bumps using layered materials (felt, napkins, or lightweight boards) and secure discreetly with tape or twine.
    • Finish with ribbon, curled tails, tissue rosettes, or small ornaments to distract from irregularities and add polish.

    Assess the Shape and Plan Your Strategy

    assess gift shape carefully

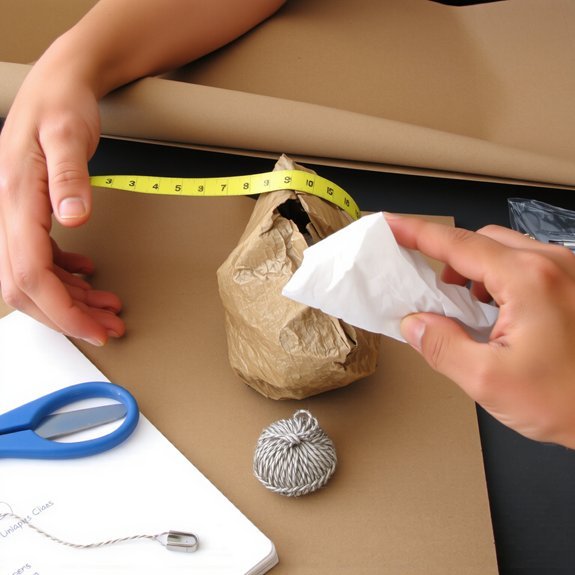
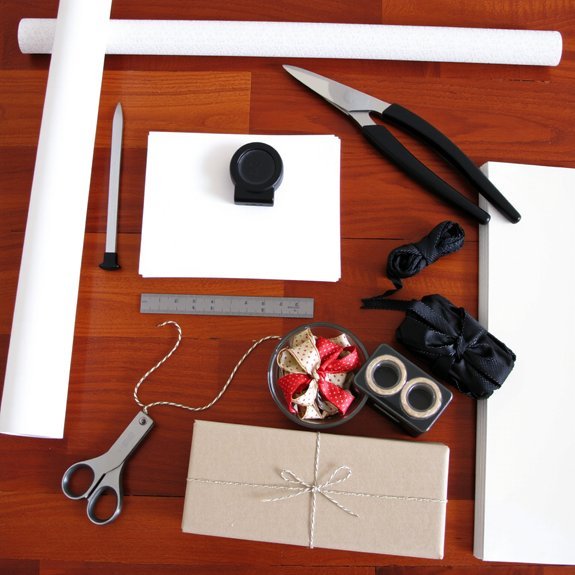
    If the gift looks like it was formed by a mischievous sculptor, don’t panic — you’re about to become a clever problem solver. You pick it up, feel odd angles, and sigh, but you also grin, because this is a tiny challenge. First, study the gift shape, turn it, tap corners, listen for hollow spots. Imagine lines where folds could live. Lay out your wrapping materials, scissors, tape, and breathe. I’ll tell you what I’d try: smooth sides get single sheets, weird bulges want panels, long bits call for rolls of kraft. You’ll test a scrap of paper, mark seams with a pencil, and reroute if needed. You move like a thoughtful engineer, playful and precise, ready to improvise.

    Stabilize and Create a Solid Base

    sturdy base for stability

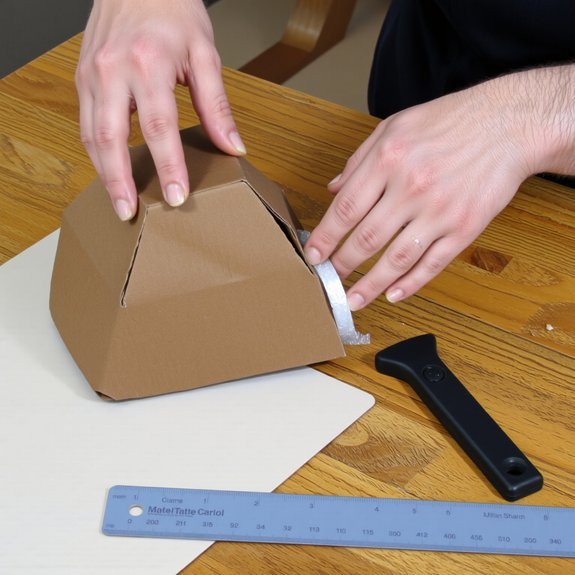
    Okay, now that you’ve examined the curves and tested a scrap of paper, let’s make this thing behave. You’ll pick sturdy base materials — cardboard, a small wooden board, or layered foam — and trim them to match the widest footprint. Feel the weight shift as you center the gift, press down, and listen for the satisfying thud of stability. Tape the base underneath, firm but neat, and tuck edges so nothing pokes out. Use a dab of hot glue or double-sided tape where needed, securing edges to the base and preventing sliding. I say “satisfying thud” because I dropped my first attempt, dramatically, in front of my cat. Now it sits steady, like a well-trained pet, ready for wrapping.

    Choose the Best Wrapping Method

    choose wrapping method wisely

    How do you want this present to look when someone lifts it—the neat-and-mysterious box, the graceful bag, or the “how did they even do that?” sculpted wrap? You pick a method that matches shape, occasion, and your patience. I’ll be blunt: some items beg for a box, others scream fabric. Consider your gift wrap materials and the item’s quirks, then choose.

    • Box it: makes fragile or lumpy items feel civilized, add tissue, hear the crinkle.
    • Bag it: soft, fast, hides odd angles, ties can be dramatic.
    • Sculpt it: tape, patience, clever folds, looks like magic.
    • Layer it: combine paper, fabric, ribbon, create depth and surprise.

    Trust your hands, adapt, and have fun—odd gifts love personality.

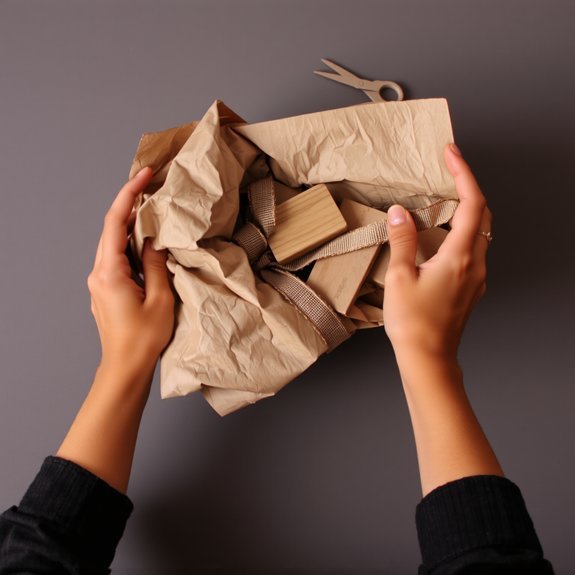
    Conceal Irregularities With Creative Covers

    Want to hide that weird bump without turning the gift into a lumpy mess? I say drape it. Grab a scarf, piece of fabric, or lightweight board, smooth it over the shape, and secure with discreet tape or twine. You’ll feel the texture, hear the soft rustle, and see the outline vanish. Mix in creative materials—felt, patterned napkins, even thin cork—for structure, and layer to disguise odd angles. Play with unique embellishments like pom-poms, a faux flower, or a tiny tag that doubles as camouflage. I’ll admit, I’ve covered things that looked like modern art gone wrong, and this trick rescued them. Keep it tactile, tidy the edges, and enjoy the surprise when they lift the cover.

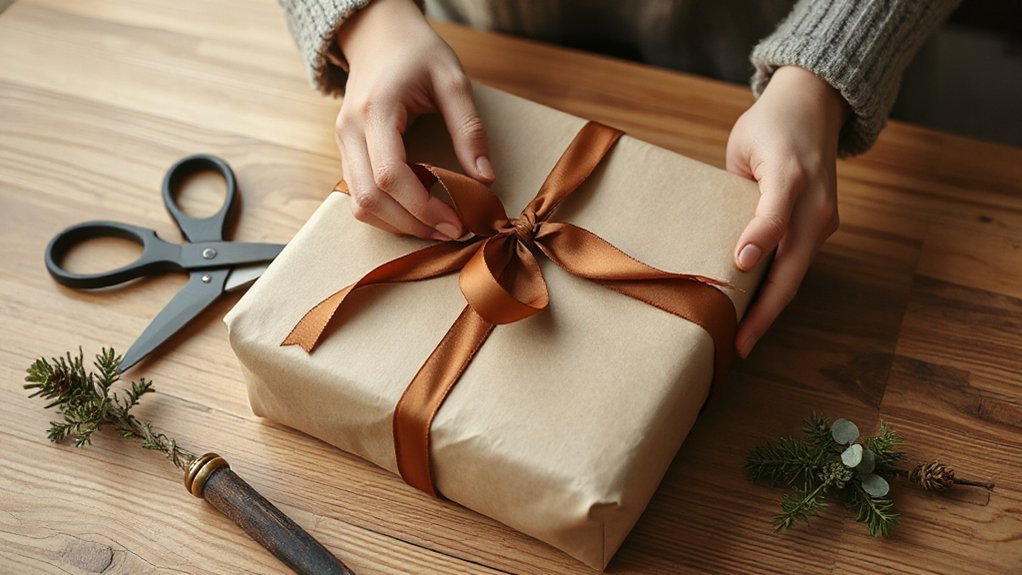
    Add Finishing Touches for a Polished Look

    Once you’ve tamed the shape, it’s time to make it sing—so don’t slap on a bow and call it a day. You want the finish to whisper “careful” not shout “I ran out of time.” Feel the paper, smooth seams with your thumbs, add weight with a ribbon accents knot that crinkles nicely. Tie ribbon tails at angles, curl one with scissors, smell the paper, grin.

    Make the finish whisper “careful”: smooth seams, knot a crinkly ribbon, curl a tail, tuck in tiny details.

    • Tuck tiny tissue rosettes into corners for depth, press gently so they peek.
    • Add a crisp gift tags, write a quick witty line, let your handwriting do the cheeky work.
    • Layer thin twine under the ribbon for texture, pull snug, not brutal.
    • Attach a small ornament or dried sprig, secure with glue or a neat stitch.

    Conclusion

    You’ve got this—assess, stabilize, cover, and bedazzle. Did you know 62% of people say gift presentation makes them more excited to open a present? So your effort matters. I’ll admit, I once wrestled a bowling pin into a paper cape and won applause; you’ll do better. Use cardboard, fabric, or a box, hide bumps with ribbon, and finish with a crisp tag. Be bold, have fun, and watch faces light up.

  • How Do I Wrap Presents Like a Professional

    How Do I Wrap Presents Like a Professional

    The first time I wrapped a gift it looked like a crumpled map, and that flop taught me more than any tutorial — so listen up, you’ll get clean lines, not chaos. You’ll gather good paper, sharp scissors, sturdy tape, and a bone folder, feel the weight of the paper in your hands, cut straight with a ruler, fold crisp corners, and learn the tiny tricks that make people say, “Wow.” I’ll show you the steps that save time and paper, and why one neat bow changes everything.

    Key Takeaways

    • Gather essential tools: sharp scissors, craft knife, metal ruler, cutting mat, sturdy tape, bone folder, tags, and tissue paper.
    • Choose appropriate paper and ribbon: heavier paper for durability, ribbon scale matching gift size, and contrasting textures for visual interest.
    • Measure precisely and cut cleanly: measure twice, use a straight-edge and sharp blade for crisp, straight edges.
    • Fold and secure neatly: pull paper taut, crease outward, use a bone folder for sharp seams, and tidy corners with careful folds.
    • Finish professionally: add layered ribbons or natural embellishments, create a crisp bow, and attach a handwritten tag for a personal touch.

    Essential Supplies Every Wrapper Should Own

    essential gift wrapping tools

    If you want your gifts to look like you actually tried (and not like you wrapped them in a frantic five-minute panic), you’ll need the right tools—no excuses. I tell you straight: start with a solid list of gift wrapping essentials —scissors that bite clean, a sharp craft knife for stubborn corners, a metal ruler you can hear tap the table, and a cutting mat that saves your sanity. Add sturdy tape, yes, but don’t forget decorative tape for flair; it’s like lipstick for packages. Keep a bone folder for crisp folds, stylish tags, and a stash of tissue paper that smells faintly like holidays. I coach you through quick setups, little rituals, and the smug pleasure of a perfectly folded corner.

    Choosing the Right Paper and Ribbon for Each Gift

    choosing paper and ribbon

    You’ll feel the difference the moment you lift the paper — heavy stock drapes like velvet, thin sheets crinkle and show every edge, so pick weight and texture that flatters the shape. Match ribbon style and scale to that choice: a wide grosgrain tames a big box, a skinny satin whispers on a slim gift, and I’ll admit I’ve tied more wonky bows than I care to confess. Let’s compare textures and spool sizes next, I’ll show you what works and what gets tossed.

    Paper Weight and Texture

    Paper matters—like a handshake before a conversation, it sets the whole mood. You’ll feel the difference the moment you touch it: silky, toothy, crinkly. I tell you to scout texture variety—matte for restraint, gloss for pop, handmade for drama. Heavier stock resists tears, holds sharp corners, hides sloppy folds; that’s paper durability, your secret weapon. Light sheets work for awkward shapes, they flutter and conform, but they wrinkle, so handle them slowly. Rub the edge, crease with bone folder, listen for that crisp snap. Smell matters too — a faint paper scent says real effort. You’ll choose weight like choosing shoes: comfy or statement. Trust your hands, test a corner, and wrap like you mean it.

    Ribbon Style and Scale

    Now that you’ve felt the paper—its weight, its whisper, its little attitude—let’s talk ribbon, because a bow can make a sweater sing or a box look like it tried too hard. You’ll choose ribbon types to match scale: skinny velvet for delicate jewelry, wide grosgrain for bulky boxes, satiny curl for playful parcels. Think texture against paper, contrast or blend, color that hums. Measure ribbon lengths with a confident thumb—long enough for loops and tails, short enough to avoid a necktie calamity. I like a tidy three-loop bow on small gifts, a dramatic layered bow on large ones. Tie, trim, fluff. Step back, squint, adjust. If it looks a bit smug, you’re done; if not, add a sprig or fewer tails.

    Measuring and Cutting Paper for Clean Edges

    measure cut clean edges

    You’ll want to measure twice and cut once, because crooked edges scream “last-minute” from across the room. Grab a sharp blade and a straight-edge, press firm against the paper, and feel that satisfying, whisper-snap as the scissors-free cut glides through. Trust me, your corners will thank you—neat lines, clean creases, and no sad paper tears.

    Measure Twice, Cut Once

    If you want crisp, museum-worthy edges, measure twice and cut once — no drama, no sad jagged flaps. I tell you this like a parent who’s seen one too many ripped corners. Lay your box down, smooth the paper, and use basic measuring techniques: wrap the paper around, mark overlap with a pencil, measure height for neat end flaps. I like taps and small visual checks, you’ll too. Pick reliable cutting tools, feel the blade glide, don’t hack. Hear the soft slice, see the clean line — satisfying. Pause, breathe, re-check marks, then cut. If you mess up, shrug, adjust, laugh — we’ll fix it. Practice makes perfection; confidence follows, and the gift looks sharp.

    Use Sharp Straight-Edge

    Alright, so you’ve measured like a saint and cut like a novice — time to bring in the tool that actually saves your dignity: a sharp straight-edge. You grab it, feel cold metal under your palm, and I tell you, this is where fancy wrapping looks happen. Lay the paper flat, line up the straight-edge with your pencil mark, watch the edge alignment lock in like a promise. Use scissors only for curves; rely on cutting tools that ride the ruler for long, clean slices. Press down, glide the blade, listen for that smooth whisper. No jagged teeth, no ragged corners. Fold, crease, admire. You’ll look pro, even if your ribbon’s a little crooked.

    Folding Techniques for Crisp Corners and Seams

    When I fold a corner just so, the paper snaps into a sharp ridge and I feel a tiny, victorious zing—like getting the last puzzle piece in place. You’ll learn corner folding that makes boxes look tailored, neat, somehow gourmet. Pull the paper taut, crease outward, then tuck the flap under with a thumb, listen for that crisp whisper. For seams, press flat, then run a fingernail or bone folder along the joint, sealing with tiny, invisible tape. If the edge puckers, unfold slightly, re-tension, try again—no shame in redo. Work slowly where corners meet, trim a sliver for bulky overlaps, keep angles clean. You’ll finish faster, look practiced, and still blame the cat if it goes wrong.

    Professional Finishing Touches and Embellishments

    Because the last five minutes are where gifts go from “nice” to “someone cared,” you’re going to learn the little moves that make people look twice. You’ll add gift embellishments and decorative accents that feel thoughtful, not try-hard. I show you how to layer texture, tie a bow that sits right, and tuck a sprig that smells like winter.

    • Use ribbon textures: satin, jute, velvet, mix them.
    • Add small items: dried orange, cinnamon stick, tiny ornament.
    • Fold a crisp bow: loop, pinch, cinch, secure with wire.
    • Attach a tag: handwritten, angled, sealed with wax.

    You’ll finish like a pro, fingers neat, smile smug, present ready to impress.

    Time-Saving Shortcuts and Waste-Reducing Tips

    Those final ribbons and sprigs look dreamy, but they can eat time and paper if you’re not careful — so I’m going to show you how to get the same “wow” with half the fuss. I’ll teach you quick folds, and how to prep a whole stack of boxes like a wrapping assembly line, so you won’t feel like you’re wrestling tinsel at midnight. Use time management: set a 20-minute sprint, cut all paper at once, stash tape where you can’t miss it. Choose eco friendly materials — kraft paper, fabric scraps, twine — they look chic, smell faintly homey, and toss less. I’ll show you a faux-bow trick that fools grandparents, saves ribbon, and makes you look practically professional.

    Conclusion

    You’ll wrap like a pro, I promise — picture crisp paper whispering under your fingers, corners sharp as a new razor, tape hiding like a shy friend. You measure, snip, fold, press with a bone folder, and the box transforms. Step back, admire the clean edges, add a ribbon that sings, scribble a tag with a flourish. It’s simple ritual, a small thrill, and yes, you’ll feel quietly smug — in the best way.