
You want gravy that smells like dinner’s winning, so we’ll do it right: sweat onions, brown the roast until the pan is naughty with fond, whisk in flour, then add stock a little at a time while you stir like you mean it; taste, tweak with salt, pepper, a splash of acid or sherry, finish with cold butter for shine—simple, exact, and stubbornly delicious—stick around and I’ll show you the tiny tricks that turn good gravy into the stuff people fight over.
Key Takeaways
- Build flavor by sweating a mirepoix (2 parts onion, 1 carrot, 1 celery) and browning meat to create fond.
- Deglaze the pan with stock or wine, scraping browned bits to incorporate deep savory flavor.
- Thicken gradually with a roux or cold slurry, whisking constantly to avoid lumps and achieve silky texture.
- Adjust seasoning and balance with acid (lemon, vinegar, or wine) and a final pat of cold butter for sheen.
- Rescue issues by straining lumps, simmering to concentrate, or diluting salty gravy with unsalted stock.
Essential Ingredients and Equipment

Alright, let’s get real: good gravy starts with the right stuff. You’re going to want stock, fat, flour, salt, and pepper, nothing mystical. Smoked drippings, chicken bones, or mushroom stock give different gravy types, so pick your mood. Grab essential tools: a whisk that won’t clump, a wooden spoon for scraping, a fine sieve for shine, and a heavy pan that heats evenly. I’ll admit, I once burned flour—I winced, you’ll laugh—so keep a scraper handy. Taste as you go, adjust with acid or butter, watch texture closely, it tells you the story. Prep your mise en place, keep warmth nearby, and don’t forget a mug for spoon-licking. You’re ready.
Building a Flavorful Base

You start by sweating a mirepoix—onions, carrots, celery—until they smell sweet and a little like caramel, and yes, that smell alone makes you feel proud. Then, brown your roast in the same pan so the fond sings, those dark bits sticking like tiny flavor trophies you’ll scrape up with stock. Stick with me, we’ll turn that caramelized, browned mess into gravy that talks back.
Aromatic Mirepoix Roast
Three things happen the second you toss a rough-chopped onion, carrot, and celery into a hot pan: they sizzle, they brown, and they start telling you the story your gravy will later brag about. You’ll pay attention to mirepoix ratios — the classic two parts onion, one part carrot, one part celery — because balance matters, and because I like to argue with tradition while mostly obeying it. Roast those aromatics until edges caramelize, stir, breathe in the sweet, savory perfume. You’ll get the aromatic benefits immediately: depth, sweetness, a savory backbone that hugs your gravy. Don’t let them burn, just coax color and flavor, scrape browned bits gently, taste constantly, and laugh when it smells so good you almost skip the gravy.
Fond Development Techniques
Now that your mirepoix has sung and browned, it’s time to let the pan tell the rest of the story—really listen to that caramelized whisper stuck to the bottom. I teach you to coax those flavors, you watch the magic. First, know your fond types: brown beefy bits, pale fond from poultry, and sticky veg caramel—all useful, all different. Use fond techniques like deglazing with wine or stock, scraping with a wooden spoon, and simmering to dissolve treasures. Smell it—nutty, toasty, a little sweet. Don’t burn it, you’ll sulk over bitterness. I’ll jab a lemon or add butter for roundness, you’ll nod. It’s theatrical, intimate, a tiny kitchen confession that turns drippings into delicious gravy.
Achieving the Perfect Consistency
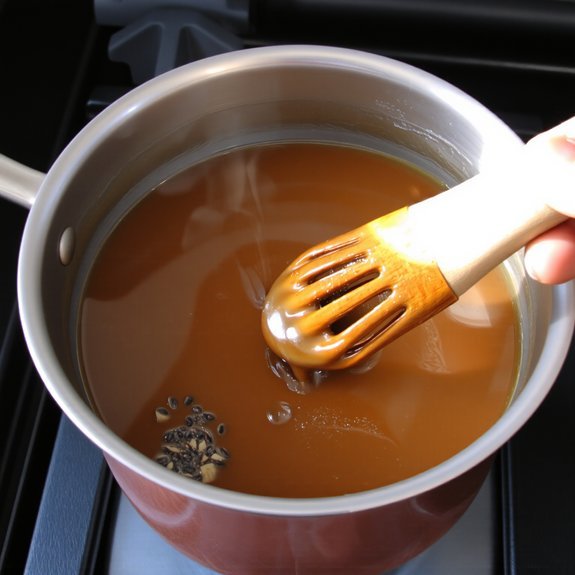
If the gravy’s too thin, it’s sad and slippery; if it’s too thick, it’s a gloopy crime scene — let’s aim for silky, pourable perfection. You’ll watch texture like a hawk, taste as you go, and use simple consistency techniques: simmer to reduce, whisk to smooth, and add measured thickening agents. Start hot, then lower heat; a steady simmer mellows starch and concentrates flavor. Make a slurry with cold liquid before you stir it in, or temper a roux into warm stock, no lumps allowed. I nudge with butter at the end for sheen and silk. If you need to loosen, add warm stock spoonwise; to enrich, simmer a touch longer. You’ll learn the feel: coats the spoon, drips slow, looks irresistible.
Fixing Common Gravy Problems
You nailed the texture lesson, and now we cope with the mess-ups that sneak up on you—because gravy is a diva, and you’ll need a few tricks when she throws a tantrum. I’ve seen the lumps, the thin puddles, the sad gray sheen. Common mistakes? Not whisking, adding cold liquid to hot roux, or cooking off the flavor. Troubleshooting tips start with rescue moves: blitz lumps with a blender or strain through a fine sieve, simmer slowly to thicken, or whisk in a beurre manié spoonful by spoonful. If it’s too salty, dilute with unsalted stock, if too thin, reduce or whisk in starch slurry. Taste constantly, adjust heat, and own the fix—gravy forgives, eventually, when you do the work.
Flavor Variations and Add-Ins
Welcome to the flavor toolbox—I’m about to make your gravy interesting, not intimidating. You’ll want to taste first, then tweak. Add herb infusions like thyme sprigs, rosemary needles, or a bay leaf tied to a spoon; simmer briefly, then fish them out. Try splashy add-ins—sherry, soy, or a mustard whisk—to lift sadness from bland gravy. For heat or depth, grind fresh pepper or fold in spice blends like smoked paprika and cumin, sparingly at first. Want richness? Stir in brown butter or a pat of cold butter off-heat, whisking until glossy. For brightness, squeeze lemon or drop minced shallot sautéed until sweet. I promise, with small experiments, your gravy will sing, not mutter.
Serving and Storage Tips
Plating’s where your gravy gets to brag a little, so don’t let it slouch in a sad spoon — ladle it hot, steady, and with a confident wrist so it pools just right around the meat and veggies; I like to warm the gravy gently on low while the plates rest, give it one last whisk to gloss it up, then drizzle in an S or a heart if I’m feeling dramatic. Keep an eye on serving temperature, aim for warm, not scalding, so flavors sing and mouths don’t protest. If you’re saving leftovers, cool gravy quickly, skim any fat, then portion into airtight storage containers, label and chill. Reheat gently, whisk to revive the sheen, taste, adjust salt, then serve like you meant it.
Conclusion
You’ve learned the recipe, now think of gravy as a loyal dog: you train it with patience, feed it good stock, and it repays you with warm, glossy devotion. I’ll say it plain—don’t rush the browning, taste like you mean it, finish with cold butter for that shine. You’ll end up with something comforting, saucy, and seriously gratifying. Keep practicing; the perfect gravy’s a friendship, not a miracle.