You’re making winter candles, and I’ll walk you through it—wax, wick, jar, a dash of cinnamon or spruce, melt slow, pour steady; you’ll smell nutmeg and pine while the kitchen fogs a little and your cat judges you. I’m practical, not woo-woo: we’ll pick soy or beeswax, match wick size to container, add fragrance at the right temp, cool without cracks, and trim the wick—stick around, I’ll show the simple recipes and how to rescue a wonky pour.
Key Takeaways
- Choose a clean-burning wax (soy or coconut blend) and a wick sized to your container to ensure even burning.
- Pick a winter fragrance combo: citrus top, cinnamon or peppermint middle, and cedar or pine base for depth.
- Color jars with frost white, evergreen, candy-cane red, or muted amber dyes to evoke a seasonal look.
- Heat wax to recommended temps, add fragrance at the right temperature, and pour in a draft-free area to cool.
- Perform test burns, trim wicks to 1/4″, and adjust fragrance or wick size to fix weak scent or tunneling.
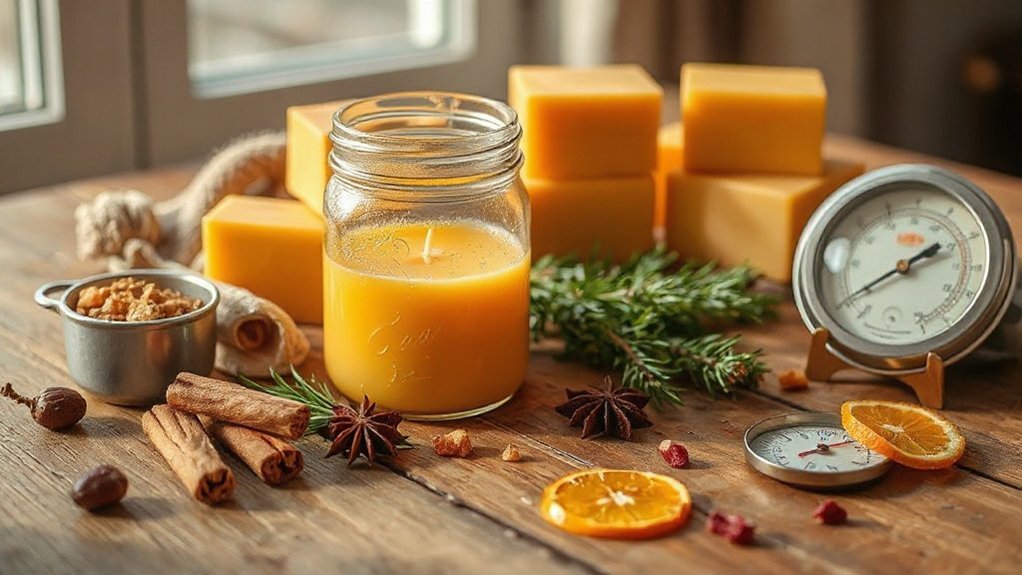
Choosing Wax, Wicks, and Containers
If you want your winter candle to actually smell like winter and not like a sad, smoky sock, start with the basics: wax, wick, and container. You’ll pick wax first, weigh options, and I’ll nudge you toward paraffin alternatives like soy or coconut blends, they burn cleaner, hold scent differently, and feel less guilty. Choose a wick that matches diameter, test a burn, watch for tunneling or soot—don’t panic, adjust. Containers matter: glass, tin, ceramic—think heat transfer, look, and lid fit. Add natural additives like coconut oil or stearic acid sparingly, they tweak hardness and throw. You’ll label jars, note ratios, light one for a trial, and learn fast, with maybe one tiny kitchen mishap.
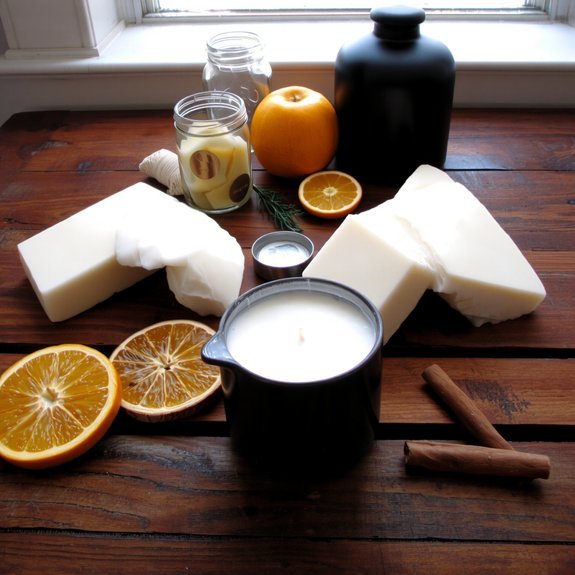
Winter-Inspired Fragrance and Color Ideas
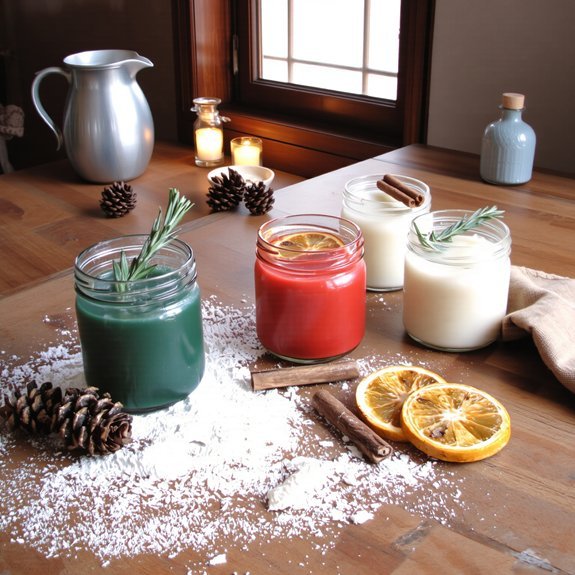
You’ve picked your wax and wick, you’ve learned what not to set your oven mitts on—now let’s make these candles actually smell like winter and not regret. I tell you to layer scents like a pro: start with citrus zest top notes, add a heart of cinnamon spice or peppermint swirl, finish with cedar wood or pine forest base, and you’ll have depth, not mystery. Pick colors that match — frosty white, deep evergreen, candy-cane red, or muted amber for warm vanilla vibes. Test small batches, burn, sniff, adjust. For that cozy fireside sensation, boost smoky notes lightly, don’t overdo it. Label blends “holiday cheer” or “open when it’s cold,” and take pride in smelling like success.
Simple Recipes: Soy Mason Jar and Beeswax Teacup Candles
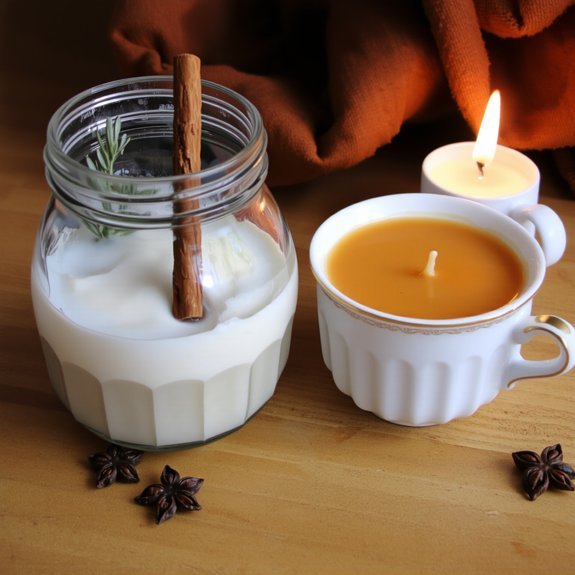
You’re about to get hands-on with two supremely cozy projects: I’ll walk you through melting soy, measuring fragrance, and pouring into mason jars so you get that clean, creamy burn; then we’ll switch gears to gently heating beeswax, wicking tiny teacups, and coaxing out warm honeyed aromas. You’ll feel the soft heat on your wrists, smell citrus and cinnamon lift the room, and maybe burn a thumb once — I promise it’s part of the charm. Ready? Let’s light one, make a mess, and call it winter magic.
Soy Mason Jar Steps
1 jar, a friendly block of soy wax, and a wick—let’s do this. You’ll feel the soy candle benefits immediately: cleaner burn, longer life, and a soft scent throw that won’t fight with your cocoa. Mason jar advantages mean easy cleanup, safe container, and rustic charm. I walk you through it, step by step, quick and proud.
- Clean jar, secure wick, melt wax slowly—stir, don’t splash.
- Add fragrance at 185°F, pour at 135°F, steady hands, steady heart.
- Let cool overnight, trim wick to 1/4″, label and enjoy.
You’ll smell warm vanilla, see smooth cream wax, and grin—because you made this, and it’s actually lovely.
Beeswax Teacup Method
Grab two teacups you like—mismatched is fine, actually preferable—and let’s make a beeswax candle that smells like a firelit kitchen and looks like it belongs in a cozy novel. You’ll see beeswax benefits right away: clean burn, warm honeyed scent, no fake chemical tang. For teacup selection, pick sturdy porcelain, rinse, and dry; a chip adds charm, not danger. Melt beeswax in a double boiler, clip a cotton wick to a skewer, center it, pour slowly, watch the molten gold settle. Let it cool, trim the wick, light it, and inhale—the room softens, old recipes crowd your thoughts. I’ll admit I once spilled wax; you will too, maybe, and that’s part of the fun.
Step-by-Step Pouring and Setting Techniques
You’ll start by heating your wax to just the right temperature, humming a bad song while you watch it melt into a glossy pool, because too hot ruins scent and too cool makes a lumpy mess. I’ll show you when to add fragrance so it binds, and how to pour with calm hands—slow center stream, wiggle to stop air, and don’t panic if a sinkhole forms. Let it cool in a draft-free spot, nudge the wick straight, and I’ll give you quick fixes for cracks and topping up, so your jars come out cozy and not catastrophic.
Melting and Temperature Control
Melting wax smells like cocoa butter and quiet victory, and I’ll tell you how to tame it without burning your kitchen or your dignity. You watch the wax go glossy, stir slowly, and check the melting points on your packet, trusting the temperature gauge like a tiny, honest friend. Don’t rush. Don’t roar the heat.
- Preheat, monitor, stabilize — patience is the craft.
- Aim for the pour range, hold till steady, then lift the pan.
- Cool gradually, anchor wicks, cap shrinkage with gentle taps.
I talk you through scooping, straining, and timing pours so wax layers set smooth. You’ll learn to read the sizzle, feel the tempo, and smile when the first candle stands proud.
Adding Fragrance Safely
Once the wax hits its sweet spot and the kitchen stops smelling like a science fair, it’s time to add fragrance — but do it like someone who knows a few things and isn’t trying to set off the smoke alarm. I tell you to measure, not eyeball; fragrance oils and essential oils aren’t interchangeable doses. Use a kitchen scale, add oils at the recommended temperature, and stir gently for sixty to ninety seconds so scent disperses, don’t whip air in. Smell a tiny dab on a spoon, adjust carefully, you can always add a touch more, you can’t un-add. Wear gloves, keep kids and pets away, and ventilate. If you’re nervous, test a small sample candle first — fewer tears, more cozy success.
Pouring and Cooling Tips
Before you pour, take a breath and steady the ship — I learned the hard way that impatience makes wax do ugly things. You’ll warm the jar with hot water, check wick position, and test temperature. Pour slowly, steady hand, and watch the glossy surface settle. Good pouring techniques cut bubbles and sinkholes, trust me.
- Cool gradually: move jars to a draft-free spot, cover loosely.
- Use temperature charts: pour at recommended temps, then let wax fall 10–15°F before topping.
- Patch and finish: fill low spots after initial set, trim wick when firm.
Cooling methods matter, they shape texture and scent throw. You’ll feel pride when the smooth top gleams, and yes, you’ll grin.
Safety Tips and Storage for Homemade Candles
If you’re planning to light your homemade candles around the house, you’ve got to treat them like hot, beautiful little divas—respectful distance, steady surfaces, no unsupervised drama. I’m serious. For candle safety, always trim wicks to 1/4 inch, keep drafts away, and never leave a burning candle alone. Put them on heatproof trays, away from curtains, paper, pets, and kids; think “no-fly zone.” When they cool, cap or cover jars to keep scents fresh and dust out. For proper storage, stash candles upright in a cool, dark place, wrapped in tissue or bubble wrap if they’re fragile. Label scents, date batches, and rotate older candles forward. You’ll thank me when your living room smells like winter, not panic.
Troubleshooting Common Candle Problems
Okay, you’ve got your candles trimmed, parked on their heatproof thrones, and safely tucked away when not in use — good job, you’re practically a scent sommelier. Now, if a candle tunnels, smokes, or smells faint, don’t panic — you’ve got this. Check wick alignment first; a centered wick burns clean, an off-center one eats wax and puffs smoke. For weak scent throw, try warmer room temps, larger wicks, or more fragrance oil next time. Simple fixes, big payoff.
- Trim to 1/4″, center the wick, relight.
- Allow full melt pool, avoid drafts, be patient.
- Rebatch or add fragrance if scent throw stays shy.
Talk to the flame, not literally, but with action.
Conclusion
You’ve got everything you need to make winter candles that actually smell like the season, not a chemistry set. I’ll be honest, you might spill wax, but that’s part of the fun—learn fast, laugh faster. Pick your wax, choose a snug wick, stir in cinnamon or pine, pour steady, trim the wick. Let them cool like a good story. These candles are tiny, glowing hearths, a pocket-sized winter you can carry anywhere.