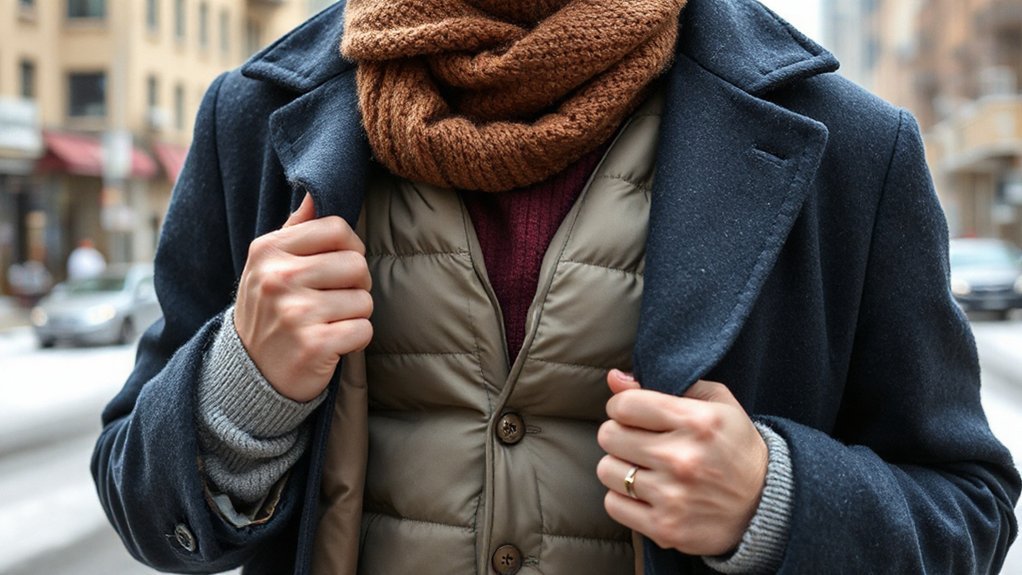
You’ll want to think in layers, not lumps—start against your skin with something that snugs and wicks, add a cozy mid layer that traps warmth, then top with a shell that blocks wind and wet; I’ll show you how to pick fabrics, tweak fit for movement, and tweak on the fly when you start sweating or shivering, but first picture stepping out into sharp air, breath fogging, fingers numb—now let’s stop that from happening.
Key Takeaways
- Start with a close-fitting, moisture-wicking base layer (merino or synthetic) to keep skin dry and prevent chill.
- Add an insulating mid layer (fleece, wool, or down) that traps warmth while allowing movement and breathability.
- Finish with a weatherproof outer shell that’s windproof, waterproof, and roomy enough to layer underneath.
- Use moisture-wicking socks, insulated waterproof boots, and layered gloves or liners for dexterity and foot warmth.
- Pack and organize layers in labeled cubes, wearing heavier items on travel to save space and stay comfortable.
Why Layering Matters: The Principles of Warmth and Moisture Control
Because if you ignore layering, you’ll end up freezing on the trails or sweating like a startled dog on the city bus. You’ll learn to think in layers, I tell you, because thermal regulation isn’t magic, it’s strategy. Start by picturing skin that stays dry, then imagine warmth that’s adjustable with a tug or unzip. That’s moisture management in action: sweat moves away, you don’t get clammy, and you don’t trap cold. You’ll add and shed pieces like a pro, quick hands, no drama. I’ll nudge you to feel fabrics, test cuffs, breathe into collars — little experiments that teach. Trust me, you’ll stop guessing and start controlling comfort, so winter becomes something you handle, not endure.
Choosing the Right Base Layer: Fabrics and Fit
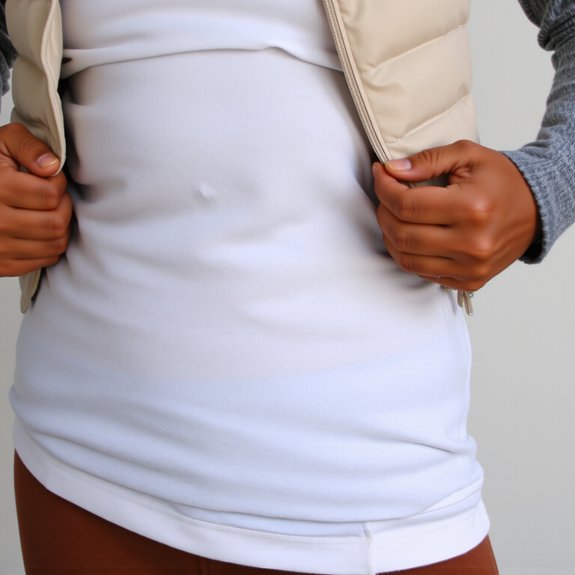
Alright, now let’s talk base layers — the stuff that actually touches your skin and decides whether you’re cozy or miserable. I want you to feel the difference: slick, clammy polyester versus soft, warm merino. I’ll tell you plainly, fabric types matter — merino wicks and smells better, synthetics dry fast, silk feels luxurious under a sweater. Try things on, move, stretch, bend; you’ll know if the fit’s right. Fit importance isn’t optional: too tight and you chafe, too loose and you trap cold pockets. I prefer slim, breathable pieces that follow your shape, not squeeze it. Pick seams that don’t bite, long sleeves that tuck, and colors that hide sweat. You’re set if it feels like a second skin.
Building the Mid Layer: Insulation Options for Different Activities

When the temperature drops and you’re still deciding whether to wear your bulky hoodie or go full expedition mode, the mid layer is the part that actually does the heavy lifting — trapping warmth, shedding moisture from the base, and giving you freedom to move without looking like a marshmallow. You’ll pick fleece for brisk walks, it’s soft, airy, and dries fast, or a synthetic insulated jacket when you’ll be sweating, those insulation materials wick and stay warm when damp. For backcountry days, down wins for compressible heat, but you’ll swap to synthetics on wet outings. Casual city strolls call for a stylish sweater or light puffy. Match the mid layer to your activity types, tweak fit for mobility, and test on a chilly porch before you commit.
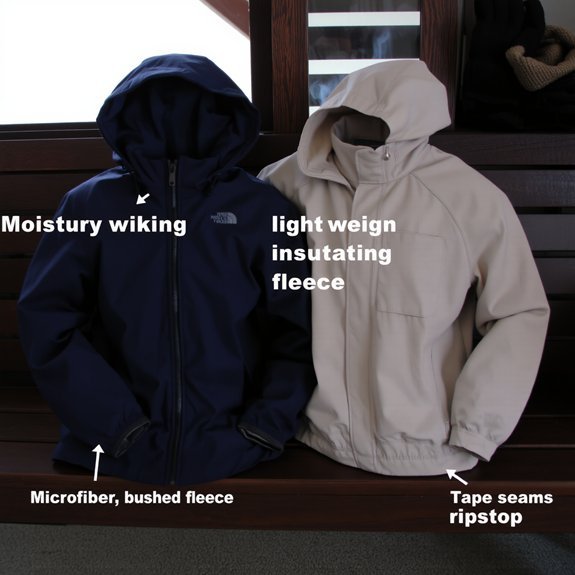
Selecting an Outer Layer: Waterproof, Windproof, Breathable
If you want your core to stay dry and your hair to stop looking like a damp mop, the outer layer’s the star — it fends off rain, blocks wind, and lets the sweat you made hiking Mount “I Overpacked” escape. I want you to pick jackets with waterproof materials, taped seams, and a hood that actually fits your noggin. Look for windproof features like sealed zippers and high collars, they keep the bite of gale off your neck. Feel the fabric, pull it tight, whisper “not today” to the weather. Test breathability by moving hard, you’ll know if you steam up. Buy something light enough to move in, tough enough to shrug off sleet, and stylish enough you’ll wear it out.
How to Adjust Layers for Temperature and Activity Levels
You’ll start by matching your base layer to the activity — think slick, sweat-wicking fabric for hard moves, cozy wool for slow walks. If you heat up, shrug off the midlayer; if the wind bites, snap it back on and zip your outer, which needs to breathe or you’ll stew like a forgotten stew pot. I’ll show you how to read the thermometer and your own body, and make quick swaps that keep you comfy without looking like a confused marshmallow.
Match Base to Activity
Because your base layer is doing the heavy lifting, pick one that matches how hard you’ll be moving and what the weather actually feels like, not the fantasy version in your head; I slap on a silky merino when I know I’ll be hiking fast and sweating, and a heavier synthetic or wool blend for lazy snowball fights and sidewalk coffee runs. Think base activity, and be honest about activity preferences. If you’ll sprint or climb, go breathable, slim, wick fast, feel cool against skin. If you’ll stroll, sit, or sip, pick warmer, soft, slightly fuzzy, comforting. Test by doing five minutes of whatever you’ll do, check dampness, chill, and comfort. Swap quickly if wrong. You’ll thank me when you’re warm, dry, and smug.
Add or Shed Midlayer
Three small moves — zip, shrug, slide — and you’ve fixed the whole temperature problem. I watch you fiddle with the midlayer, and I’ll tell you what works: grab a fleece or light insulated piece, because midlayer materials matter for quick warmth and easy shedding. You’ll feel the soft nap of fleece, the restrained loft of synthetic fill, the snug stretch of a wool blend; each one changes how you manage temperature regulation. If you’re hiking hard, unzip, push sleeves up, let heat escape. If you pause, shrug the jacket back on, zip, trap heat, smile like you planned it. I joke, you act; we both look clever. Quick, tactile moves beat overthinking — and keep your cheeks rosy.
Outer Layer Breathability
When the wind starts sounding like a small, judgmental drum and your breath fogs the world, pay attention to your outer layer’s breathing — it’s not just a jacket, it’s a thermostat with manners, and you’re the one in charge. I want you to feel the fabric, tug the zipper, test vents. You’re balancing moisture management and temperature regulation, not conducting a science fair project. If you’re hiking hard, crack vents, shed a layer, let sweat escape before it freezes. If you’re standing around, zip up, seal seams, block drafts. Use shells with pit zips and adjustable hems, they’re tiny miracles. Listen to your body, check collars and cuffs, and don’t be proud — tweak layers like a pro, keep moving, stay comfy.
Footwear, Socks, and Glove Layering Essentials
Boots matter — like, a lot; you’ll notice the cold at your toes before anywhere else, and a squat, grippy pair can turn a miserable slog into a brisk, cheery outing. I swear by insulated footwear for deep freezes, they trap warmth without turning your feet into saunas. Start with moisture wicking socks, thin base layer, then thicker wool or synthetic socks if you need padding; no cotton, ever — that’s the cold sponge. Pick waterproof boots for slush and ice, stomp confidently, shake off snow. For hands, layer thin liners under thermal gloves, so you can fiddle with zippers and still slide your mitts back on. Test dexterity, breathability, and comfort; if it feels clumsy, tweak it. Simple, practical, and surprisingly cozy.
Fit, Mobility, and Style Tips for Layered Outfits
If you want to move, look good, and not feel like a stuffed burrito, start by treating fit like a friendship: respectful, honest, and a little bit picky. You want layers that slide, not fight. Try slim baselayers, roomy mid layers, and a jacket that lets you reach, bend, and laugh without pulling at seams. I like tactile checks — raise your arms, sit, hug yourself, feel fabric whisper, not choke.
- Choose pieces with stretch, breathable fabrics, and streamlined cuts for easy motion.
- Use layering techniques that balance warmth and silhouette, mix textures for stylish combinations.
- Prioritize sleeve length, shoulder fit, and hem proportion to keep looks crisp, not bulky.
Move freely, feel confident, look intentional.
Packing and Travel Strategies for Layered Winter Clothing
You’ll pack by layer type, not by outfit—base layers together, midlayers together, shells together—so you can pull a whole system out without playing suitcase Tetris. I stuff bulky knits into a compression bag, hear the sad little whoosh as the air leaves, and reassure myself it’s still cozy when unpacked. Trust me, organized cubes and a checklist beat frantic hotel-room rummaging every time.
Pack by Layer Type
Start with three piles and call them your new best friends: base, mid, and shell — trust me, they’ll do the heavy lifting. I sort by layer types so my bag behaves, not mutinies. You’ll see textures, feel warmth, and pick what’ll earn its keep on day one.
- Base: snug, breathable, light — underwear, thermals, socks; choose moisture-fighting fabrics.
- Mid: cozy, insulating, variable — fleece, wool sweater; stash a versatile mid for changing light.
- Shell: protective, roomy, weatherproof — jacket, overpants, hat; keep wind and wet out.
Use simple packing techniques, toss like items together, label mentally, pack what you’ll actually wear. You’ll thank me at the hotel sink, sipping tea, feet warm.
Compression and Organization
Three tricks will save your back and your sanity when you’re stuffing bulk winter into one bag. I swear by compression benefits first: vacuum or roll, squeeze air out, and feel the bag lighten like a magic trick. Next, use clear packing cubes, label them, and treat them like tiny roommates who keep their socks in line; organization techniques make mornings painless. Third, weigh layers — boots and parkas stay in carry-on, light base layers go in cubes. I jab items into cubes, hear zippers protest, then zip them into submission. In transit I chat to my bag, mockingly, then pat it like a nervous pet. You’ll travel warmer, neater, and with knees intact, promise — you’re welcome.
Conclusion
You’ll nail layering by starting snug, adding loft, and finishing with a shell — like building a cozy sandwich you can eat on a windy day. I promise, you’ll feel warm without sweating, fingers happy, feet dry, breath visible and crisp. Try, tweak, peel a layer mid-hike, stash it, zip it back on. You’ll learn what works, laugh at the mishaps, and enjoy winter more, because you dressed for it, not against it.